
Best iPhone Camera Settings 2022 - Beginners Tips/Tricks
Welcome to 22 iPhone camera tips, tricks & settings for 2022. We shall begin with some basic need to know stuff and then move on to more advanced pro tips and hidden settings towards the end…
And I'm not gonna tell you home to take photos; instead, I'm just giving tools so that you can become the master of your iPhone's camera system…you ready? Let's go.
1. Two ways to access settings

The first thing you should learn is how to quickly access the camera settings bar. You can do this by hitting the downward arrow at the top. But that sounds like a lot of work… Here's an easier way. Swipe up on any part of the screen and tada... Here is your camera settings bar.
An important side note, although it doesn't show it, there are more settings if you swipe right on this bar.
2. Live Photo Frames
So, this is a trick that many people probably don't know about. It's how to grab a single frame from a Live Photo...as, by default, Live photos are enabled on the iPhone... So you find yourself re-discovering funny moments with this tip.

A Live Photo captures the movement before and after you take the picture…if you hold your finger on a Live Photo, it replays the moment.
So you can essentially fast forward & rewind time if you missed a smile or funny moment.
So, first of all, make sure Live Photo is enabled. it should be on already but double-checks anyway. To do this, Swipe up to call up the settings bar. Tap on this icon that looks like a bullseye with dots around the outside. Enable the feature.
Now, you can head over to the Photos app. Tap the bullseye icon, scrub through the frames, and choose your favourite one as your keyframe. Or if you want to just keep your favourite image and discard the rest, hit the pen at the top. This will open the markup interface, and in doing this, you are converting the live photo to a single image. Will will revisit mark up later on in the video.
3. Loops, bounce & Motion Blurs
So here's another little trick that involves Live Photos being switched on. Once you snap a Live Photo, you can do more than just grab a single frame & you can, in fact, play around with all the image data quite a bit.
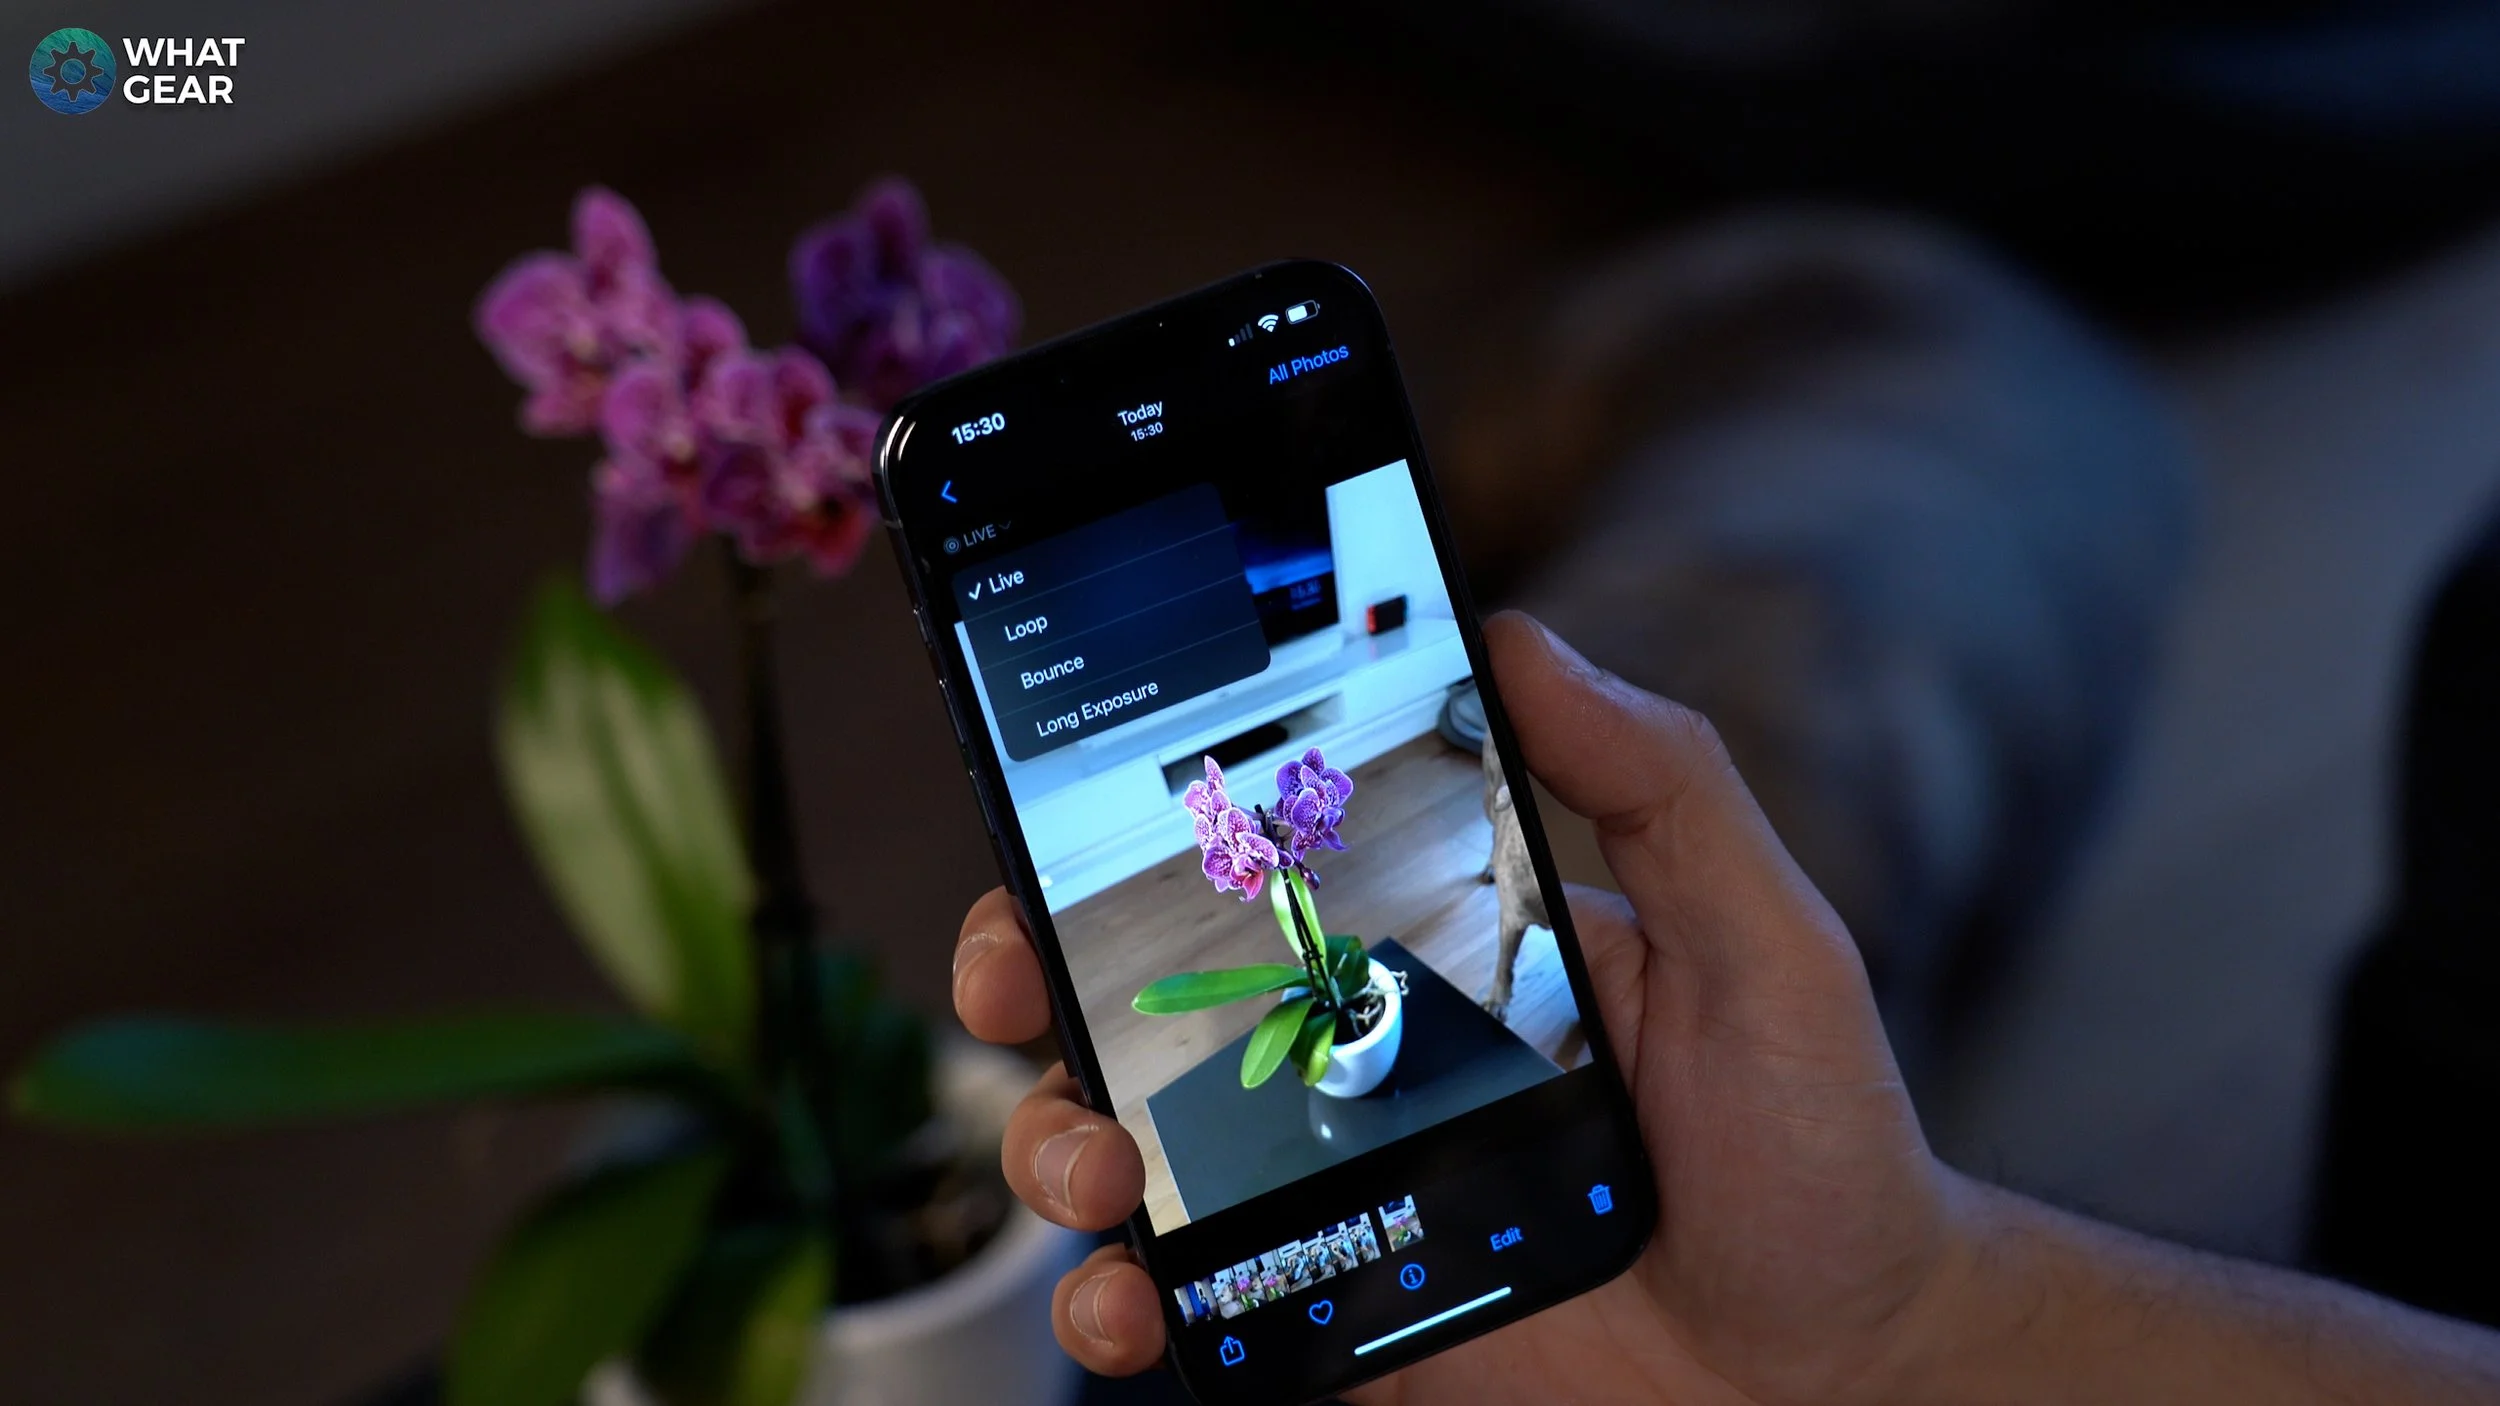
To do this, go to your live photo in the photo app. You will see the word live and the live phone icon. Tap that to expand the drop-down menu. Now you have the option to loop the live photo, bounce it back and forward like a boomerang or combine all the shots for a long exposure effect.
This long exposure effect works really well for moving objects like cars, waterfalls & rivers, and stuff. Try it out.
4. Quick switch between creative looks

A feature you must absolutely positively know about is the Apples Photographic Styles. Essentially these are apple built in-camera filters that mimic other phones like the Samsung Galaxy's and Google pixels.
You can go to settings then camera to access these here… but again, that's a lot of effort. Here's a much easier way.
Swipe up within the camera app or hit the down arrow at the top. Go to the settings bar, the icon that looks like a bunch of squares stacked on top of each other is your quick access to photographic styles… the choice is yours.
Side note. Just in case you were wondering. Rich Contrast style mimics the Google Pixel camera & the vibrant style seem to closely match Samsung Galaxy flagship phones.
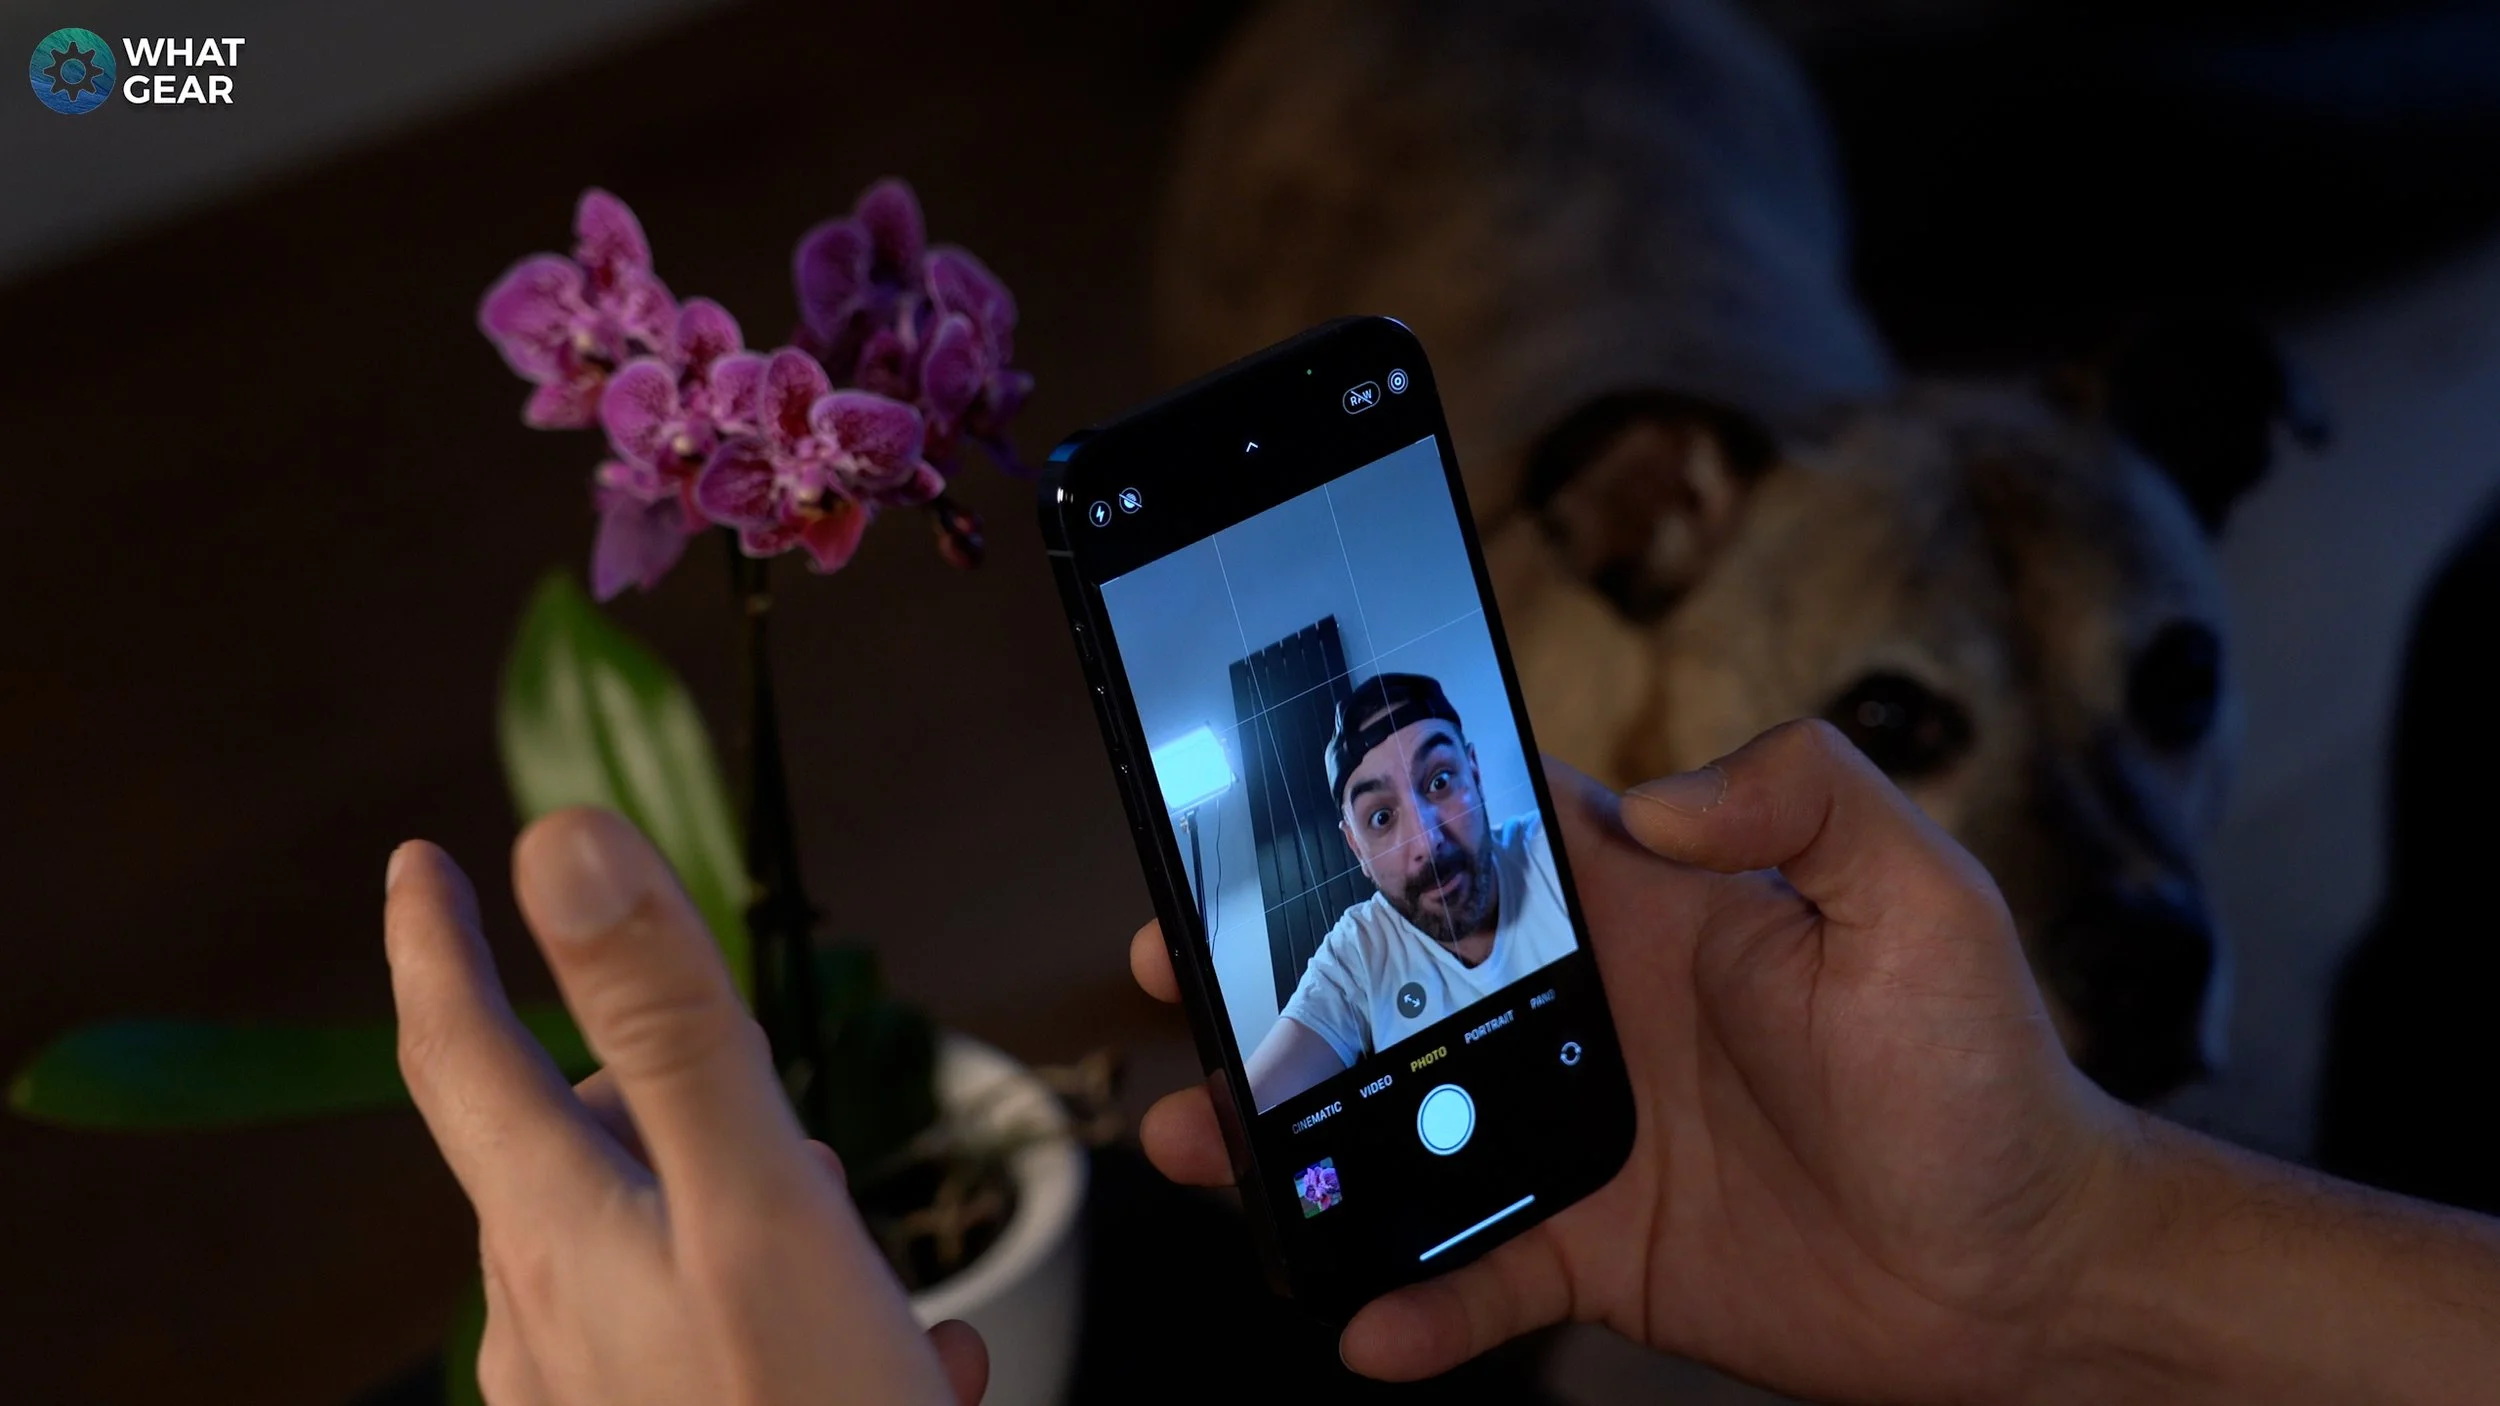
5. Quick switch between modes
Now, this might sound obvious to you but maybe not to others. You can quickly switch between different camera modes at the bottom of the screen by tapping on the words…but why do that when you can just swipe right or left anywhere on the viewfinder…minimal effort…maximum effect…perfect.
6. Timing is everything
When it comes to photography, being in the right place at the right and pulling the right face at the right time can be key… and if you're setting up a long exposure shot on a tripod… you definitely need to know this trick. Swipe up on the camera app. Hit the clock icon & here, you can set a time delay on the camera shutter. Which will give you time to prepare for a selfie.
Also, it will help avoid any camera shake created by tapping the phone to take the picture. That tiny bit of camera shake can ruin a night shot, long exposure, or a selfie… so master your timer.
7. On the Grid

It's easy to ruin a photo. Even something as simple as not being level can truly f things up. You can, of course, adjust photos in post-editing, but that might involve cropping large parts of the image out. You know what I say, it's better to get it right in the first place…go to your phone settings camera and turn on the camera grid.
Now you will see a faint grid overlay on your camera app. Use these lines to square up your photos better. Also, there is a well know method called the rule of thirds.
Lining up the subject with the intersecting lines is a great way to compose a shot and give it more of a creative look. Give it go...and get on the grid.
8. How to set exposure

The iPhones auto HDR and auto-exposure value metering are some of the best when it comes to smartphone photography. When there are bright areas of a scene, the camera AI will do its best to balance the brightness and darkness without losing too much detail…but sometimes you might want to turn off the guidance systems and use the force to overexpose a photo or underexpose a shot for creative purposes. Here's how to do it.
Tap the photo's focal point to lock the metering on that point. Now you can slide up or down to adjust the exposure… and if you want more precise control, you swipe up and tap this minus plus icon… and this will do the same thing but will give you a better visual gauge of the exposure setting.
9. Lock manual exposure settings
Now let's say you've nailed the manual exposure & you're going to be shooting a bunch of photos in the same lighting conditions. You can lock the exposure values and even get the iPhone to prompt you to take the reigns when it comes to exposure every time you take a picture. Only turn this setting on if you feel confident.

Go to settings / camera / preserve settings / toggle on exposure adjustments.
And if you have just done that, you are on the path to becoming a camera Jedi.
10. AE / AF lock
This is a powerful tip that not so many people know about. Let's say you're composing a photo using the rule of thirds with the focal point being in one of the intersections on the grid & now You've learned how to dial your exposure values like a pro…

The next step is to learn how to nail your focus manually. Here is how to lock your autofocus onto someone or something in the picture.
Touch and hold on to the area you'd like to lock on to. Now when you move the phone around and it will continuously focus on that point…the Ai will also do auto exposure compensation for light in that location…but you can override it if you want… using what already showed you in the previous tip.
11. Micro-Manage your Macro
The iPhones ultra-wide lens doubles up as a Macro camera. This lens allows you to get incredibly close to your subject whilst maintaining focus.

It's really one of the best smartphone macro lenses out there…but sometimes it kicks in automatically, which can be really annoying…because the iPhone's primary camera can often be better at mid to close range…
So I suggest you learn to micromanage the macro feature. Go to setting, camera, macro control. Now you'll get this little flower icon in the bottom left corner of the camera app to manually switch to macro mode on and off when you decide.
12. Manual depth of field
So remember that swipe up to quickly access the settings? Depending on the camera mode you're using, these settings will change. Let me show you how to manually adjust the depth of field, aka the amount of blurry background effect... or Bokeh... which is was derived from a Japanese word that means haze or blur... Most of my Saturday mornings are kinda Bokeh.

Go to portrait mode. Swipe up and hit the F icon. Now you can manually adjust the digital F stop. Think of it like the pupil of your eye. The smaller the F-number, the smaller the photo's focus point will be… if you go big with the F-number, It's like having your pupils wide open, which gives you a more significant focus area.
13. Continuous shooting - hold slide left
Now let's say you are at a football match or something like that, and things are moving pretty fast. You can do continuous burst shooting on the iPhone to capture those fleeting moments.

And it's not so apparent unless someone shows you how… so let me show you. Tap and slide the shutter button to the left… and it begins the rapid rife photography, So now you know how to snap shots like a paparazzi.
14. Quick take video - slide-right
But why snap photos when a video is worth a thousand photos…I mean that sort of literally…because of the amount of frame per second, and also you get all the audio data.

Quick take video is a feature that allows you to capture video instantly. It is similar to continuous shooting, except this time, just hold your finger on the shutter button and keep it there to start recording. When you take your finger off, it stops. If you swipe right whilst keeping your finger on the shutter button, it will continue to record even if you take your finger off.
Another way to activate a quick take video is to hold the volume button down.
15. Perfect Top Down Shots
I know we spoke about snapping shots like a paparazzi. But when I say top-down shots, Just to be clear, I'm actually talking about shooting photos directly downwards... not down tops.

This is an excellent feature for product photography and video…and it is obvious... If you've ever tried to take photos downwards. But I haven't heard anyone talk about it, so I guess down to me to show ya. See these tiny crosshairs at the centre of the screen. Line them up perfectly. And you now positioned your camera directly towards the centre of gravity.
This is genuinely an underrated feature. I wish more phones had this.
16. Meet the Raw
Think of a photo as a metaphorical piece of meat. Your cameras Ai is like your own personal chef who will cook those photos for you. So when you look at them, they're freshly baked, so to speak…but what if you want to cook up your own recipe from scratch?

Well, you got to start with the raw ingredients &, in this case, Raw photo files. Swipe up on the camera app. And toggle on RAW. Image data will be significantly larger when you take RAW photos because they have a more dynamic range, colour depth, and fidelity. To clarify this, an 8Bit Jpeg can capture 16.8 million colours, which is not bad, right?
Apples 12Bit Pro Raw feature on Pro models can capture 68.7 Billion colours.
And when you drop these RAW files into any editing software, you can make a lot more adjustments to them and really play with the image values without the photo quality falling apart…
Disclaimer, RAW files take up significantly more storage than Apples HEIC and JPEGs.
Pro-tip for iPhone pro users. Enable Apple's ProRaw format for the maximum 12Bit Raw format. go to settings/camera/ formats
17. Manual night shots
The iPhone is excellent at automatically taking night photos using camera AI for stability & long exposures. But did you know you can take even brighter photos if you manually go in and set a more prolonged exposure… pro tip use a tripod for the best results.
Here's how you do it.
Swipe up to bring up the settings bar and tap this half-built Death Star looking icon. This will bring up essentially a digital shutter speed slider…
It will max out at ten seconds if you're in a dark setting. The longer the exposure, the brighter the image.
18. Label image
So this is something that I believe is probably underutilised by many iOS users. That is the built-in organisational features hidden within the Apple photos app.
For example, you know you can quickly add notes to photos whenever you want. To do this, swipe up on an image and type something memorable. This makes that photo easier to find using the search bar tool at the top of the app. And did you know you can search by location too?
19. Add text boxes Mark-ups
Apples own photo editor is valuable and easy to use. Just hit edit, and now you've got all your regular photo adjustments. Very similar to what Instagram offers natively…but what I want to show you here is mark-up.
Hit the pen at the top. This opens up a world of possibilities. You can draw over images and add text if you want. This is a great way to create memes, things like that.
And this is incredibly useful. If you need to sign a document. You could screenshot the document you need to sign and then use this mark-up feature to sign it digitally. This could be a game-changer for you. Let me know if it is?
20. Siri says say cheese
So this one is hidden away but can be found within one of Apple's own apps. The shortcuts app. Search App Library for the shortcuts app, and you will discover it.
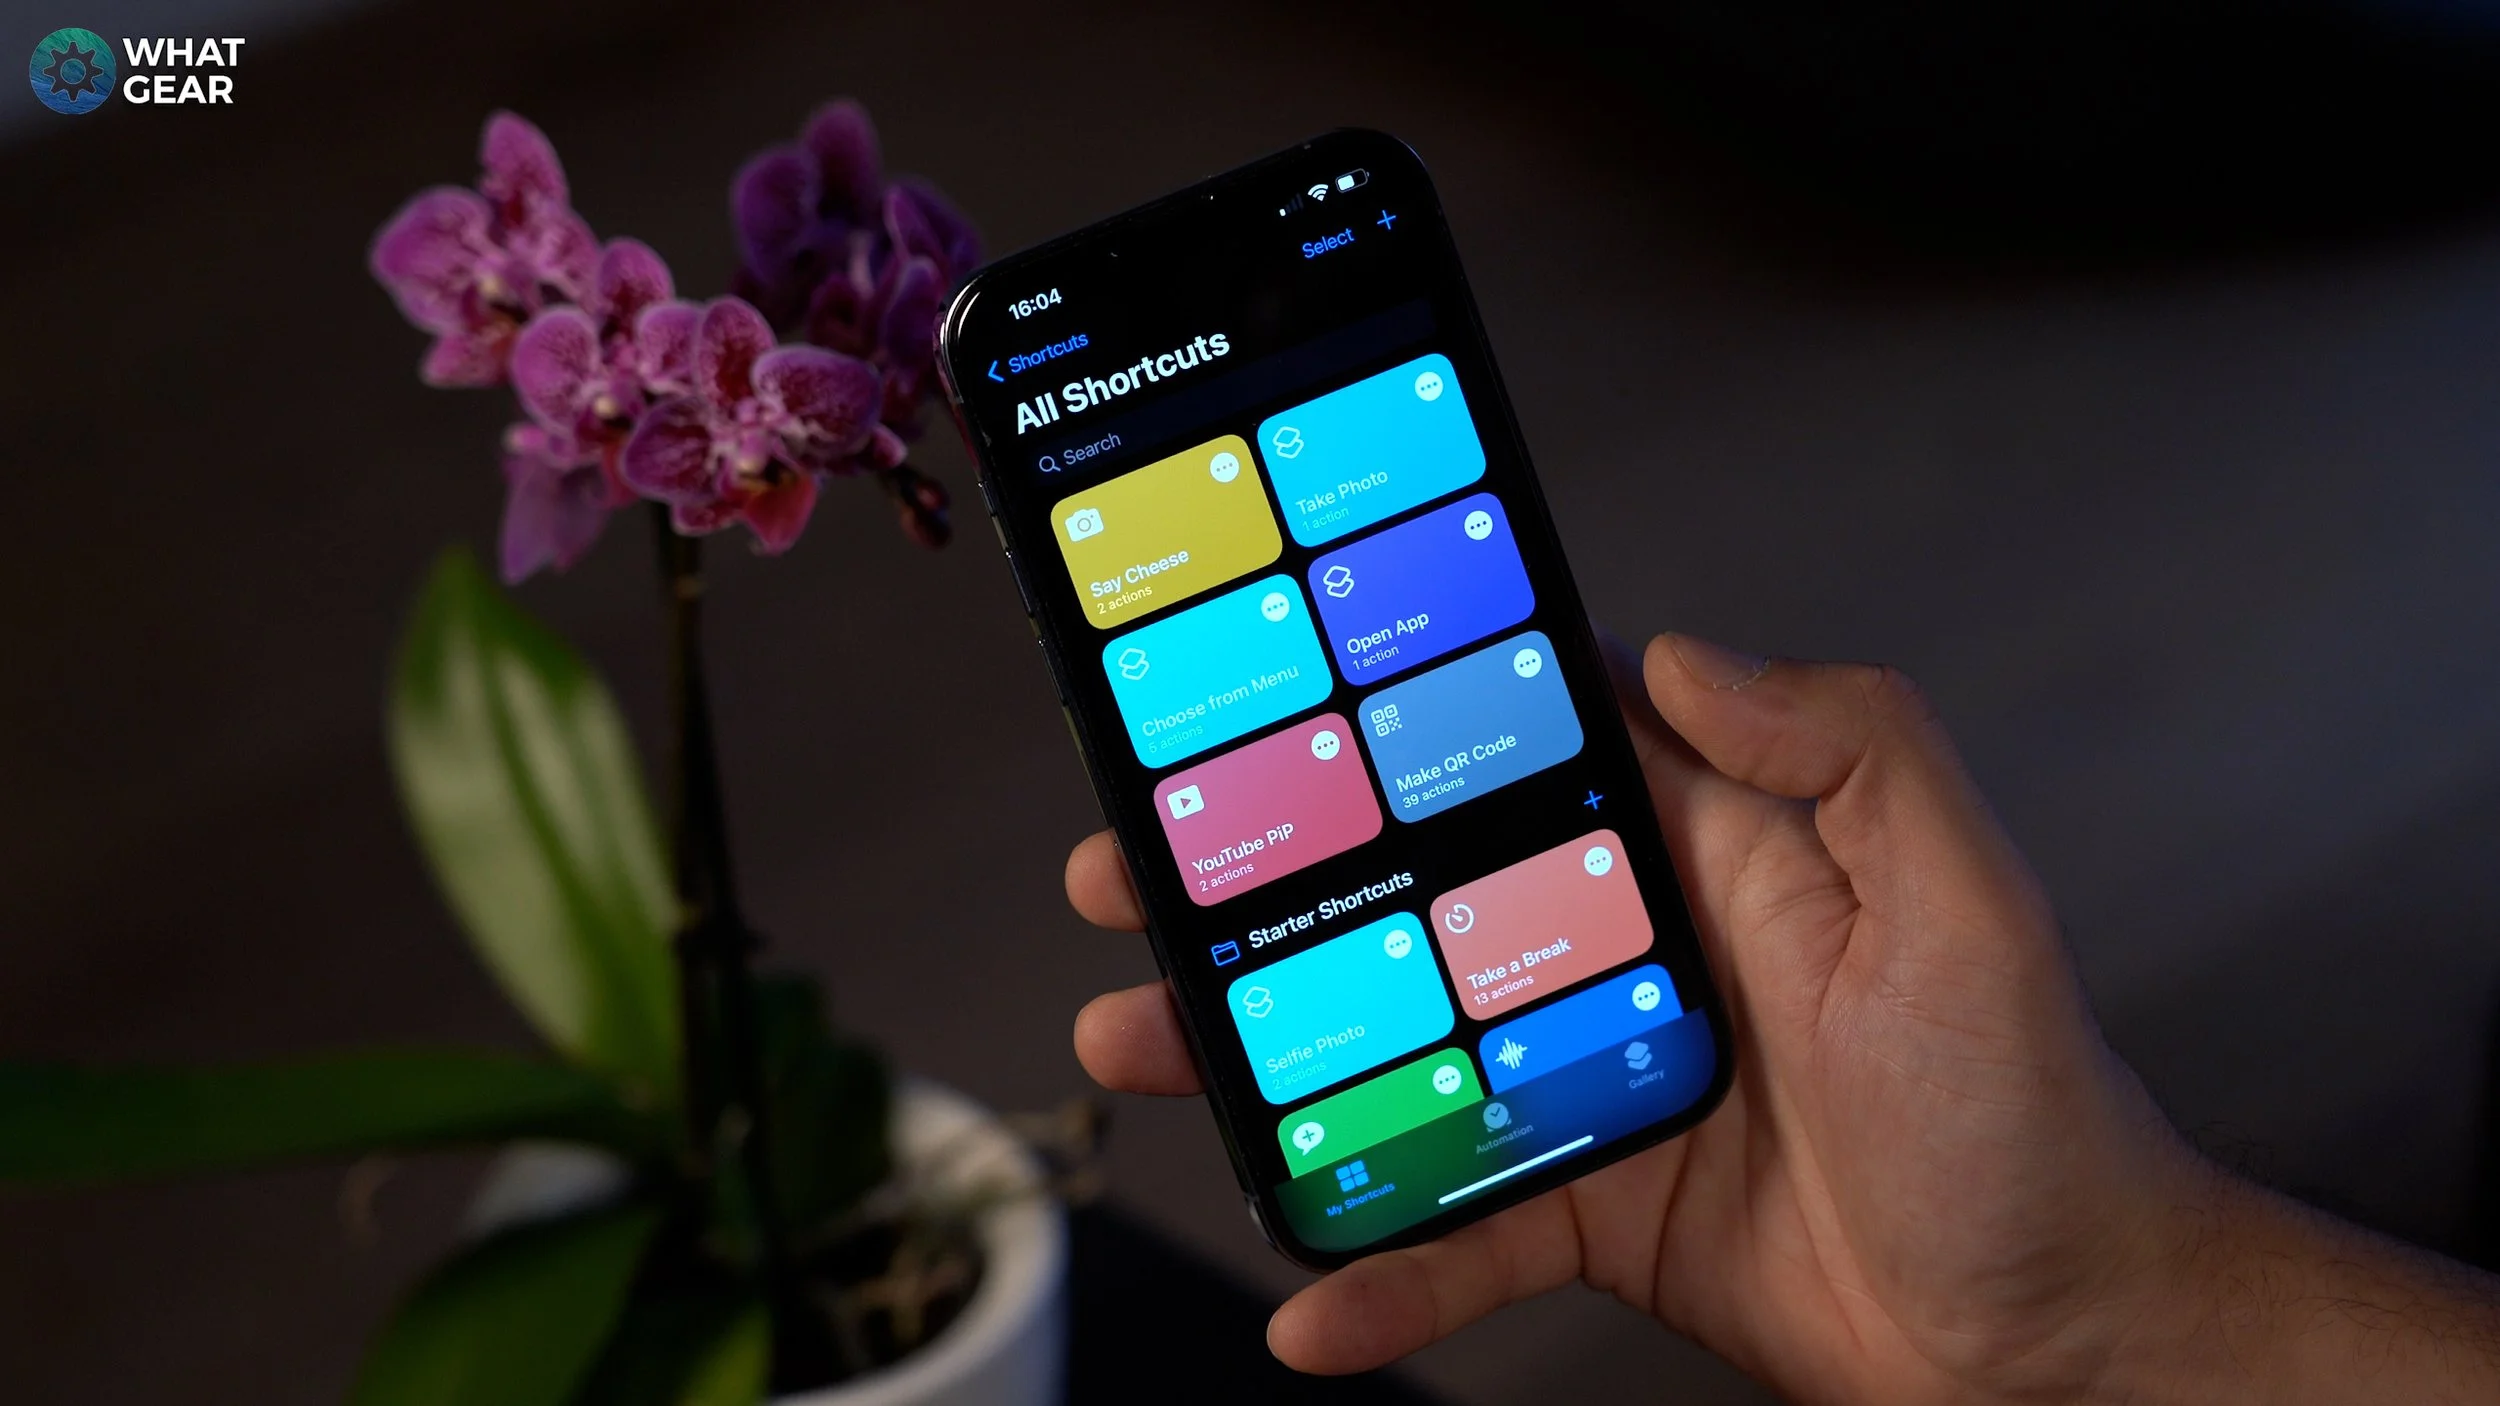
Once you open it, go ahead and enter the gallery page. Here search for the 'say cheese' shortcut and enable it. Now when you call Siri and say 'say cheese', this will operate the shutter button within the camera app…and it does help if you open the camera app first.
Using this shortcut, you no longer need to touch the screen or set a timer to take a photo.
21. Clone yourself pano

This little camera trick is fun to try & you can use it to create a unique image. Using the panoramic camera mode. Get your subject to stand in one place and begin a panoramic shot. You hold the camera still & get the subject to move out of the frame to the right. Now rotate the camera to the right to capture the subject in the second position. You've now created a clone with minimal effort, zero post editing...maximum effect! Try it out!
22. Adaptive Frame Rate
Here are a few quick video camera settings that you need to know about. First, go to settings, then camera & then record video. Here you can select what formats you want to use. I personally leave my video settings on 4K 30FPS. It's a good rounder... However, 60FPS will allow you to capture double the frames in the same amount of time. This means you can slow the footage down by 50% in post-editing and create some nice silky smooth slow-mo... However, 60FPS will struggle in low light...
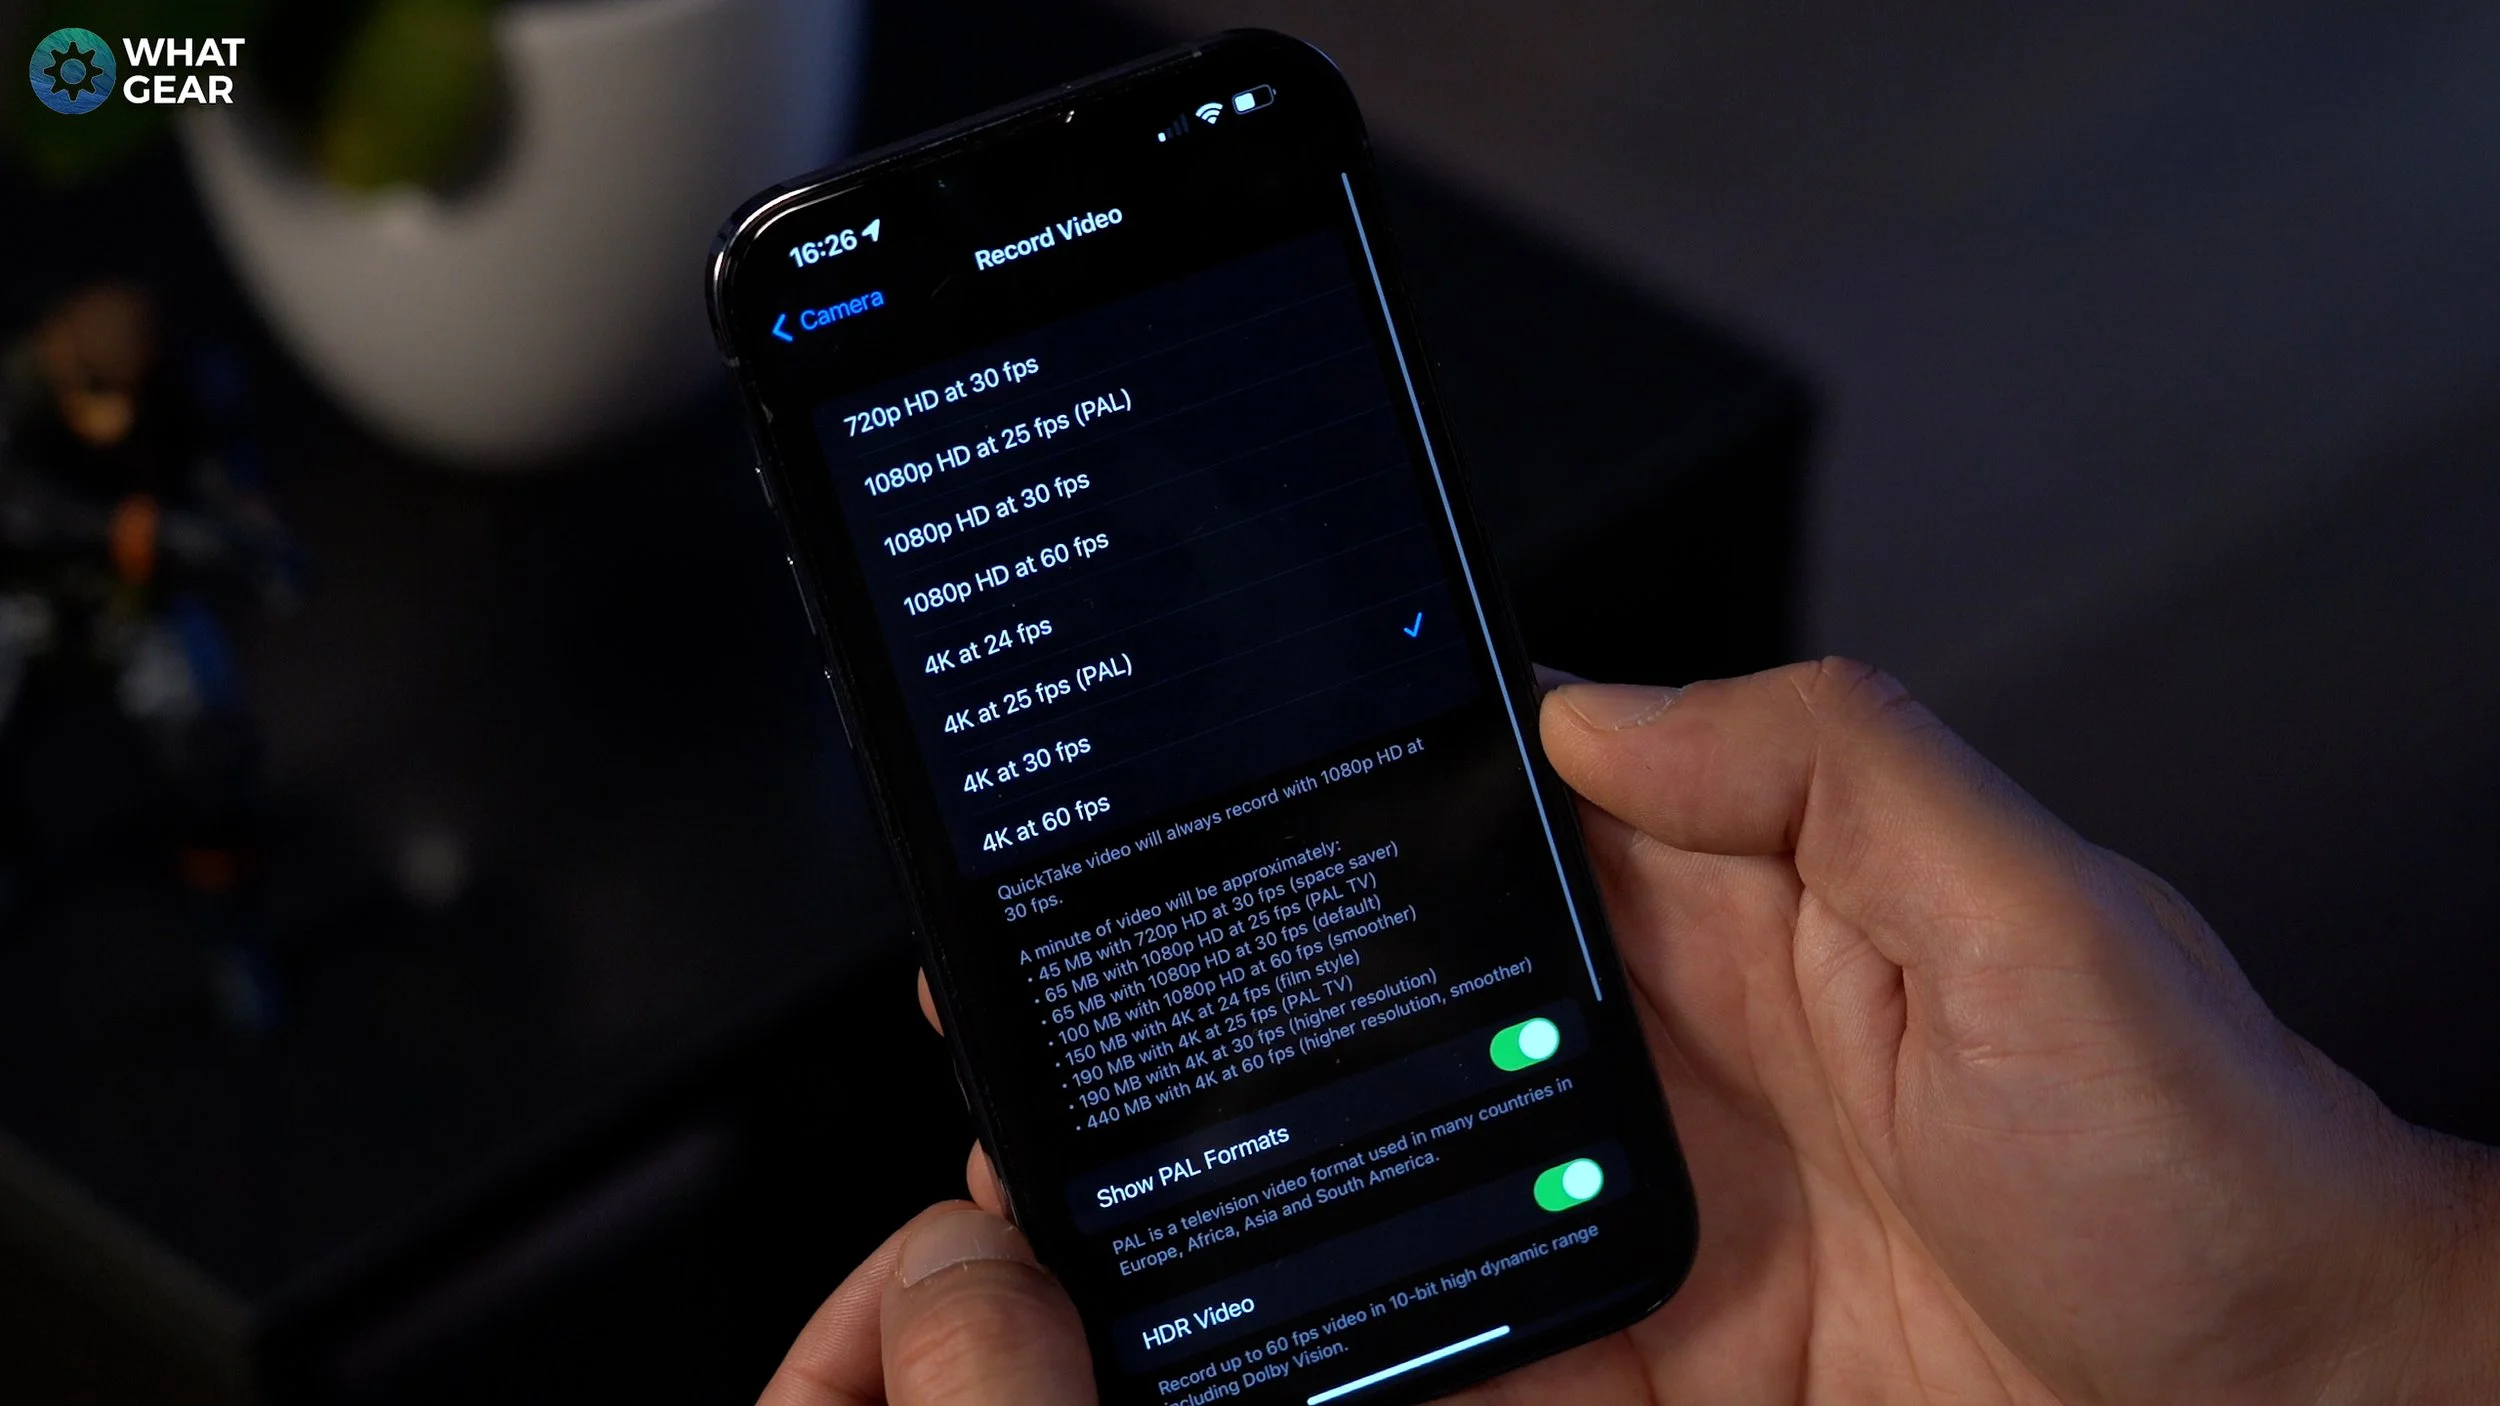
That's where this brilliant video camera setting comes into play. Switch on Auto FPS, and now your iPhone will optimise its video frame rates based on the lighting conditions. It will automatically drop down to a slower 24FPS, which lets the image sensor gather more light & in doing you will get the best possible night videography with your iPhone.