33 iPhone 15 Tips, Tricks & Hidden Features That You NEED to Know!
/So you've got a new iPhone and want to maximize every aspect from day one. You're in the right place? And if you've seen any other first things to do, tips & tricks. Let me just tell you,
this one is not like the others. And yes, I did borrow that line from the Foo Fighters. Anyway, stick around, and you'll see what I mean.
Tip 1 - Silent Slider
So, the most significant change to the new iPhone is the addition of the action button and the fact that Apple has now ditched the mute switch. By default, it will be set to silent mode. So, holding down the action button puts it into silent mode. But this button can be powerful if used correctly.
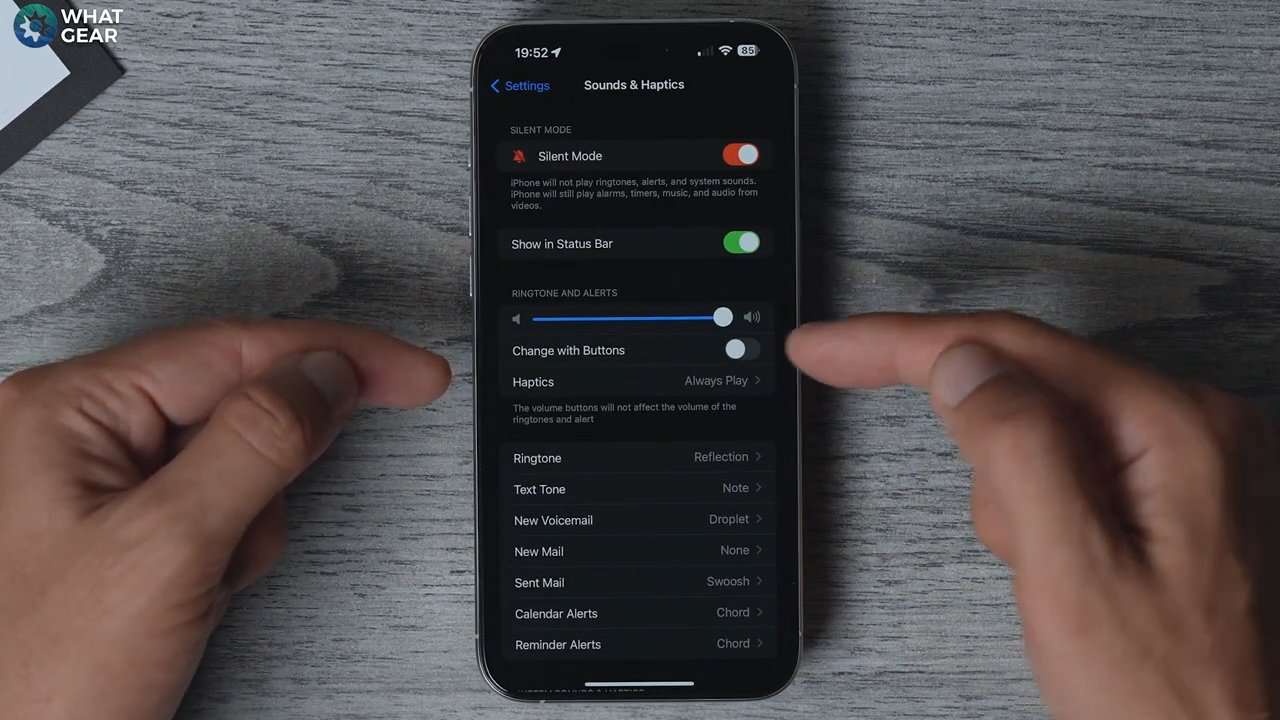
Let me show you a better way to activate silent mode. Go to
settings / sound and haptics
And then, in the ringtone and alert section, you'll see changes with buttons. Enable this. Now, your volume up and down controls on the phone's left side can adjust the volume of your ringtones and alerts. So, if you want to silence all of the ring tones alert, just hold the volume down button, and that will silent your iPhone.
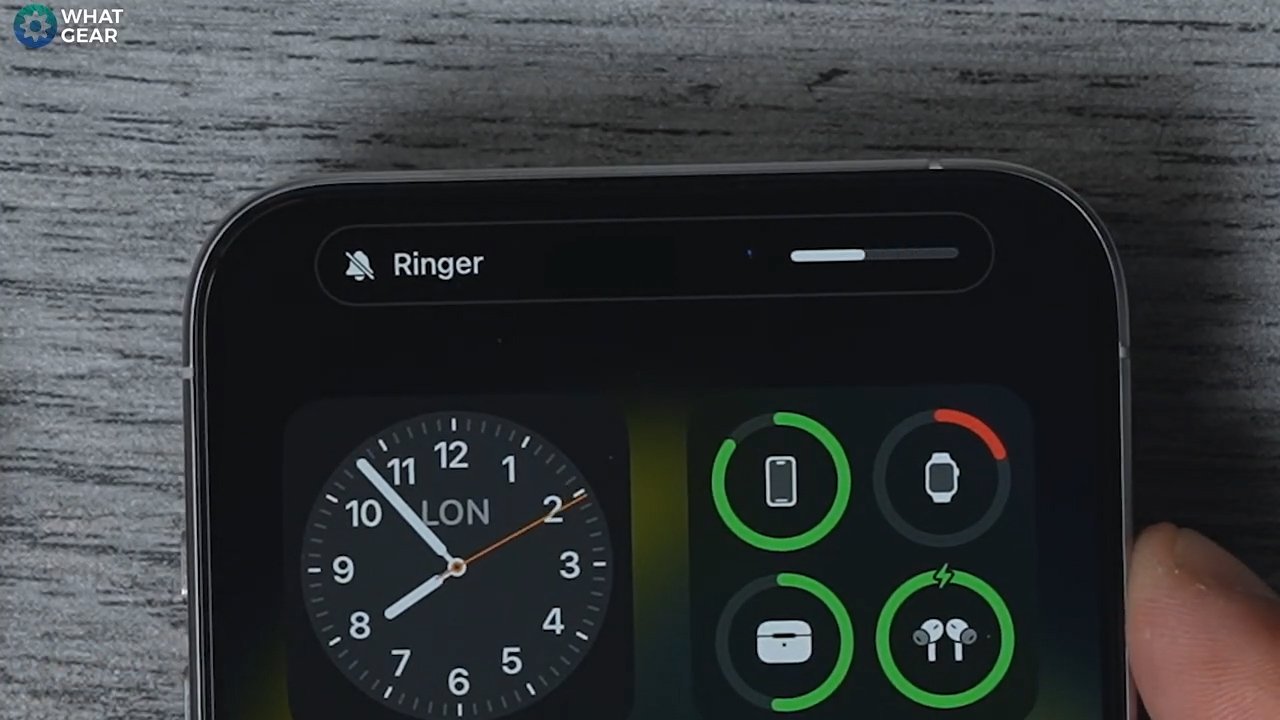
And one of the cool things about doing this is it uses the dynamic island. By pushing either one of the buttons you can see what level your ringer is at any given time.
Tip 2 - The best way to use the Action Button

settings /action button
Now, you have many options here, and you can decide which makes the most sense. It doesn't need to be silent anymore because you set up tip one. What I recommend you do is set it up as a focus mode. And I recommend this because activating a focus mode affects all of your Apple devices.
If you stick with the regular silent mode on the phone, it only silences the phone. And if you're sitting in front of your Apple Mac computer, MacBook, or iPad, or if you've got the Apple Watch on and someone rings, guess what happens? All your other devices start ringing, which defeats the purpose of silent mode.
Let me show you very quickly how to set up a focus mode. Go back into your
Settings / focus / Hit the little plus in the top right corner
Create whatever you want. You can use one of the presets or create a custom one. Give it a name, give it a colour, give it an icon. Hit next, and then you can choose what you want this focus mode to do. And this, like I said before, affects all of your devices. And the great thing about this is you can choose custom wallpapers for your lock screen, home screen and watch.
Tip 3 - Your Calling Card
Open phone app / Tap your name at the top
You should see the contact photo and post that; tap that. I've already set one of these up. If you still need to set one up, it will talk you through it. But I'm going to show you how to add a new one.
Phone App / Tap your name / edit / create new.
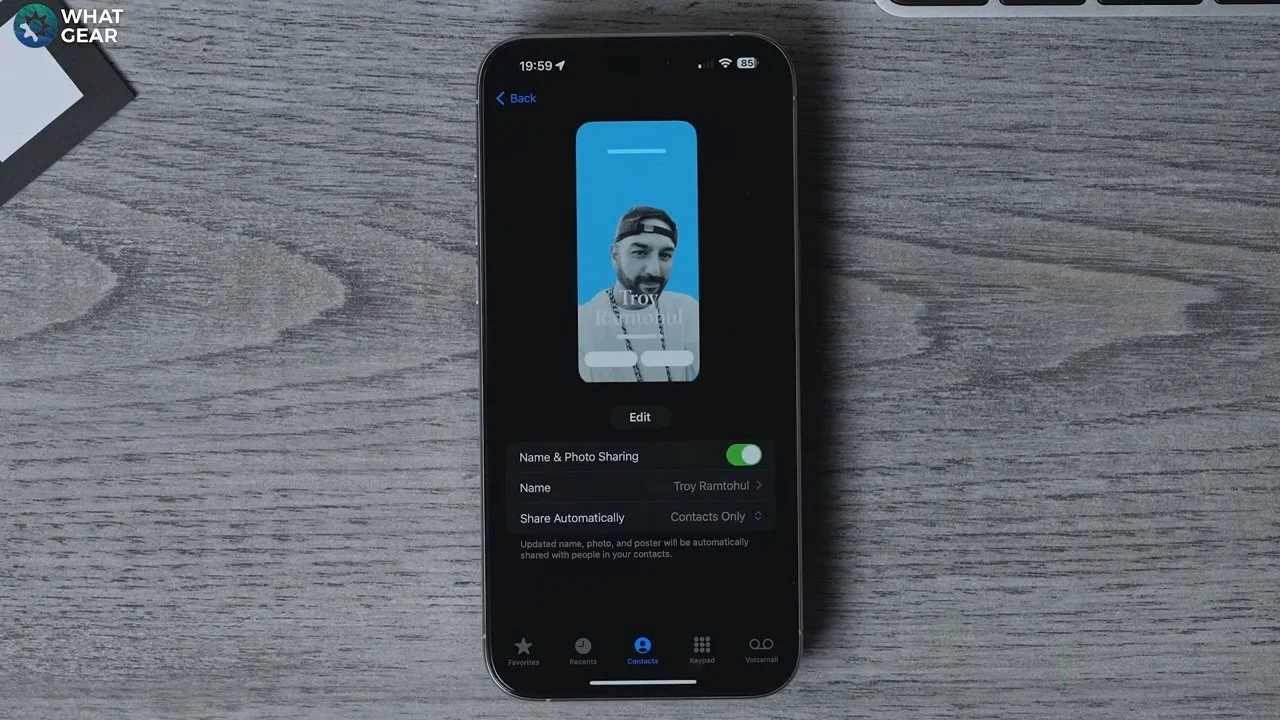
Now, here, we can choose a poster. When you call somebody to go to the photo, this background will show up. Select your favourite image here. You can adjust the size of the image, and I can adjust the size of the text. I can even change the colour of the text. And if you swipe across, you can add different filters to the image.
You can also customize the contact photo so I can use a different image for this if you want to. Now, whenever I contact someone else with an iPhone, whether it be a phone call, FaceTime or iMessage, this is what they will see on their phone.

I do recommend you set this up straight away.
Tip 4 - Casetify Discount
Let mel tell you something you already know: the iPhone is expensive, and you must protect your investment. That's why we partnered up with the sponsor of this video, Casetify.
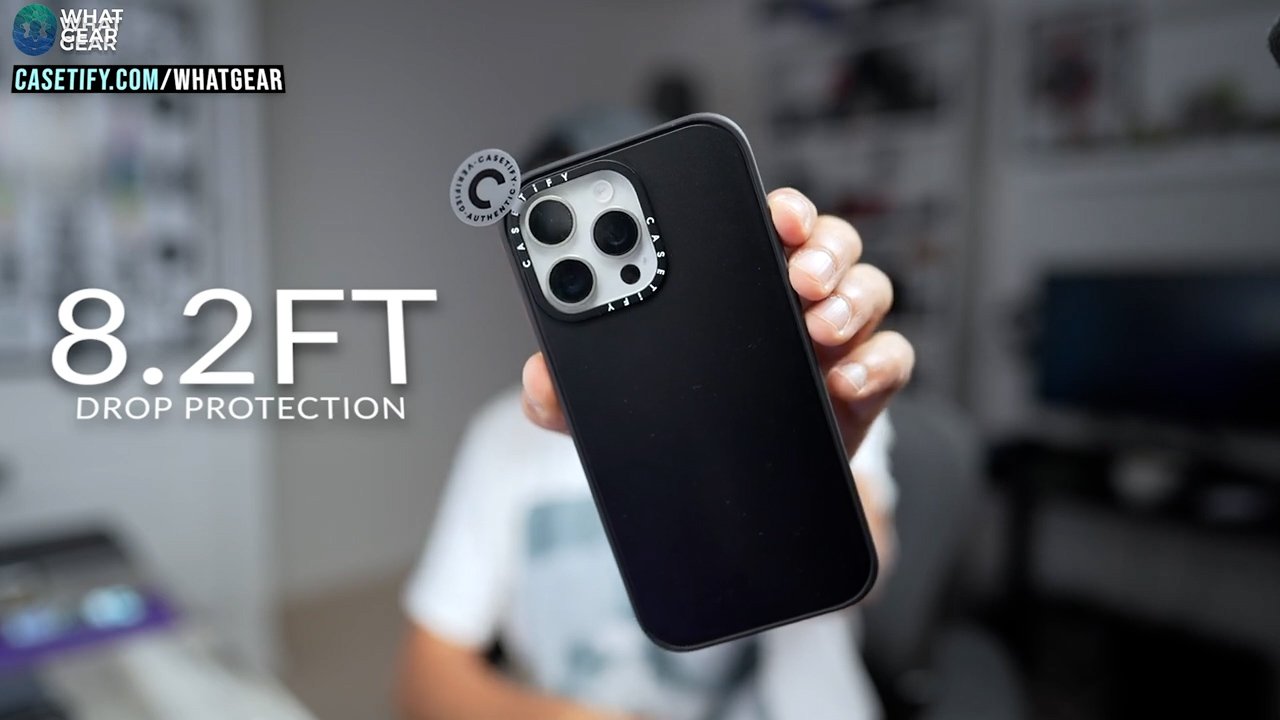
Now, listen, it's better to have protection and not need it than not have it. And Casetify is striving to become the world's most protective accessory brand. They have a full range of cases with varying amounts of shock resistance. Let's start with the impact case that can withstand drops of eight feet. It's low profile, it's Magsafe compatible, and there are a ton of designs that you can choose from, and you can even create your own.
Then there's the Bounce case with reinforced corners and shock resistance to meet military standards. In fact, this case can withstand drops of 21.3 feet. That's equal to the height of two elephants, and Casetify has focused on making the bounce case durable, protective and easy to hold. And this year, it is 16% slimmer than before.

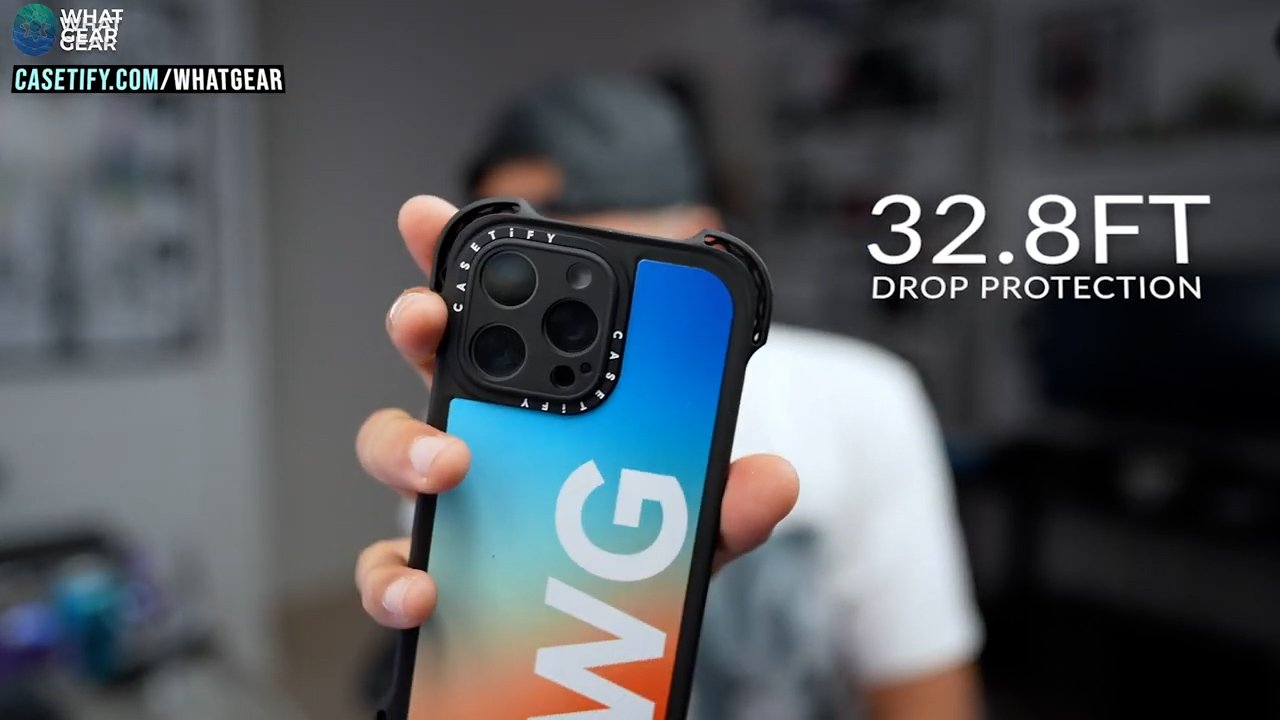
And now there's the new ultra bounce case with even more protection. The ultra-bounce case from Casetify uses revolutionary ultra-bounce corners and has upgraded protection for the camera module. And this case can withstand drops of up to 32.8 feet. That's similar to the height of a T-Rex.
All of the cases here are eco-shock lined and our endurance tested. But this particular one has six layers of rugged protection to ensure you don't suffer the heartbreak of a broken iPhone.
You should know that Casetify has an eye on the environment and uses reclaimed cases to create these high-performance cases you see here. And if you want to pick any of these cases up, use the link below. Casetify.com/whatgear for 15% off your order today.

Tip 5 - Secret button

Settings / accessibility / back tap
Scroll down again to see, touch, scroll to the bottom of this page, and you'll see back tap. Now, this is a secret button on the back of the iPhone. It's not technically a button, but you can activate specific actions if you tap the Apple logo.
I've tested this out before and recommend you not activate the double tap. However, triple tap works nicely. As you have mapped the action button as the focus mode and have setup the volume rocker for silent mode.
You could set up a quick way to activate the camera with a triple tap on the back. And as you’ll can see, it works perfectly.
Tip 6 - Control Center
Many people don't do this and just trust the default is the control centre layout. I recommend that you know exactly what's there and what isn't. Go to
Settings / Control Center

I recommend you delete all of these and start with a clean slate even if you need them. And now, start afresh with the things that you consider to be the most important to you. For example, for me, I use a calculator all the time. I use an alarm all the time. The flashlight is handy. Low power mode could be convenient. Music recognition is a good one.
To maximize the entire space in the control centre, you can set up 12 apps. But keep it simple, keep it easy to remember so that you have quick access to the settings that are most important to you.
Tip 7 - Better Wallet Settings

Settings / Apple Pay / Compatible cards
Scroll down to where you see Wallet and Apple Pay. Scroll down again to where you see this section. Online payments and compatible cards. Switch this on.
What this will do is use your Safari autofill data to add compatibility. If you've ever put card details on any of your Apple devices using Safari, what you're doing is giving your phone permission to add these to your wallet, which means if you've bought something on your Apple Mac computer or iPad, that card will also appear here on your phone, making it easier for you to spend money.
And if you want to spend some money right now, there is a super thanks button below this video.
Tip 8 - Transcribe Everything

Settings / accessibility / live captions
Now, if you enable this your phone will use this onboard AI to transcribe everything that's playing on the device, even if the volume is set to zero. And when you activate it, you'll notice you get this floating speech bubble that can be placed anywhere on the screen.
When you tap that, it opens up the option to live caption Whatever's on screen. Something you need to know about this is that it will stay permanently on screen until you return to the accessibility settings and switch it off.
This could be useful if you're in a meeting and must listen to the forum. You can go back and read the notes from that meeting. Or if you're watching a podcast and don't have headphones, you can turn this on and just read what they're saying.
Tip 9 - Create Your Voice in Ai

Settings / accessibility / personal voice
You'll be able to use this in a very unique way. Enable live speech, go to voices, and make sure you selected your own voice, and you'll see here, just under the tick box, it says triple-click the side button to show life speech. So now, when I triple-tap this, it brings up the option for live captions, which I just showed you. This is another way that you can activate that and live speech.
For example, if you get a phone call and you're in a class or meeting, you could pick up that phone call, triple tap, and then get your phone to speak in your own voice. “Sorry, I'm in the meeting at the moment.” Call me back later or something like that. I'm sure you guys can think of some other use cases. And now it's time for you guys to hear my personal Ai voice. watch the video at the top to hear it
Tip 10 - Your Photographic Style
Wouldn't it be great if you could capture the best possible photos every single time? Well, this video is designed to help you do that. The first thing you need to do when you get a new iPhone in regards to the camera is choose your photographic style. To do this, go to your
Settings / camera settings / photographic style
by default. The tone is set to zero, and the warmth is set to zero. This is Apple's style of photography. However, you can choose from different types that mimic other devices, such as the Google Pixel, for example, or the Samsung Galaxy.

And if you like more warmth or cool looks in your photos, you can go for warm style you can do that here. Once you set this, your phone will default to this photographic style for every picture. So choose wisely and just remember how to get back here. In case you don't like the style that you've picked.
Tip 11 - Rapid-fire photos
Now, many people need to realize that what they can do with the iPhone is use the volume-up button to snap a photo. But we can take this one step further. Check this out. Go to :
Settings / Camera / Volume up for best shots
Now, when taking a photo, you can hold the volume up and snap a sequence of pictures like a proper paparazzi. And check this out. You’ve set up a quick way to open the camera by tapping the Apple icon three times. And with this setting now enabled, I can snap photos incredibly quickly. A
Once captured you can choose one of the best photos that we want to keep. And if you're going to, you can keep everything.
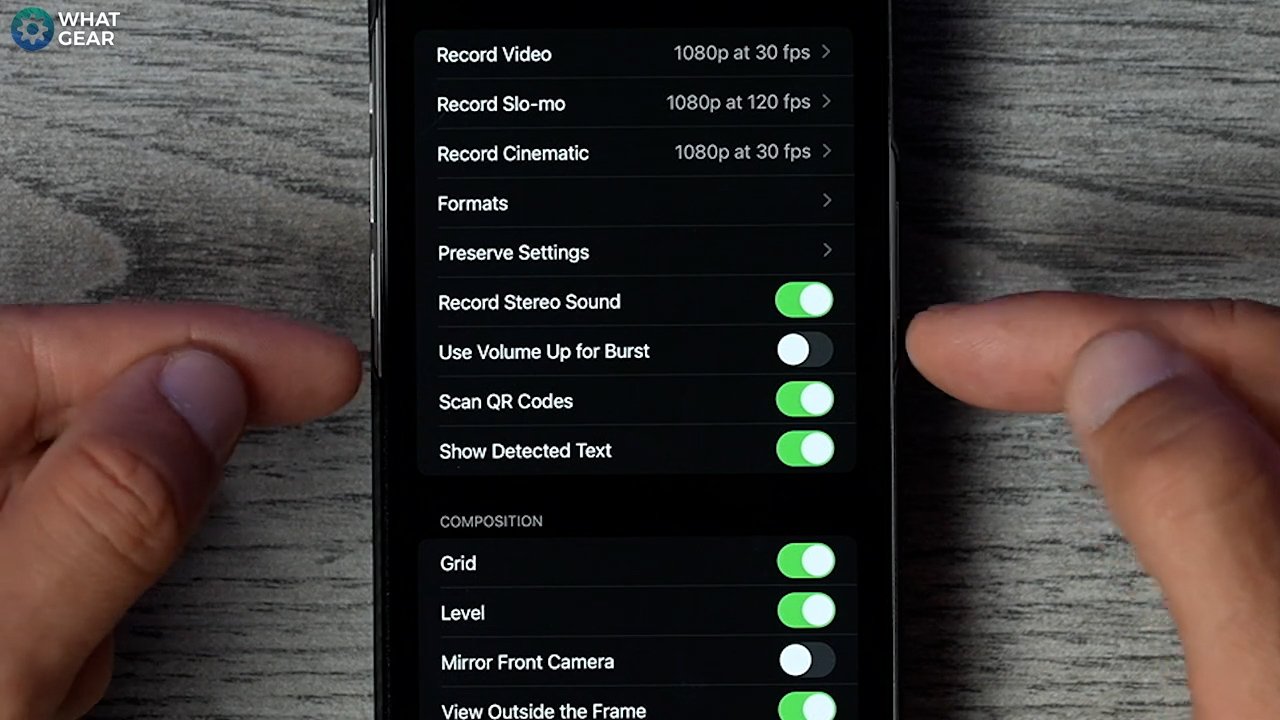
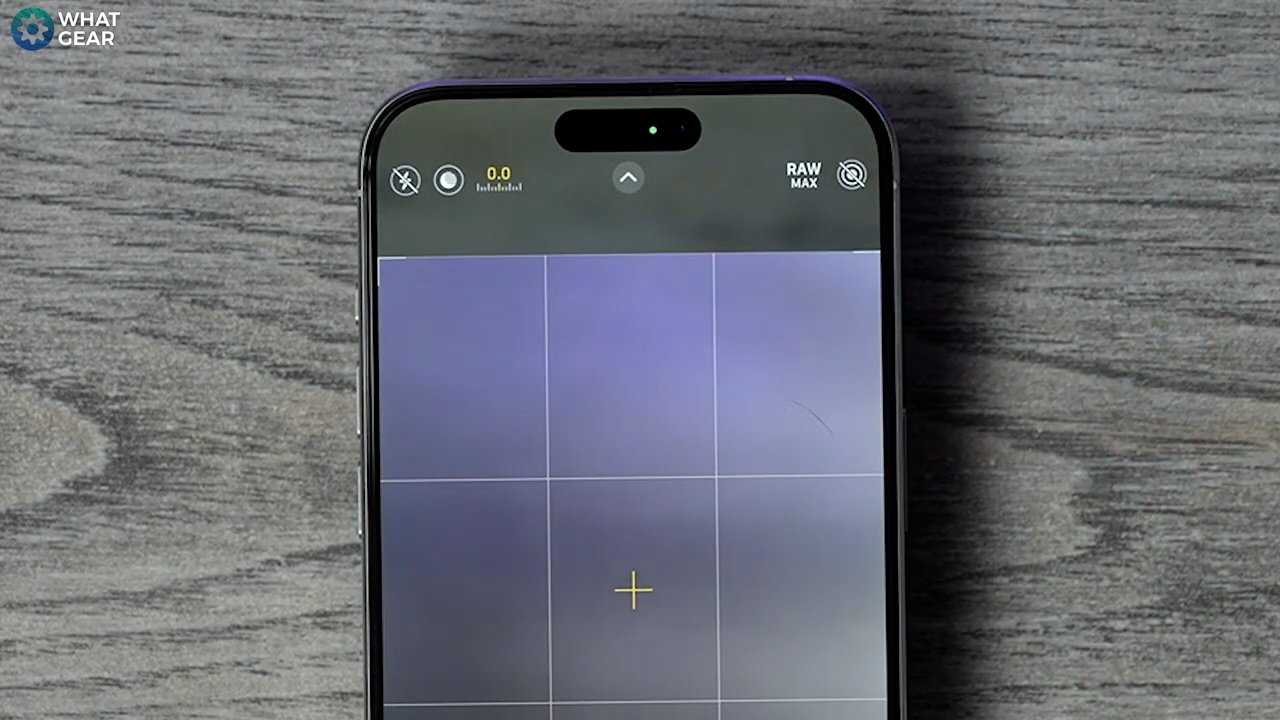
Tip 12 - Composition Tools

Settings/camera/composition
Section of the camera settings and enable the grid and the level. So now you have these faint grid lines on your viewfinder. You'll also have the spirit level in the middle that will help you level up with the horizon, and if you use the intersection of the grid lines for focal points in whatever it is you're taking a photo of, for example, you could line up with someone's eye. And if you're going by the rule of thirds, the human eye should naturally be drawn to that point in the photo. So definitely use these tools, and your photography will improve.
Tip 13 - Primary Camera Focal Lengths
The new iPhones, the primary sensor size is more significant than ever, and the megapixel count is 48 offers more than ever. This means the camera can crop in on that sensor and deliver better focal range without losing quality. There are a couple of ways to shift between these focal ranges, and there are actually three focal lengths that you can toggle between.
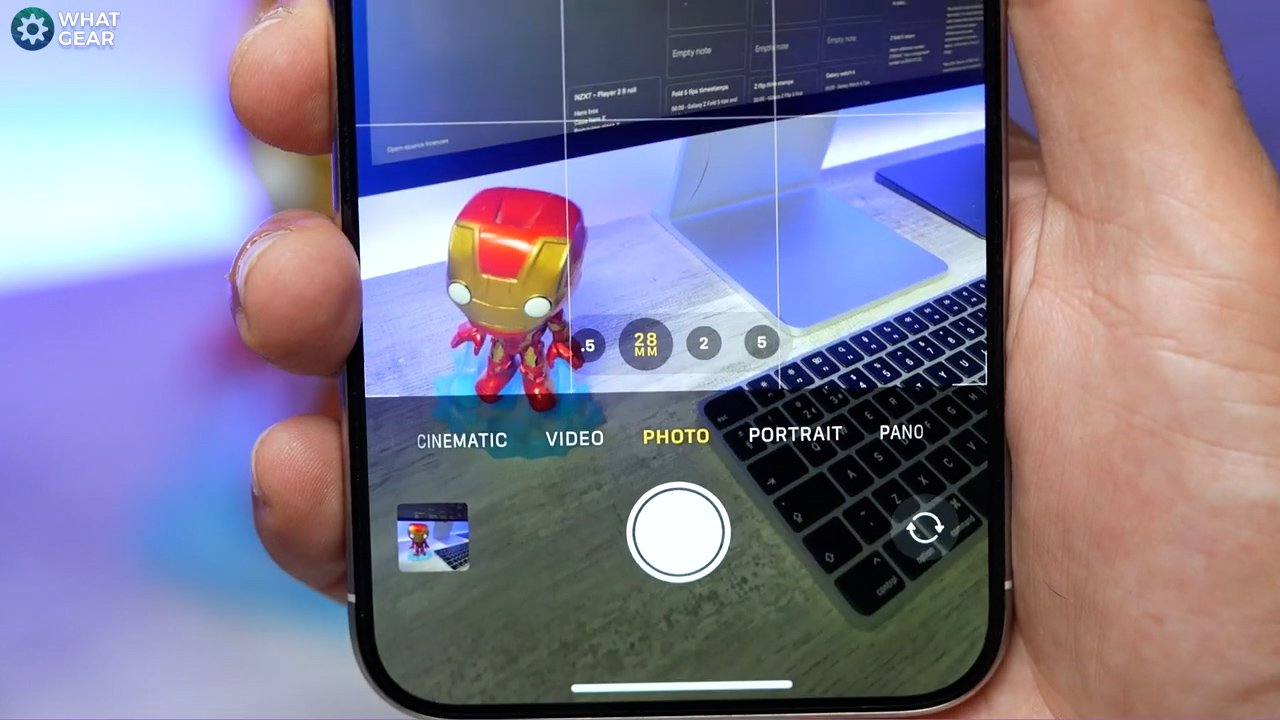
The primary camera, tap where it says one X1, and it changes to 28 millimetres. If it you tap again, it would change that 35 millimetres. Tap it again, it goes back to the original 24 millimetres, all of which are handy focal lengths.
And here's another way you can adjust quickly between those focal lengths. If you hold your finger down a slide on the zoom section of the camera, you can change between all the focal lengths.
Tip 14 - Default Focal Length
Let's say you really like the 28-millimetre zoom or the 35-millimetre zoom, and you want that to be your primary camera all the time. You can set that up to do this. Go into your

Settings / Camera / Main Camera
Scroll down again; you'll see this section here: primary camera. By default, it will always be 1x. if you like the other focal lengths, you can change them here. If you don't like those of a focal length, you can switch them off permanently. So you'll only have 1X. So, it is a feeling-out process to see what suits your style of photography. Whether you want to set a different default lens is entirely up to you. And if you don't, don't worry; you know how to switch between them quickly.
Tip 15 - Auto Portraits
There is a new feature on the iPhone's camera, and it is the ability to capture portrait photos even when you're not taking a portrait photo just to make sure that you can do this, check this setting, go to
Settings / Camera / Portraits In Photo Mode
Here and make sure this is switched on portraits in photo mode.

Now, this will only work when you're shooting regular photos, you can use this whilst set to Raw Max images, HEIF Max or JPEG Max photos. It has to be set to the default camera mode for this to work. And this works with the rear camera and the selfie camera.
Just ensure that the raw in the top left corner has a line through it, meaning it's not on.
When taking a photo, you'll know that this captured the depth of information. When you see the low F in the bottom right corner
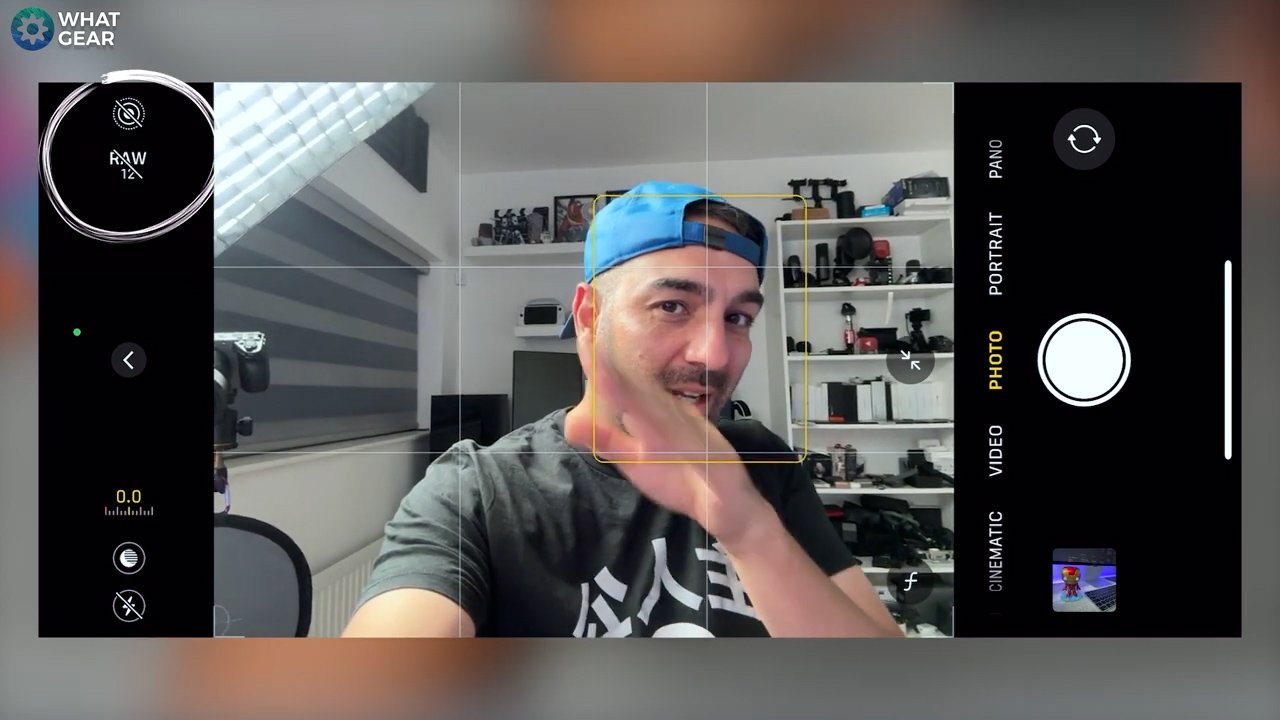
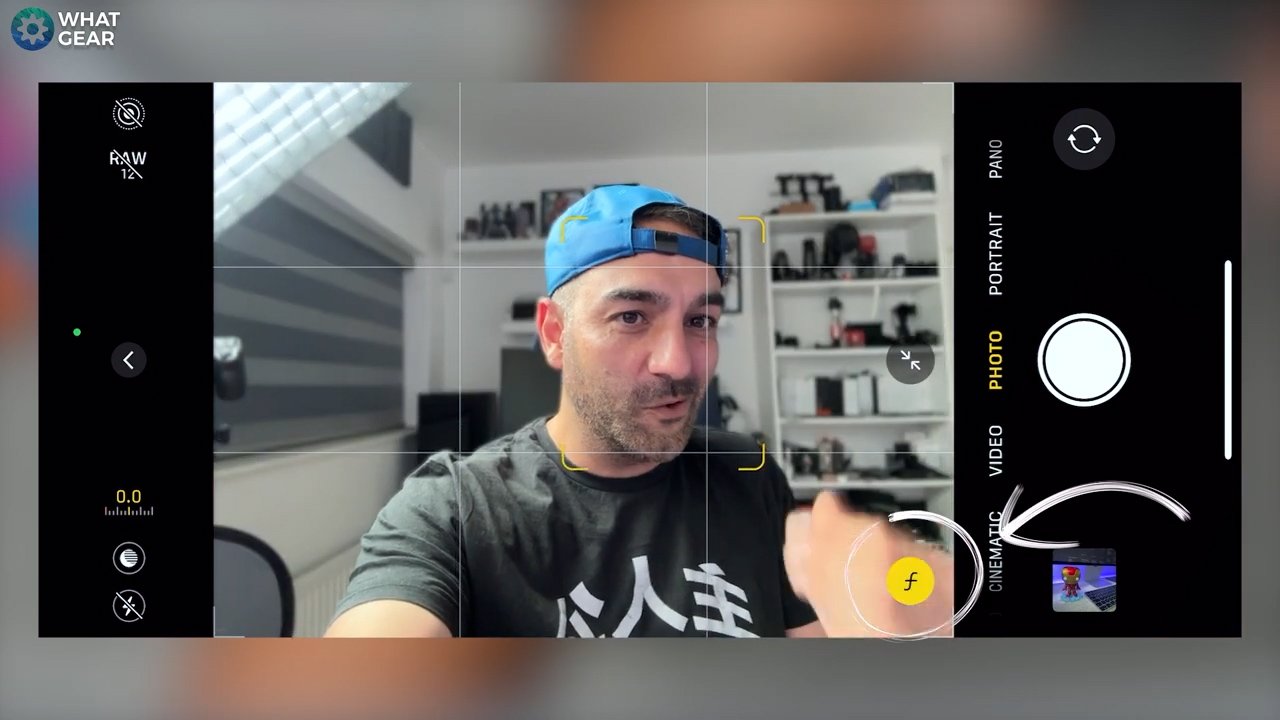
When you see this your iPhone automatically captures the portrait information. Tap the photo in your photos app and you’ll see the option to add the effect in the top right corner.
Tip 16 - Photo Formats
When I was speaking about Raw and HEIF & JPEG Max, you might wonder what I was talking about? Well, let me explain that to you. Go back to your

Settings / camera / Formats
By default, it will be set to high efficiency. This is very friendly on your storage on your device; however, if you're sending HEIF photos to someone on Windows, they might need help to open them. I've experienced this several times by sending pictures to people outside the Apple ecosystem.
If you are running into that problem with others on Android or using Windows computers, you might be better off switching to a more compatible option. This will now save photos as regular JPEGs and videos in H264, this format is more recognized across more devices.
Tip 17 - Set your default format
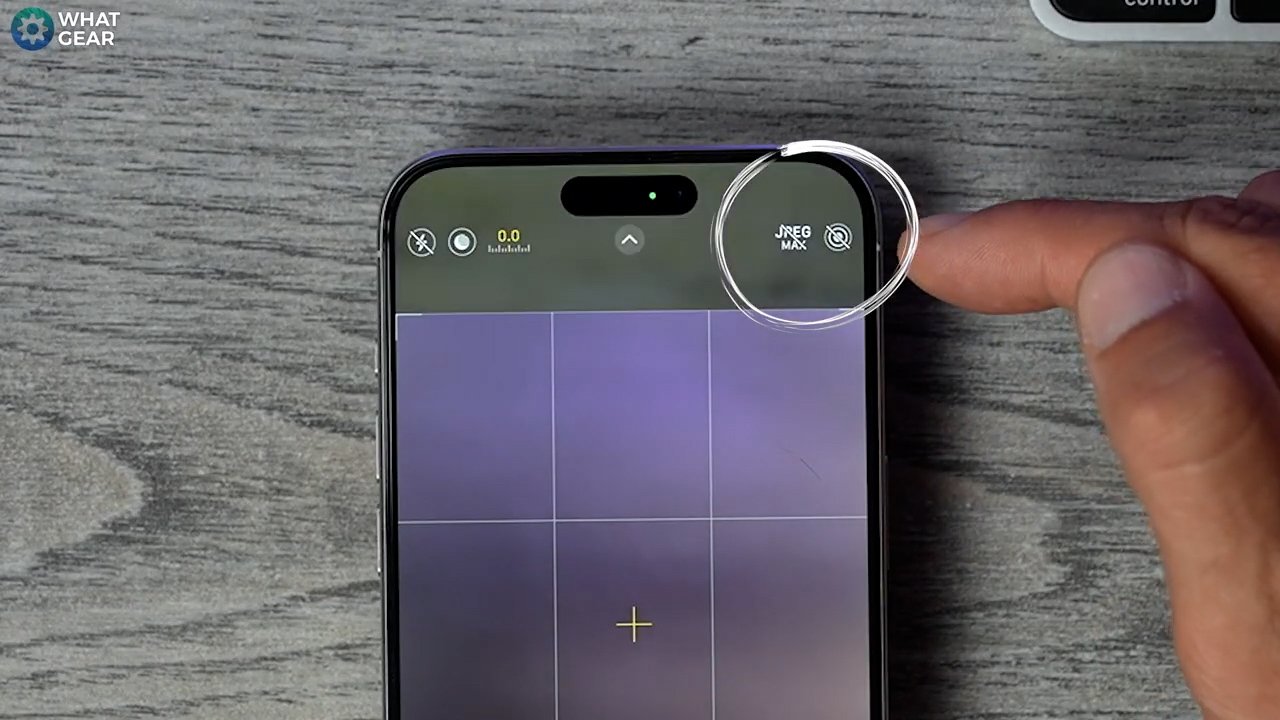
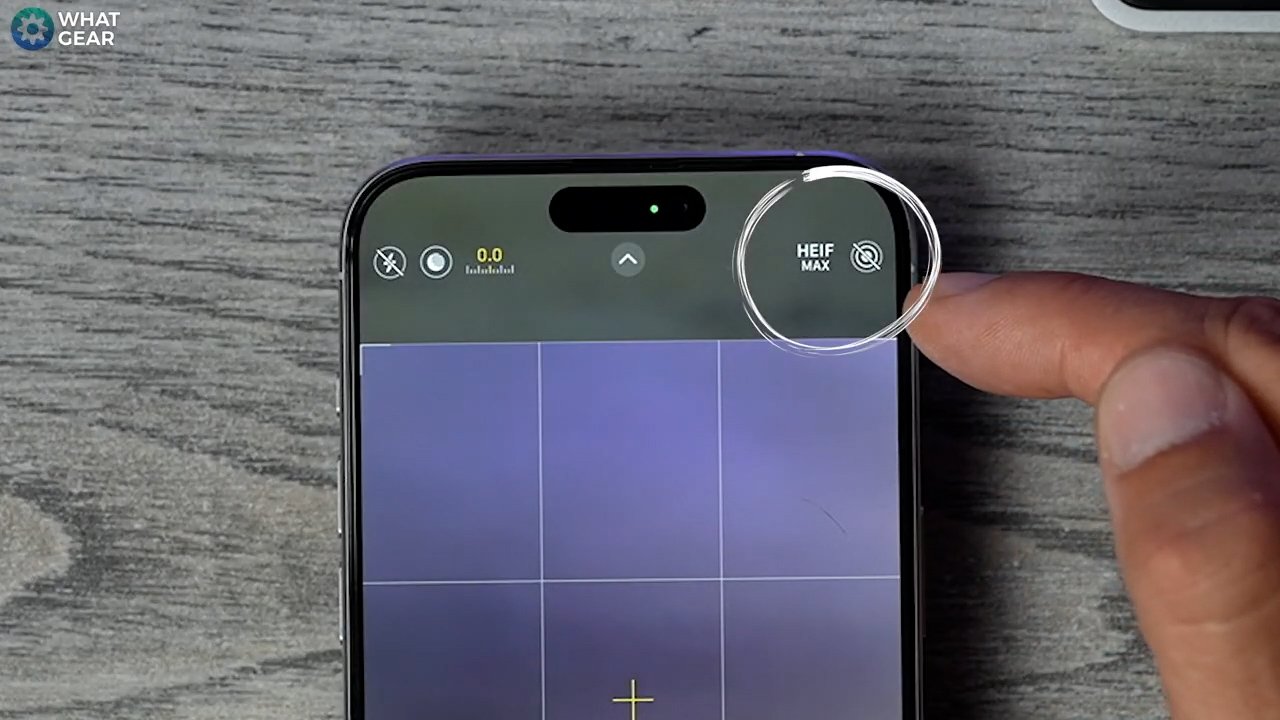
Let me show you how you can tell what mode you're currently in. Returning to your camera in the top right corner, I have JPEG. Max. If I go back and change it to high efficiency, you'll see HEIF Max, So that's a quick way to tell which mode you're currently in.
In the Settings / Camera / format you can change the amount of megapixels per photo by default.
It's on 24, but if you want to save more space, you can change it to 12 megapixels. You will lose some quality, but it will be insignificant to most people. And just below this, it shows you approximately the difference in file sizes.
Now, below this, the pro default is set to HEIF. However, if you change this to raw max, you will get maximum image detail when taking a raw photo. So, if you return to the camera mode, you'll see how it is changed to raw max. So when we enable this, you can take full 48-megapixel photos in RAW.
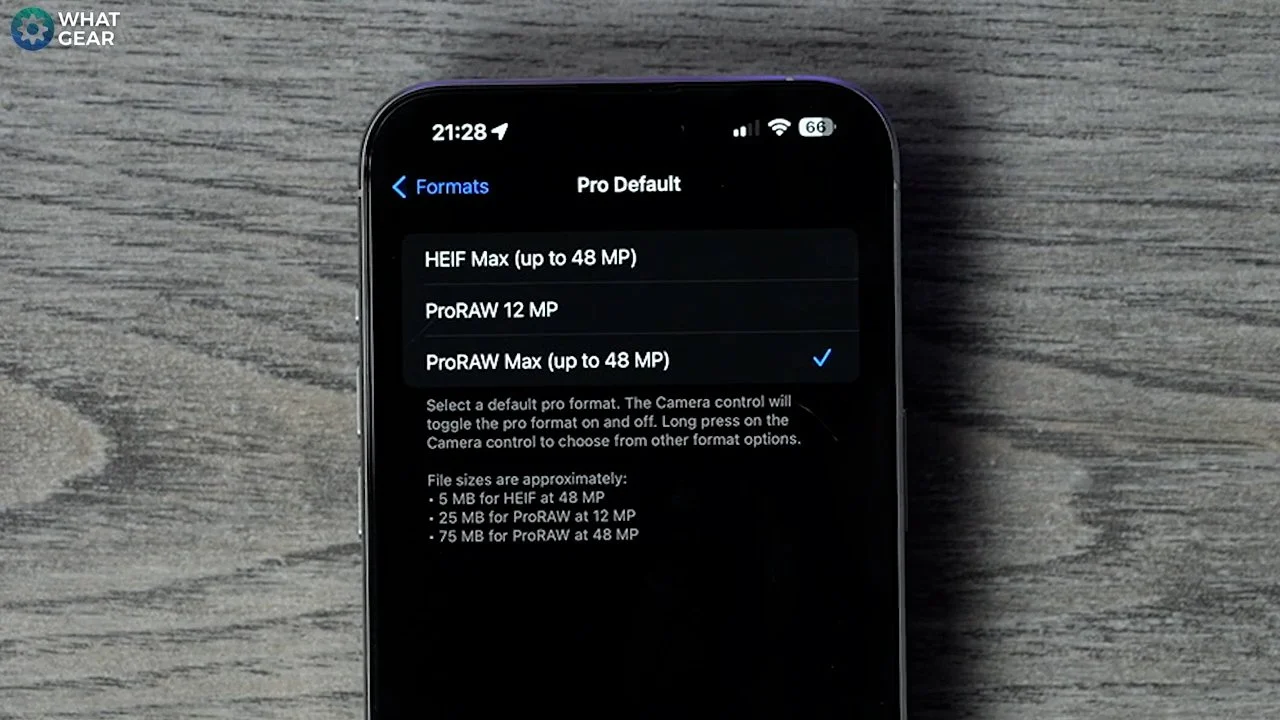
So when you RAW photos into post-editing software, for example, Lightroom, you have way more information to play with, and it will give you a lot more freedom to colour grade and pull details out of it and things like that.
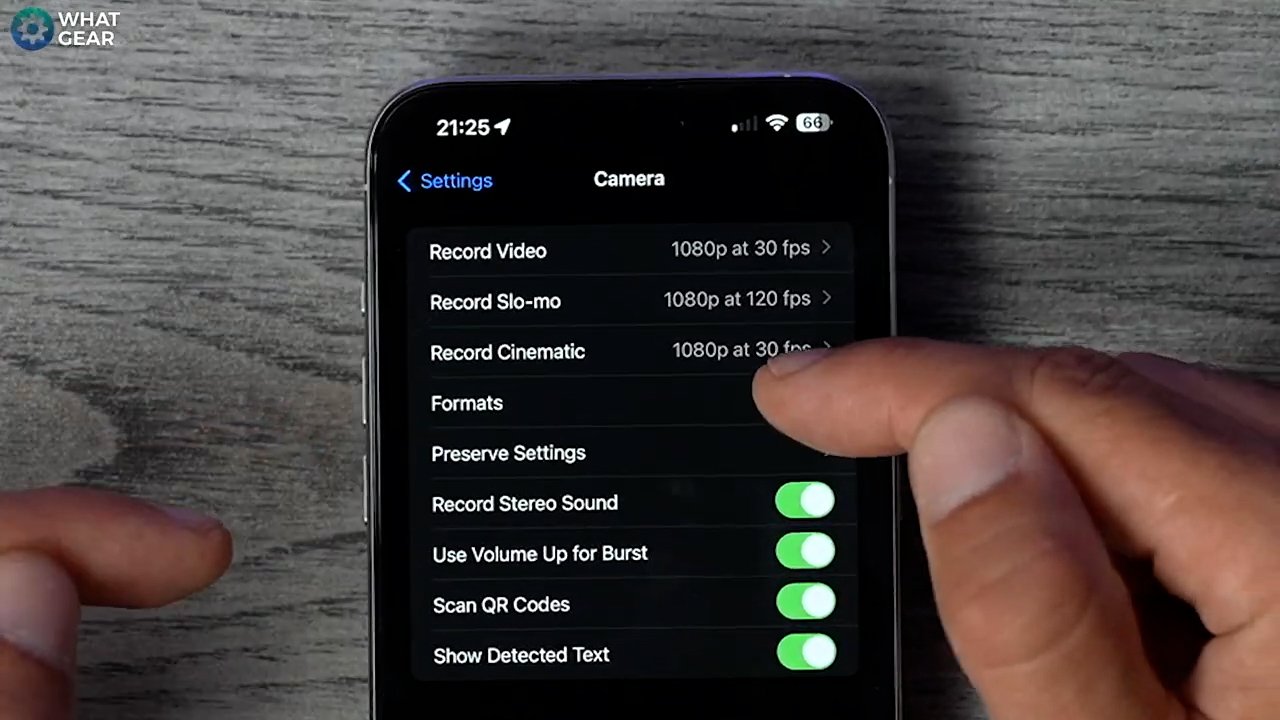
Settings/ camera / Record video
And here at the top are three things you must look at: the record video section to record slo-mo and the record cinematic. So, in the video recording, you can adjust the resolution and the frames per Second, and the maximum resolution is 4K 60. It shows down here what kind of file sizes you'll be dealing with if you adjust.
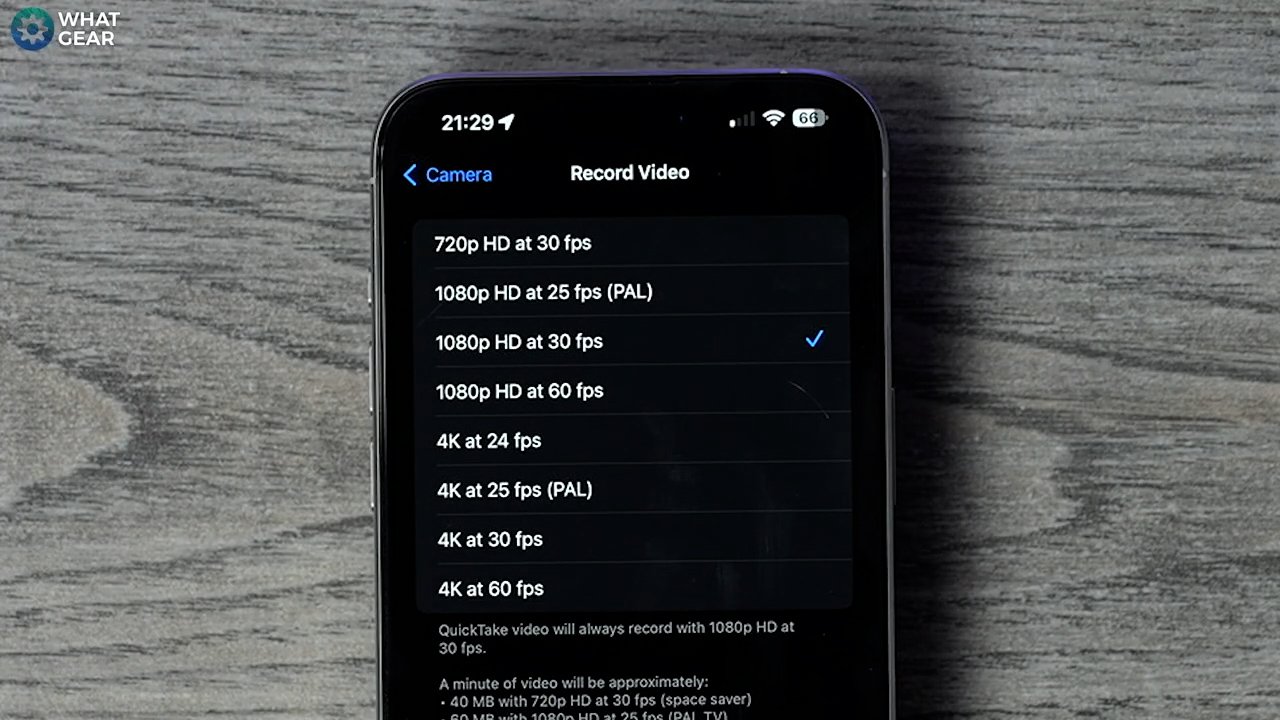
You should go 4K 30 by default; 4K 60 will be better for faster-moving scenes. For example, if you're filming a football match or something like that. And 30 frames per Second is the frame rate used most often. And it's also better in low light.
If all of this sounds very complicated, you should do this: Scroll down and enable auto frames per Second. This will allow your phone to decide what frame rate will be better for your camera based on what you're filming. If you want better videos with less effort, turn on auto 30 frames per Second and 60 frames per Second.

18 - Better Slo-Mo settings

The next thing to look at is the slo-mo option. So, the iPhone 15 pro max can now shoot 240 frames per second in full. HD is set to ten 8120 frames by default. By switching this to 240 frames per Second, you will get even slower. Slo-mo.
But just know, because he's capturing so many frames, the footage will be darker . So, this is going to work better in bright settings. If you're shooting slo-mo and it's too dark, you might want to switch it back to 120 but trust me, but if there’s a lot of light the results will look nicer here with 240 frames per Second.
Tip 19 - HDR / SDR or LOG
Okay, The next video setting the record cinematic. If you're recording cinematic stuff with the iPhone, you want the best possible quality. And by default, it's on 1080, 30 frames per Second. I recommend FHD at 30 frames per Second. Once again, the file sizes will be larger, but the quality of the footage will be much better. Now, come back to your

Settings / camera settings / Video Capture
And there's one more thing you need to know about recording the best possible videos here on the iPhone. Just below the record settings we just looked at is the format section. If you scroll down to the bottom in the video capture section, you'll notice this Prores encoding if you tap that is currently set to HDR, so high dynamic range you can lower that to SDR.
But if you want the maximum amount of data in the video, use LOG. So when you put it into an editing suite, you can really colour grade things and play with the video footage.

If you're a video creator or aspiring content creator, shooting in LOG could be a game changer for you. So just be aware of where this is.
Tip 20 - Use iPhone as a web cam
Okay, so the following camera setting is not in the camera settings. This time, we're going to go into the

Settings / General / Airplay and handoff.
And at the bottom of this page, you'll see a continuity camera. If you enable this. Now, your iPhone camera can be used as your webcam. So, definitely switch this on on day one If you have an Apple Mac computer.
Tip 21 - Create Stickers From Any Photo
You can create stickers from your photographs very quickly. Just by holding down a part of the image. You can drag this around, and once you highlight it, you can add a sticker here.

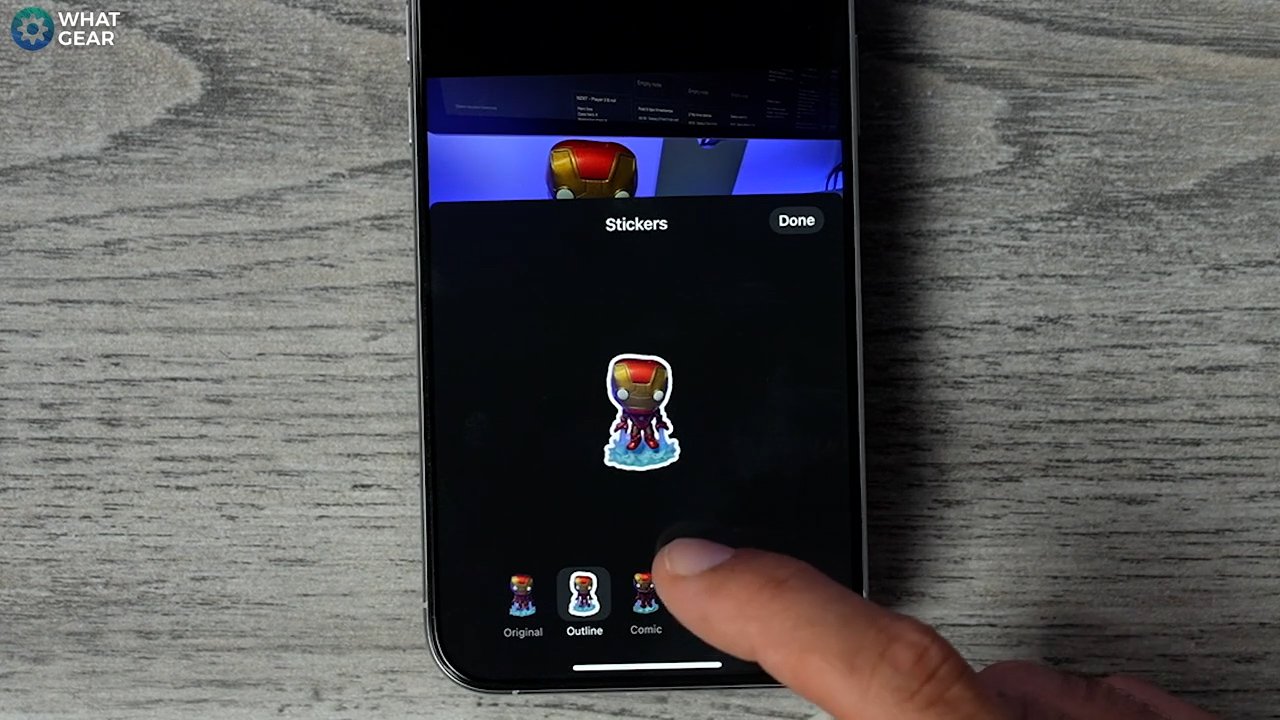
You can copy and paste it into an I message. I will go to add a sticker, and once we add the sticker, we can also add an effect. If you want to like an outline comic style, puffy, shiny. So, when you think about it, you could take a photo of almost anything you see and instantly turn it into a sticker.
Tip 22 - BATTERY Saving
Okay. So you've made it this far, and you've now levelled up your camera game. You're fast becoming an iPhone Jedi master. But if you only knew the power of your iPhone. Let me show you how to maximize the Apple iPhone's juice. Let's kick this off with a setting that only some people know about.

settings / Wi-Fi / Tap the i
And next to your Wi-Fi network. Hit the i icon, and you will see this low data mode. When you apply this mode, your phone will prioritize the Wi-Fi connection over mobile data, so your phone won't constantly scan and measure mobile data connections in the background. And this could save you a little bit of power.
Tip 23 - Background App Refresh
So I'm going to take a guess and say that you have some apps on your phone that you're not really using that much, and they're not that important to you, but you've got them anyway, just in case you need to use them one day. Well, one easy way to stop your phone from wasting power on these apps is to do this.

Settings / general / background app refresh
Now, go through this list one by one. And until any apps you don't care about, just know that when you blow up the app, it will refresh anyway. And the idea is that you only leave on the apps you use regularly. And in doing this, you will save a little bit of power.
Tip 24 - Best chargers for iPhone 15
Now, if you're watching this, you already know when it comes to tech, only a little can be achieved without speed and power. That's why I've partnered up with the sponsor of this video. UGREEN
The new iPhone has a USB-C port, so it makes sense for you to pick up some charging tech to get you to the optimal charging speeds. And yes, you could go for a regular single-port power brick. But if you want to take your power delivery to the next level, you will look at this from you.
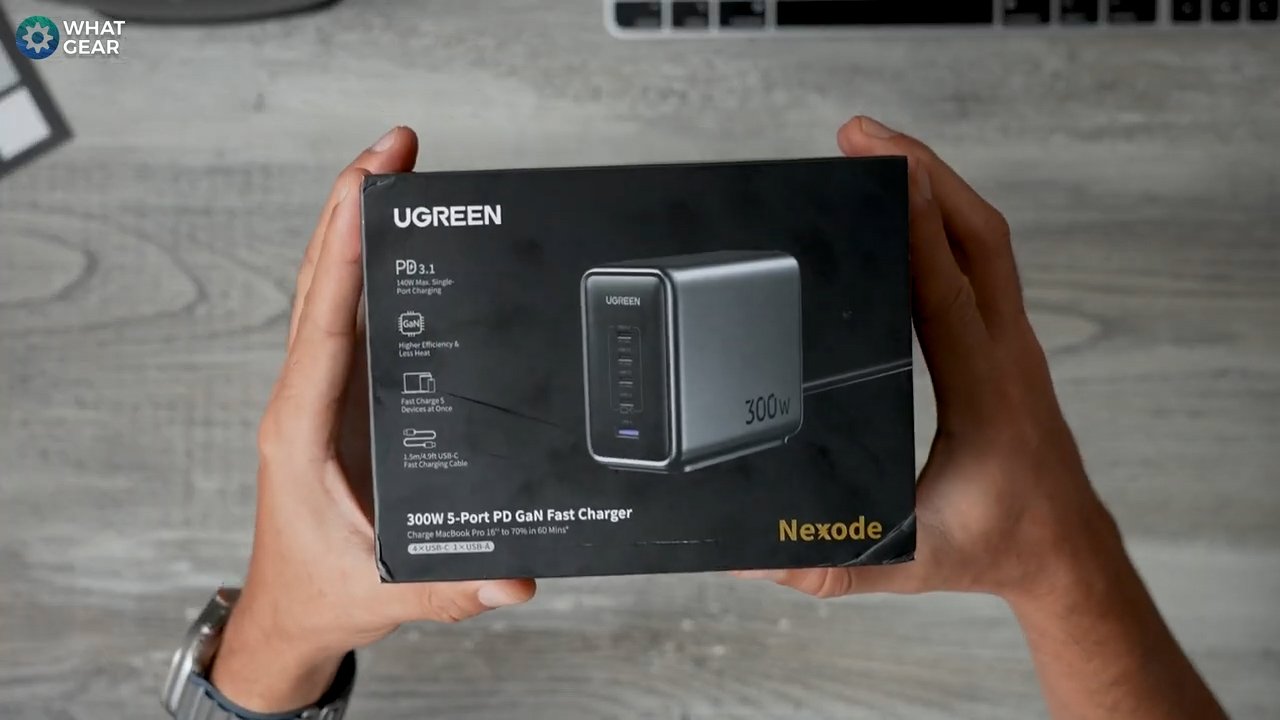
It's the Nexode 300-watt five-Port PD gan fast charger.
Not only can this charge your iPhone at peak speed, but it can also charge for other devices simultaneously. And you can even use it to charge up a MacBook Pro and get it to 70% in just 60 minutes. The gallium nitride tech makes the charger more efficient and creates less heat, making you more efficient with your time. Thanks to the insane charging speeds that this Nexo charger is capable of. And check this out if you need portable power.
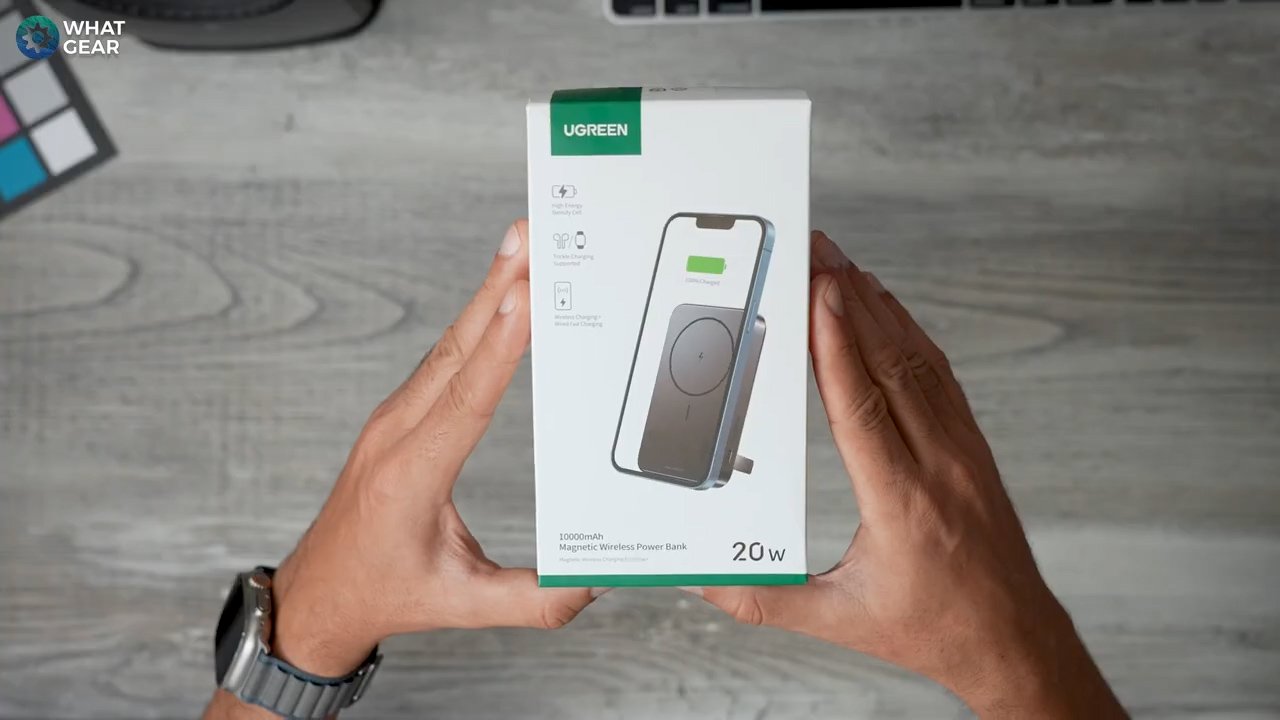
The UGreen 10,000 Power Magnetic Powerbank is a fantastic travel companion. It supports fast wired and wireless charging, and because it has a built-in kickstand and magnets, you could use it to binge-watch content on an aeroplane on your phone without ever having to worry about power. So, if you want to upgrade your power delivery systems, check out the link in the description. And when you do, you'll agree you have got what you need.
UGREEN Nexode 300W Charger(Amazon)
Tip 25 - Battery Saving Shortcut
Here's a more advanced tip for you guys. Consider it a preemptive power-saving protocol in your app library. Search for Shortcuts, which is an official Apple app, and go to the automationsection at the button, hit the plus at the top, go to the battery level, set this to around 20 or 15%, whatever you feel is better and select it to when it falls below 15% and then search for low power mode.

Now, when your phone reaches 15%, it will automatically switch to low power mode, and you can choose very specifically when you want it to kick in using the battery percentage slider on the previous page.
Tip 26 - Always on or off
If you've had your iPhone for a while and you're starting to realize the battery life could be better than it once was, you have to ask yourself a question. Do you really need the always-on display? And if it's something you have yet to use, you should definitely do this.

Settings/display in brightness
scroll down to always on show, and here we can switch off the wallpaper and the notifications if you want to, or we can switch off always on entirely. And again, even though it doesn't use much power, it still uses some power. And doing this will save you that little bit of extra energy.
Tip 27 - Power efficient refresh rate
If your eyes are good you might notice the difference between 60Hz & 120HZ. If you don't see the difference, then you should do this because it will save you some of that juice.

Settings / accessibility
In this section, you'll see motion; at the top, you'll see reduced motion. Also, you can limit the frames to 60 in the same menu. So now your phone will reduce the motion regarding effects, and the frame rate will be locked to 60Hz.
That's half of what the new iPhone displays typically, and it's guaranteed to save you some power.
Tip 28 - Siri Always On
So here's another question for you guys. How much do you use Siri? If you don't use it that much, then this one could help you back into your

Settings / Siri and search
And at the top, you'll see the listen for section. So if you go to this, you can switch this off entirely. Now, your phone won't be constantly listening for that white quiet. So, there must be more processing on your phone at all times.
If you decide to switch this off, I recommend pressing the side button for Siri. So you still have access to it when you need it.
Tip 29 - Battery optimisation settings
Okay. So this next one is a new feature on the iPhones. If you go to your
settings / battery health and charging / charging optimization

Here you can limit the amount of charging to 80%. This is better with newer phones. This will extend the overall battery life over a longer period of time by not charging the device to 100% every single time. If you plan on keeping your iPhone for a long time, this is a good one to switch on. If 80% is not enough for you daily, you should skip to the next one.

Tips 30 - Give your iPhone some downtime
Once in a while, it's important for you and your iPhone to have a bit of downtime. Check this one out.

Settings / downtime
Here you can schedule this to kick in whenever you want it to daily. Or you can even customize the days. This will apply to all of your Apple devices. Keep that in mind; it will reduce the amount of information coming to your phone during that time and downtime. You can choose and allow phone calls to still come through.
Tip 31 - Dark Mode
And one last battery-saving tip for you guys is the dark mode. If you don't like the dark mode on all the time, you can set it to automatic so it will kick in at sunset or sunrise. This will save you power because the black areas of the screen aren't being powered at all. When you are in light mode; all of these bright areas are using battery life.

So I recommend you either use automatic or leave it permanently in dark mode.
32 - Screen Distance

Settings / screen time / Screen distance
And here is a new feature called Screen Distance. Many people don't realize they're damaging their eyes by holding the phone too close to their face. And this actually will let you know when you're doing that. What the phone does here is it uses the sensors on the front to measure the distance that you're holding the phone from your face. Test it out. Let me know how you get on with it.
33 - The Night Shift
And here's another one that will help your eyes. It is the night shift. Go to

Settings / display / Night Shift
And here you'll see I've set my night shift to kick in at 11 p.m. and switch off at 7 a.m. This will changes the hue on the screen. It’s important as when your eyes absorb too much blue light, it can keep you up at night and disrupt your sleeping patterns. It's good to use Night Shift daily. And you can tailor the colour temperature here to whatever suits your eyes the best.
MORE APPLE TIPS & TRICKS
So you made it to the end. If you want to dive deeper into iOS settings, here are some more videos that I made that will help you
Here are some of the first things you should do if you have just got an Apple Watch Ultra 2 or Series 9 Apple Watch. There are 25 Tips and Tricks in this video & there are timestamps so you can jump around if you need to. Do me a favour and let me know if any of this help you.
If you have just bought the new Apple AirPods Pro 2 (generation 2). Here are the first 15 things to do. These tips & tricks include some well-hidden features! So keep your eyes and ear open ;)