
Galaxy S26 Ultra Beginner's Guide: 15+ Essential Settings You're Missing
This is the absolute beginner’s basics guide to the Galaxy S26. And I’m making this video to help you make sure that you’re not using it wrong. So here are 17 day one tips and tricks that most people don’t necessarily know. And even some of the pros may have forgotten about some of this stuff. Because they may have been blinded by the brand new AI features and fun things to try on day one when it comes to this device, and I have made a video all about that, so I’ll link it at the end of this video. So if you have just got this phone and you’re feeling a bit like this… Well then this video has been tailor made for you. Let’s get straight into it.
GETTING AROUND
So this is likely how your phone is going to look on day one. You should see the Settings app icon. If you don’t see that, another way to get to Settings is to swipe down from the top right corner and hit Settings. Once within the settings, if you scroll down to Display and then scroll down again, you will find the navigation bar options.
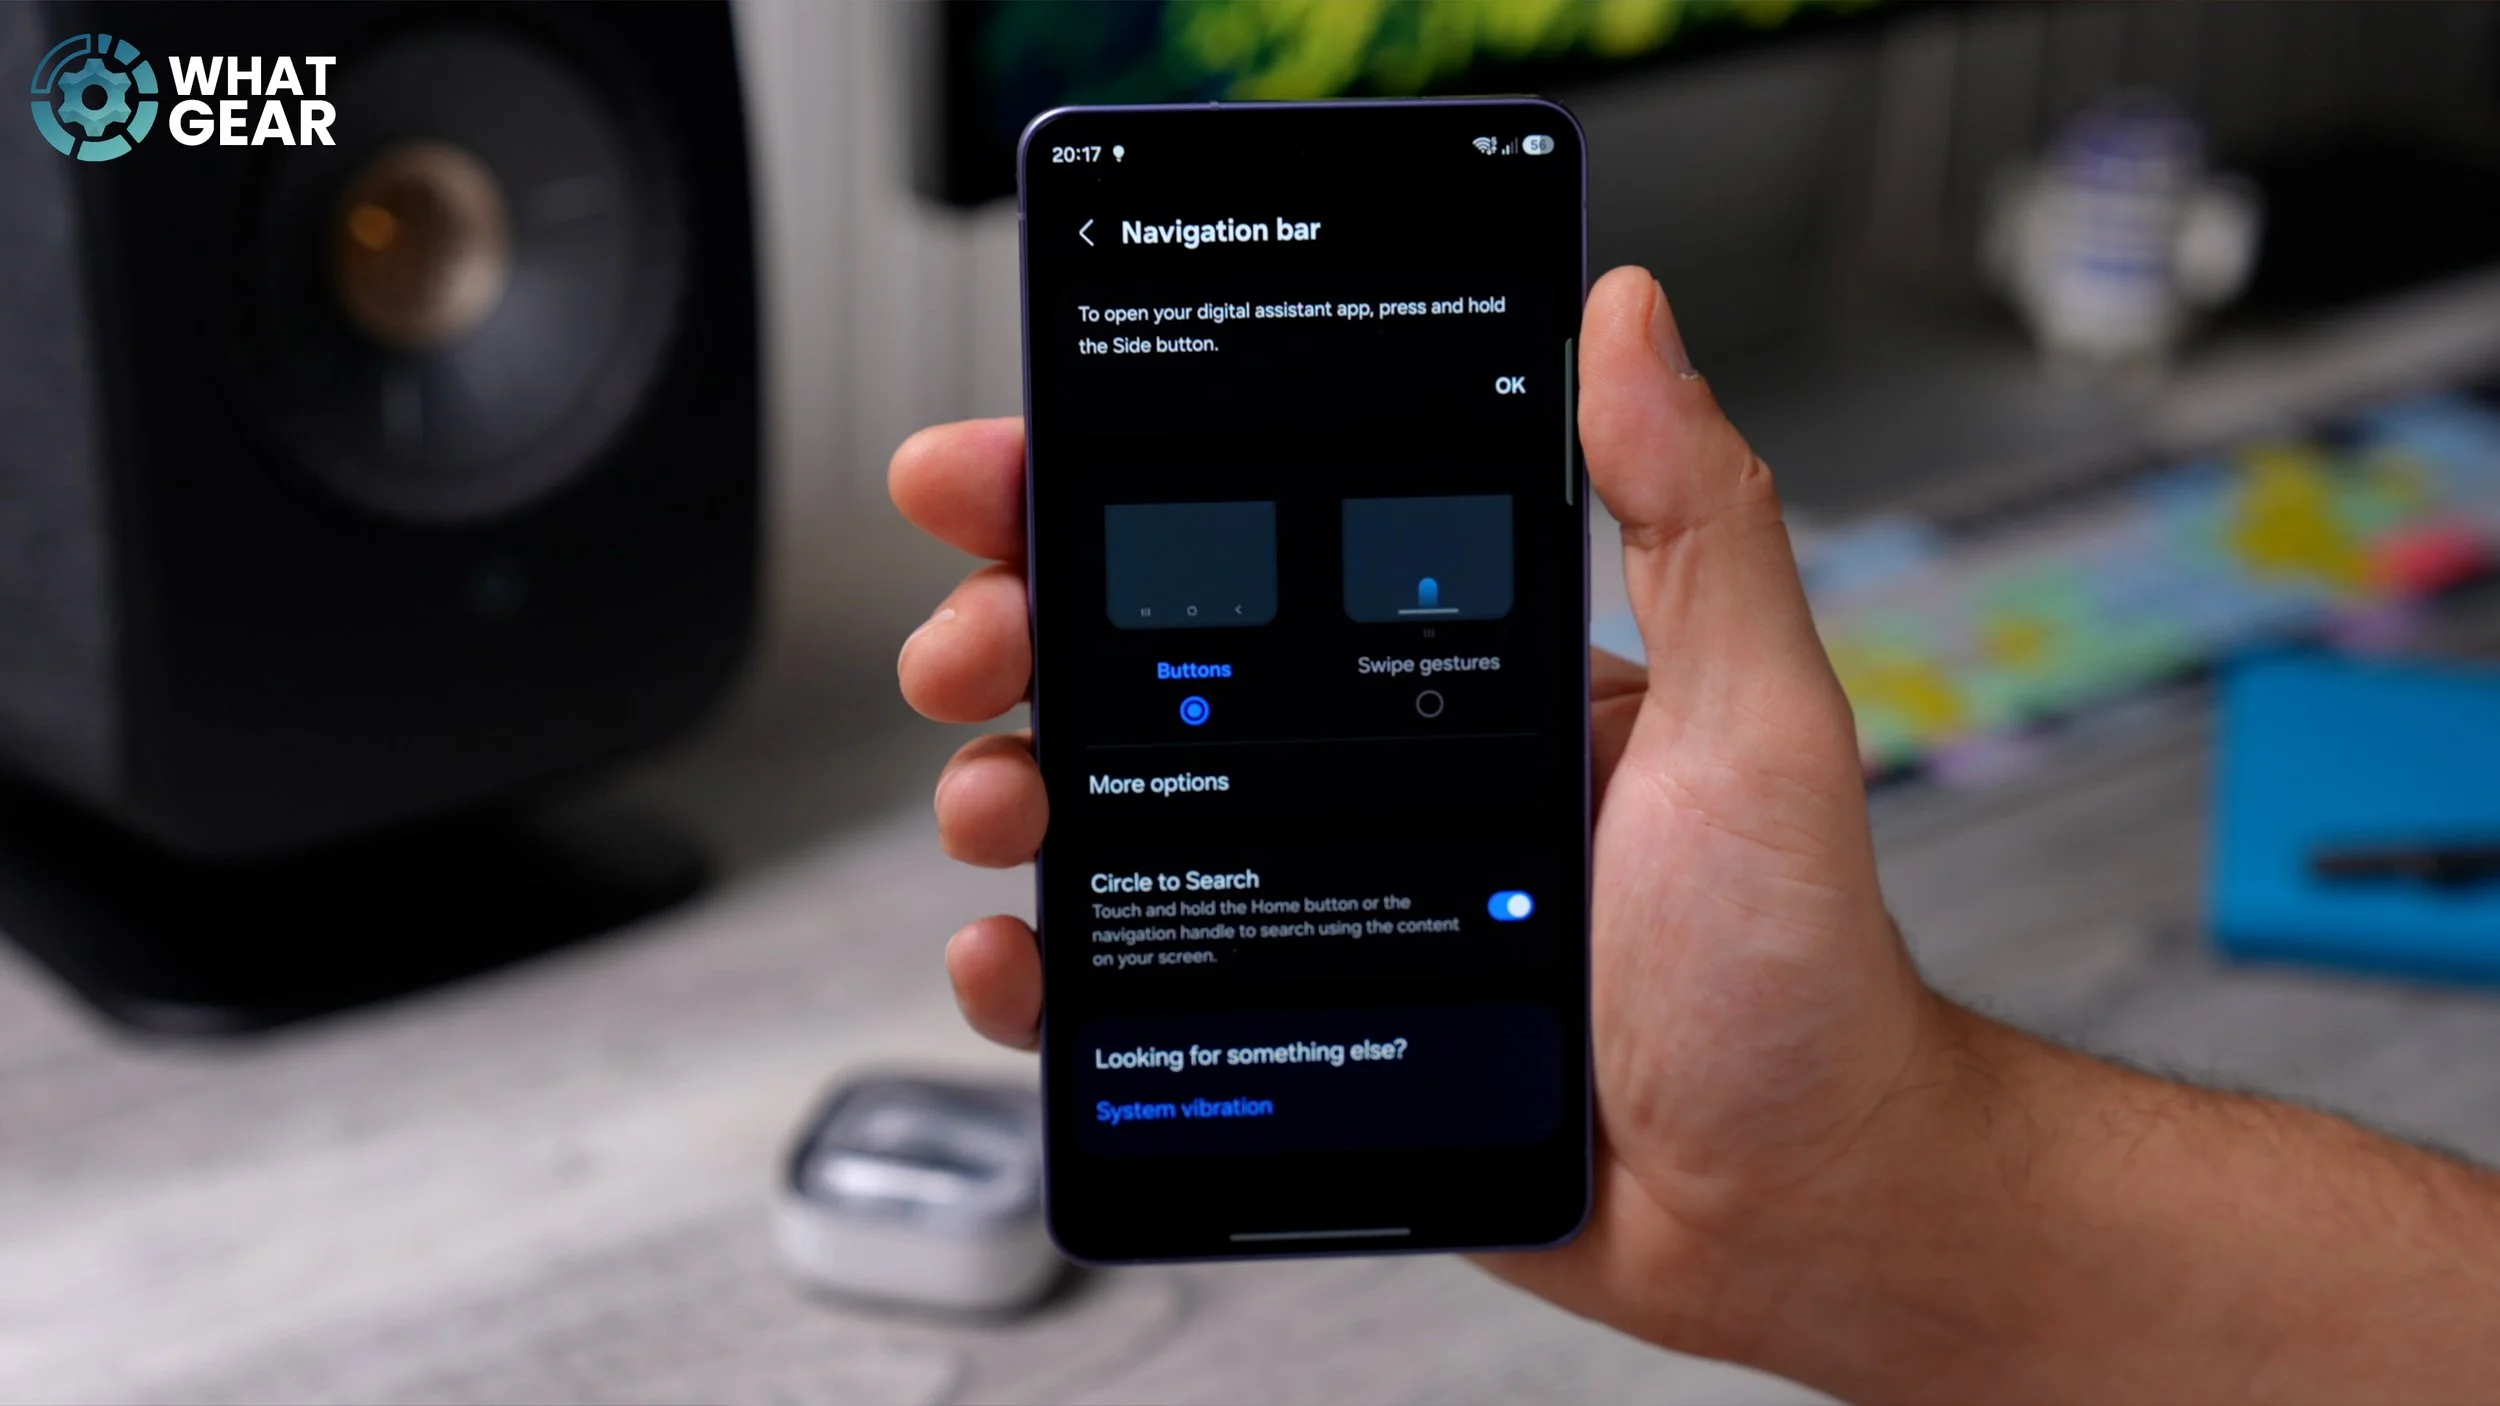
Now, some people will find the buttons more convenient, and this is actually what the Galaxy will default to. However, if you are coming over from iOS, you will be much more familiar with the swipe gestures. It is exactly the same as the iOS swipe gestures. So you need to make a decision. Are you team buttons, or are you team swipe gestures? So pick your poison, and let’s move on to tip number two.
UPDATED INTELLIGENCE
Check out this next setting. This will help you in the future, so you might as well do it now. So let’s jump into the settings again. And this time, right here at the top, you’ll see the Galaxy AI menu. If we go into that… Now, when you look at this, if there are any arrows pointing downwards next to any of these AI features, that means you don’t have the AI packs installed. I have already downloaded and installed all of my AI packs. The question is, have you?
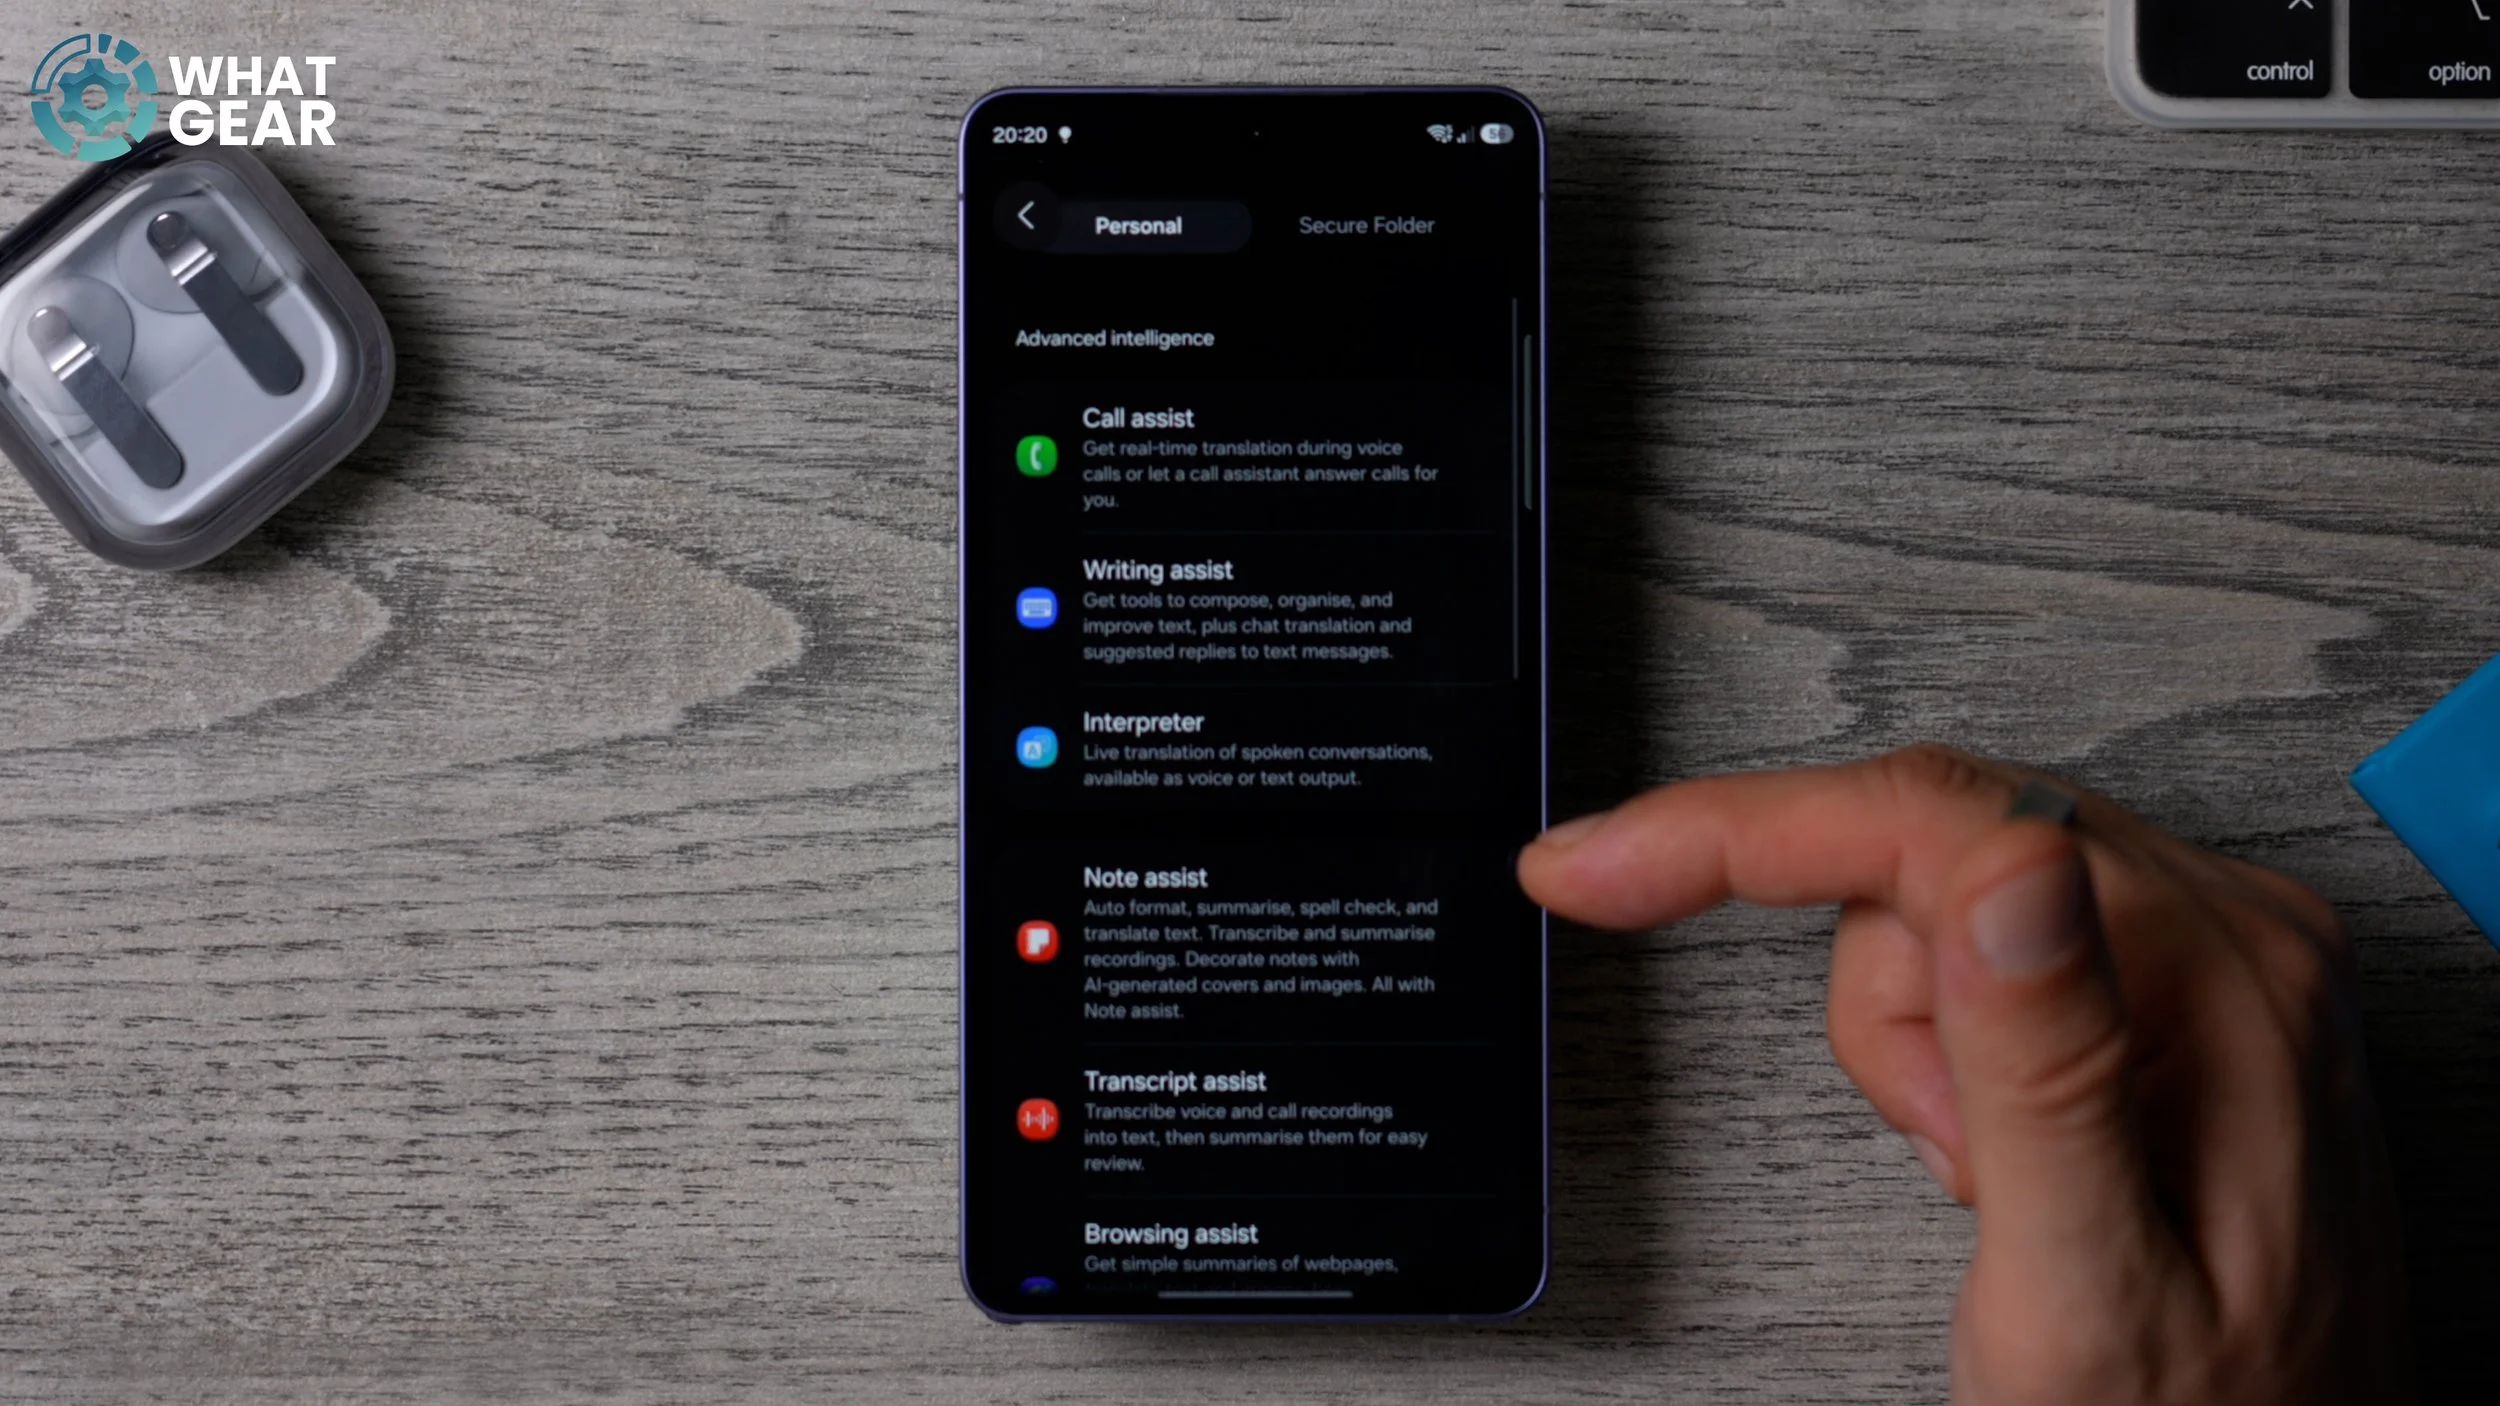
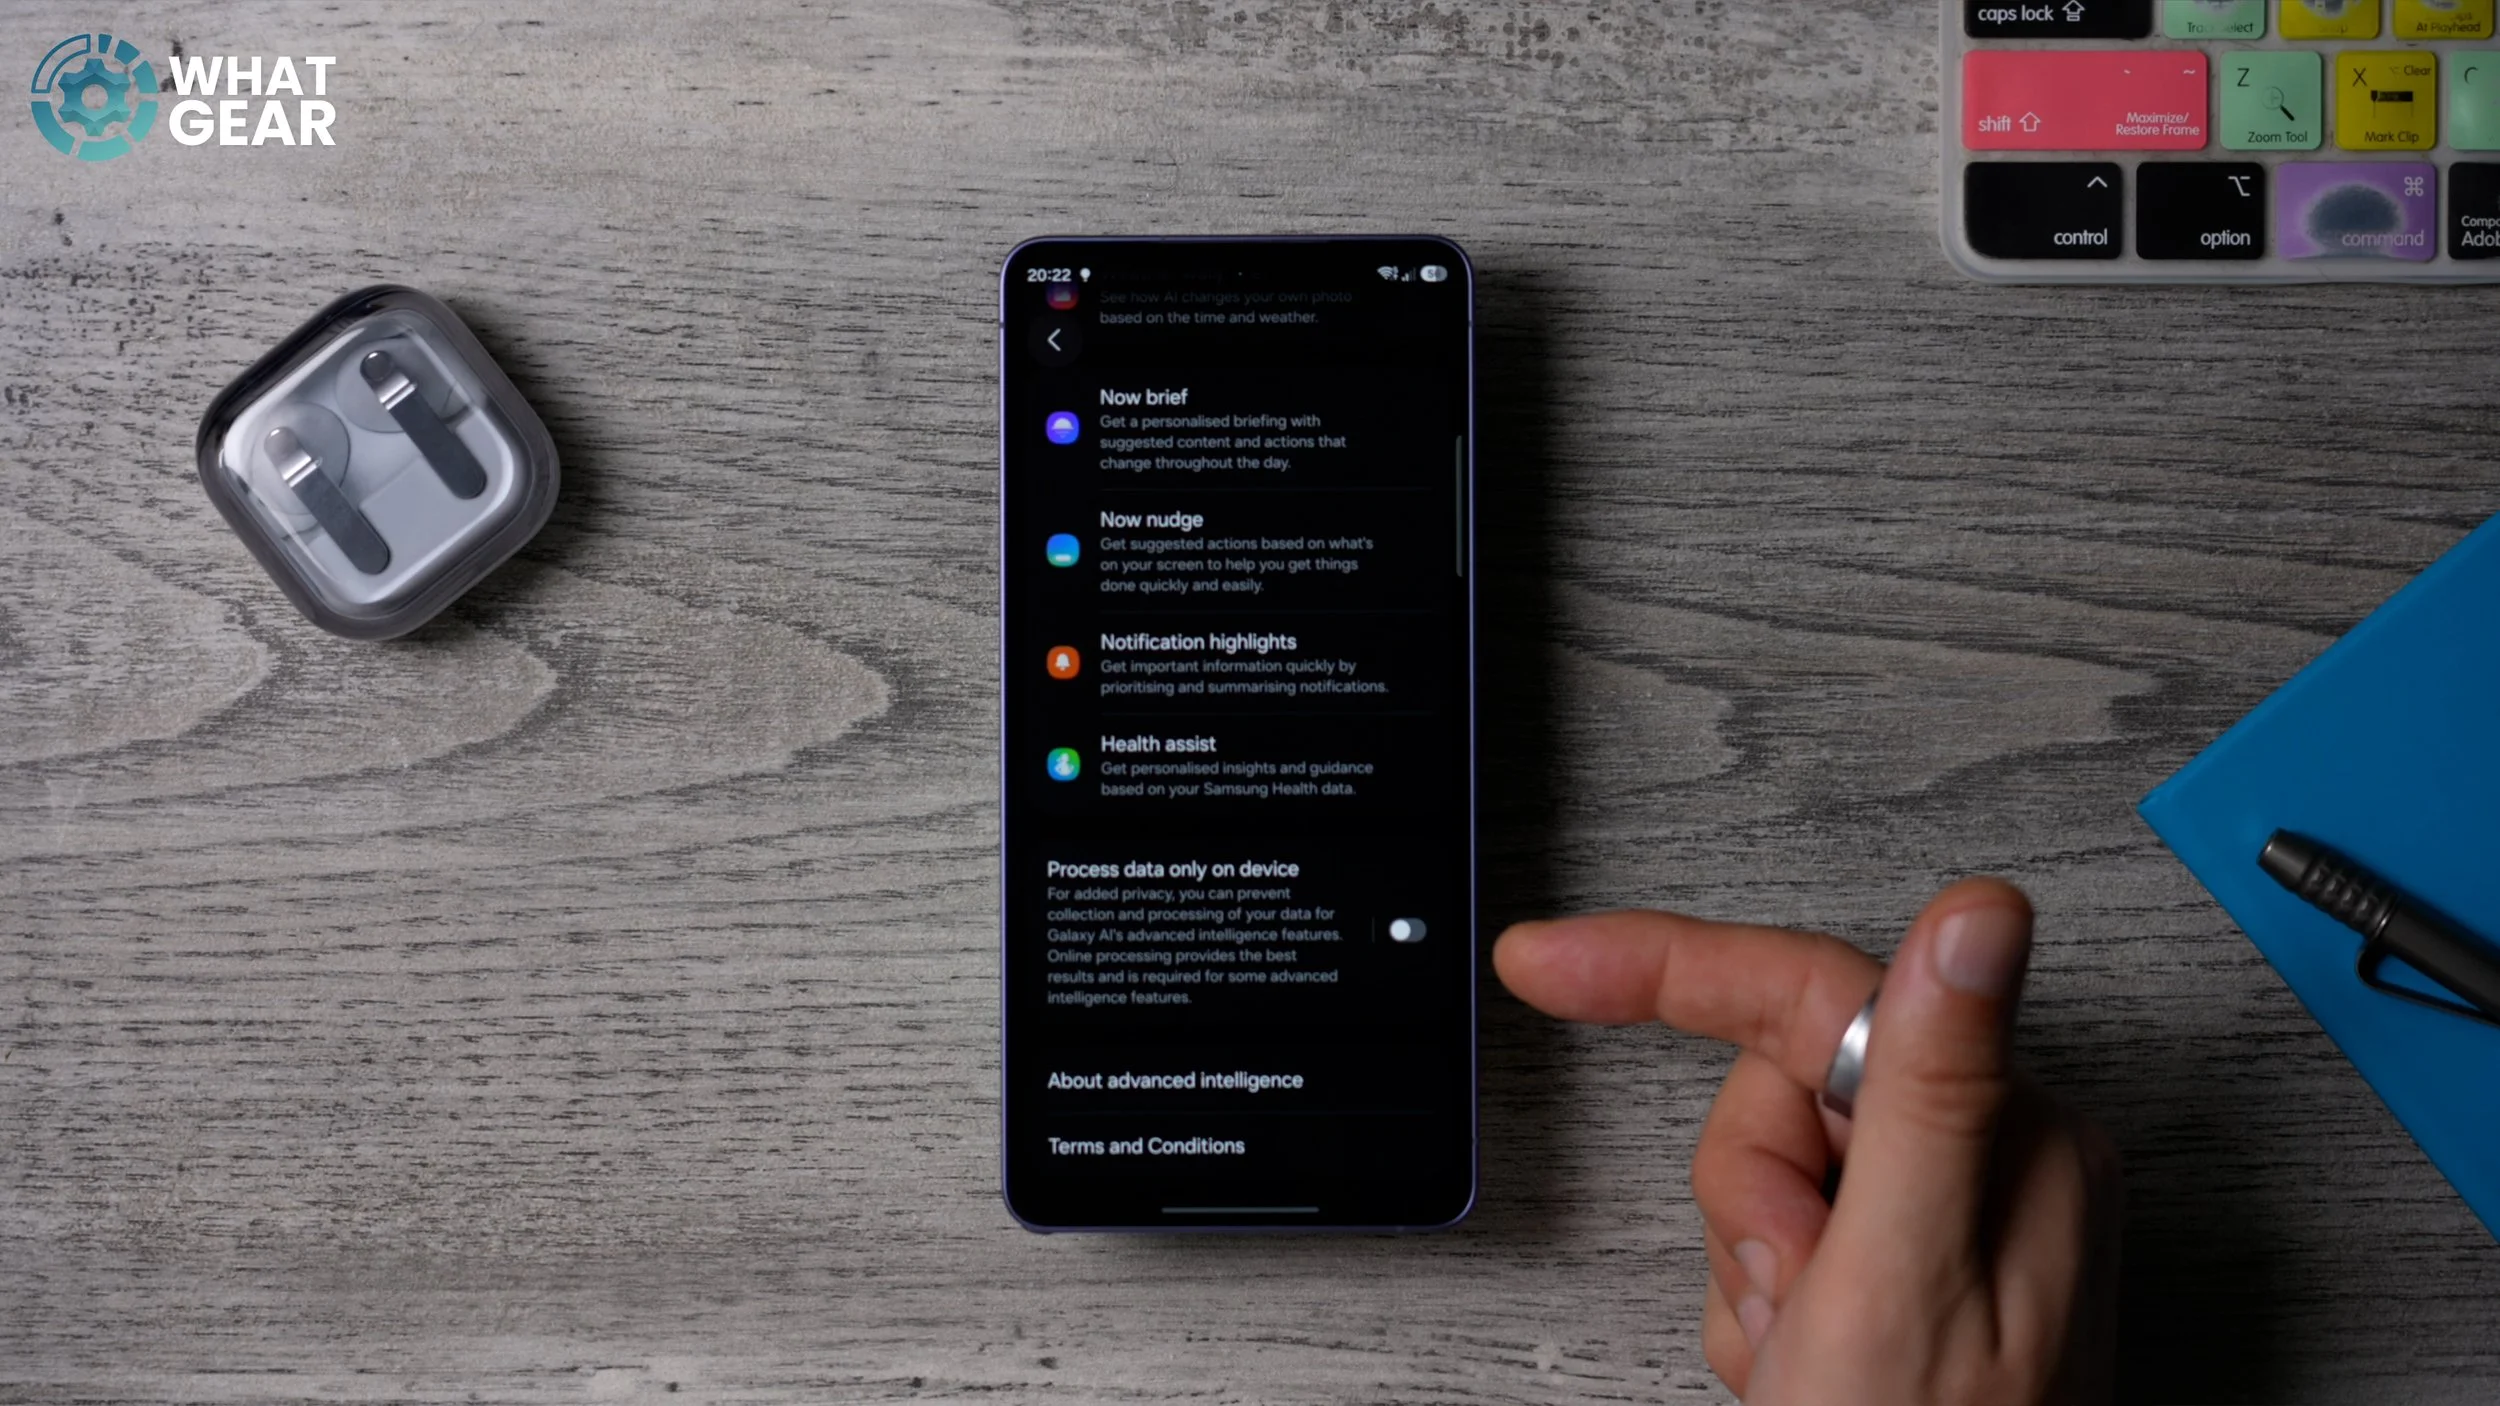
And if you haven’t, and you do see the arrows next to any of these, then download those straight away. Now, for those of you who are very security conscious and you want nothing to do with online AI, on the same page, if you scroll all the way to the bottom, you can tick this box right here. And this tells your Galaxy to process your data only on the device and not via a server.
THE LATEST EVERYTHING
This is very, very basic, but very, very important. So you should have the Samsung Galaxy Store app on your home screen. If you don’t see it, you can swipe up and search for it here just by typing in Galaxy Store. Or just scroll through the apps in your app drawer to find it. Once you do find it, open it up. And at the top of the home screen here, you will see Updates. And right now I have two, but if you got a brand new phone, you’re probably going to see way more than that.
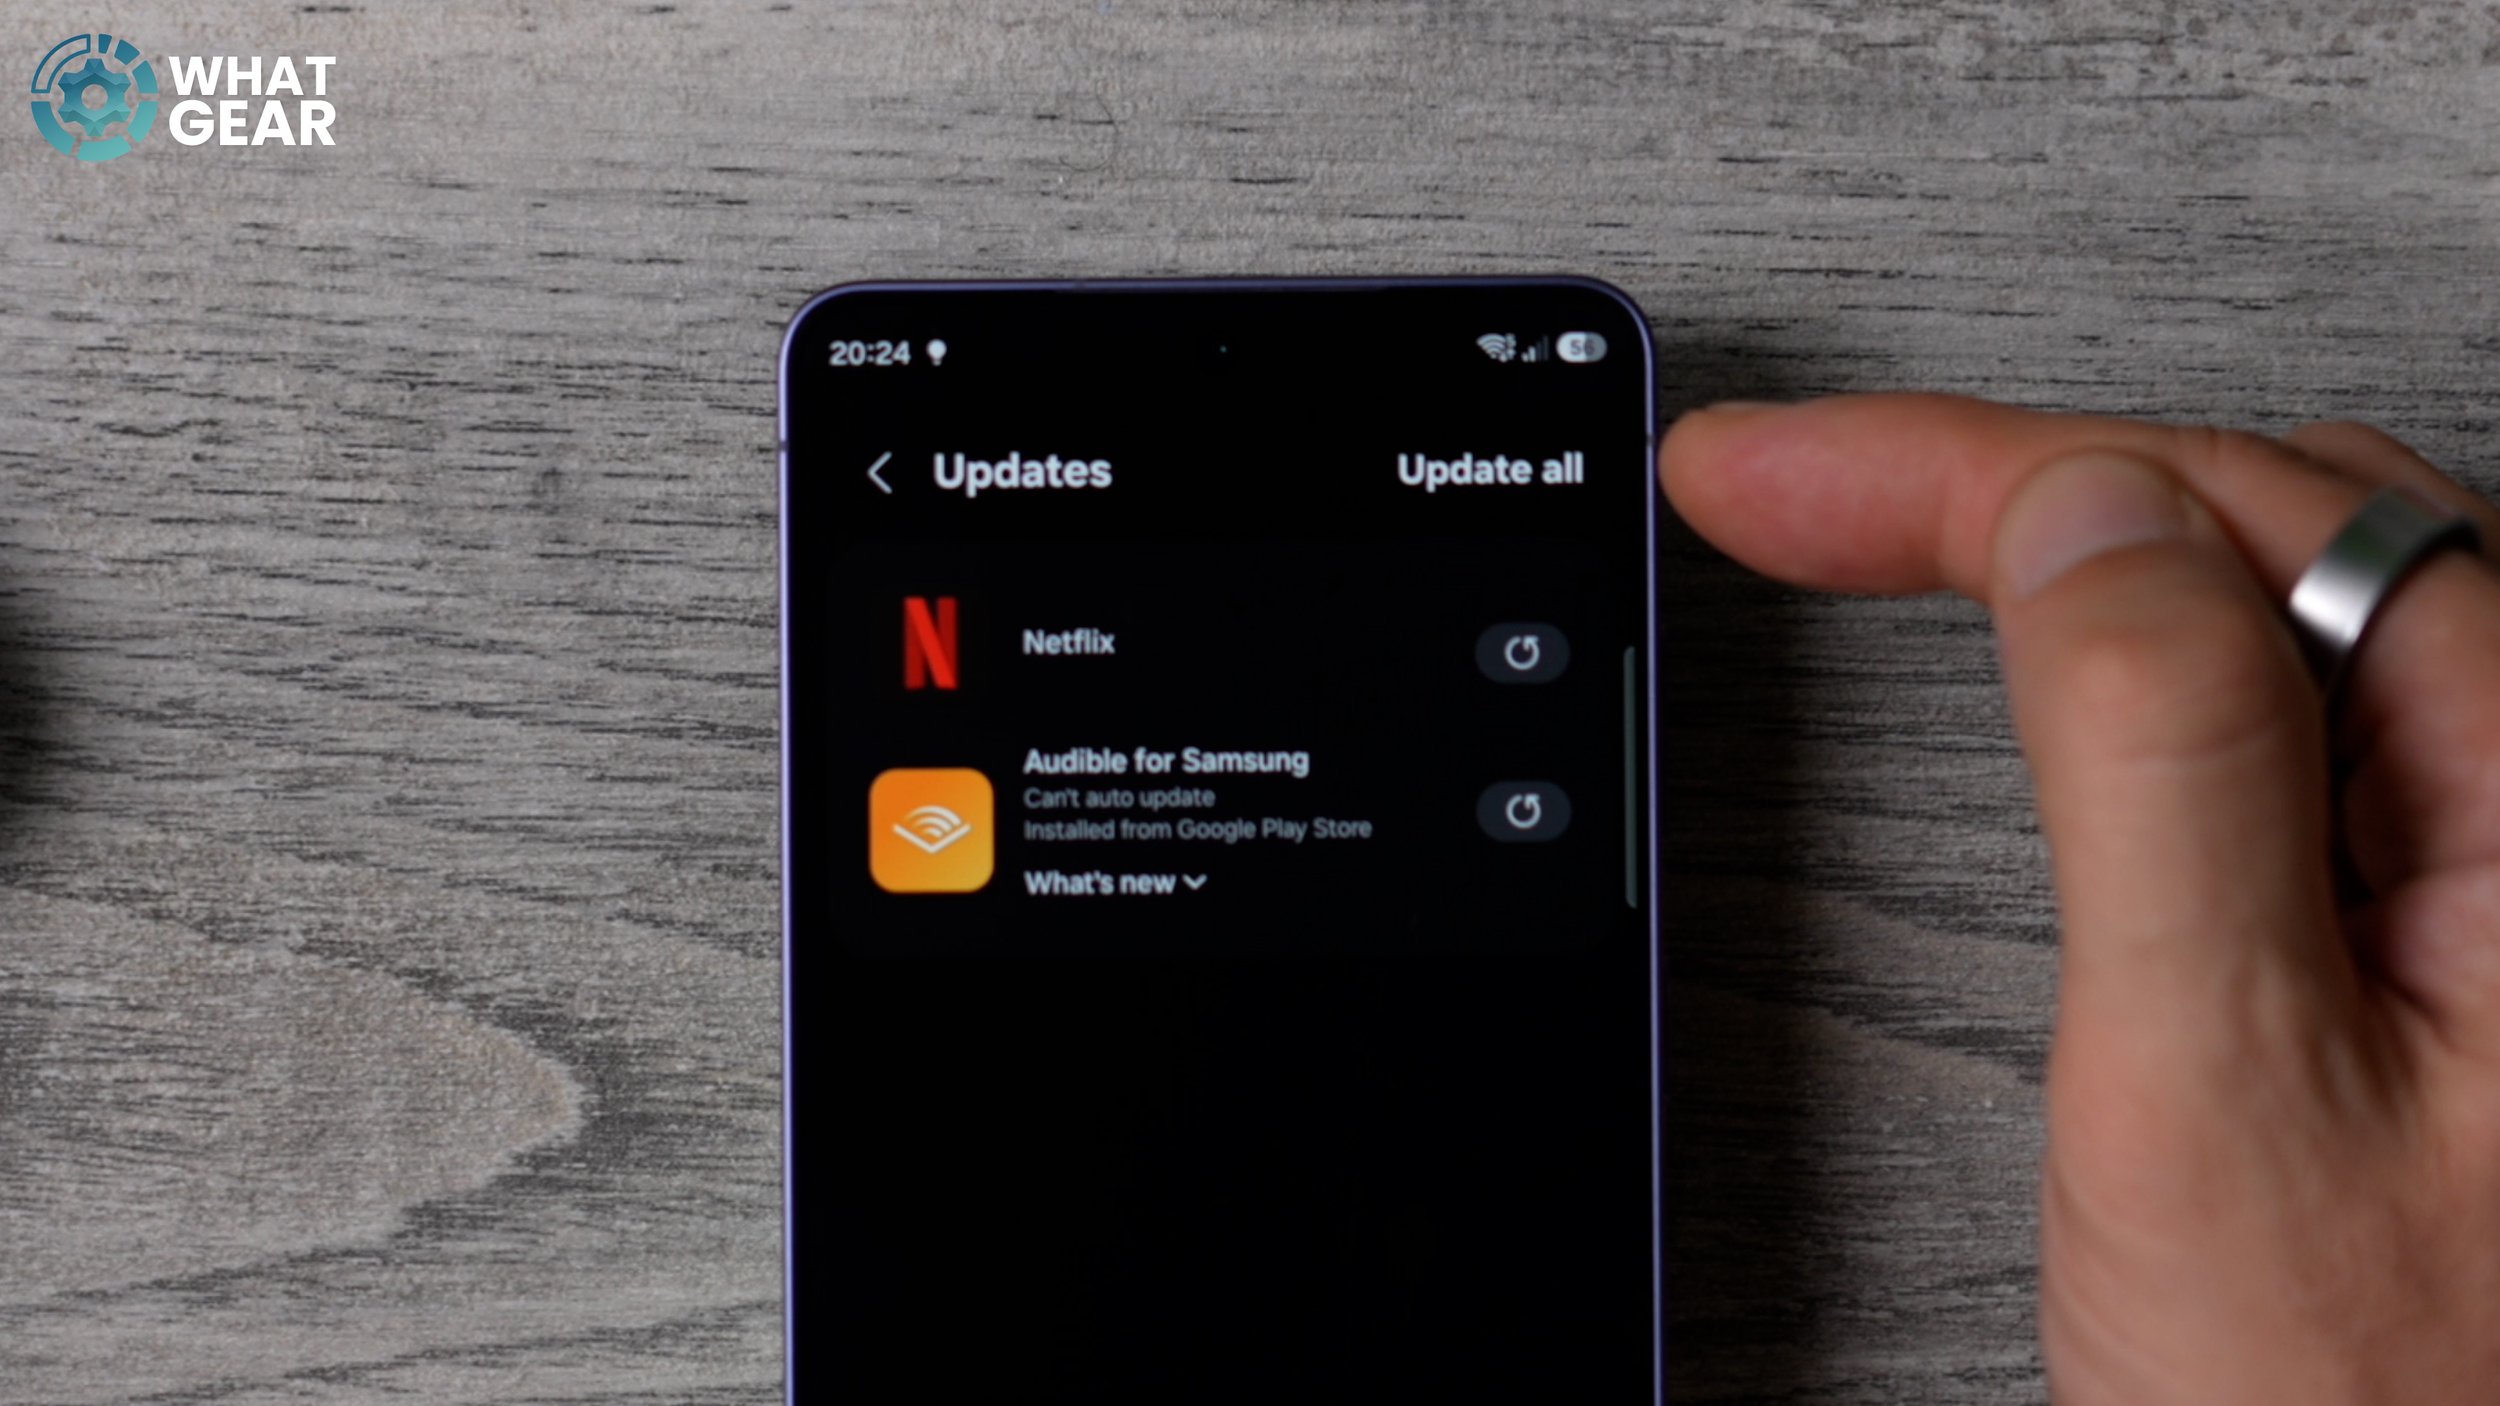
And some of them are going to be critical updates to improve the overall performance of your Samsung device. And these don’t always happen automatically for you straight away. So if you want the best, start with your new Galaxy device, go to the Updates section and hit Update all in the top right corner. And you will see what I mean about the important apps that will be listed here. Some of them will be security-related, some will be AI-related, but all of them are important.
MORE STORES
This one’s quite similar to that last one. If you’re coming over from iOS, something you’re gonna have to wrap your head around is that there is more than just one app store. So you’ve got the Galaxy Store and then you’ve got the Google Play Store. The Play Store is the one that you would use for pretty much everything, and the Galaxy Store is for the Galaxy-exclusive apps. So this time we’re going into the Google Play Store. We’re going to hit the icon in the top right corner. That should be a picture of you, or whatever icon you set up. And in here, if you go to Manage apps and device, it will scan the apps that you have installed on the device.
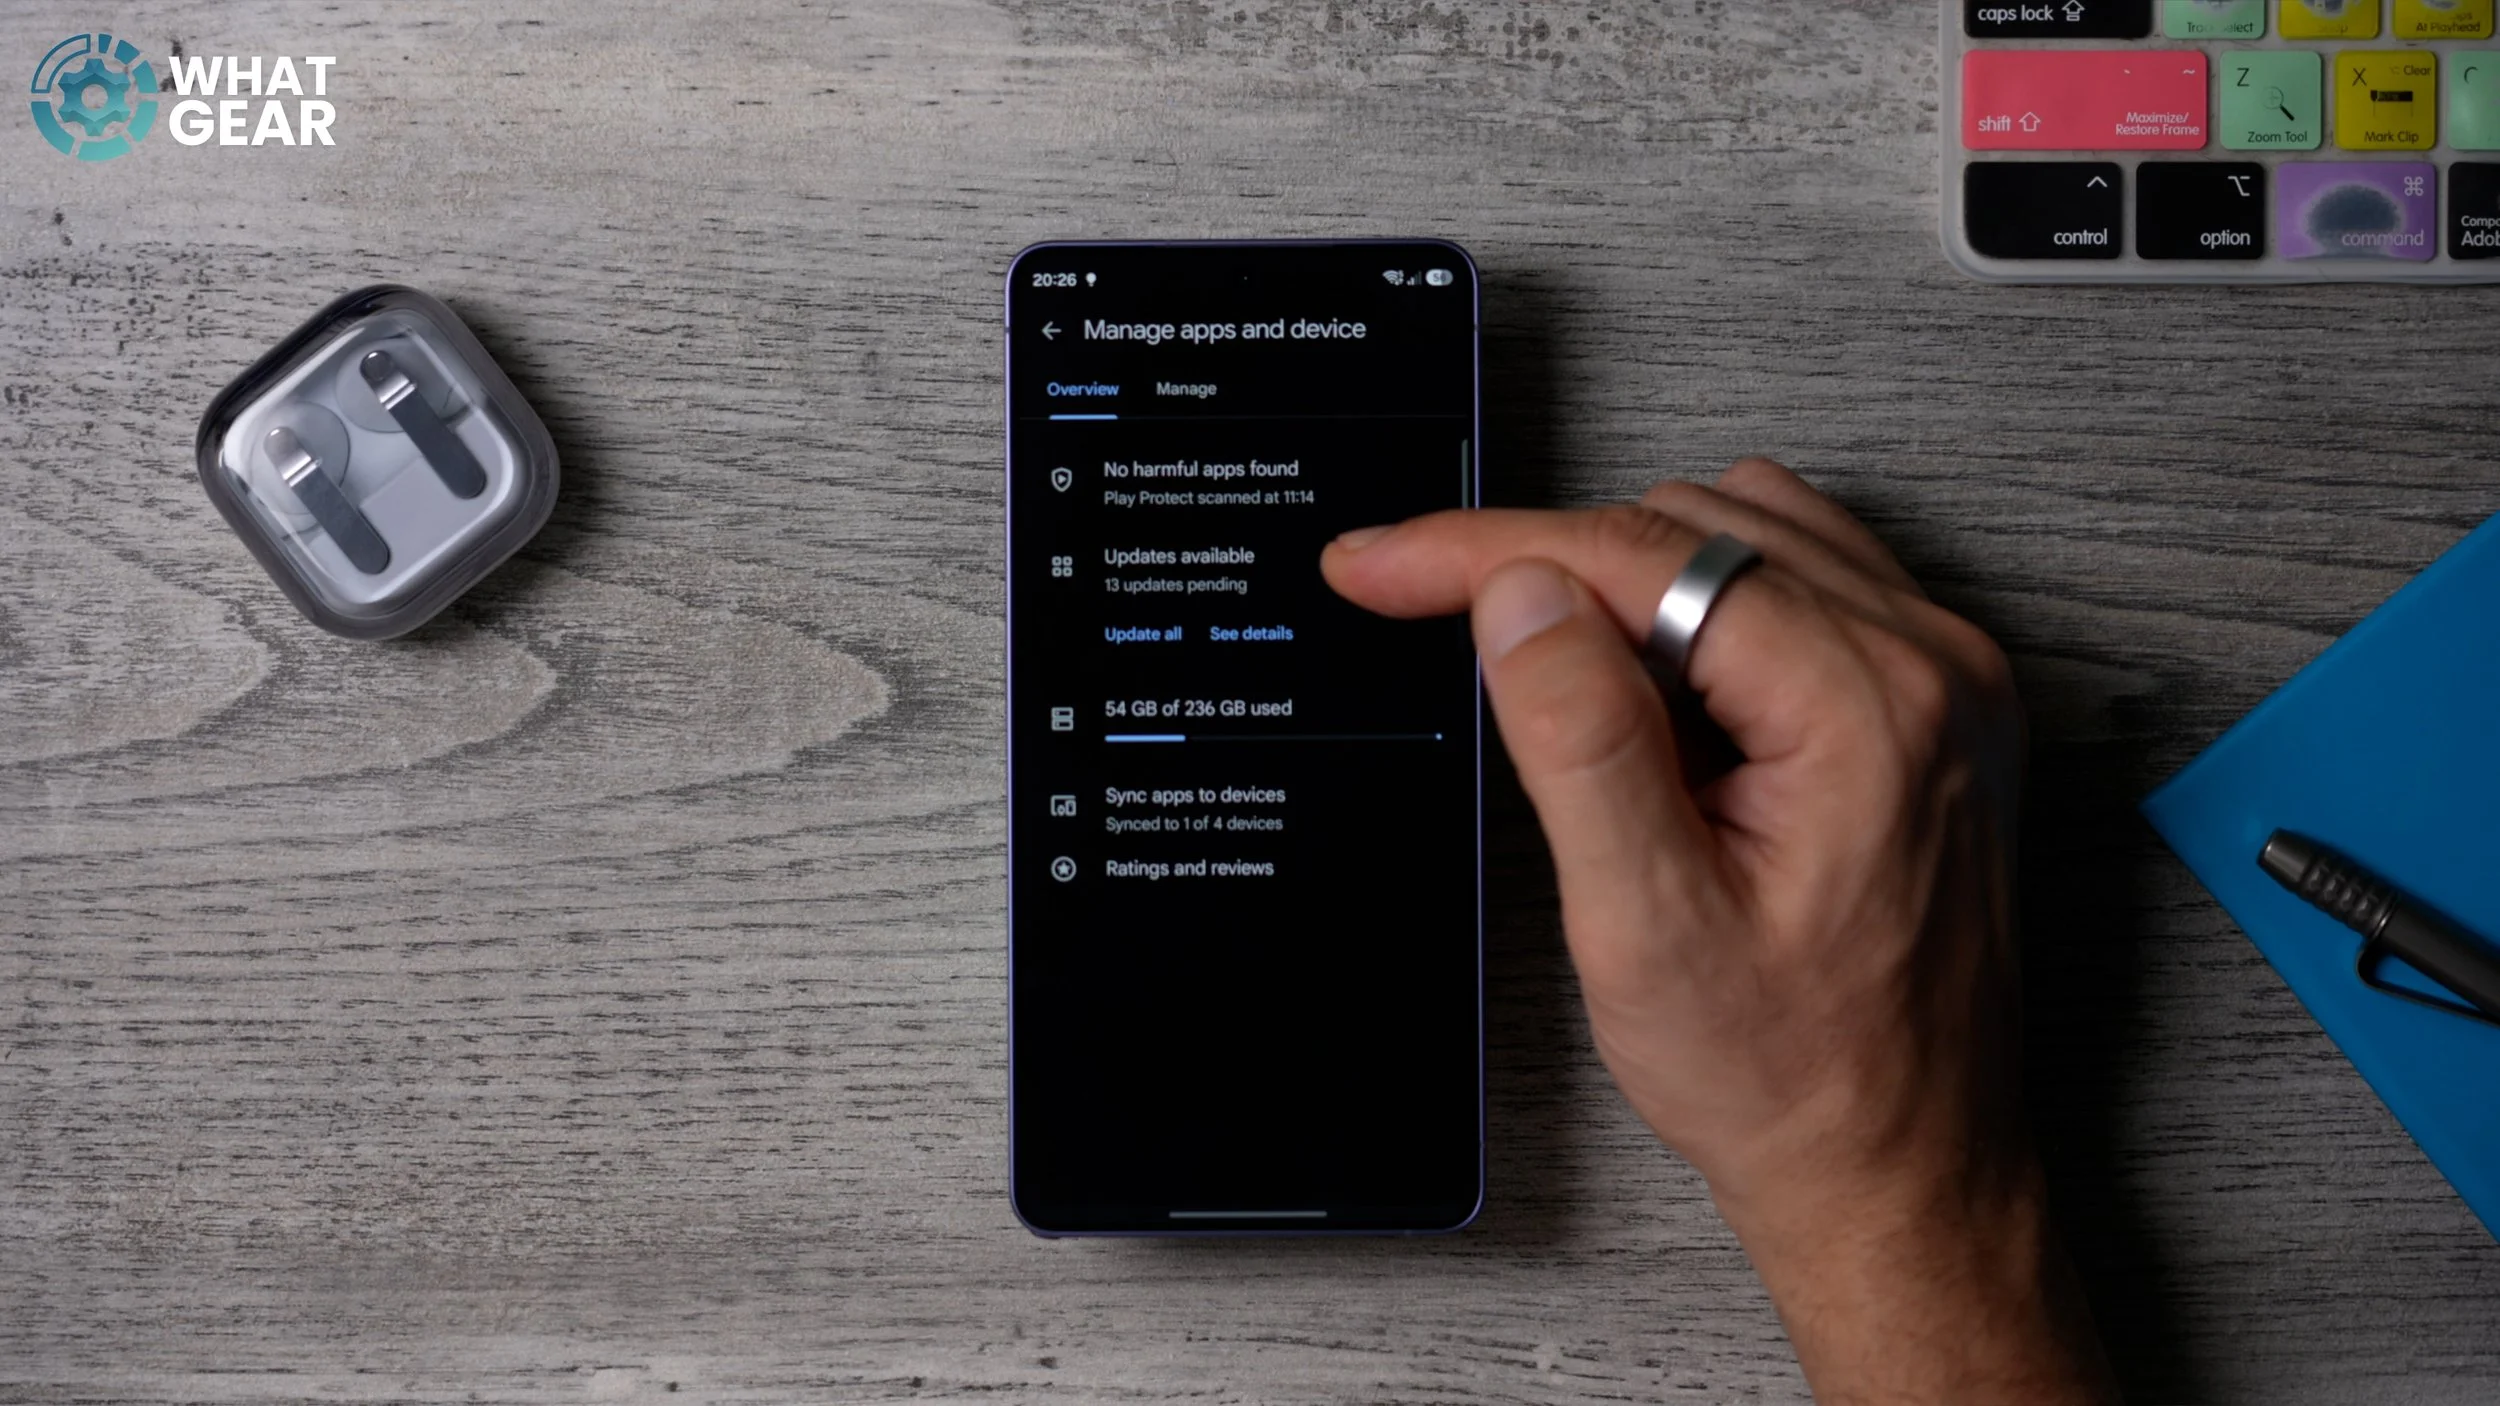
And if you tap here, you’ll see all of the updates that are available. Again, on day one, there’s going to be some really important security features and AI features and software upgrades that you need to install straight away to make sure your device is running as fast and securely as it possibly can. So just hit Update over here, and let your phone do its thing. And again, this doesn’t happen automatically for everybody, so I recommend you take manual control over this on day one, just to be safe.
EYE’S ON
If you like reading on your phone, whether that be websites or books or whatever, I think you’re going to appreciate this. If you go into Settings, scroll down and go to Display, and in here, if you scroll down, you will see this Screen timeout option. And so if you go to this, this should be set to 30s. That’s really the sweet spot. I’ve set it to ten minutes just for the video. But here at the bottom of this screen, you will find one of the well-hidden but very, very useful settings, and it’s this: Keep screen on while viewing.
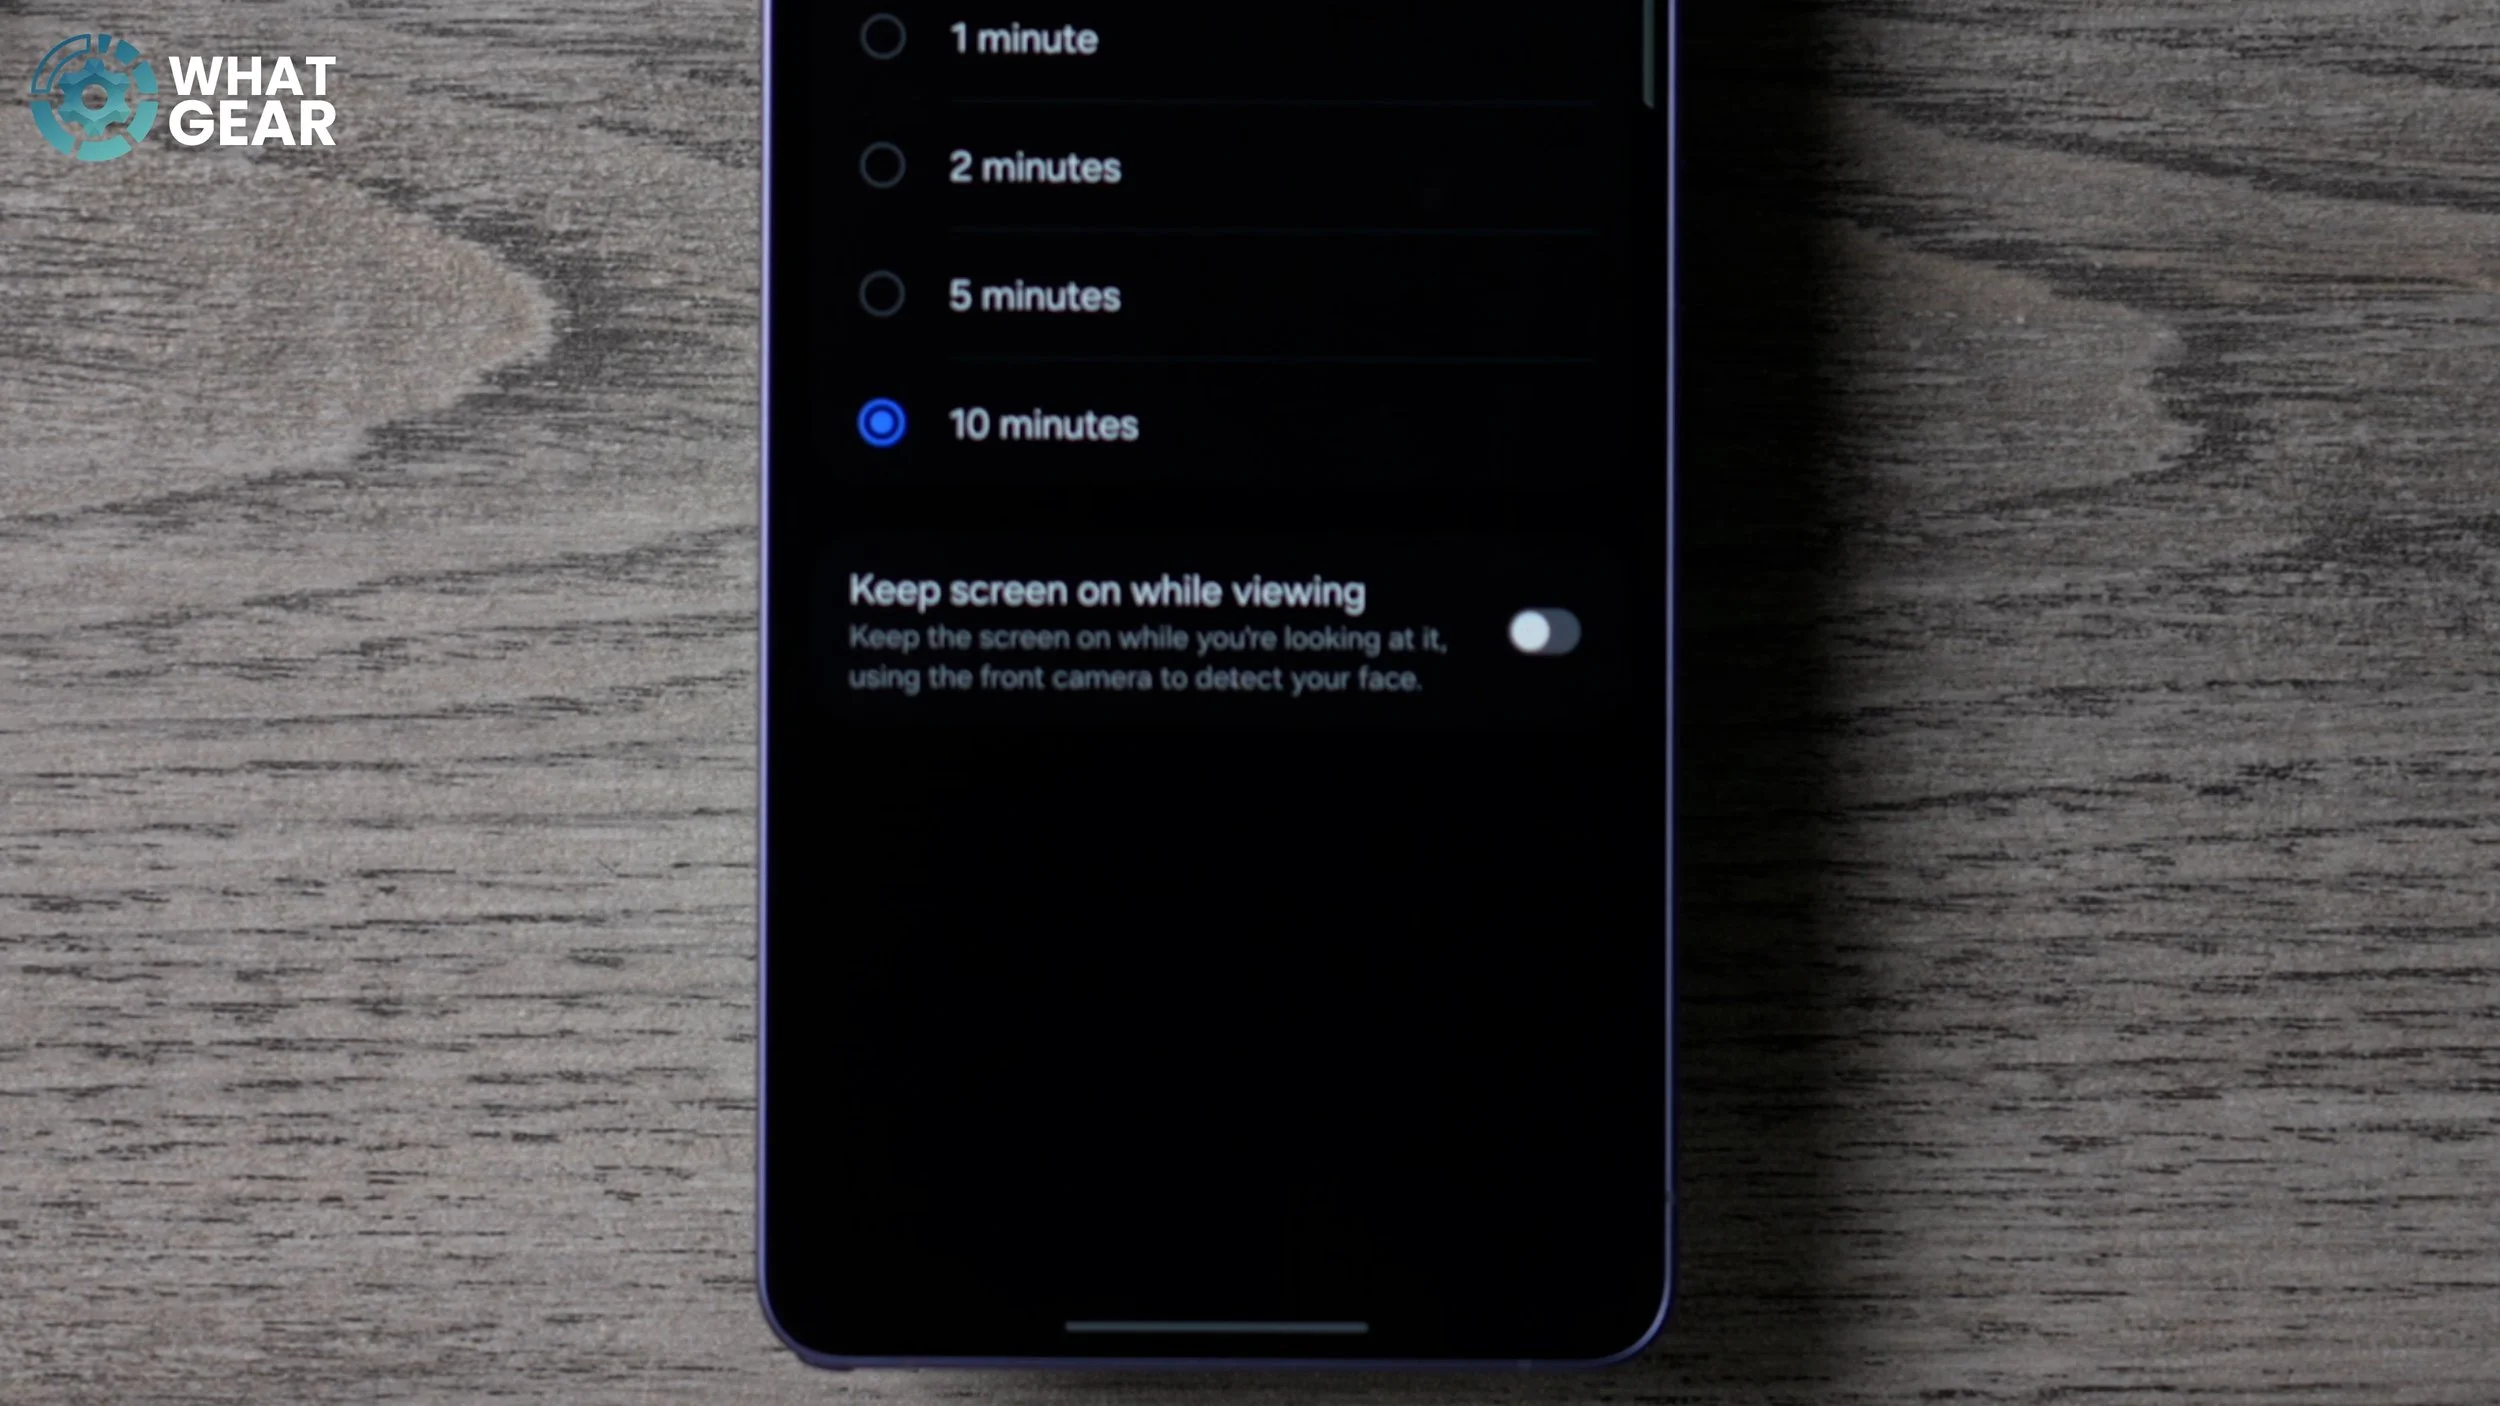
So what you’re doing when you switch this on is you’re allowing the front camera to register when you are looking at the display—for example, if you’re reading a book or something like that. This feature will keep the display on for you, so you’re not constantly having to tap the screen to keep it awake.
UNLOCK EASIER
If you’ve just switched to a new phone, one of the things you should really streamline first on day one is the ease of use. And one of the best ways to do that is this: Go into the Settings, scroll all the way down, go to the Security and Privacy section here. On this page, if you scroll down, you will see Screen lock and biometrics. I’m guessing you set up a PIN number and probably added a fingerprint, as the phone does prompt you to do that when you first set it up. But what you might not have done is set up multiple fingerprints.
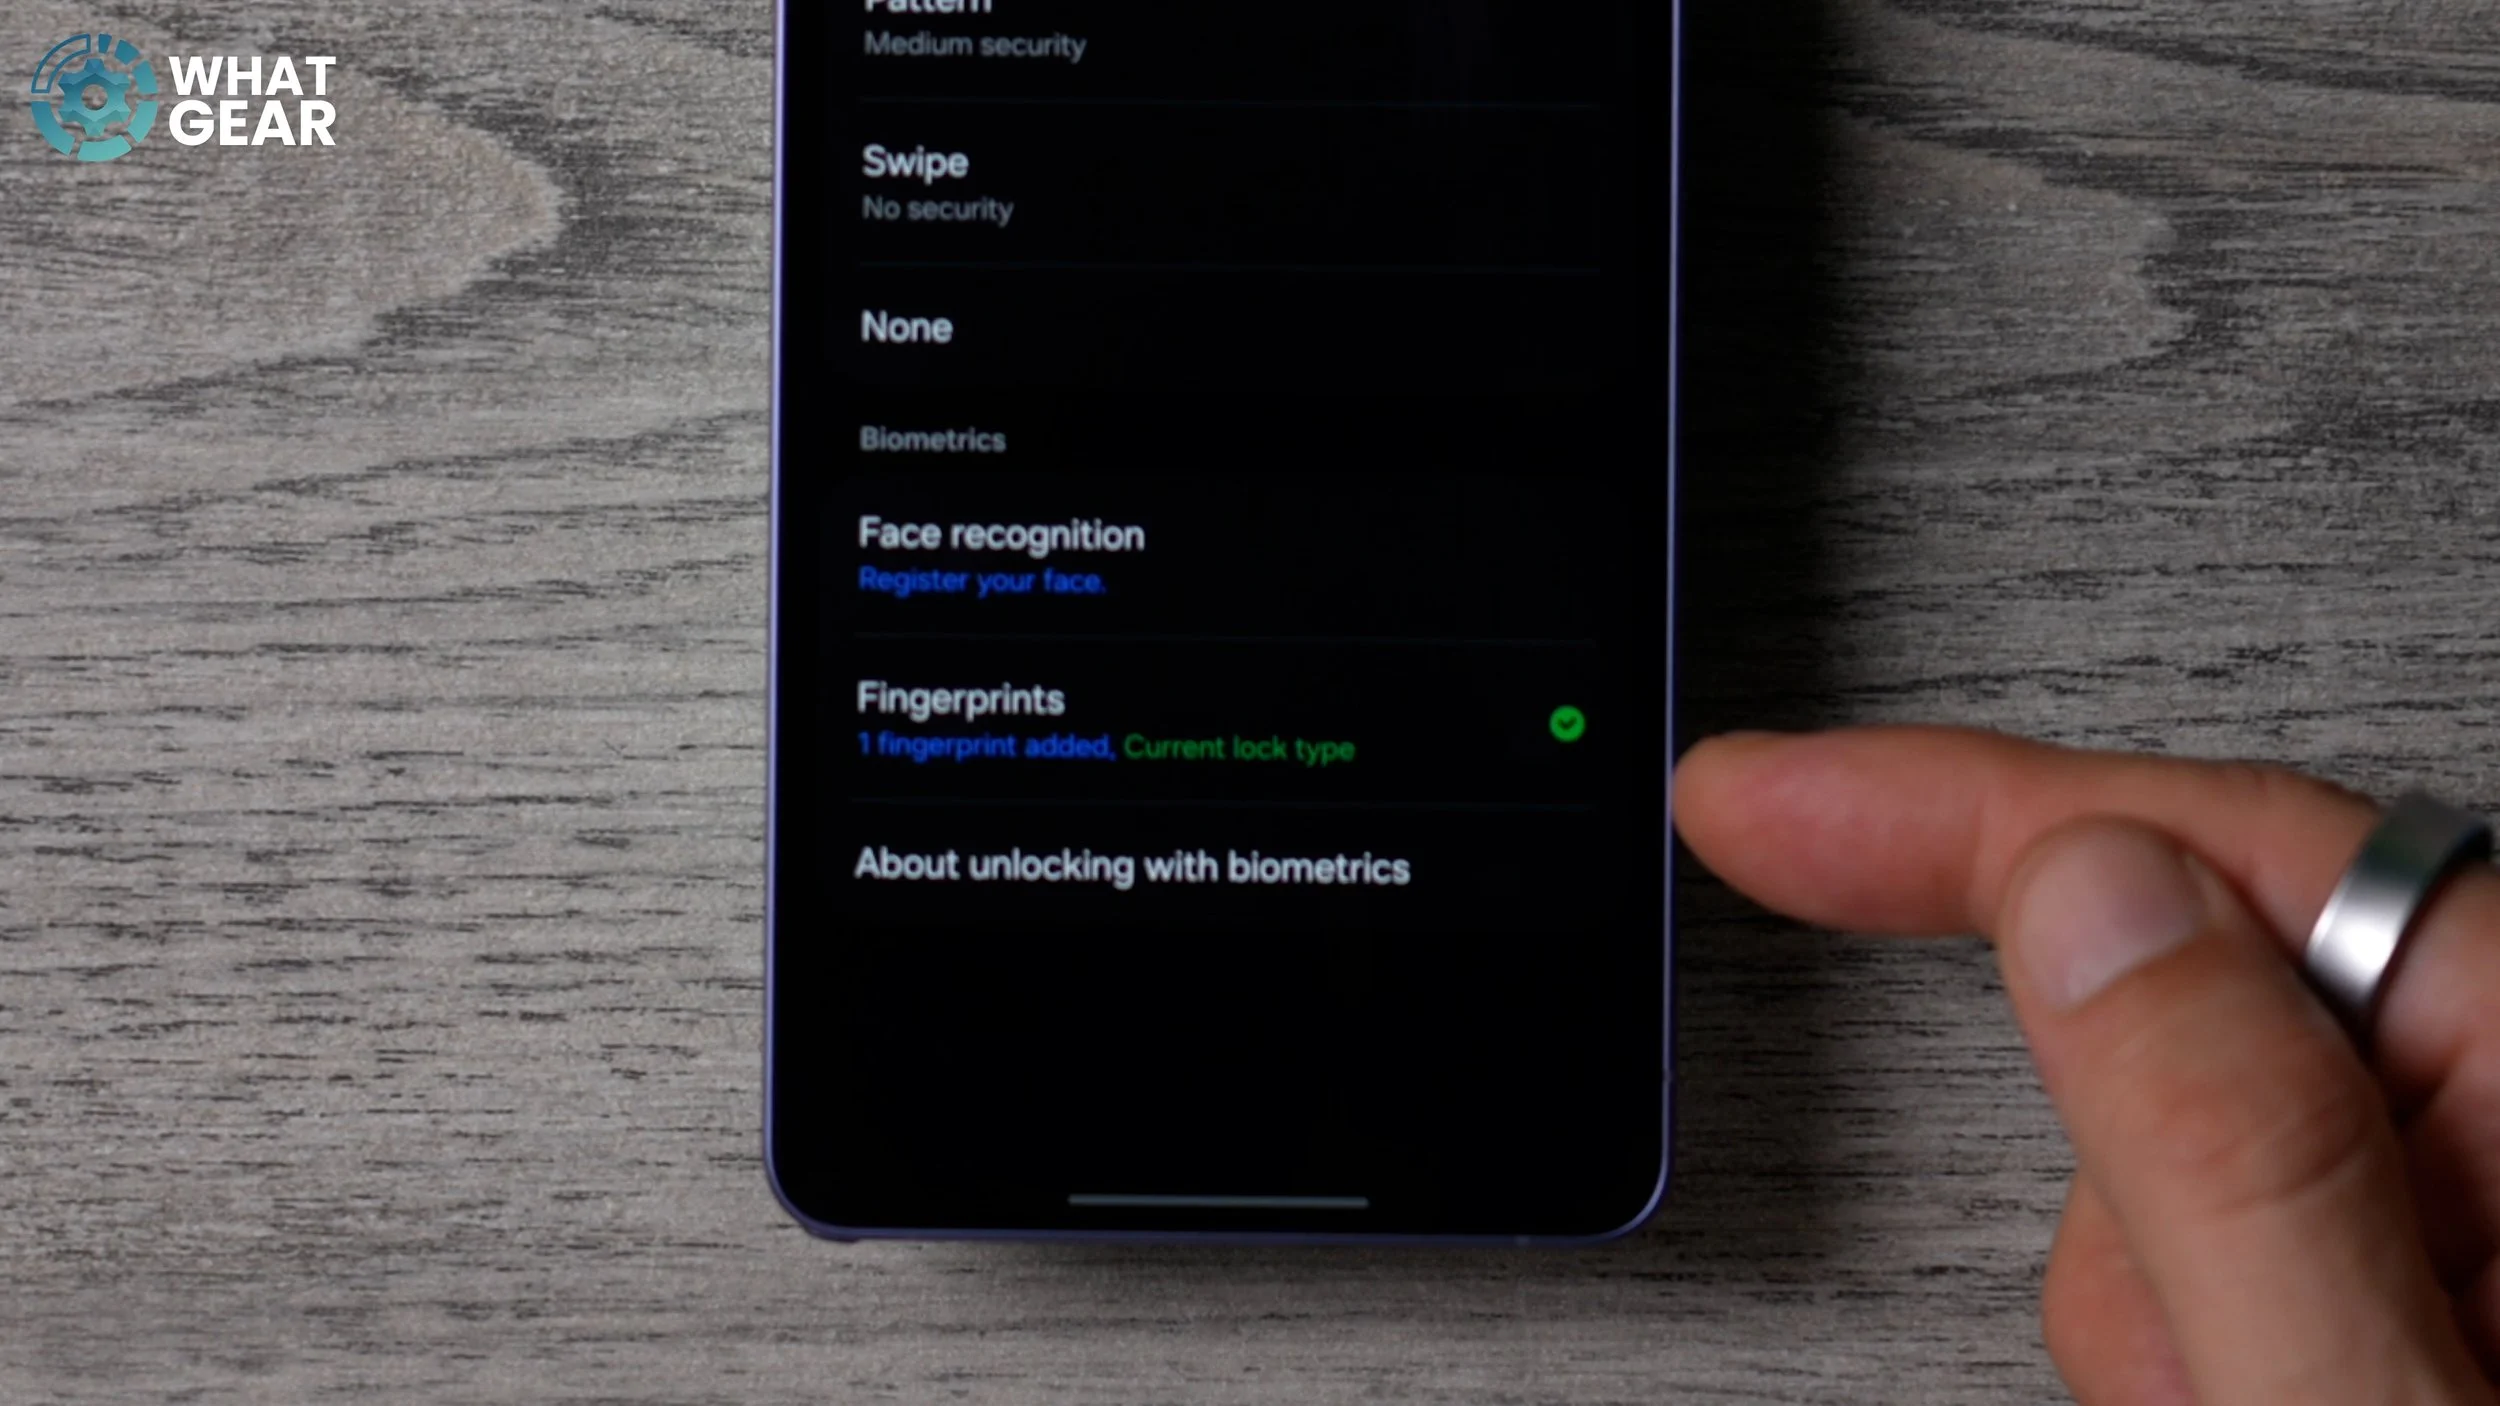
And if you haven’t, this is my recommendation for you. Go to the Fingerprints section down here. At this point I’ve only registered one digit, and that’s my thumb on my right hand. Here’s what you should do: add another fingerprint and add the thumb on your other hand, and also add your first finger on your dominant hand. So you have three ways to unlock the device. Just go to Register and then scan that fingerprint. Once you’ve done that, hit Add fingerprint again and then register your other thumb or finger.
PRO UNLOCK QUICK TIP
So no matter which way you pick up the phone now, you can unlock it very quickly. Here’s where it gets a bit more pro. And here is one of the tips that even some of the pros don’t know. What I recommend you do first, just to make sure this is going to be easier for you, is name each one of the fingerprints. So this is my thumb on my right hand… this one is the first finger right hand, so I’m just going to call it first… and then the fingerprint three is the thumb on my left hand.
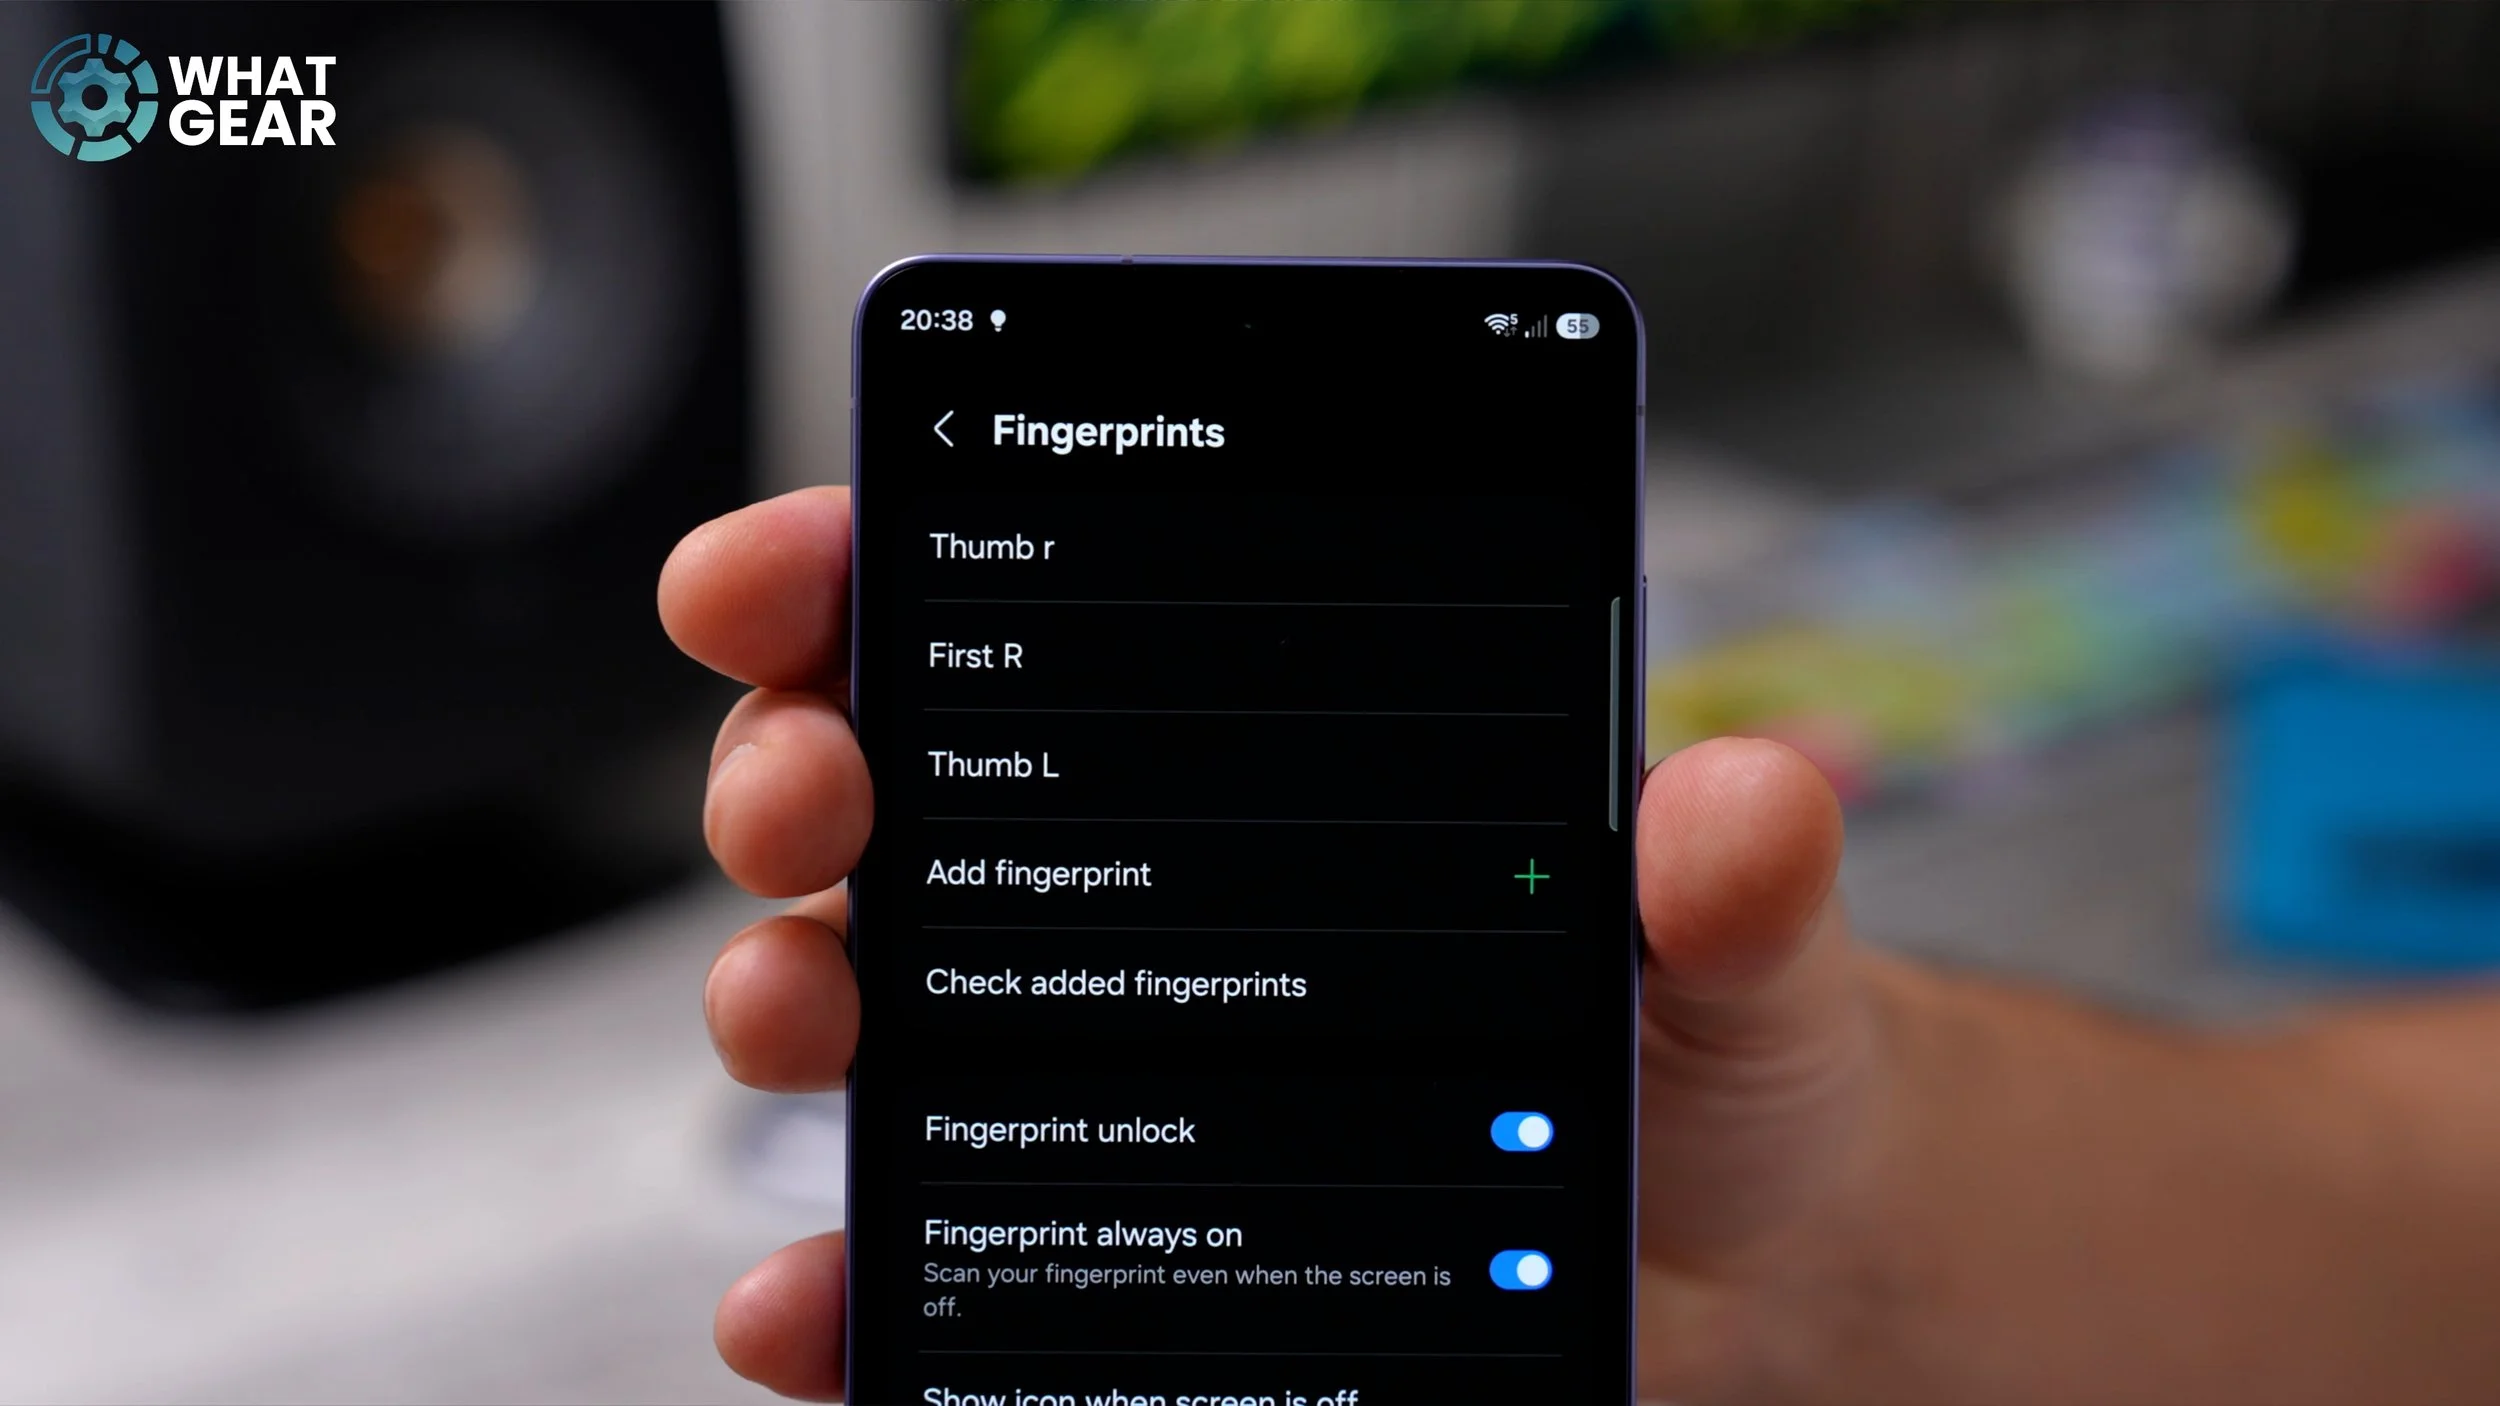
And now it all makes sense as to why I recommend you do this. When you tap on one of these fingerprint scans, you see the option to Improve accuracy. So if you are a tradesman or a chef and, for whatever reason, your fingertips are very, very tough and the skin is thick, what you can do here is improve accuracy, and then scan your thumb or finger again to significantly improve the fingerprint reader’s success rate.
CONTINGENCY PLAN
So you got a new phone, and my guess is you don’t want it to get stolen. If it does get stolen, you want to be able to do everything you can to recover it, or at least secure the data on it. And if you don’t do this next step… well, you’re going to be in trouble. So let me show you what I’m talking about. Go into Settings. At the top of this page, you should see the Samsung account menu. Tap on this. Now, if you do see this banner at the top, I highly recommend you add recovery methods. And this should ideally be emails and phone numbers that you have access to off this specific device. And spend a little bit of time setting up your security questions. Once you’ve done that, there is another step to this. Go back to your Samsung account, scroll down, and here you will find the Samsung Find option.

So go to this and make sure that this feature is enabled. This is one of the best ways to keep tabs on the location of your device if you do lose it. Also, all your other Galaxy devices will exist here too, so you can track those down—for example, your buds, your watches, your phones, your tablets, computers, everything. So just for your own peace of mind, set up Samsung Find.
KEY TO POWER
This next tip is for those of you who just want to use the phone as a phone, and you don’t really care that much about the AI and… yeah, you’ll see what I mean. So if you go to the Settings and then scroll down, you will find Advanced features. If you go to this, you will find the Side button menu. And you’ll notice the default settings here: double press for camera, push and hold opens up the AI assistant. Now here’s the thing: there are several ways to wake the assistant, so you don’t necessarily need to have this set as a long push and hold. And if you are a bit more old school, you can switch this to the Power Off menu, which can be very useful when it comes to powering down the device.
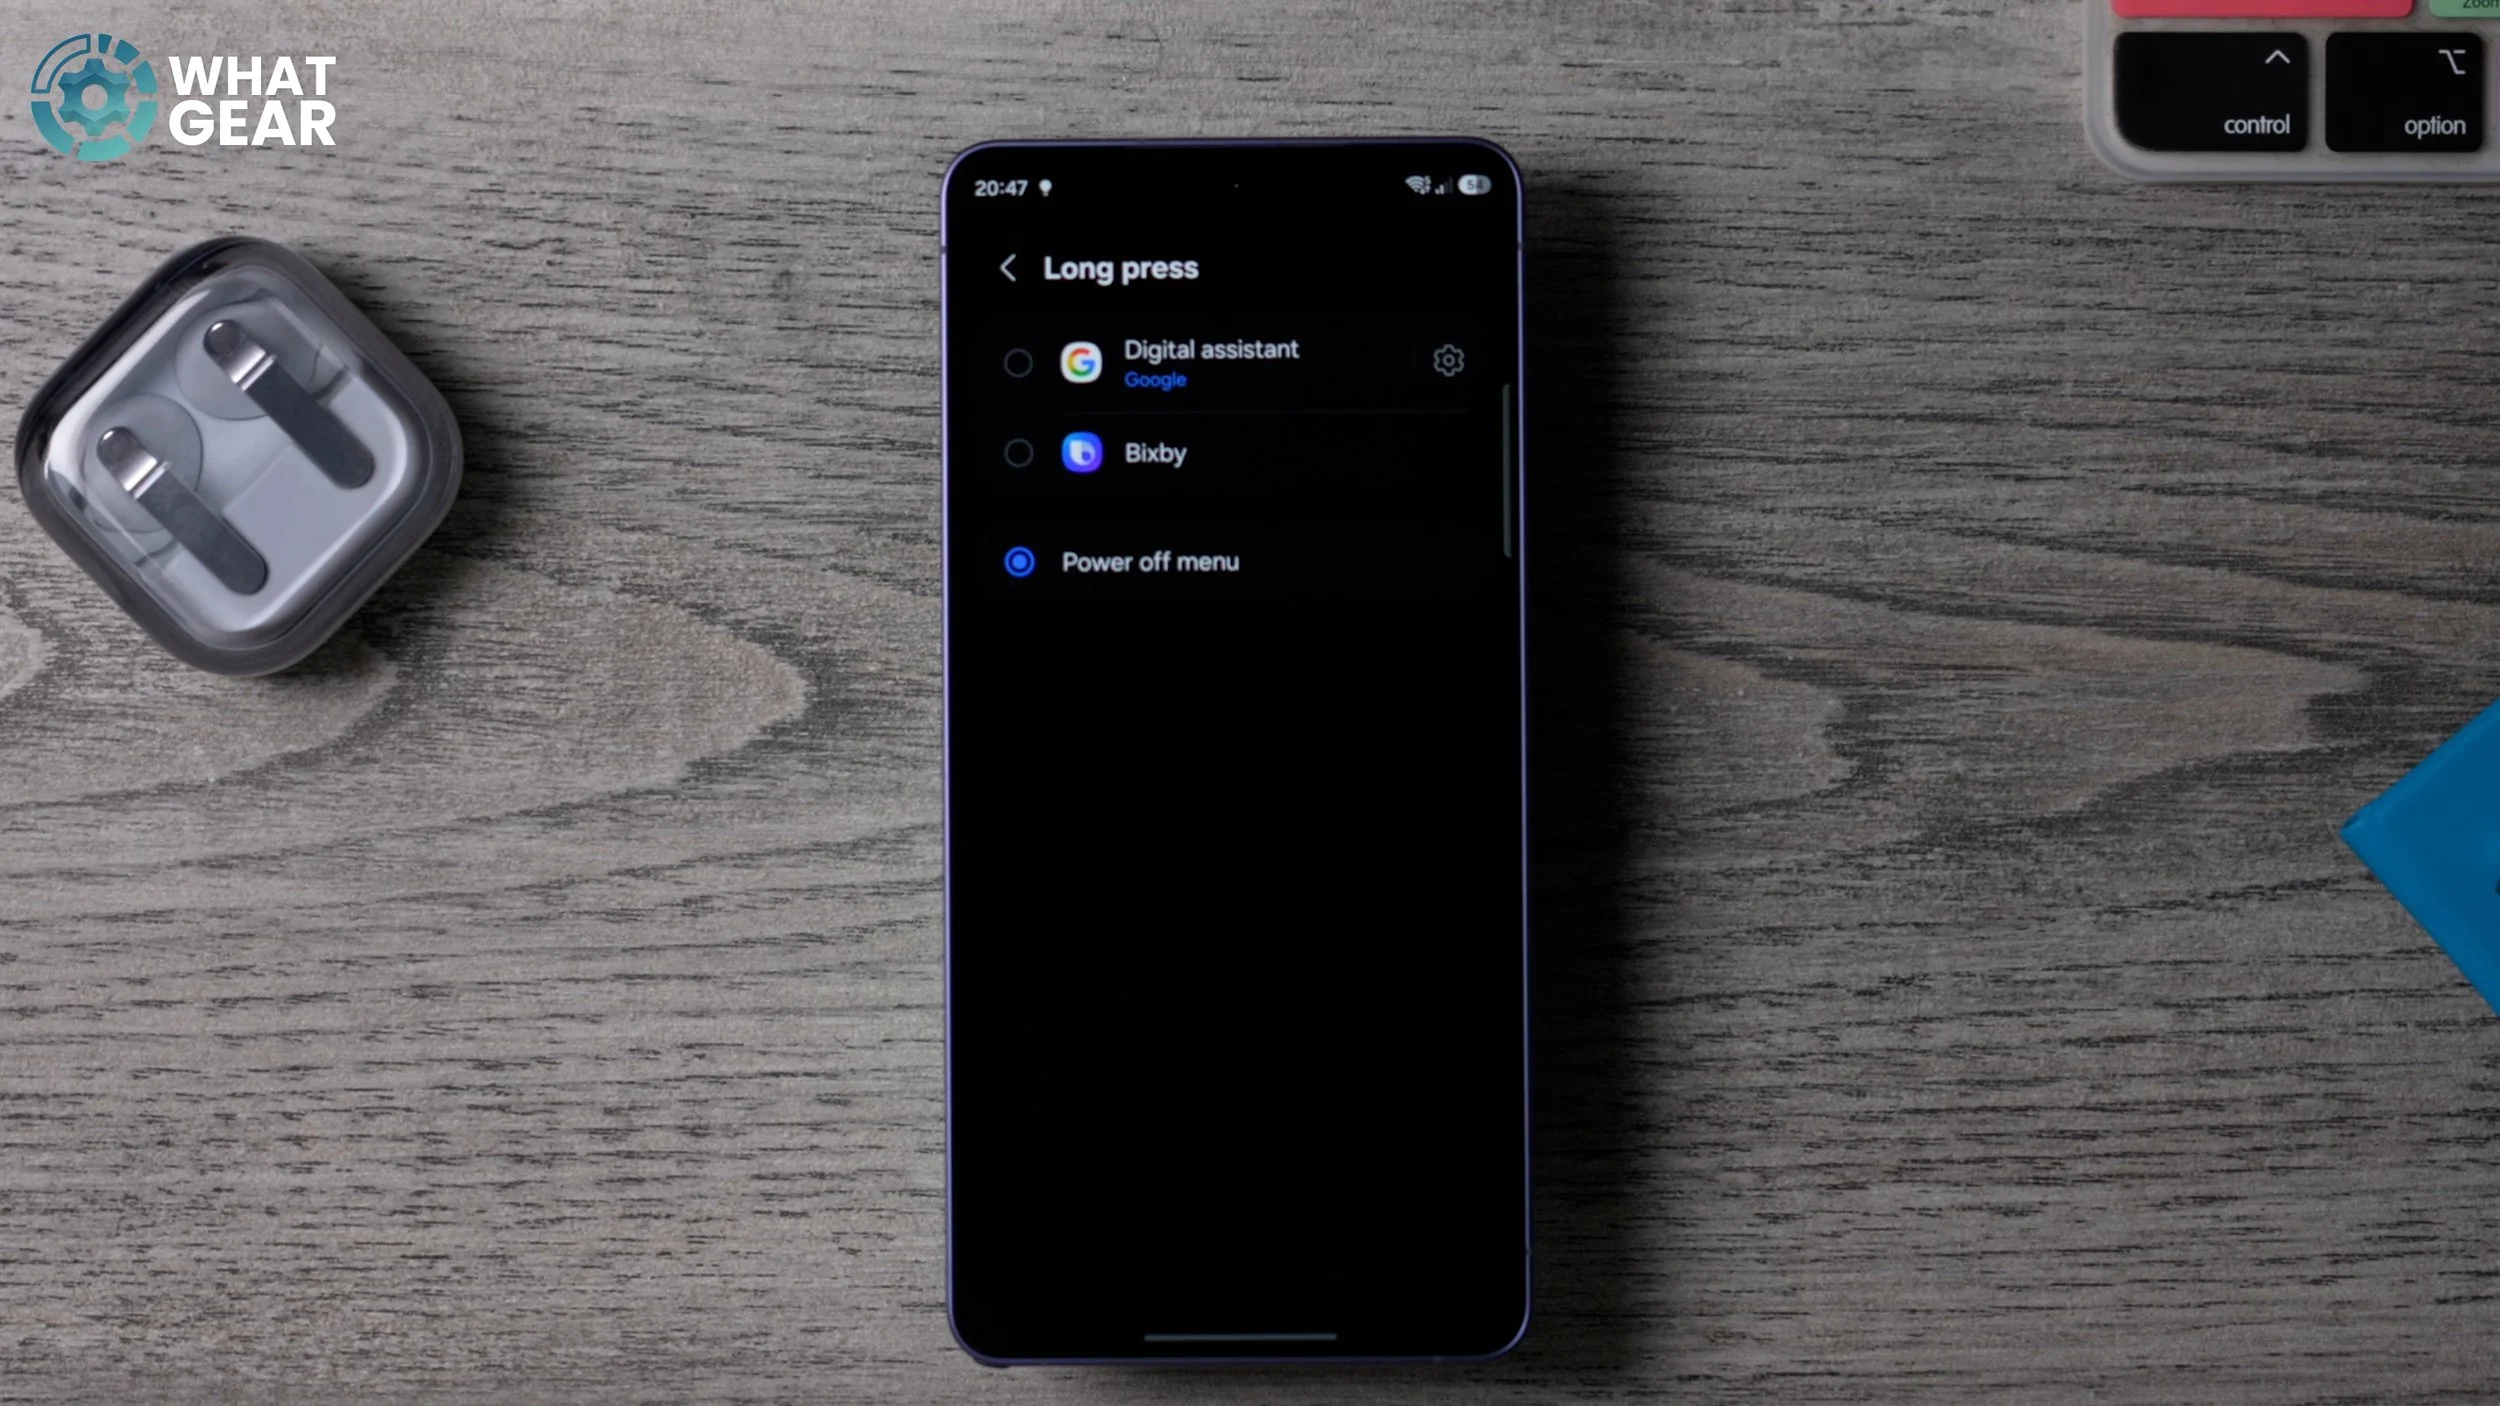
Because the out-of-the-box way to power down the device is to hold the volume down and power button together to bring up the power menu. The problem is, sometimes I get it wrong and I push the volume up and take screenshots. So I have a bunch of screenshots on my phone which are not meant to be there. And you can avoid all of that hassle by just changing this setting right here and turning the power key back into what it originally was: a power key.
PAY THE EASY WAY
This next one’s going to be very useful for anyone coming over from an Apple iPhone. So, within the settings menu, go back to Advanced features. Again, go back to the Side button. And this time, where you see Double press, tap on this. Much like the AI feature, there are a lot of ways you can open up the camera on your device without having to double-press the button, so you might actually prefer to remap this button to open up your wallet.
And for me personally, this is the shortcut that I absolutely use the most. So to remap this, just go to Apps at the bottom here. You can then choose the app that you want it to open. It can be anything, but I’m going to choose Google Wallet because that’s where I keep all of my bank cards and my loyalty cards. Now that I set that up, whenever I need to pay for something, I just double-tap and straight away jump straight into my wallet, and I can pay using NFC. And this perfectly sets up the next tip.
NFC and contactless payments
So if you go back into the settings, go to Connections at the top. Here, tap where it says NFC and contactless payments, and underneath, go to Default wallet. So, what you can do here is actually choose what your preferred wallet is. For me, as you know, it is Google Wallet. And with this enabled, what you can do is actually pay without even having to open the app first, just by tapping your phone on an NFC point on the card reader.
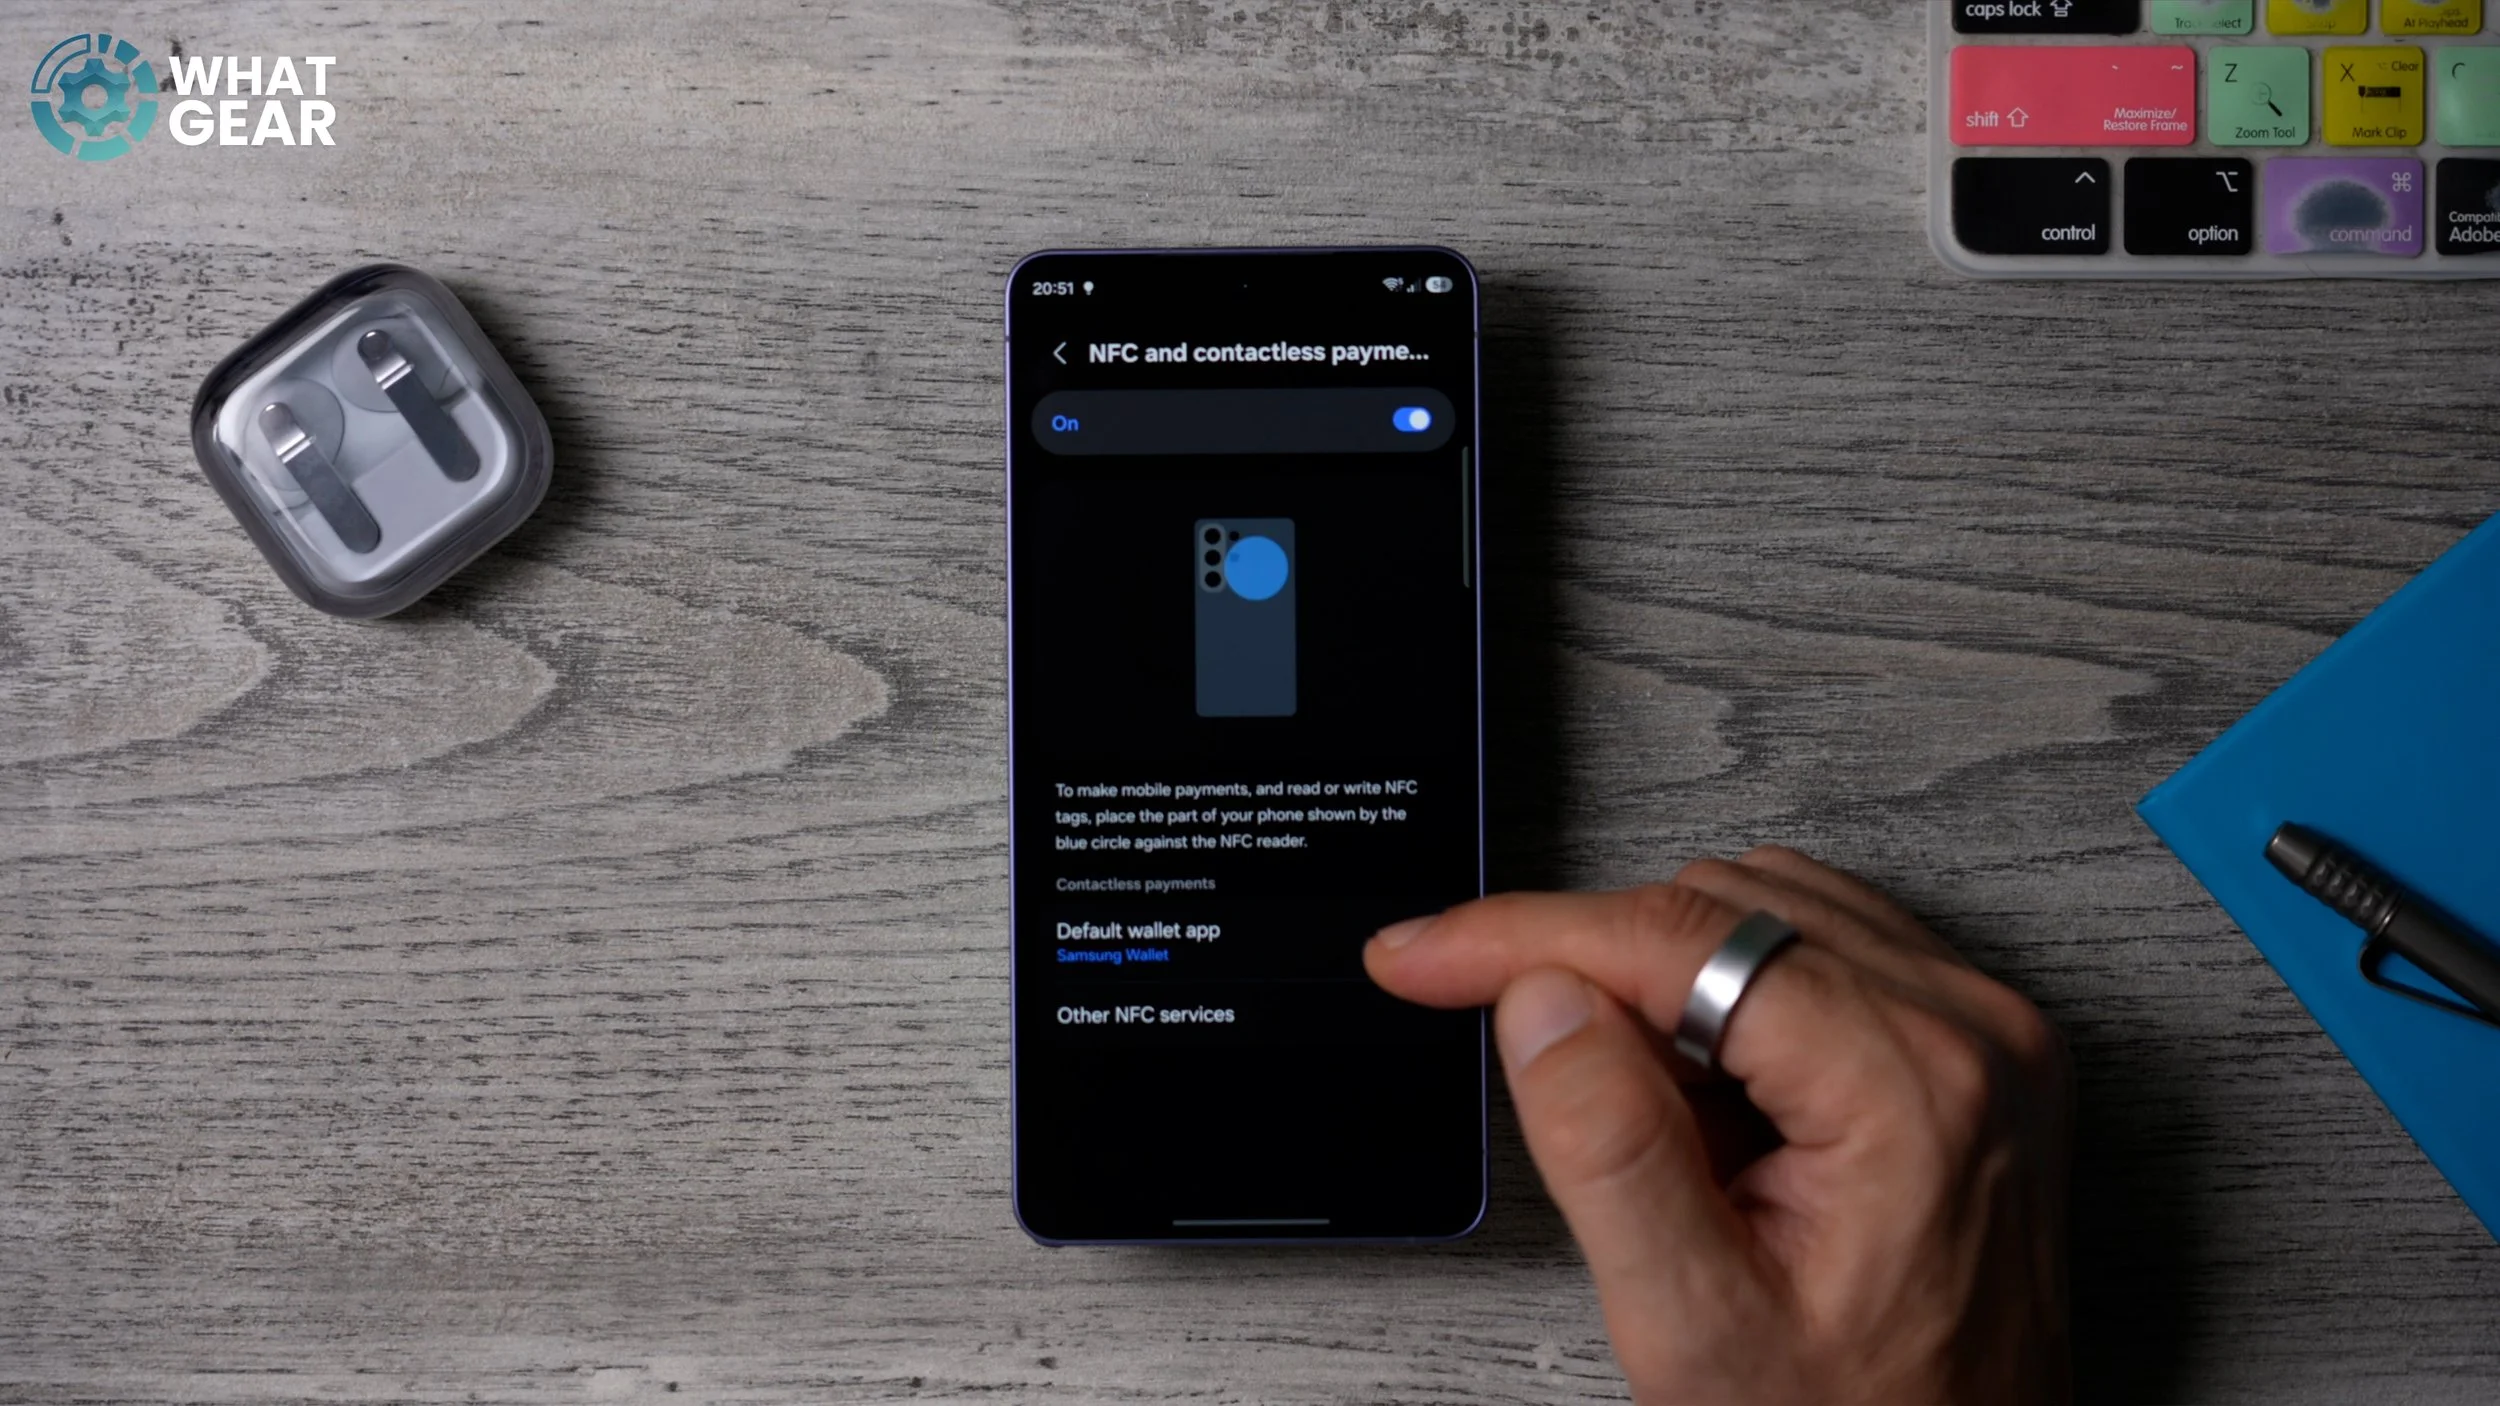
But one thing you need to be mindful of is, if you have several bank cards within your Google Wallet, it will use the default one, so you won’t actually get to choose which one it is. But if you have only one that you use, well then, changing this one little setting is going to save you a ton of time.
Someone’s phone is ringing
So I’ve made an entire customisation guide for the Galaxy S26. However, I want to show you this real quick, because this might be one of the first things that you might want to do with your new phone. Go into your settings and then go to Sound and vibration. And here, go to Ringtone.
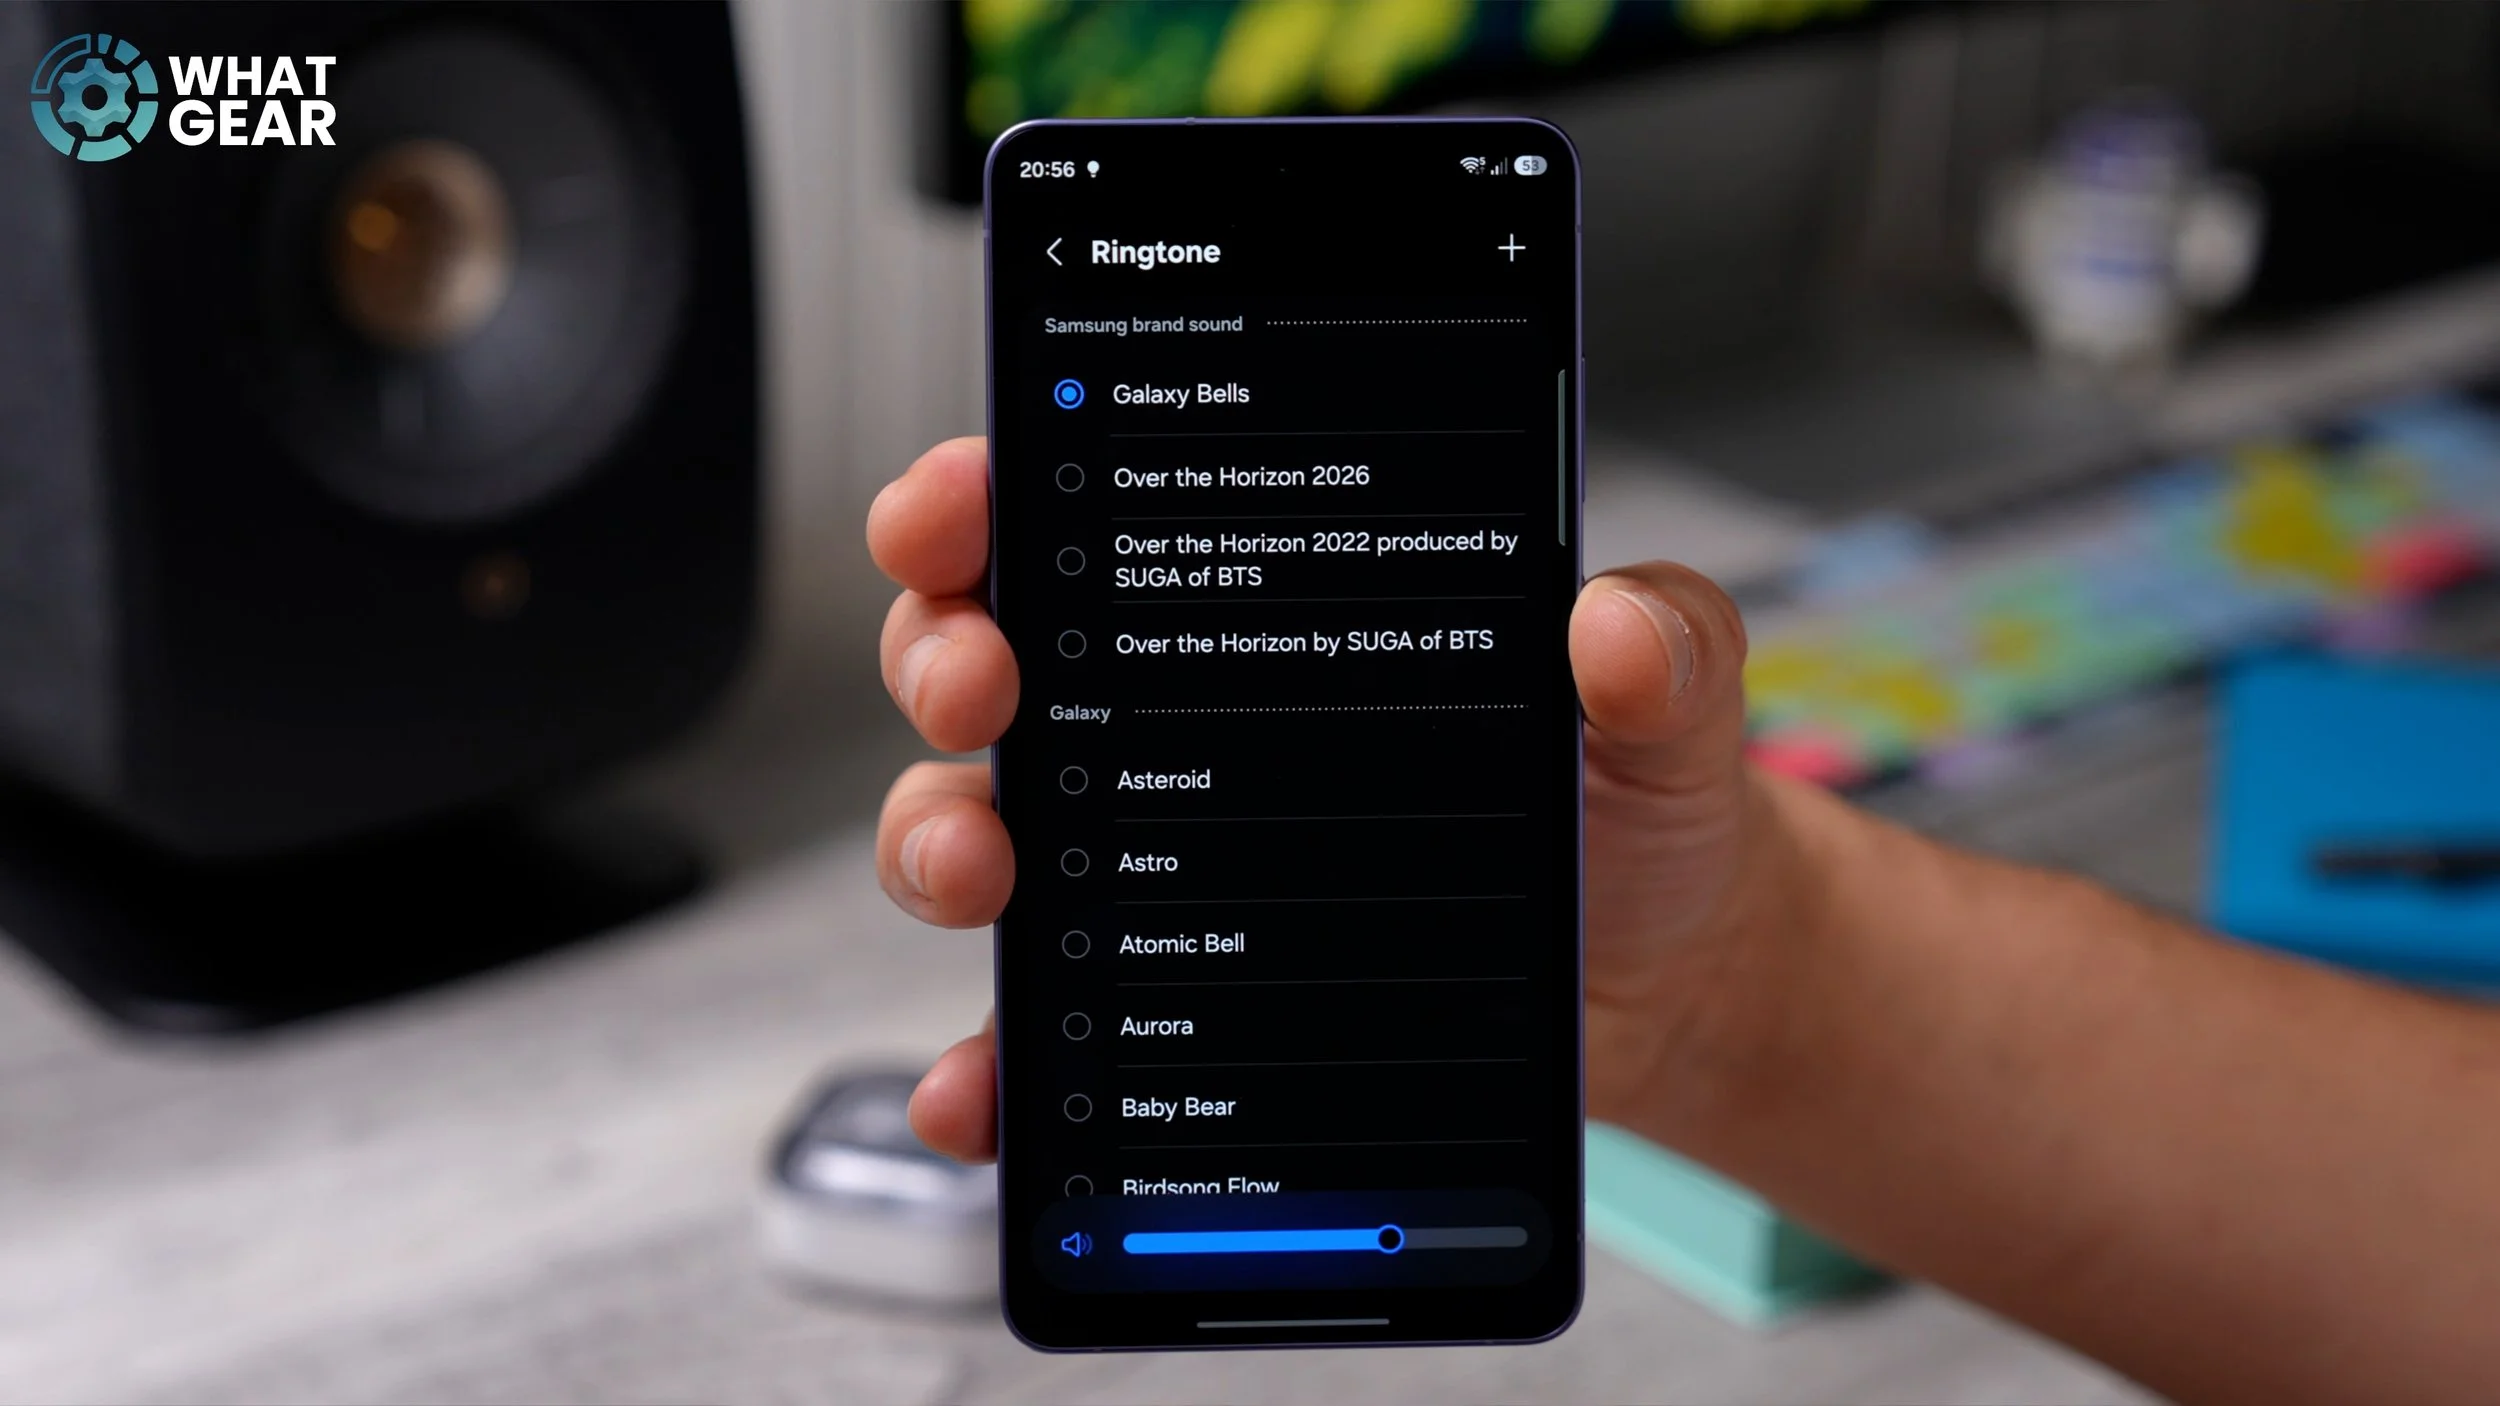
This is where you discover all of the pre-installed ringtones on your phone. And you’ll notice some “beats” songs up top here. If you scroll down, you will see there are so many, including some classics like this. And if you do have any locally stored music on your device, you can hit the plus in the top right corner and add a custom ringtone. This way, it really is that simple.
FIND YOUR TONE
Let’s say you don’t have any music to choose from, but you do know what song you want, or what notification sound you want, from maybe a movie or something like that. There is a really easy way to get it on your phone, so let me show you how to do that really, really quickly. Go into the Google Play Store. Type in Zedge. This is an app that I’ve been using for years. Install this. There are a lot of ads on there, so I’ll give you that sort of heads up in advance. They, of course, will remove the ads if you’re willing to pay. Once you open up Zedge, skip past the ads, swipe back when you get to the sign-up page, and here you have access to all of these in your library. So if you go to Ringtones, you can type in whatever you want.
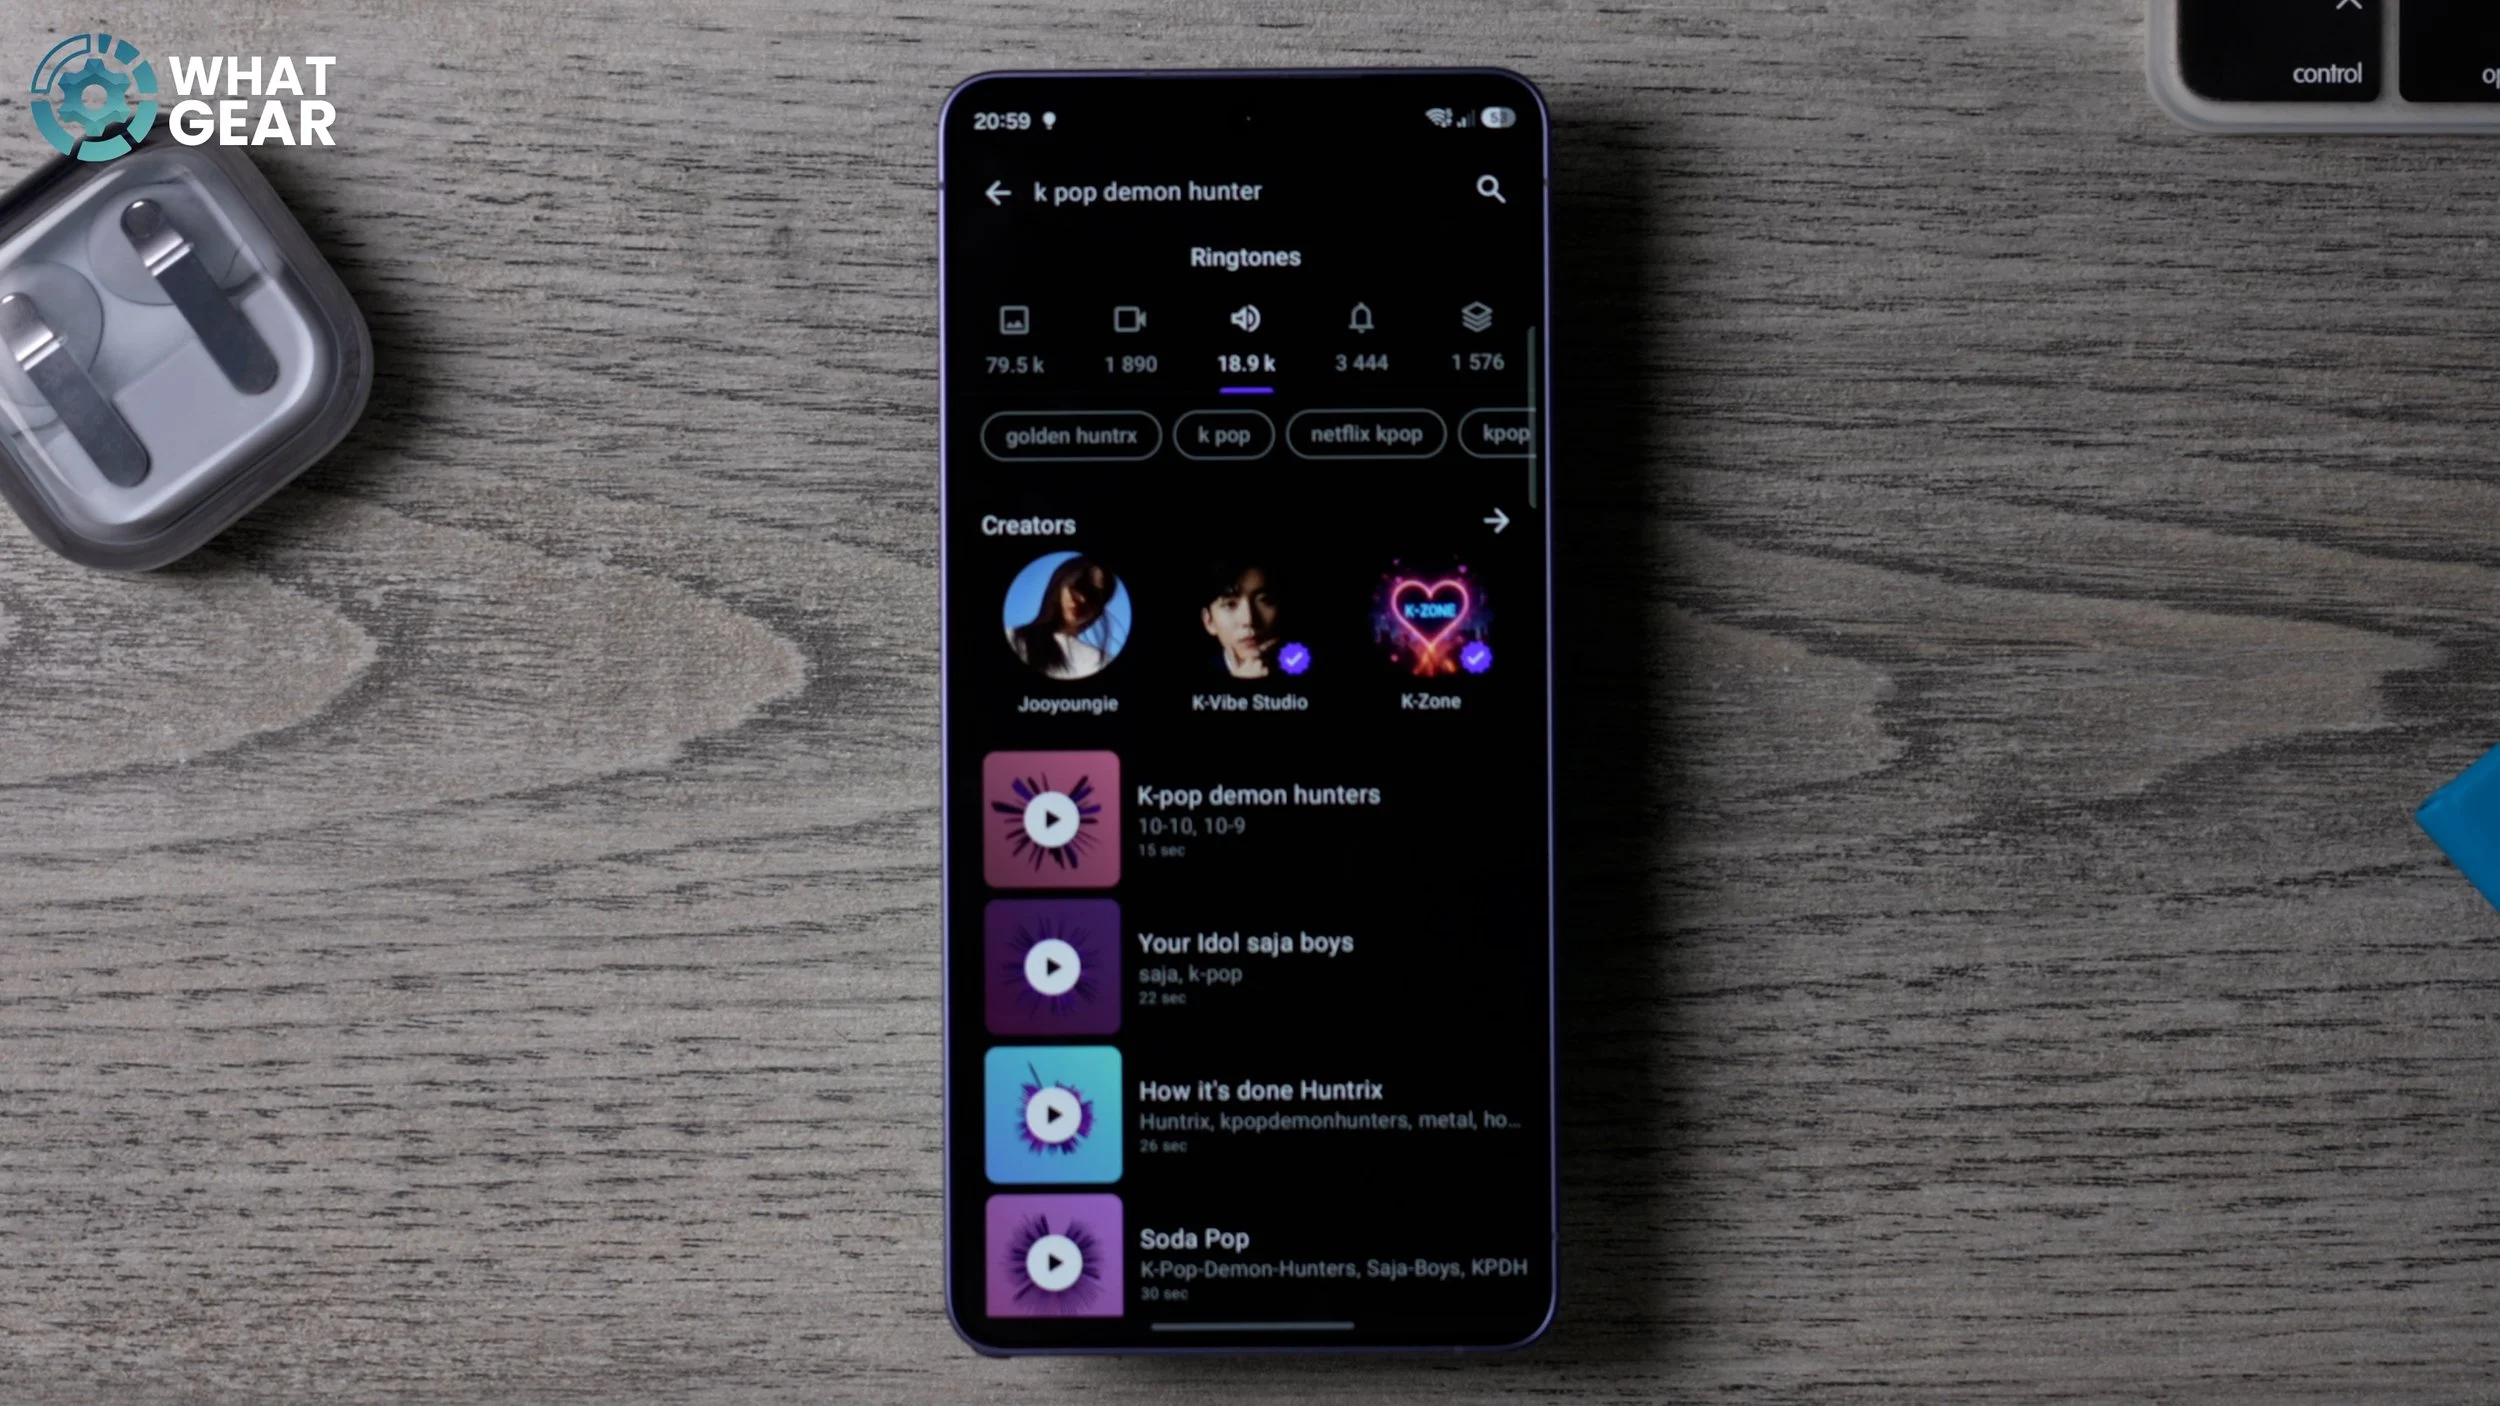
Let’s say “K-pop demon hunter”. That’s very popular right now. You’ll see all of the wallpapers, the video wallpapers, and the ringtones, and then you can simply click on one of these, download it, and instantly set it up as your ringtone. It is that easy. And the same thing applies for notification sounds as well. So if you do want custom notification sounds, here is where you’ll find them. And they really do have a fantastic library of wallpapers and sounds. So yeah, you can thank me for this one later. Just be wary of the ads.
KNOW YOUR NOTIFICATIONS
If you find yourself ever missing important notifications, then I think you’re going to like this next setting. Go into Settings. We’re going to go to Sound and vibration again, and in here we’re going to go to Notification vibration.

There are a lot of different patterns to choose from. What I recommend you do is go through these and pick the one that immediately stands out to you. Some of these are aggressive. Some of them are more subtle. What you need to do is pick the one that will be most identifiable to you when it’s in your pocket.
BEEF UP YOUR SECURITY
This next one is a very important step. Go to your settings. Go to Security and Privacy. If you see any red flags—or in this case, orange flags like this one—I recommend you tap on that and switch it on. This is Samsung’s app protection feature. And essentially, what it does is it scans any apps that you might be installing before they’re installed.

So if, for any reason, you do have to download an APK from somewhere else on the internet and not from the Galaxy Store or the Google Play Store, that’s when this will be very, very useful. It will help protect your phone. It just adds an extra layer of security on top of Google security and Samsung’s own Knox security. So I do recommend you switch this on. And once you’ve done that, you’re good to go to the next tip.
MORE EFFORTLESS WRITING
Here’s a tip that’s going to help you every time, and any time you need to write anything on the Galaxy S26. So I’m just going to open up a notepad app, like this. And then straight away, you’re going to see the Galaxy Keyboard. Now this will work perfectly well on day one, but you can actually improve the performance, and specifically when it comes to predicting what it is you’re trying to write. Go into Settings, and in here you will see Predictive text.
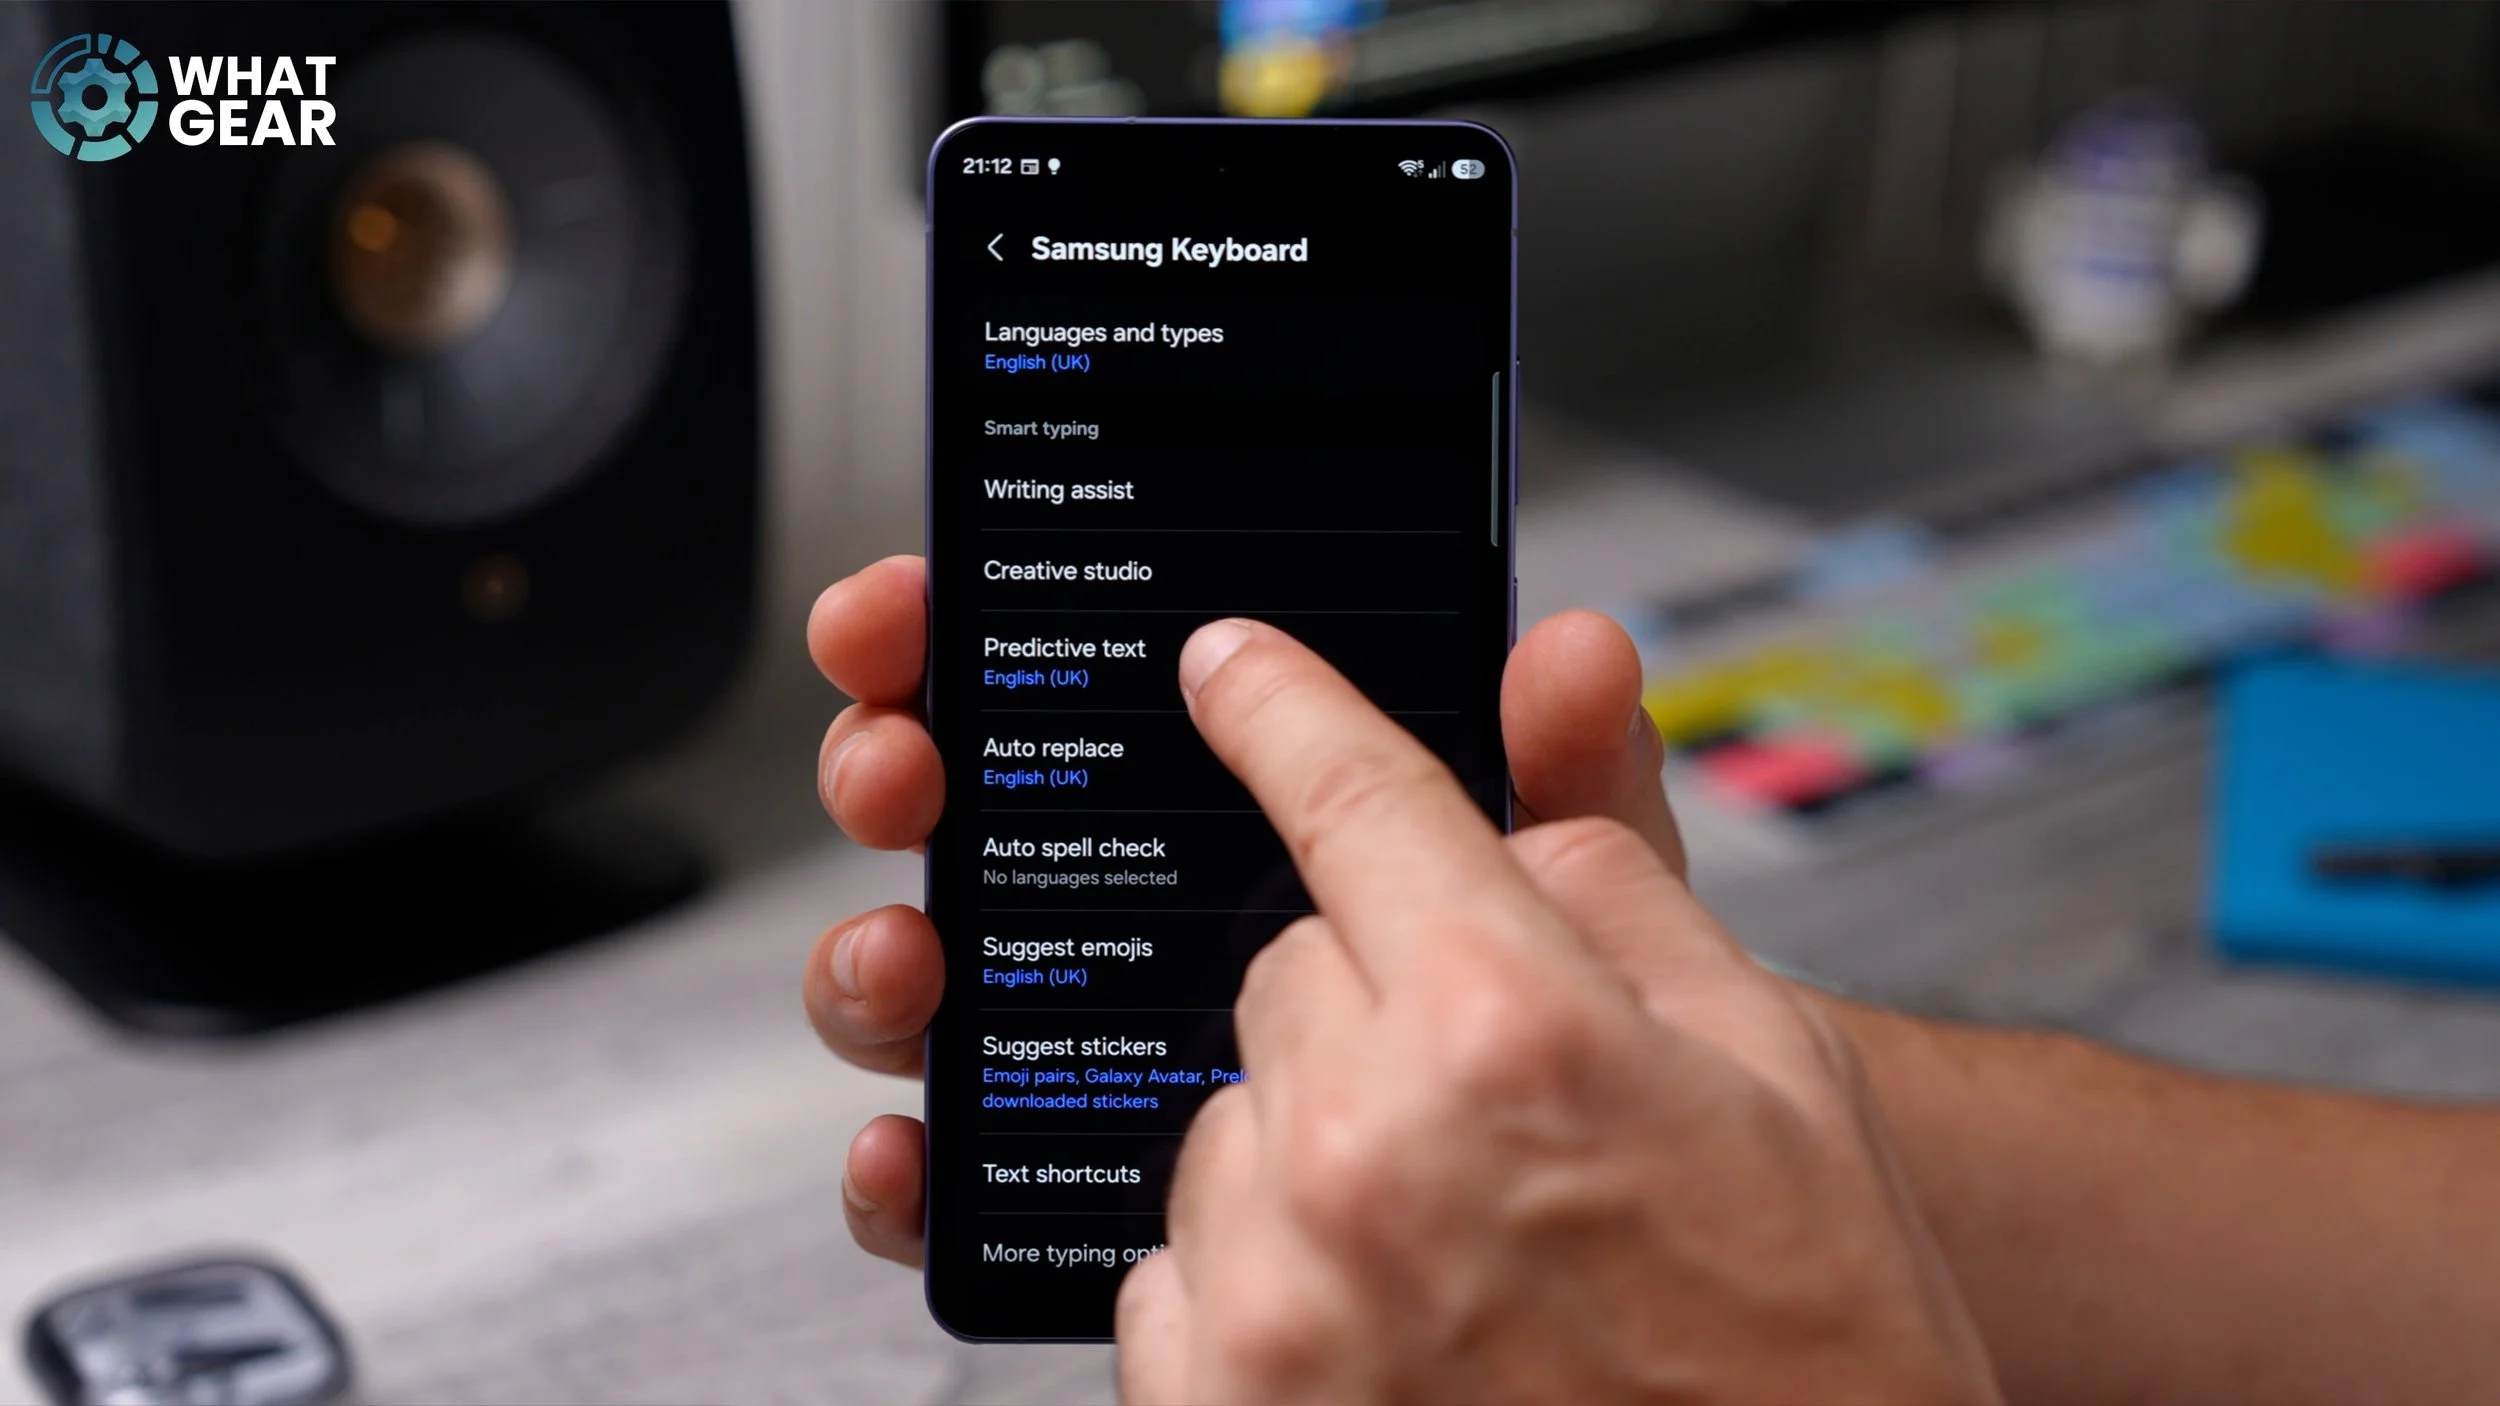
Make sure that you have downloaded the language pack for this and switched it on. Once you’ve done that, the next step might be one of the ones that the pros miss, and it is this: Auto spell check. This is switched off straight out of the box. If you turn this on, whenever you misspell a word, it will auto-correct it for you.
WRITING ASSIST…ON YOUR WRIST
Here’s another tip when it comes to writing anything on your phone. Jump back into your settings. Go to General Management. This is another way you can get to the keyboard settings. On this page, if you go to Samsung Keyboard settings, and then here at the top, if you go to Writing assist, this should be switched on. But this isn’t what I want to show you. Hidden at the bottom of this page is a setting called Suggested replies.
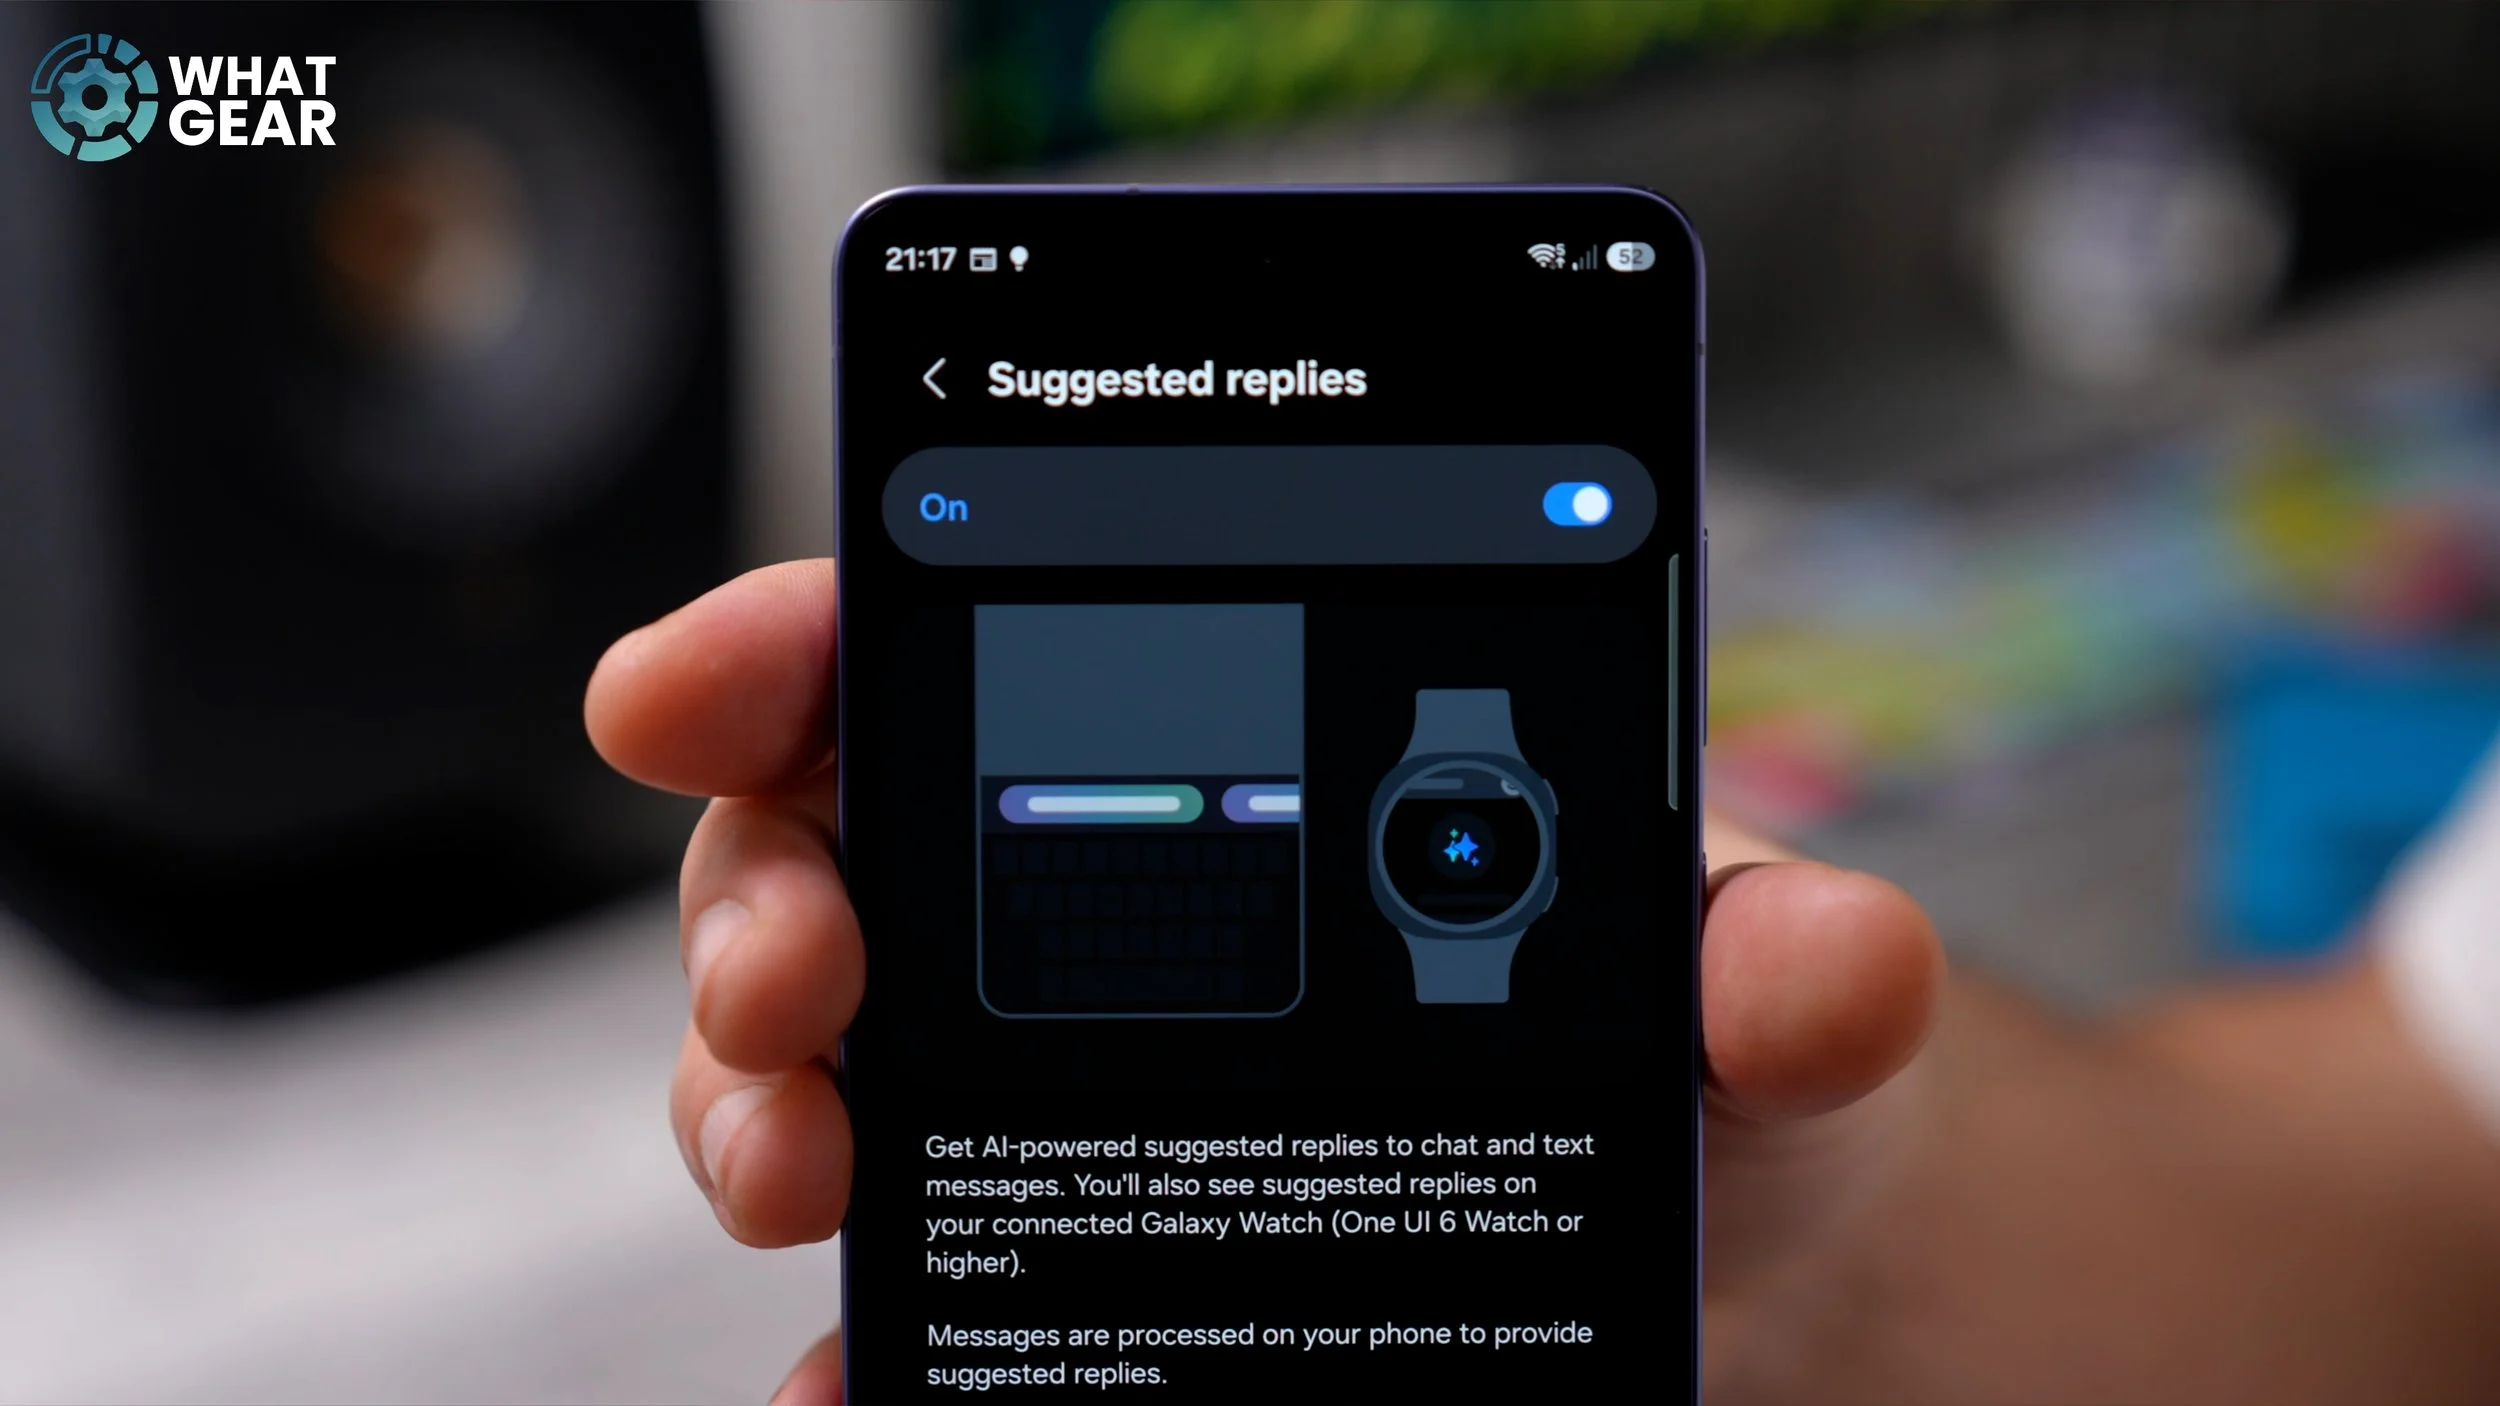
This is switched off, and it’s going to be extremely useful for you if you have a Galaxy Watch, but it also allows the keyboard to predict what you might say next based on your past conversations. Which, if you’re on the move or you’re running or something, and you see it on your watch, you can reply in just one touch as opposed to many. And when you receive an annoying text message that your answer is always the same to, well then it should be able to predict that too. And again, this is one of those settings that a lot of the pros probably don’t even know.
EMBRACE THE DARK
Now, if you’ve just got one of these phones, you might be wondering why all of my settings menus are black and not white like yours might be right now. Well, that’s because I’ve set it up in dark mode. And the reason why I believe this is better is because it’s more power efficient. And I also think it looks better. And in my opinion, it’s a bit more gentle on the eyes. So if you do want to switch on dark mode, here’s how you can do it. Within your settings menu, scroll down, go to Display, and at the top, you will see the option to switch between Light and Dark.
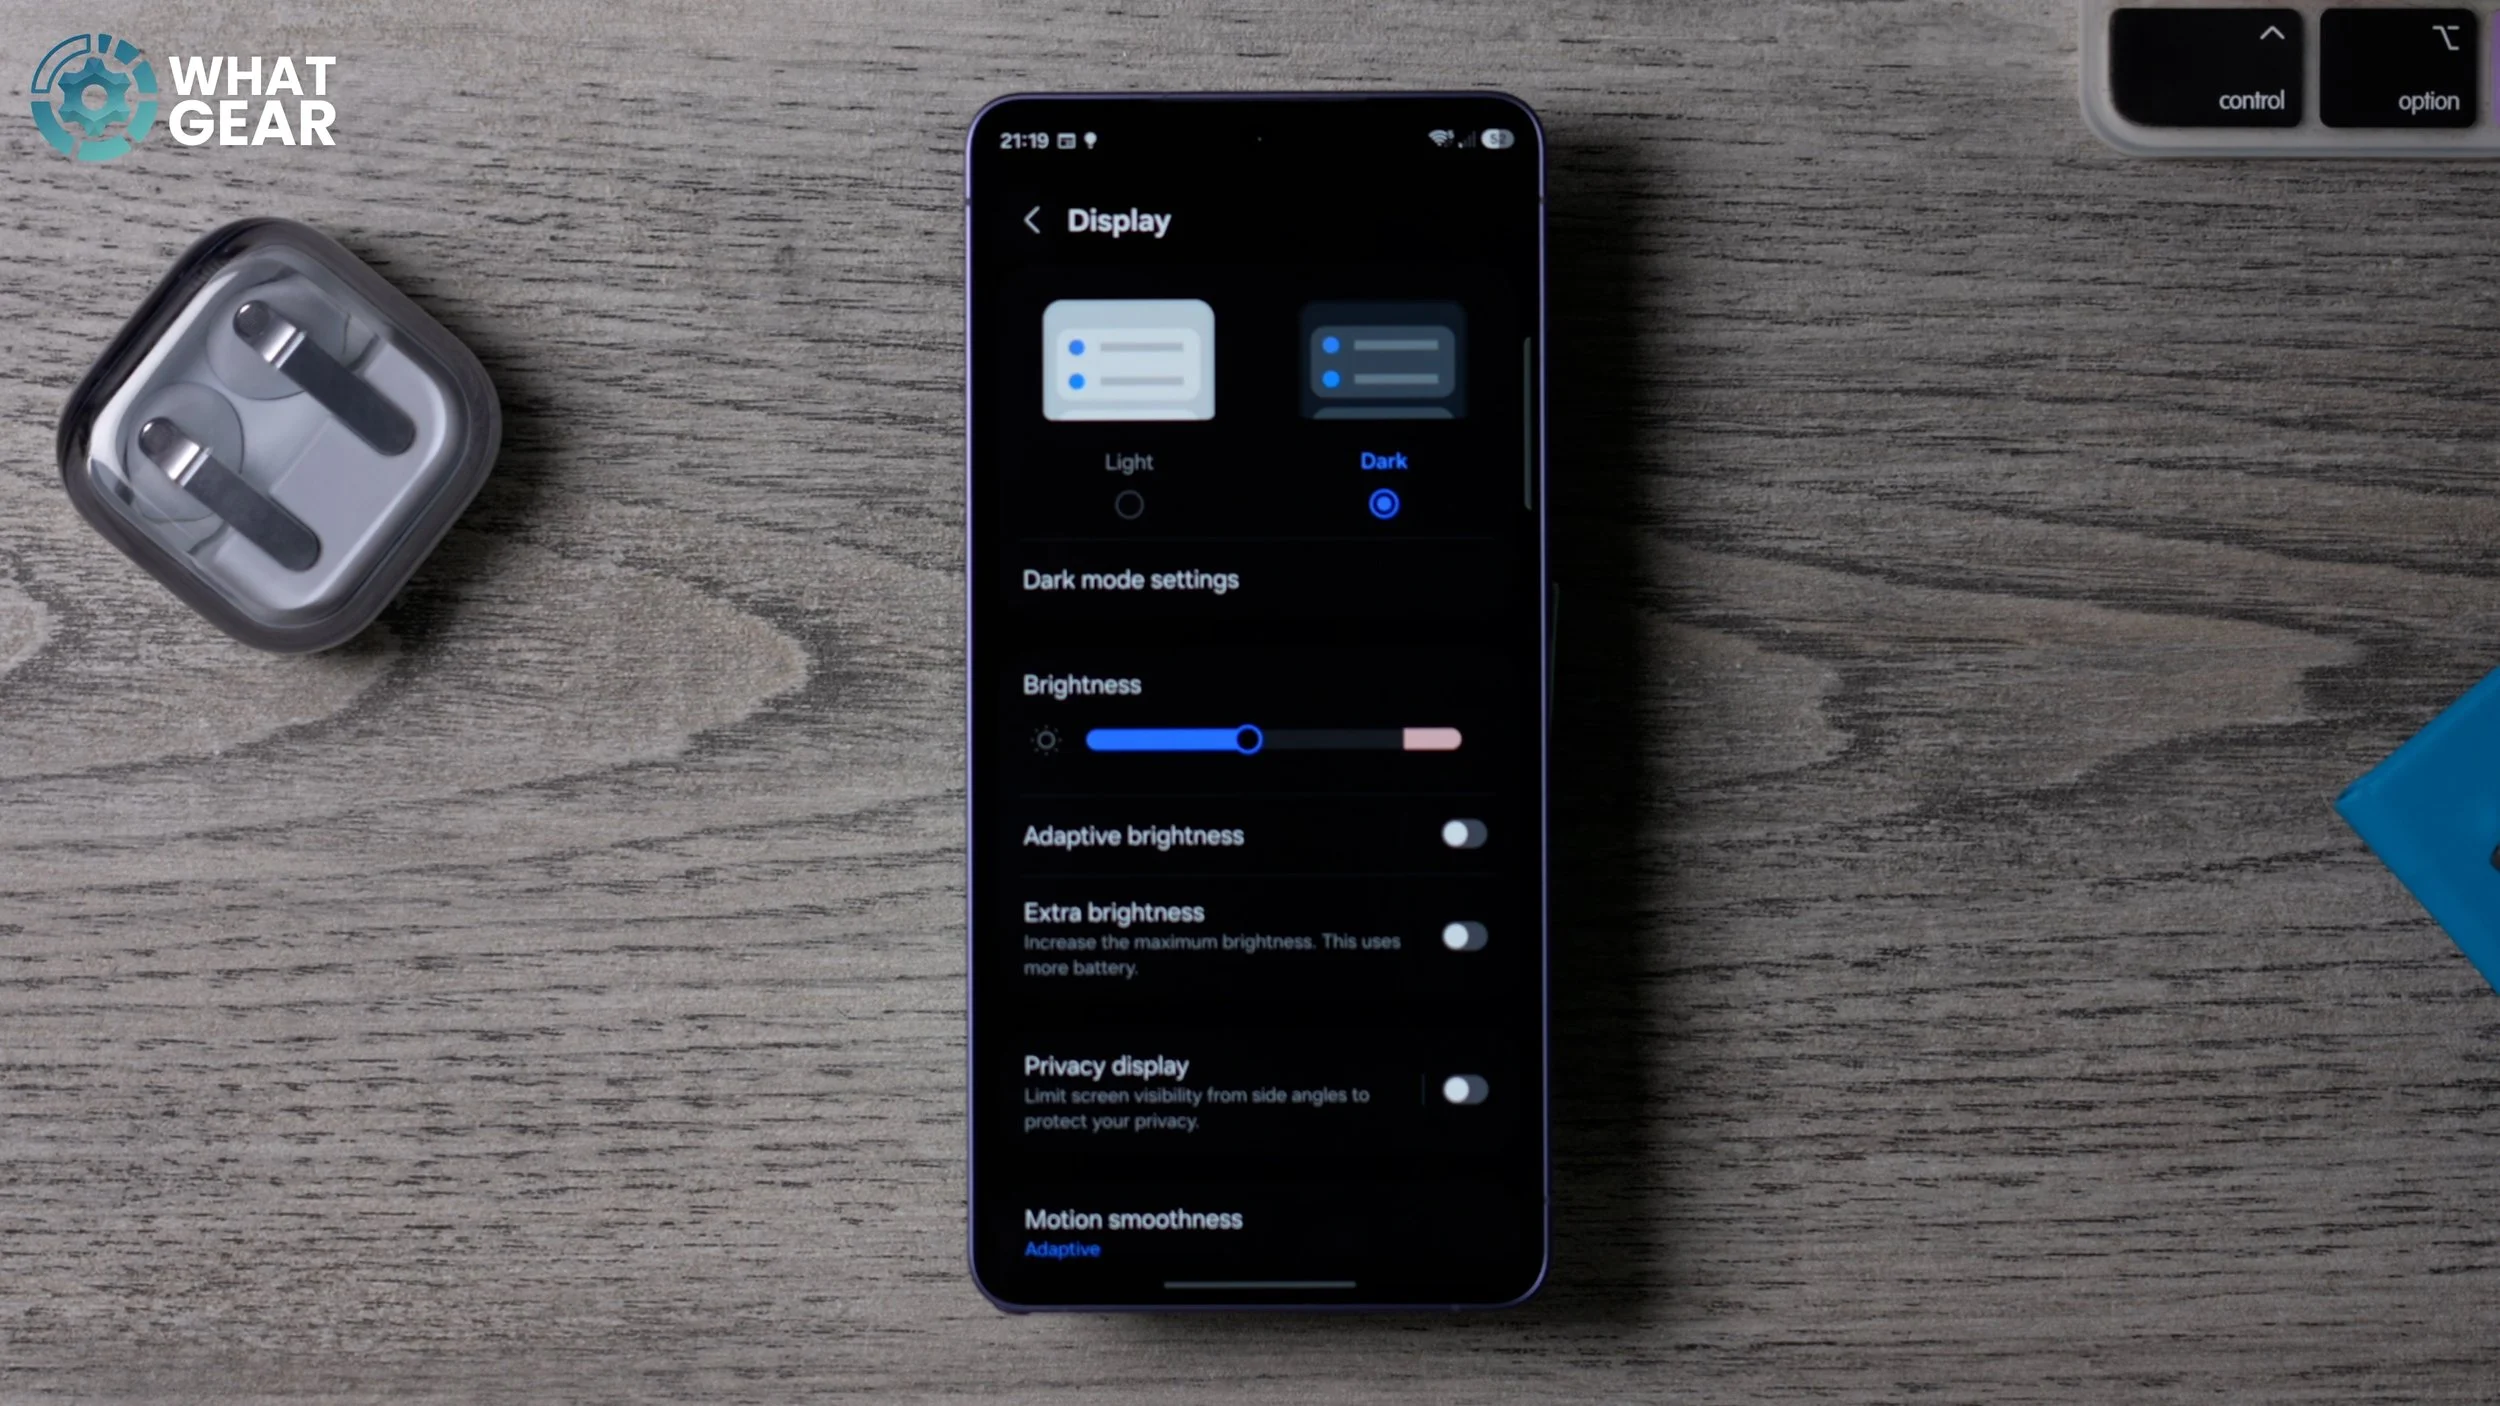
Now, one of the cool things you can do here: if you go to the dark mode settings and set it to switch on a schedule, so when sunset hits, it will switch to dark mode, and when sunrise hits, it will switch back to light mode. But if you’re all about power saving, then you should definitely use dark mode. And whilst we’re here, a couple of settings that you should also take a look at are these: adaptive brightness (which I have to switch off for this video just while I’m filming), and also extra brightness can be very useful if you live in a sunny country… which is not a problem for me because I live in England. Now, honestly, it’s actually quite nice sometimes, but you’ve got to be real careful about what you post online these days.
STAY OPTIMISED
Now you might not realise this, but sometimes your phone’s been on for far too long, and it starts to build a backlog of little processes and things that could slow it down in the long run. And actually, there’s a feature built into the Samsung phone that can help correct this at the best possible times according to your schedule. So here’s how you can use this feature: Go into your settings and then go to Device care. Scroll down, and this is where you’ll find Auto optimisation. Go to this and enable it, and set it to Restart when needed.
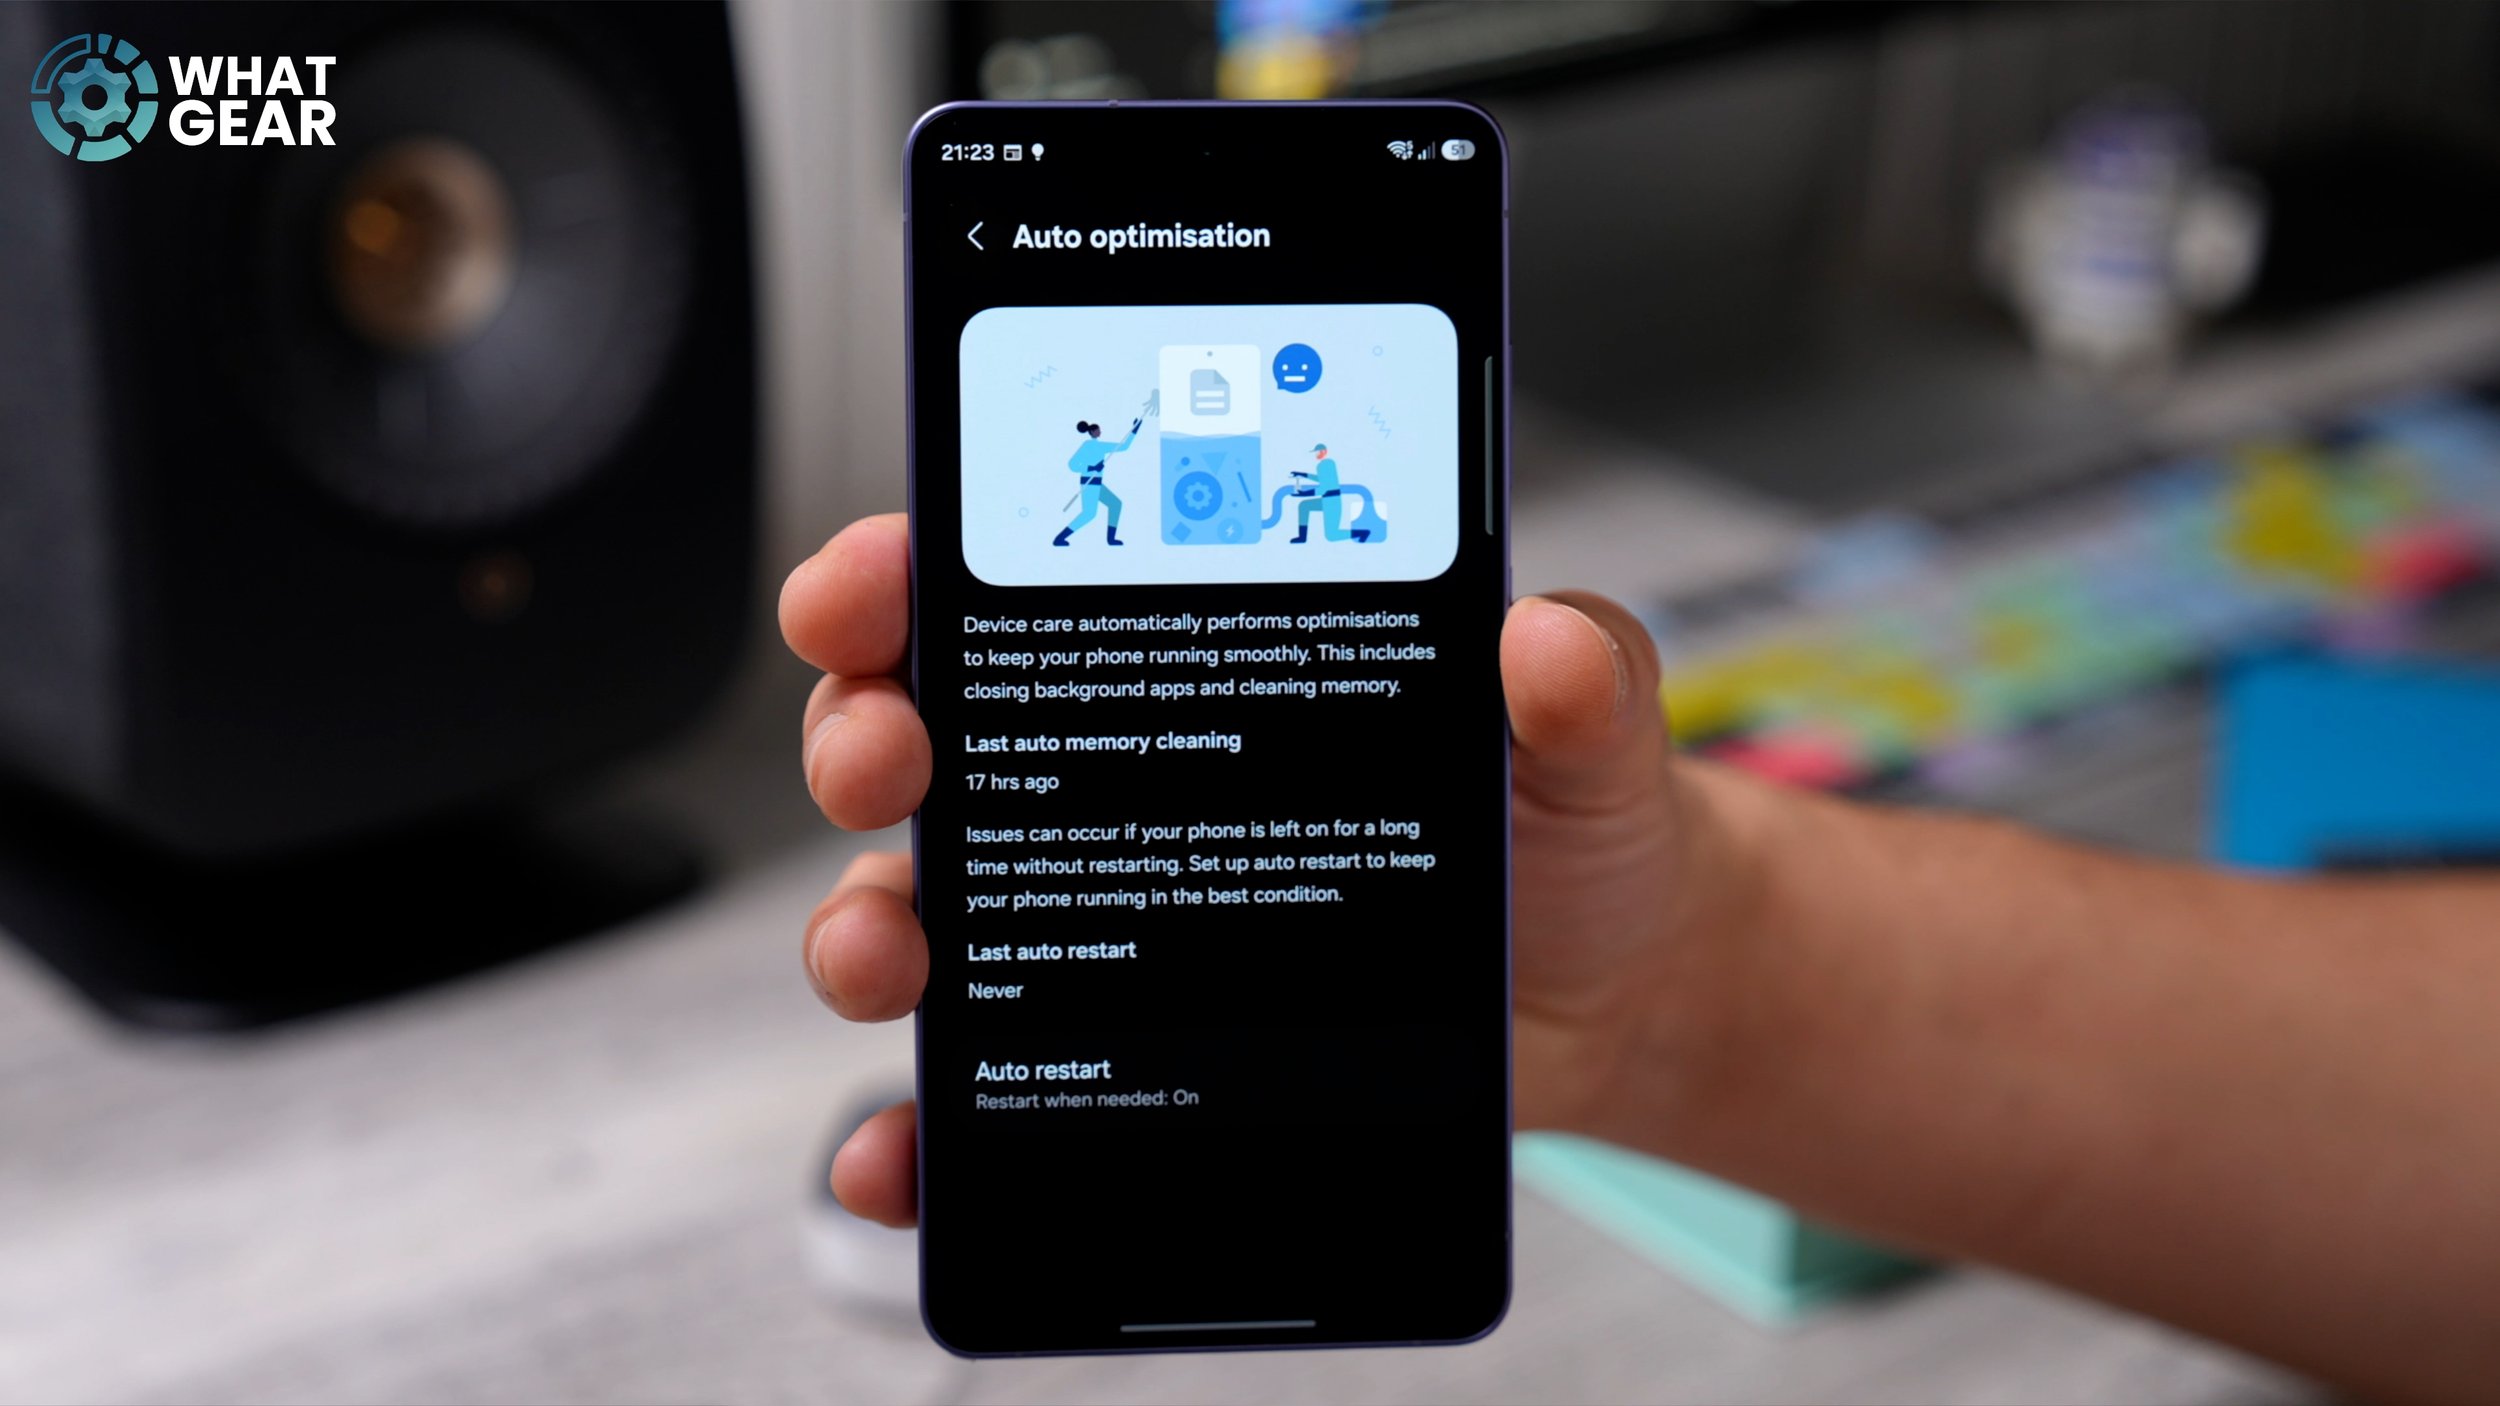
And if you want to be more specific, you can tick this box here and choose when it happens on a weekly basis. For now, I would recommend you set it to When needed. And it’s not going to randomly shut down while you’re using it, so don’t worry about that. It will only happen when you’re not using the device, and it will reboot itself. And you just need to put your PIN number in again, and that’s it. It essentially resets the phone so that everything can run as quickly as possible. So thank you for making it all the way to the end of this video. Of course, there’s a couple more tips still to go, and these ones are extremely useful in my opinion.
FIND YOUR APPS EASIER
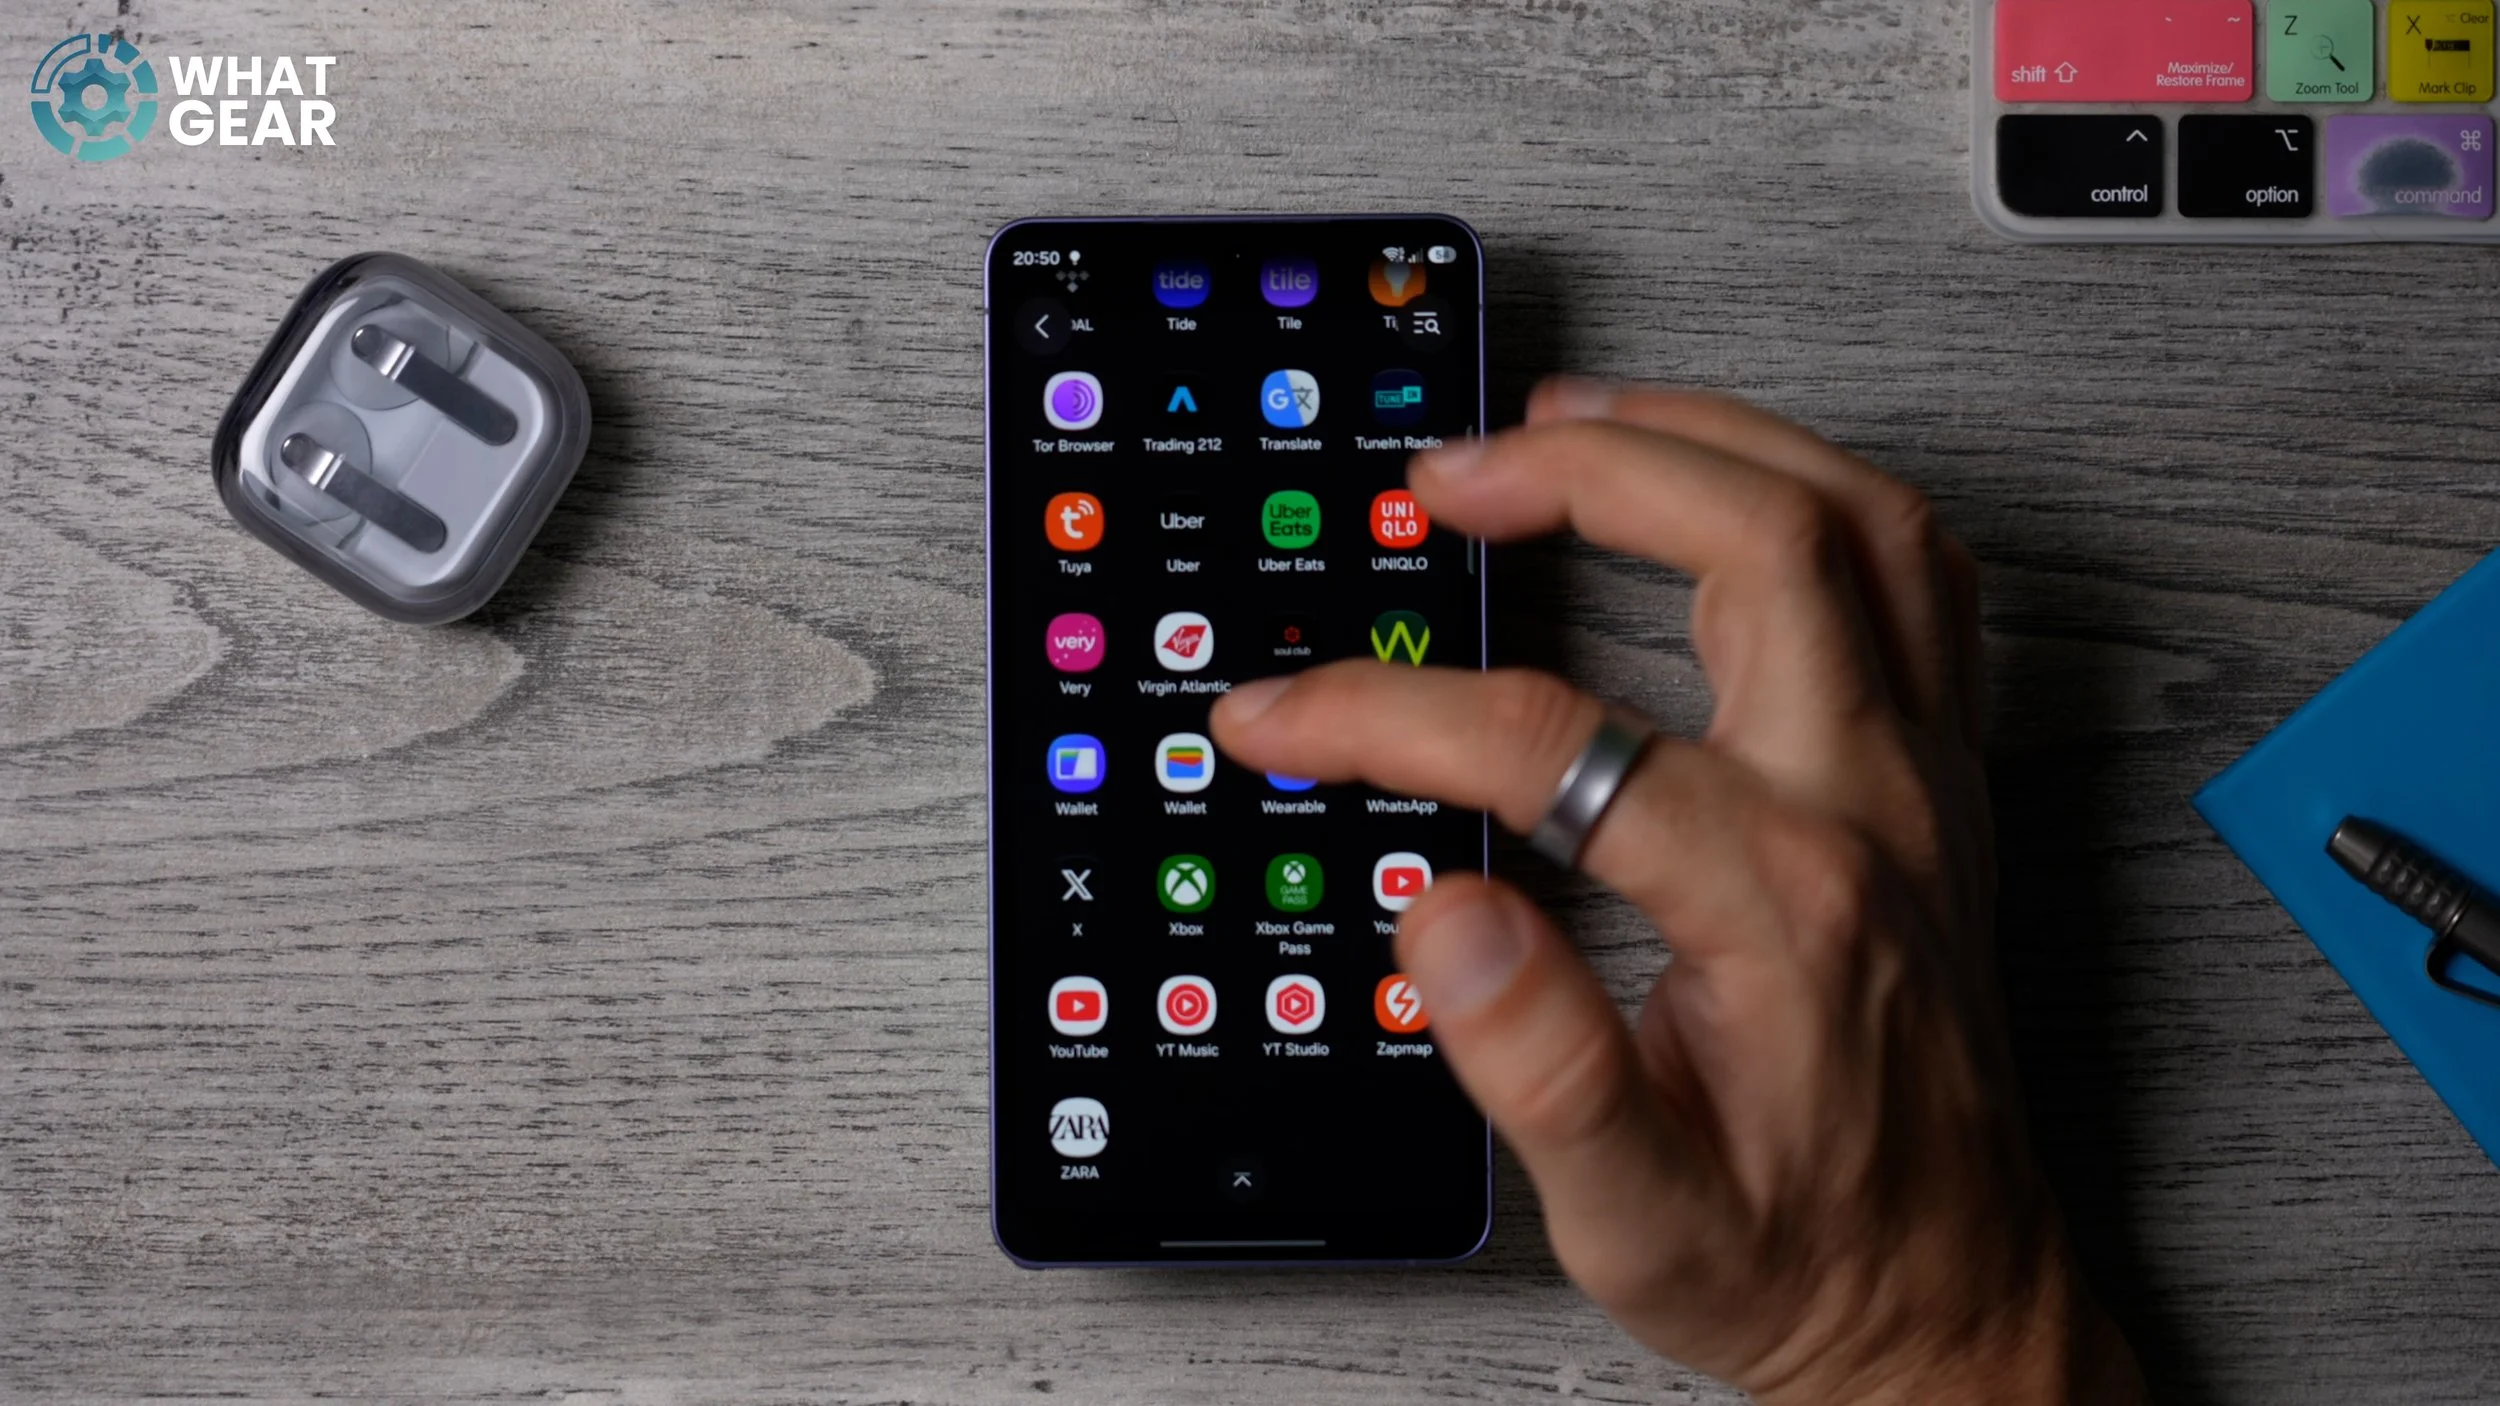
So first of all, when you get a new phone, you will have some pre-installed apps. If you’ve transferred all of your apps to an old phone… When you swipe up from the bottom of the home screen, this is your app drawer or app tray or whatever you want to call it, and what you will find is that there is no method to the madness here. It tries to organize it so that the apps you use the most are near the top. However, this is a bloody headache when it comes to finding things.
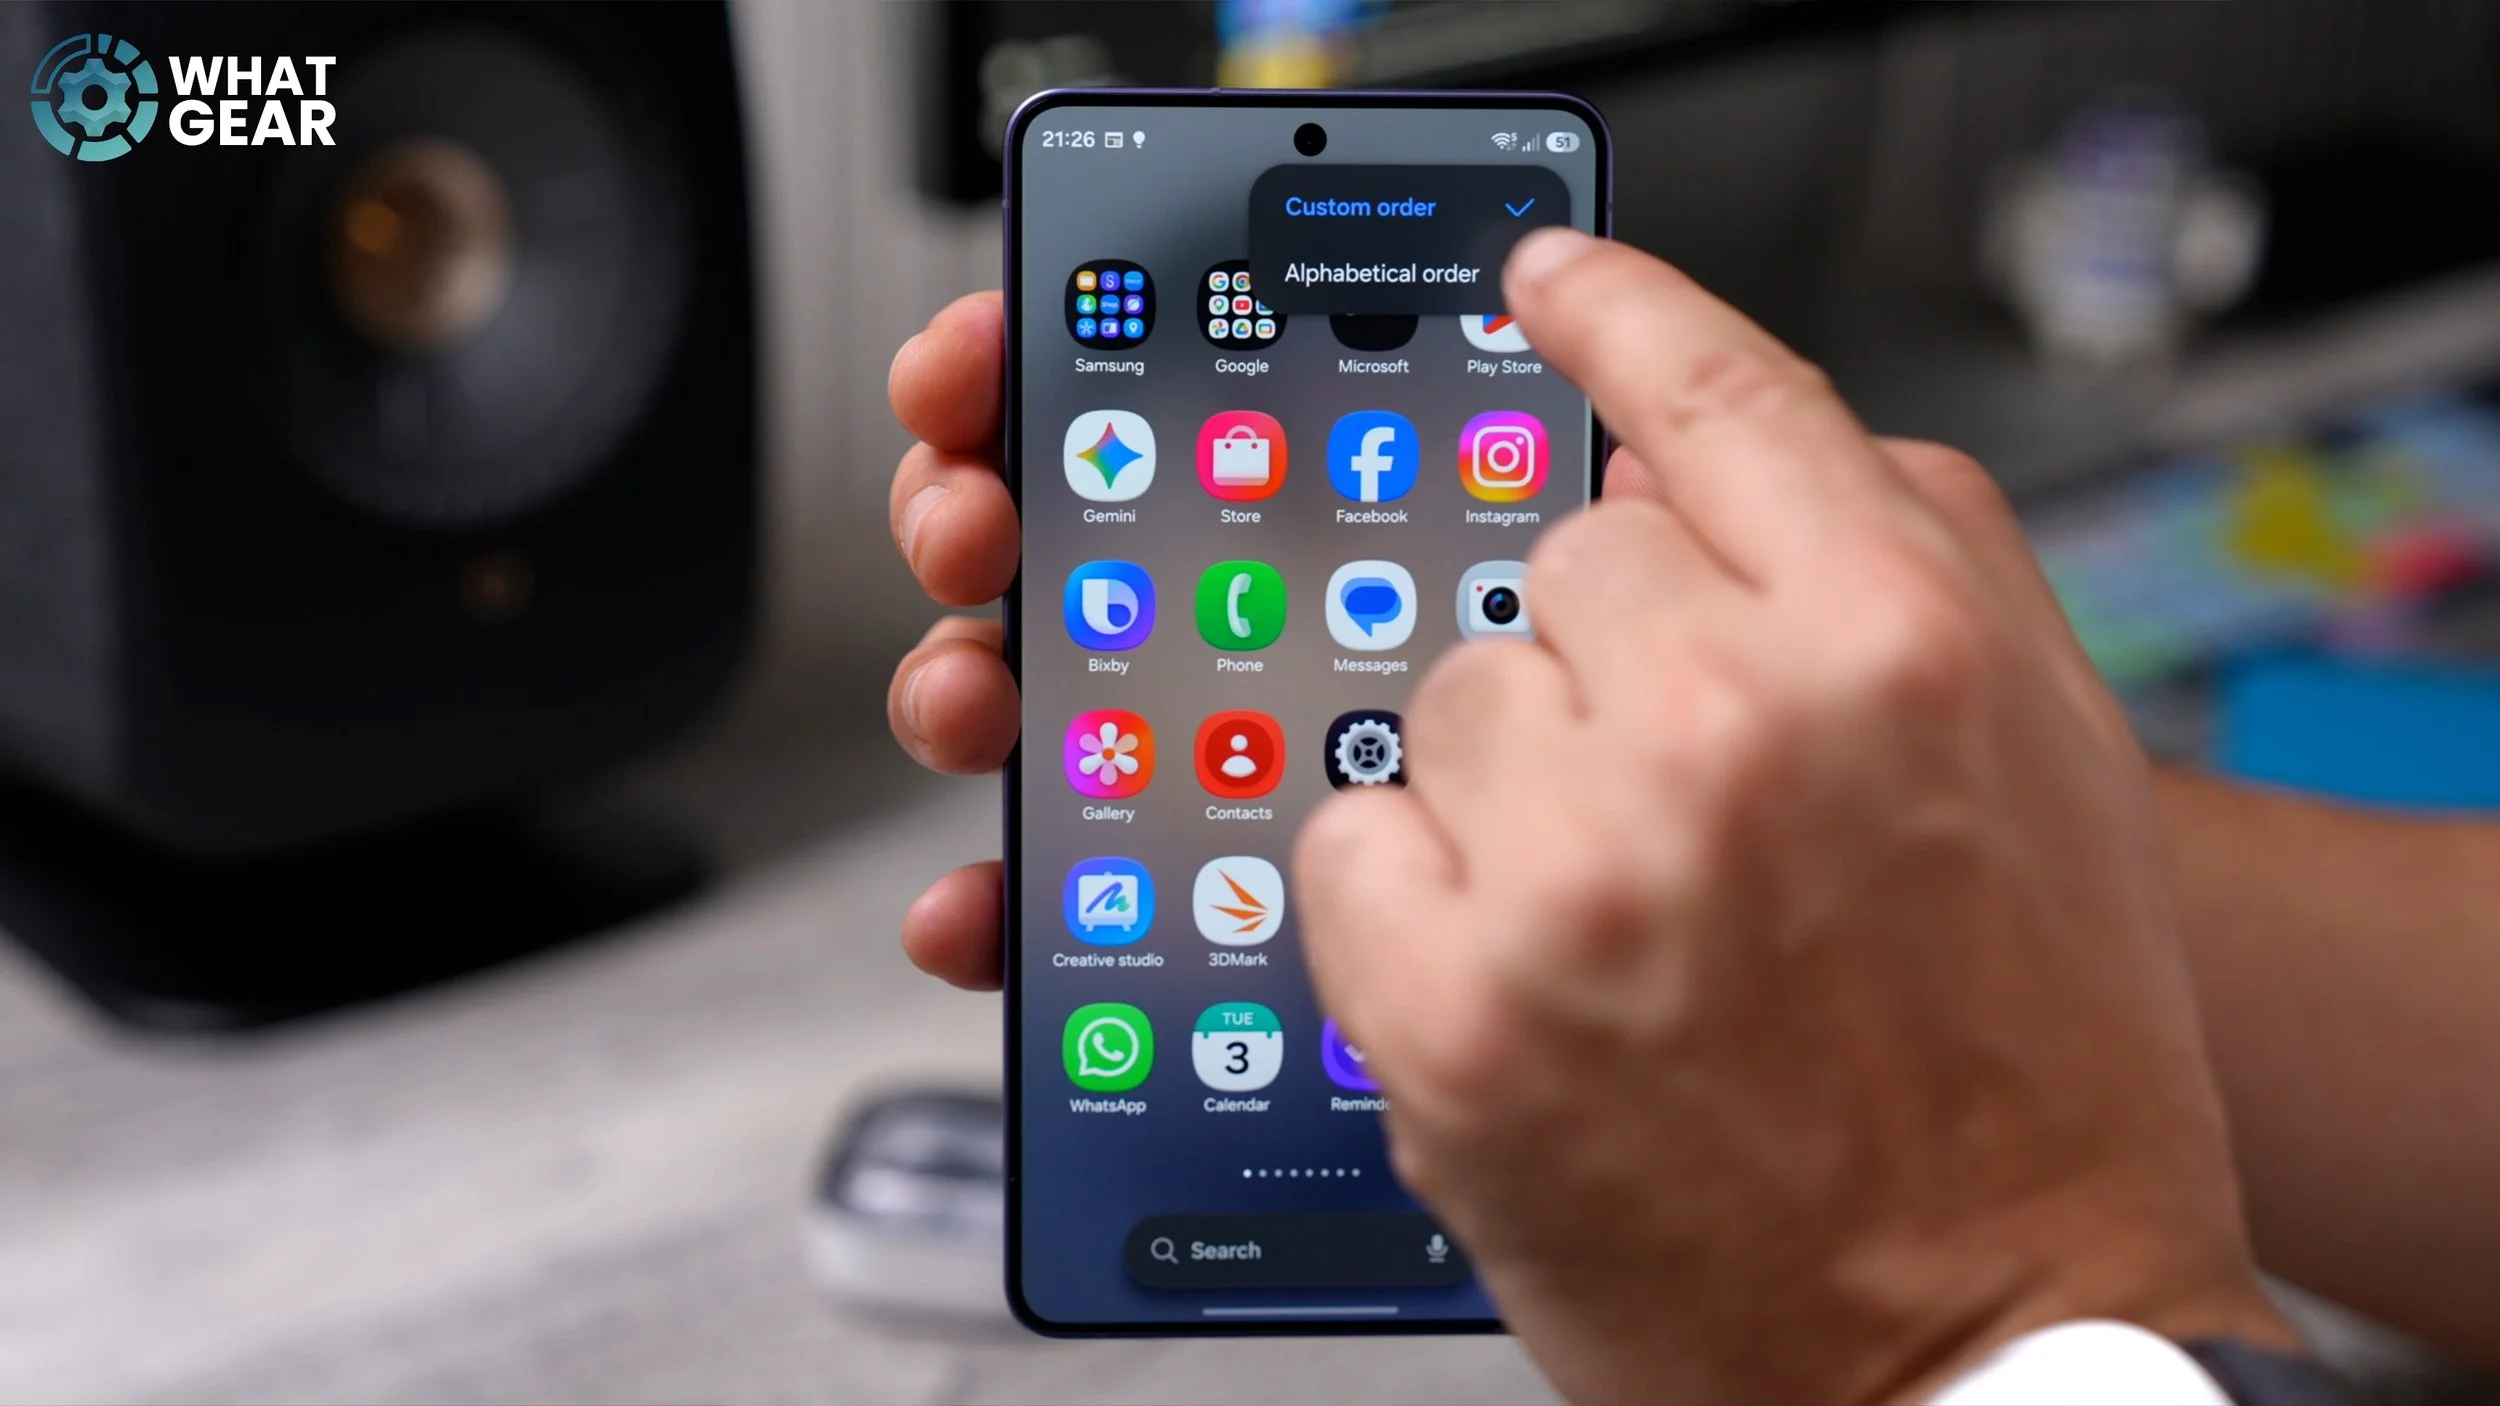
Yes, you can type in down here what you’re looking for. You could even use your voice. But sometimes the old school ways are still the best way. So when you swipe up from the bottom of the screen here, hit the three dots in the top right corner, go to Sort, and change this to Alphabetical order. And this is going to make your apps so much easier to find, because they will be exactly where you expect them to be: in alphabetical order.
ADD PLACES
If you got the Galaxy S26 Ultra—and even if you don’t—I think you’re going to like this feature. But it might be even more important if you do have the Ultra, because you will have the brand-new privacy display. I go into all the advanced settings for that in my first Things to Do video, so definitely check that out after this one. But let me show you why this next setting is important, and how it will improve how you use your phone. Let’s go back into Settings again and back to the Samsung account at the top. Right at the top of this page, you will find Places.
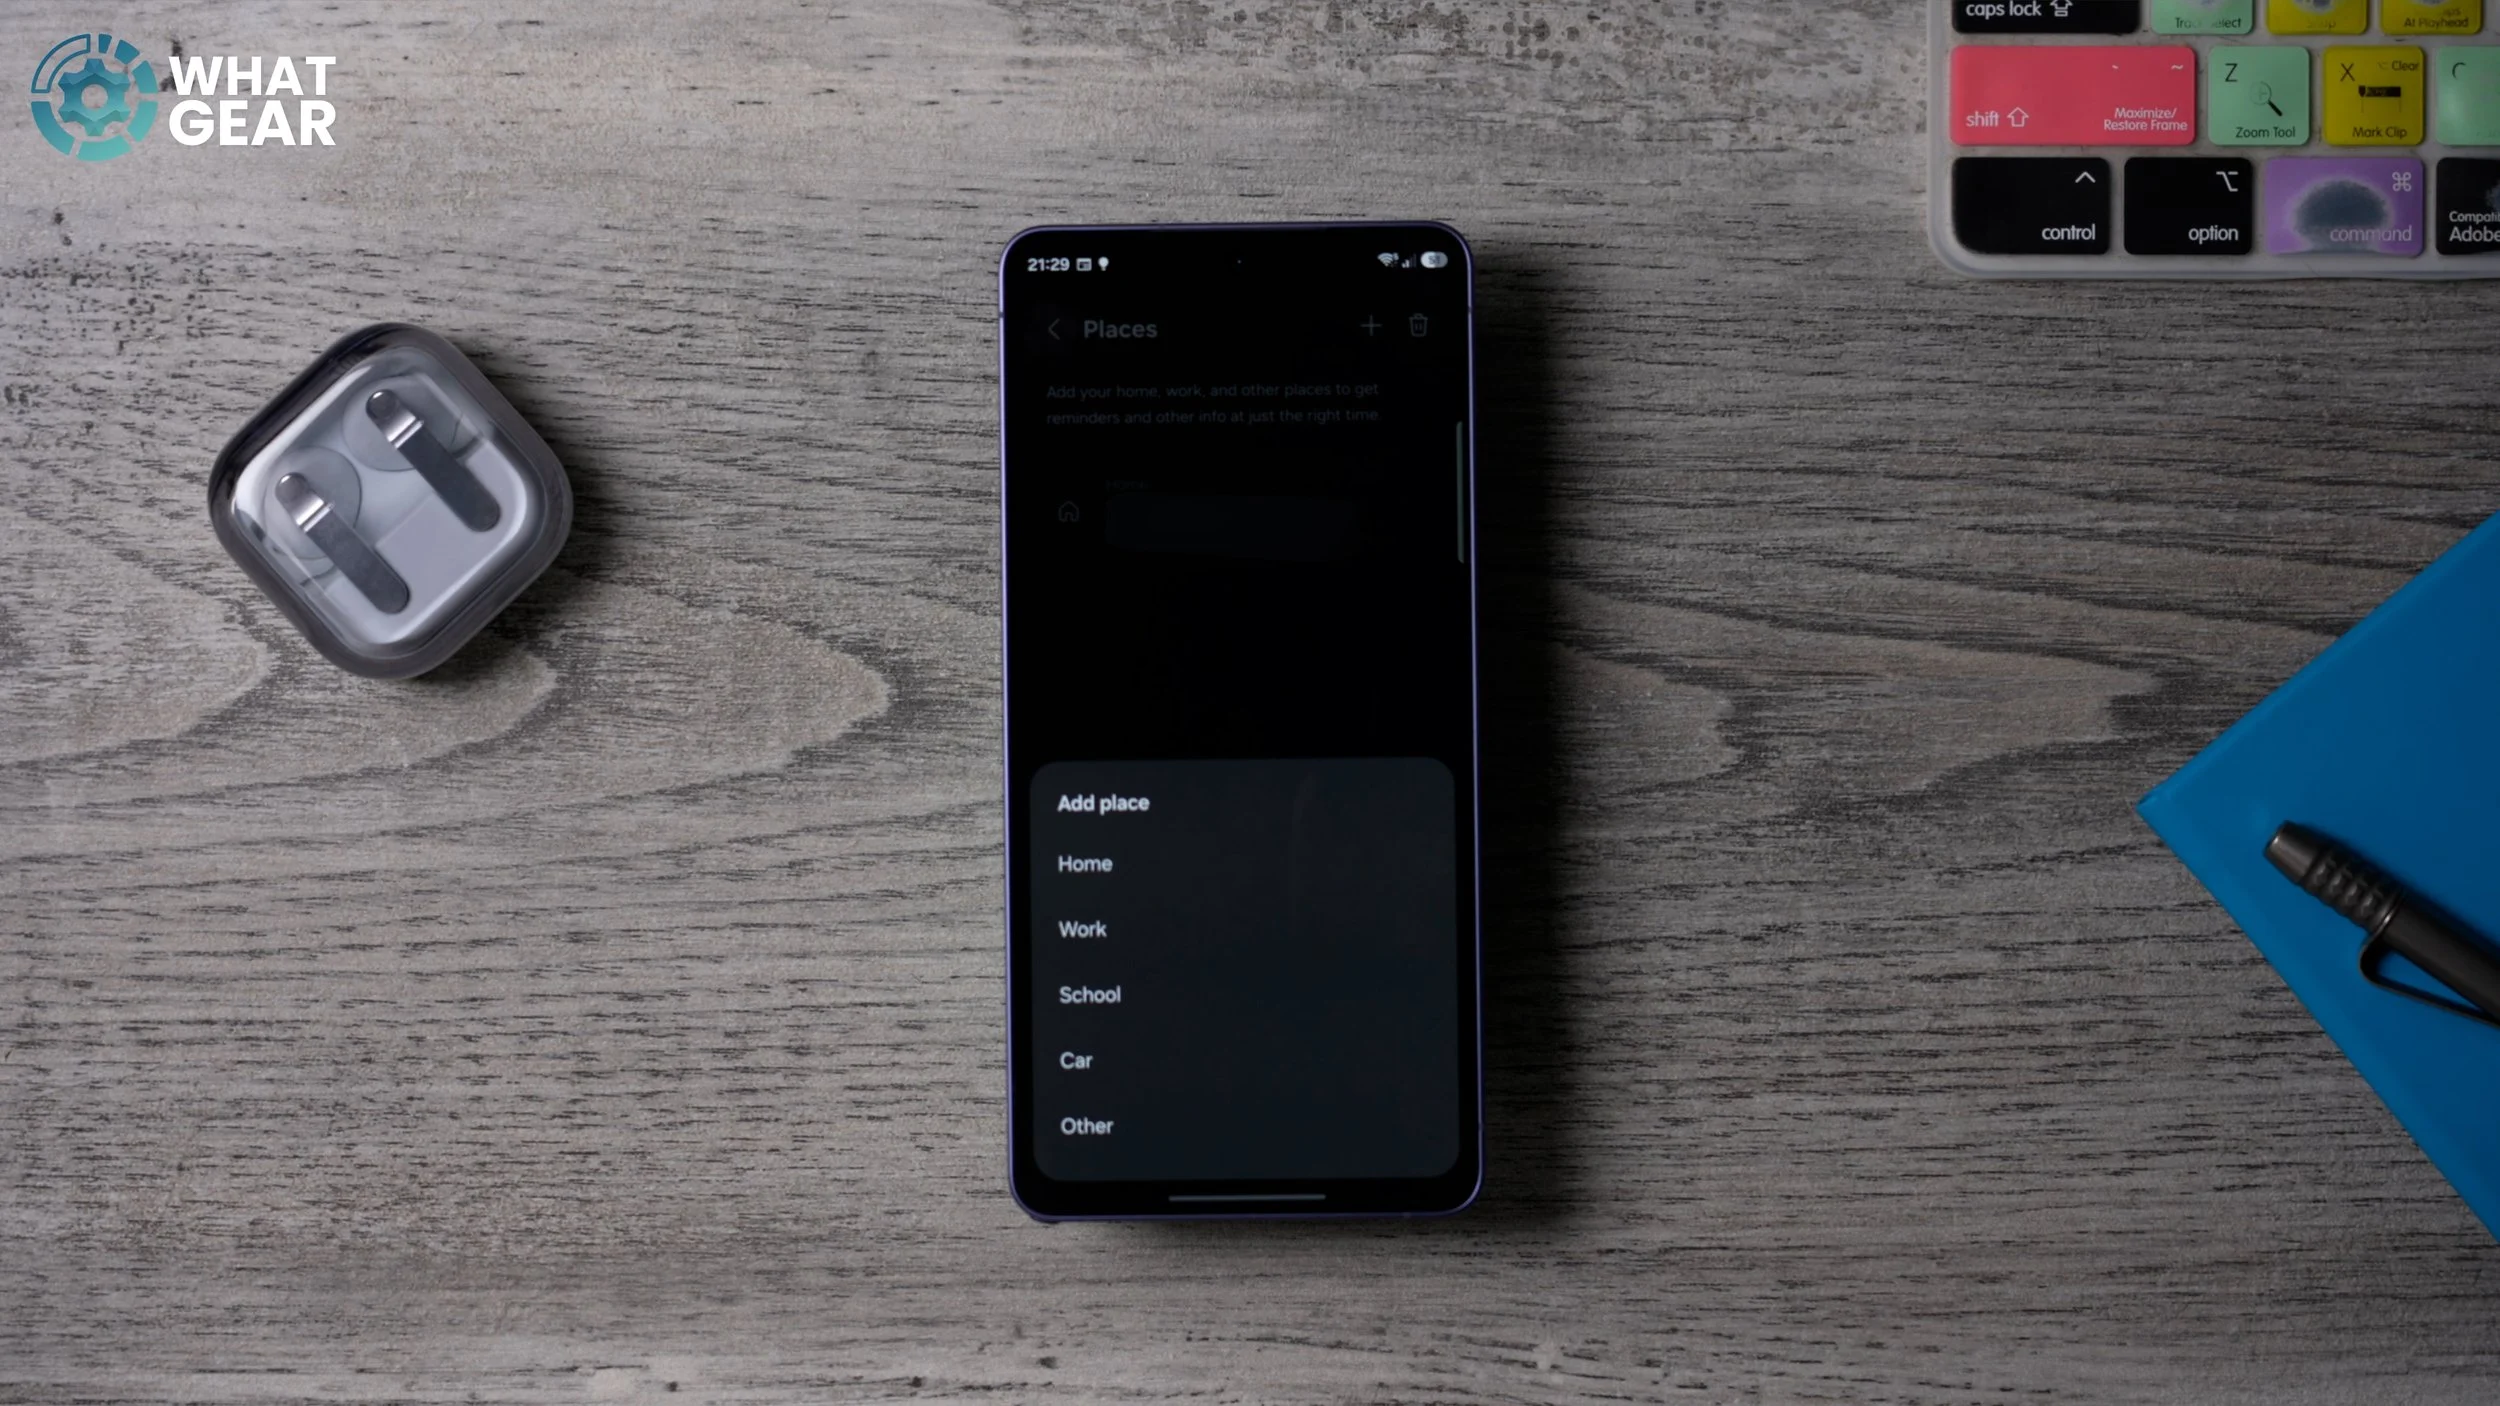
Now this is where you can add your home address, your work address, and any other places that you visit frequently. For example, maybe the gym or something like that. Hit the plus at the top of this screen, add those locations, and try and add as many as you can that are relevant to you. Now, the reason this is important is you can actually set up specific actions to take place when you’re in specific locations. For example, when it comes to configuring the privacy display, you can have it switch on or switch off according to where you are. And if you give the phone some context, it can be even more useful.