
Galaxy Z Fold 7 - Customisation Guide ( 20 Tips & Tricks ) Part 3 of 3
All right, so you've got Samsung Galaxy Z Fold seven, and maybe you've already watched my beginner setup guide, and maybe you also want to watch my useful and unique features guide on this phone, and now you want to learn how to truly make your folding phone more your own style. Let me show you how to customise like a pro. I've got 20 tips and tricks, and hidden features for you guys. We'll start with the basic need-to-know stuff first, and gradually, as we go through this video, I'll show you some customisation hacks that a lot of people just don't know.
Wallpaper options
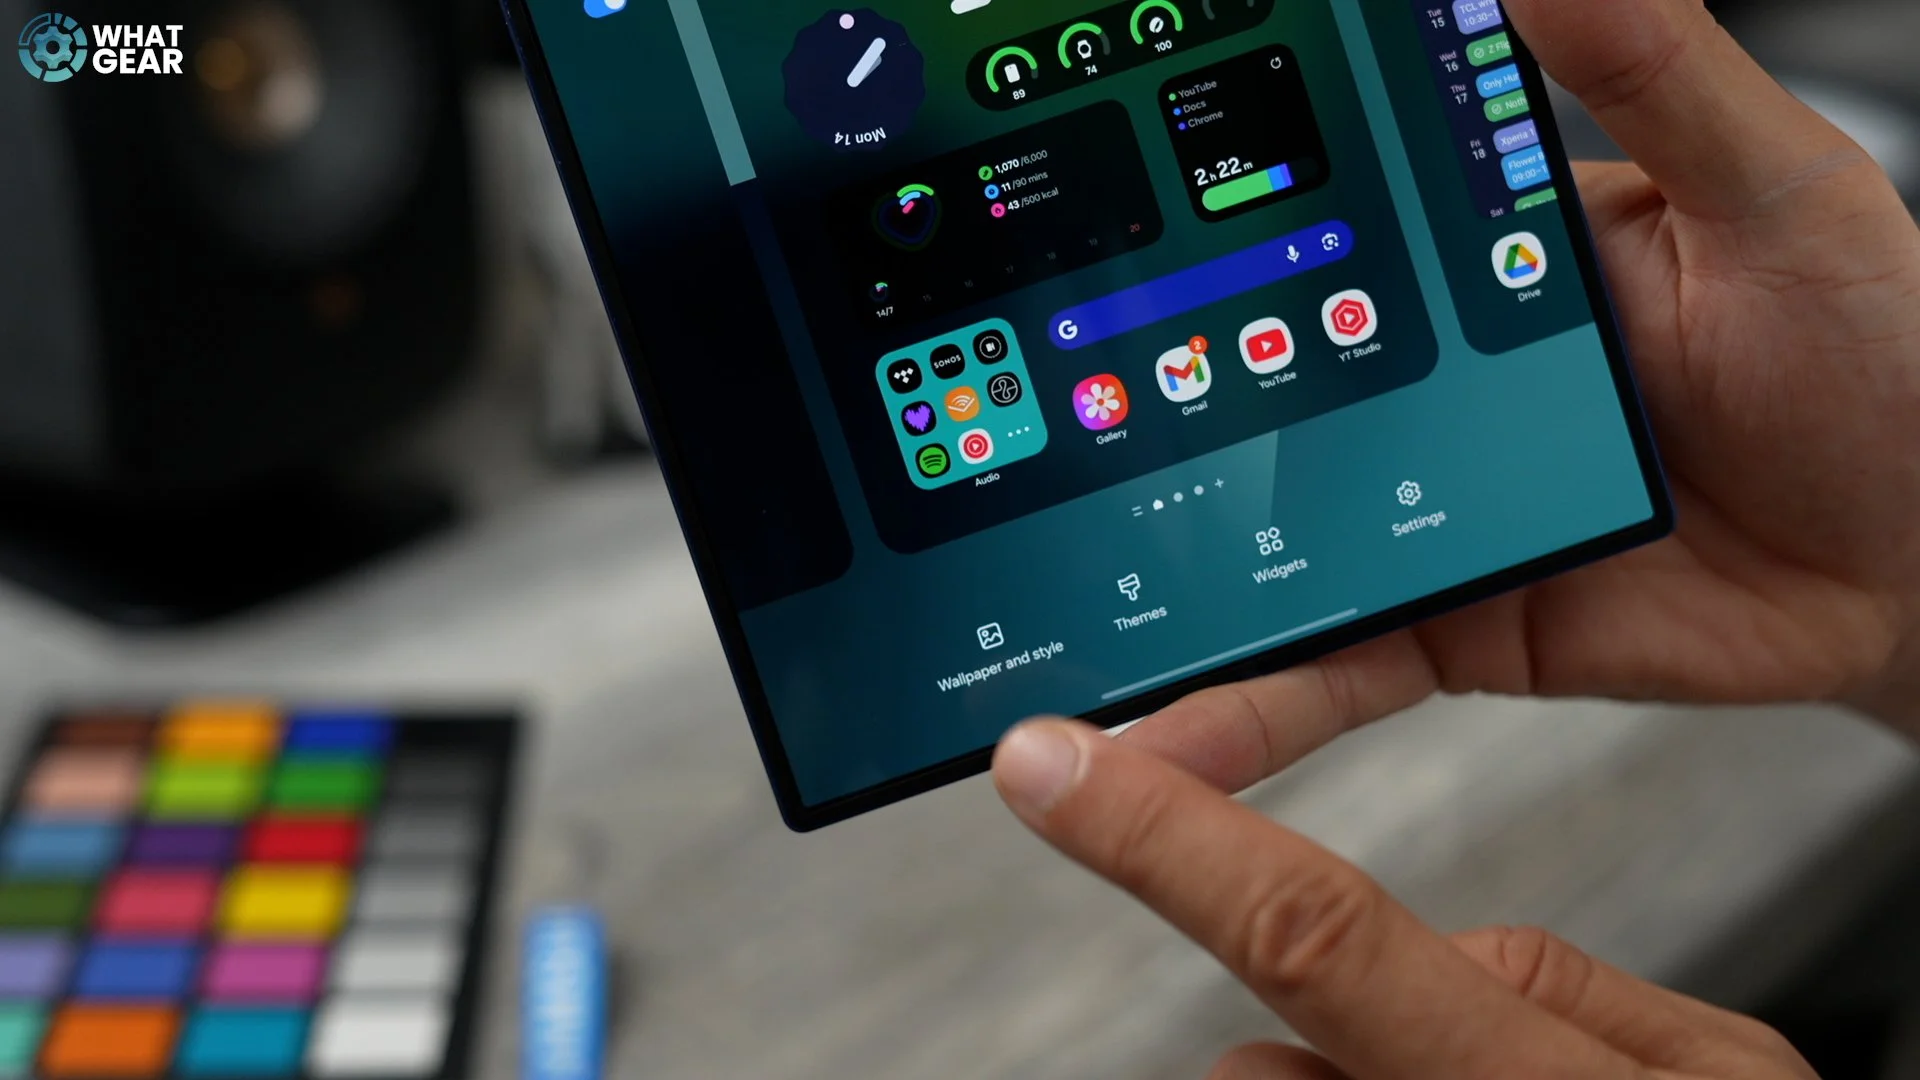
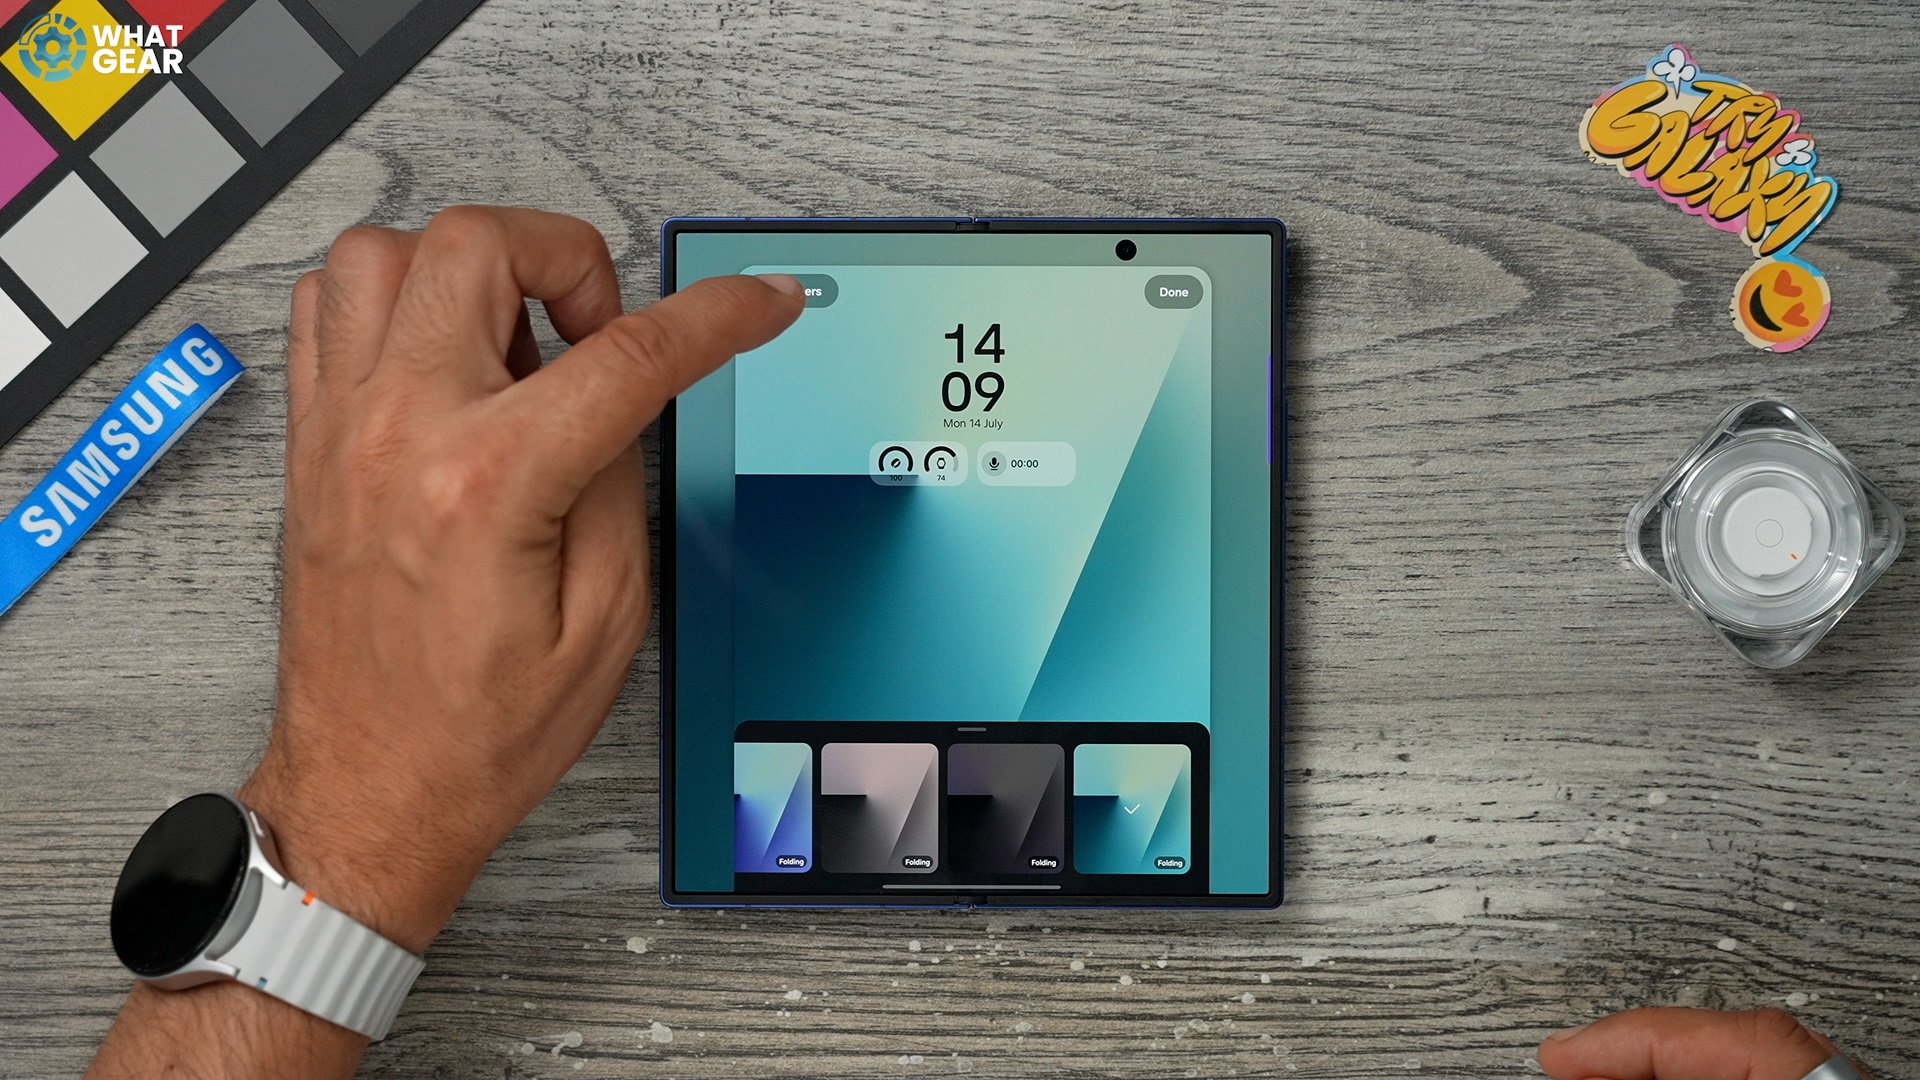
So this is the first thing you should know how to do, and do keep in mind that this affects a few of the other tips going forward. So you've got to be quite mindful about your choices here. And of course, I am referring to the wallpaper. So if you pinch the home screen, here bottom left corner, you will see wallpaper and style. Tap that. Now tap change wallpaper, and there are a bunch of different options. The featured ones are nice. So the ones at the top are exclusive to the Samsung Fold devices. And they have this kind of animation when you open and close the device. So this is a good option. You can actually modify this a little bit by hitting the variations here at the bottom. And you've got four different kinds of options to choose from.
Some other interesting wallpaper options to look at before you decide on one, the dynamic wallpapers. So these gradually change colours throughout the day. You do have a couple of different styles again, to choose from. What I found with these is that they are pretty nice. They're not too distracting, although sometimes they show colours that I'm not a big fan of, and also, it might ruin some of the pro tips. So I'm going to show you a little later on.
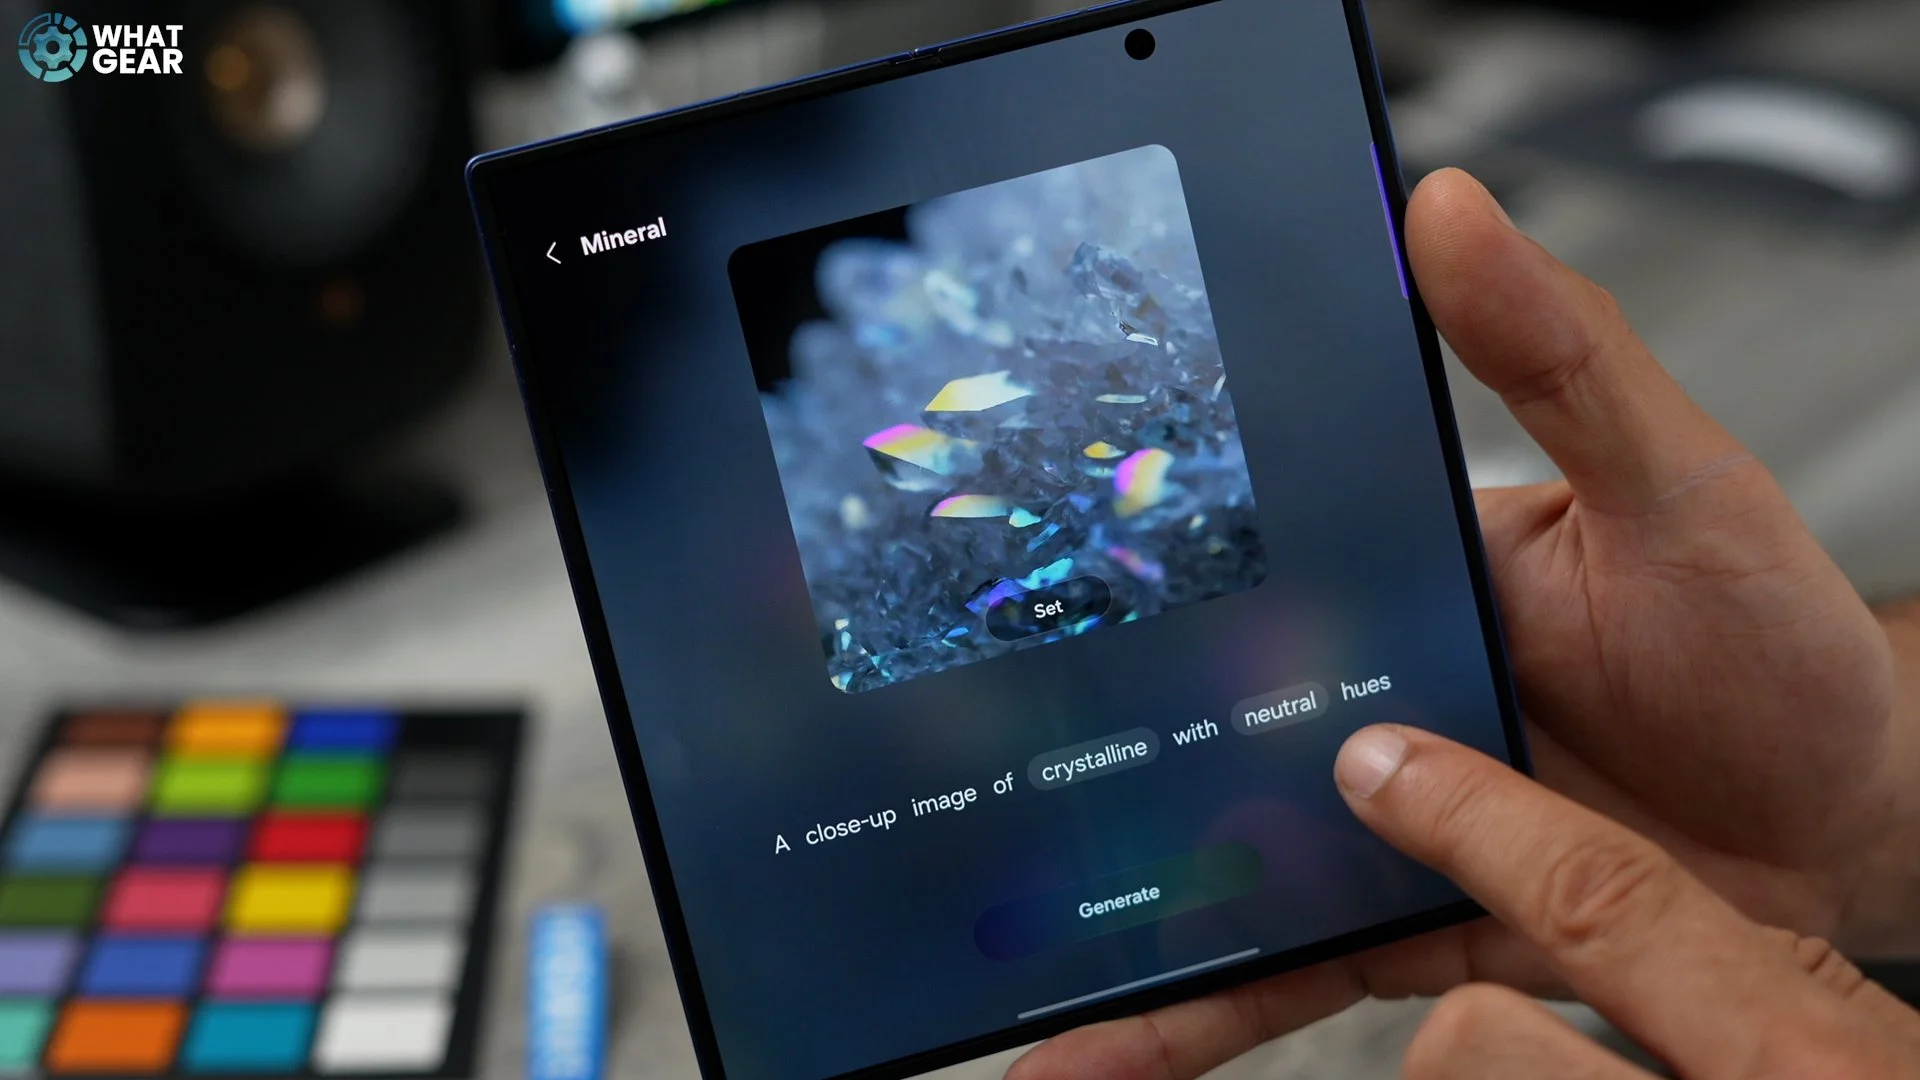
There is one more thing I want to show you. And it says to create with AI. This tool can allow you to create something very unique. So what you can do is flick through the styles up here at the top. If any of these catch your eye and you like them, then choose that category. Once you've chosen that category, you can then modify the words that are highlighted and select from any of these. I want to go to Moonstone. And then instead of neutral AI, I want to go vibrant and generate. This is essentially an AI image generation tool which can create some really nice wallpapers for you guys.
Now, there is another option here when it comes to wallpapers. And when you use this option, there are some more settings that you can play with to modify things. So if you pinch to the home screen, go to Wallpaper style - Go to change wallpaper again. This time, you can hit the little arrow up to go into the gallery. Or if you've literally just downloaded a wallpaper, you can go to downloads. One of the most popular wallpapers on the channel is this one, the Master Yoda.
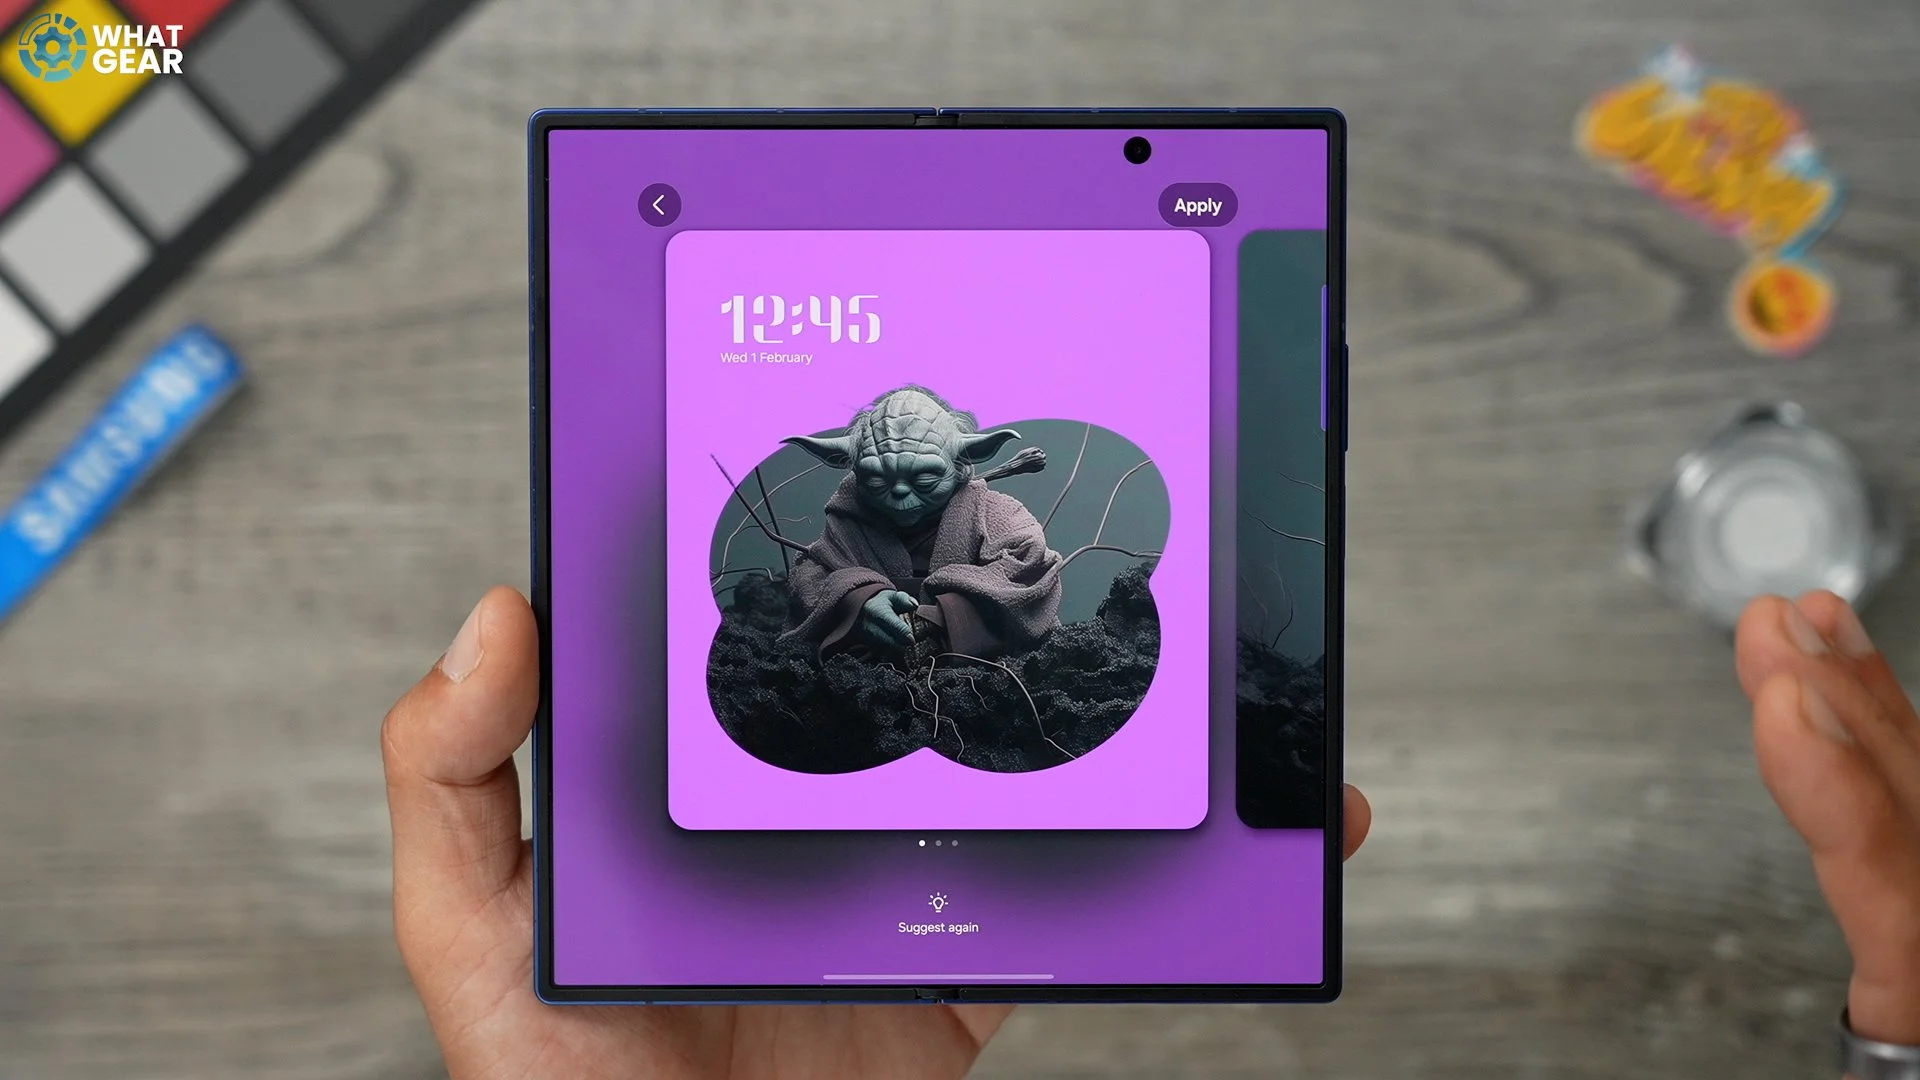
At the bottom, you have the suggest button. This will use AI to try and adjust the image for you and create something very unique. But if you want to have slightly more manual control over how to modify this custom wallpaper, you can go to the frame option here and choose different frames. And you can see how it kind of pops out. The subject of the image from the frame, and it's a nice effect. Once you have this set up how you like, you can also adjust the colours of the background.

You can even erase the background if you want to. Now you can see that it looks pretty good for the lock screen. But on the home screen, it doesn't look quite as good because there's loads of stuff on top of it. So, what we can do here is add an effect. If you go to this, you can swipe across and blur the background a bit. There are also other colour options here that can modify that wallpaper. I really like this ink drawing effect as well. If you're wondering what I do personally, I prefer to have the blur effect on, so all of the sharp edges and details in the background do not distract me from what's on the home screens.
Pick Your Palette
This next customisation tip works hand-in-hand with the wallpaper and the colour scheme of your current wallpaper. Pinch to home screen - Go to Wallpaper style. This section right here that we're going to look at. The colour palette. So this feature will be switched off by default. Your current settings and navigation menus will look like this at the top. If you enable the colour palette, this takes samples from your wallpaper and then creates these complementary colour schemes at the bottom. So what you can do here is have a look through these different colour palettes and see which ones look nicest on your settings menus.

Now, let's say you don't like any of these colour palette suggestions. What you can do is choose a solid colour. This will affect all of your UI text and things like that. Well, most of it, some of it will remain white. But here's something I like quite a bit. If you swipe across these colours, you do get some two-tone options. So instead of just one static colour, you can have two. Once you're happy with that, you can hit apply. So now that you've done that, those colours will appear in various places on the UI right here. For example, we've got the purple up here and the blue over here.
Colour Folders
So a lot of people already know how to create folders. You simply just drag apps on top of other apps. And that will create a generic folder. Now you can take this one step further by holding your finger down on that folder and then enlarging it, making it a folder that can display eight apps. Those apps are clickable without opening the folder as well. But here's where it gets even more interesting. If you tap on that folder, you'll see a little dot. You tap that dot, and this opens up some colour options. There are some preset ones based on the palette that you just set up.

If you want to get creative with this, you can open up the colour swatches right here and choose a very specific colour that you want. You can even use the pipette tool here to grab some colours, for example, this pinky red colour on the Galaxy Store app. And now that folder is that exact colour, and it's matched it so well that you can barely see the circle around the app. Now here's the next step to this. If you tap on that folder again, back into the colours, back into the colour swatches, you can adjust the transparency. Now we have a slightly transparent opaque folder.
Colour Science Tip
Here's the first pro customisation tip. If you want to get real scientific with the colours that you're using so that they work perfectly with your wallpaper, then check this out. Go to the Chrome app or your Samsung Internet app, search for Adobe Colour. Go to create Colour Themes, and here we see a kind of harmony. If you use that little drop-down there, you go to complementary.


What you can do here is drag this little wheel to the colour of your background. In my case, it's kind of a greenish blue. This thing shows you all of the complementary colours that will contrast really nicely with your wallpaper. And then if you scroll down, you can even see the hex codes right here. If you want to copy any of those hex codes, you just tap on them, and it copies to your clipboard. Now, when you're customising for the colours, you can go to the swatches and then paste in the hex code down here for the exact colour.
Mini Apps
This one piggybacks off the last one. And as you can see, we have the standard size apps. You can customise the size of those apps by going to the settings and changing the size. It is quite limited how much you can adjust those. Now that we're speaking about it, there are two things that I would want to see from one UI in the future. I'd want to see more folder shape options, and also, I'd want to see more icon shape options.

But hey, we've got to work with what we've got right now. So here's a little hack to make apps even smaller. So let's take this folder, for example, my audio folder, if I open this up at the top here, where you see the little colour button. Go to the colour swatches again. And in here, where it says 100%, we're going to take this slider and dial it all the way down to zero. So this is fully transparent. Now we have miniature apps. And these are lunchable without having to open the folder first.
A Google Exclusive
So this next customisation trick is only available on Samsung phones and Pixel phones right now, as far as I know. And I am talking about the ability to customise the Google search bar. So if you hold your finger down on this, go to the settings on this widget. And here we have a bunch of really cool options. You can play around with the presets. So that's pretty much the standard one the light mode one, the dark mode one. And then you've got the device colour scheme.


So remember how I said the palette and the colour scheme are important and affect other things. So this is one of the things that it affects. But if you want to get creative with this, just go to custom right here. You can dial in the hue just by sliding this around. I did like that dark purplish colour. You can adjust the saturation of the hue. If you scroll down, you can adjust the transparency. And then if you swipe down a little bit more, there are a couple more options. So if you go to shortcuts, you can add things like the song search or translate. So definitely take a look at these. And if you are going on holiday, maybe the translate with camera could be a good option.
Unique Screens
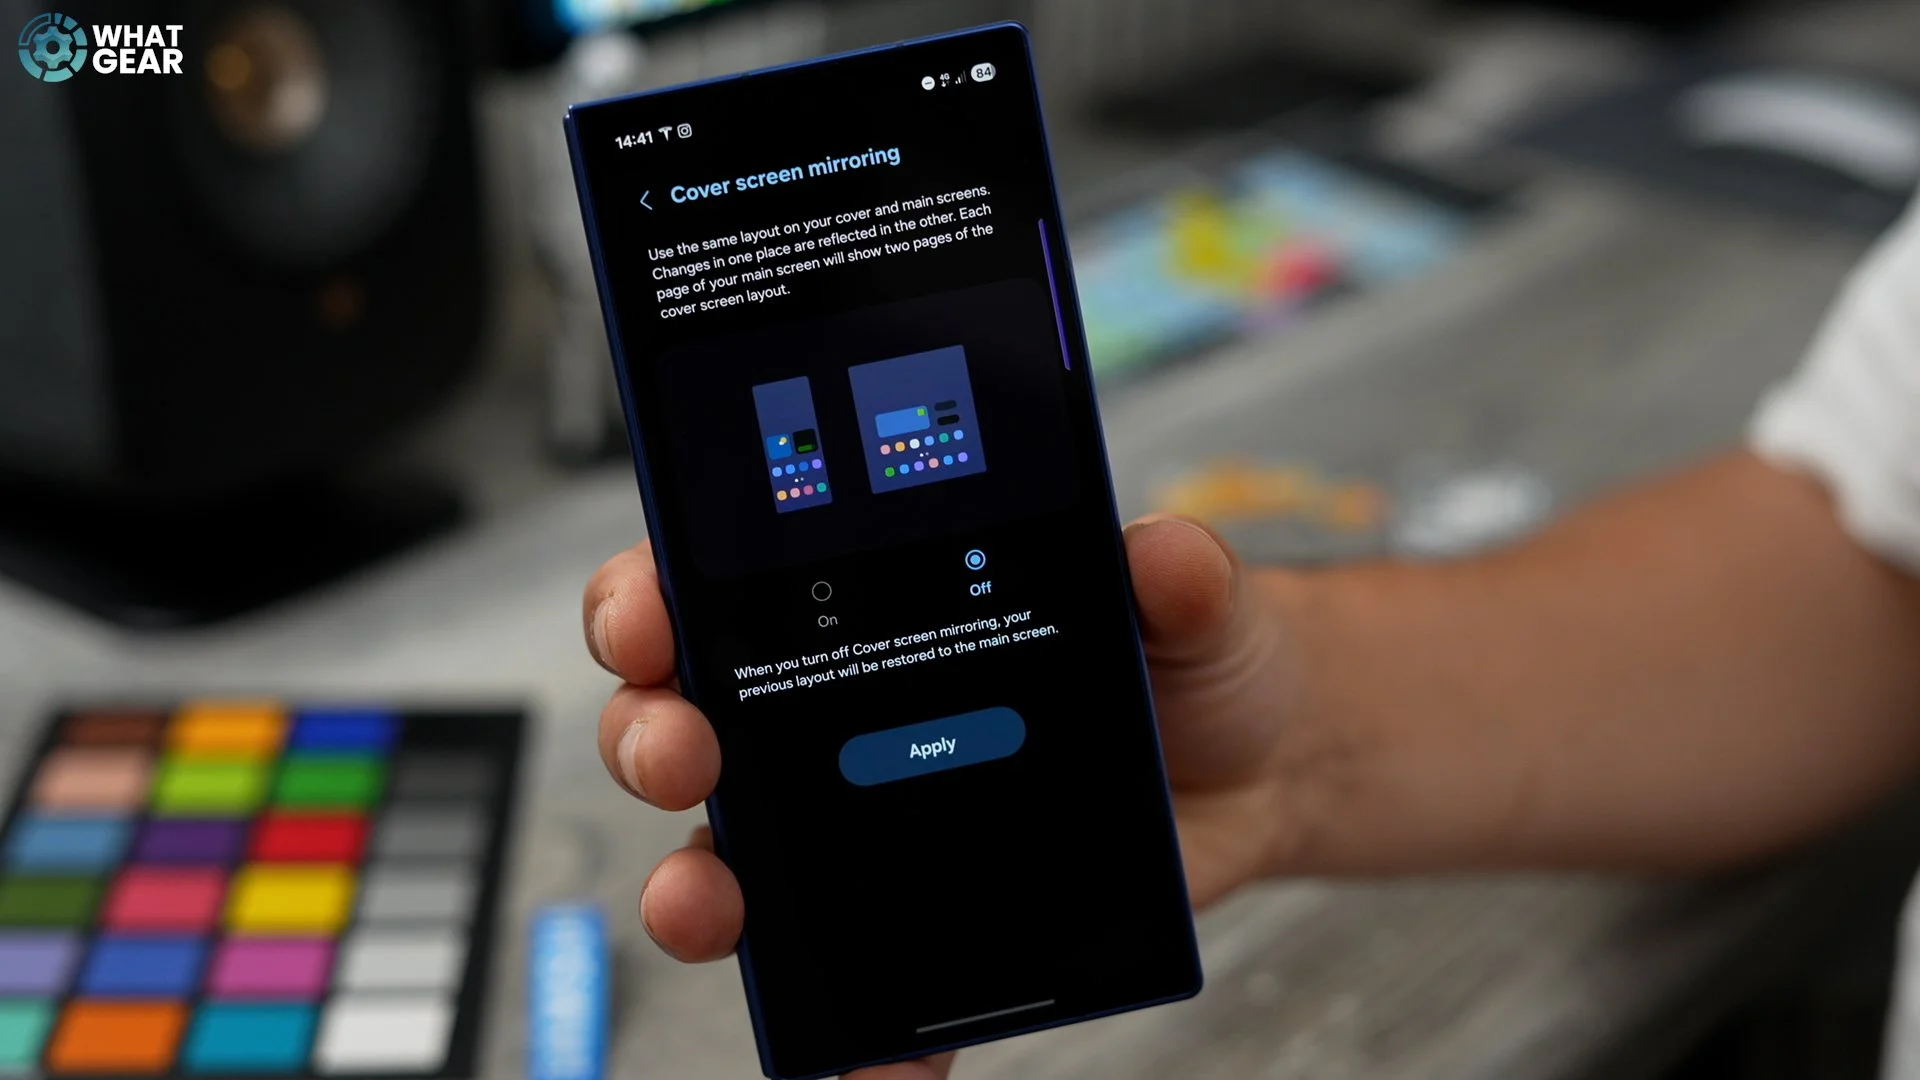
This next customisation tip will take you a little bit of time, but it will be well worth it if you pinch the home screen, go to settings here. The cover screen mirroring setting will be on by default. What this means is that when you open your phone, the same setup that you have on your cover screen will be reflected on the inside. However, I do believe you should optimise the inner display to make use of the space and prioritise the apps that work better on the end of the display. Just to explain my basic setups here on both screens. My home screen is all of my everyday apps and important information that I need to access quickly without having to look for it. The second page is my productivity page, so I have my calendar with my money apps, all my emails, note-taking apps and things like that. And then the third page is full of apps that can rob me of my time or my money. As you know, those are two things you don't want to waste. So I make them harder to access by having them the furthest away.
On the big screen, I do have a similar approach. So day-to-day apps. Plus, I've added my music apps, which I use quite a lot, and I use them pretty much every day. And I have a bunch of quick widgets here to access tools and things, and important information. Second page again, productivity page. And on that page again, time time-wasting and money-wasting page. And you'll notice I have these giant folders here, different colours. They're larger than what would fit side by side on the cover screen. The other advantage to this is that you can actually add more apps across the bottom manually. If you do go with the cover screen mirroring on, you don't get as much freedom to do that. So I do recommend you spend a little bit of time setting up two different setups for your home screen and your lock screen separately.
Custom Edge Panels
So here are some settings and options that you need to look at when it comes to the edge panel. The edge panel is the little bar down the side here that you can swipe out. If you hit the little settings icon, you can jump into all of the edge panels that are available to the phone. You'll see right now I've got two. I've got the apps. And then I've also got the tools. You can add your favourite contacts to the edge panel. You can add tasks where the clipboard, which could be very, very useful, and reminders.
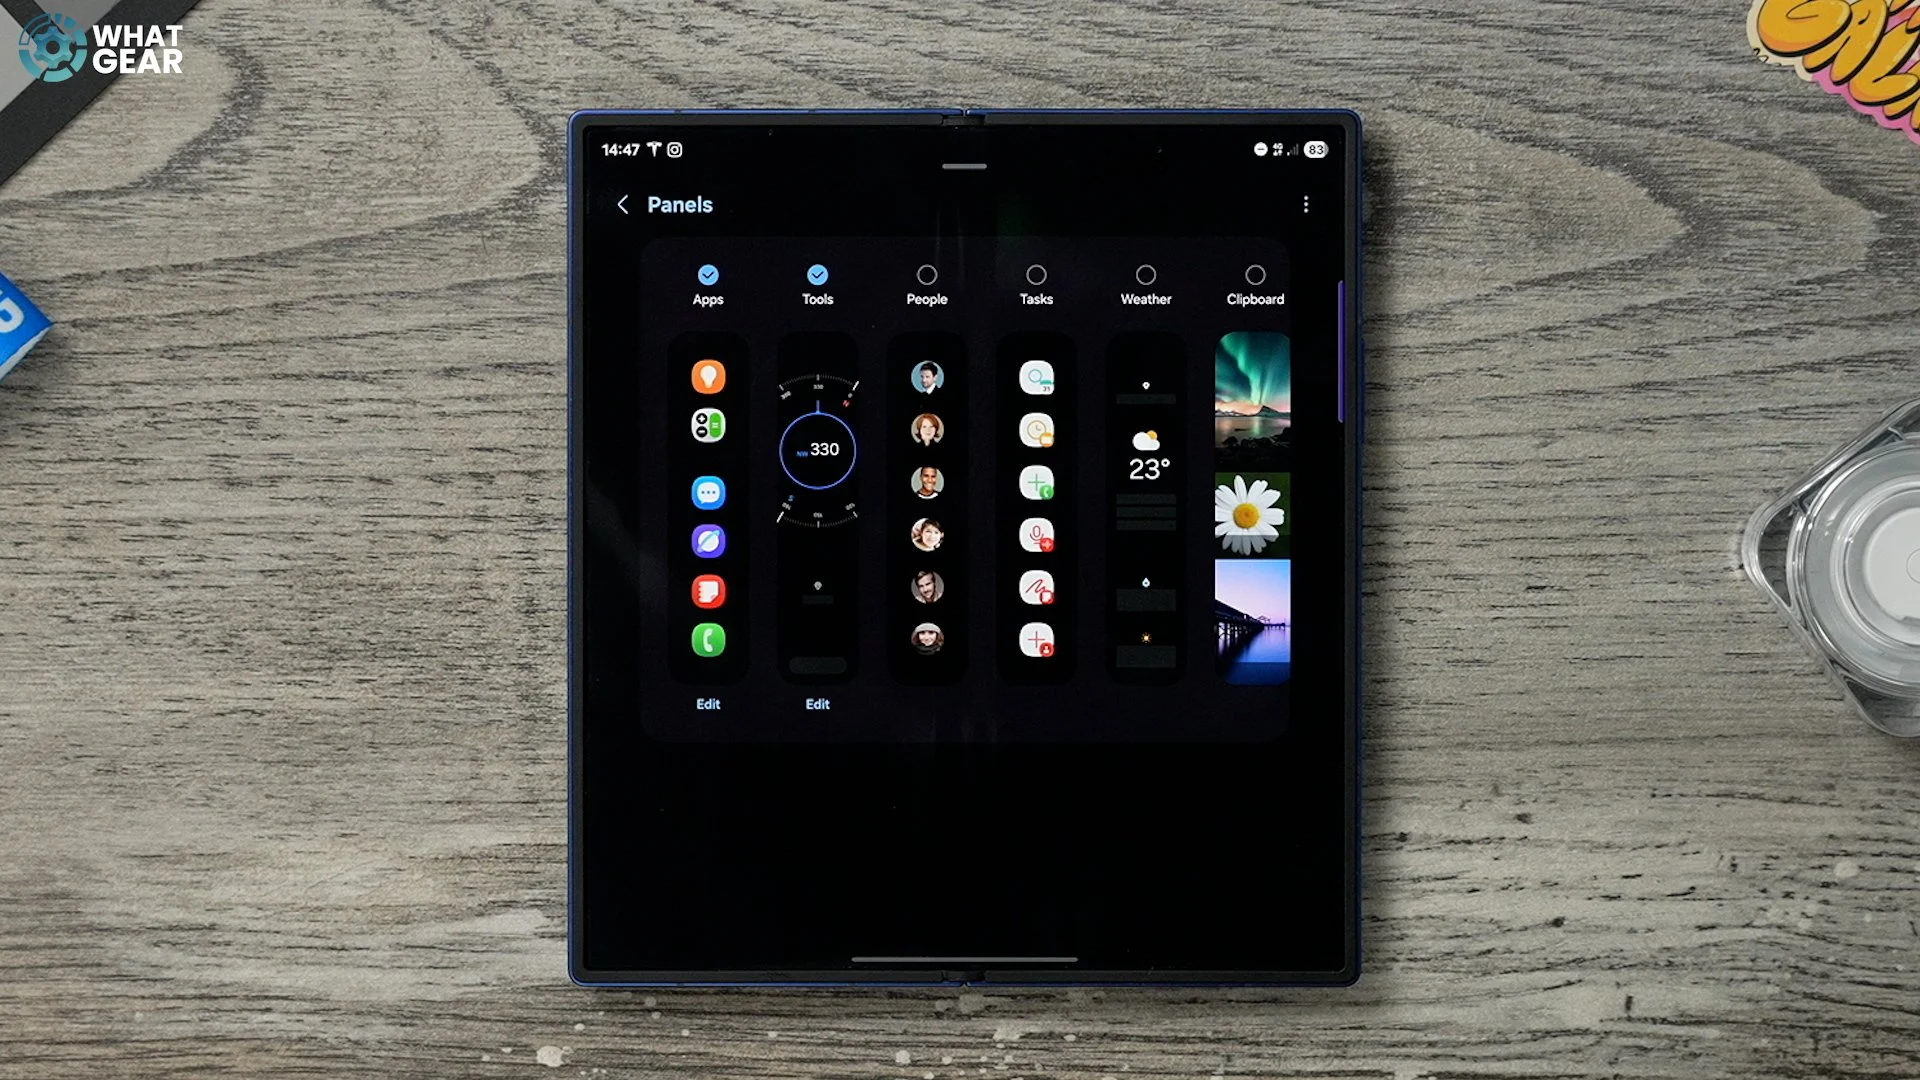
Now, the reason I've added tools is this. When you swipe out the edge panel and swipe out again. You can get to your tools. Now, if you hit the three dots in the top right corner. Here are some really useful tools that most people don't know about. So you have a tally counter. If you're sort of tracking every cycle of someone running around a track or something like that. You've also got a torch here, so you can activate that and actually adjust the brightness and dim the brightness of the torch. On the torch tool, there is an SOS button down here. If you hit that, that actually sends a signal using Morse code.
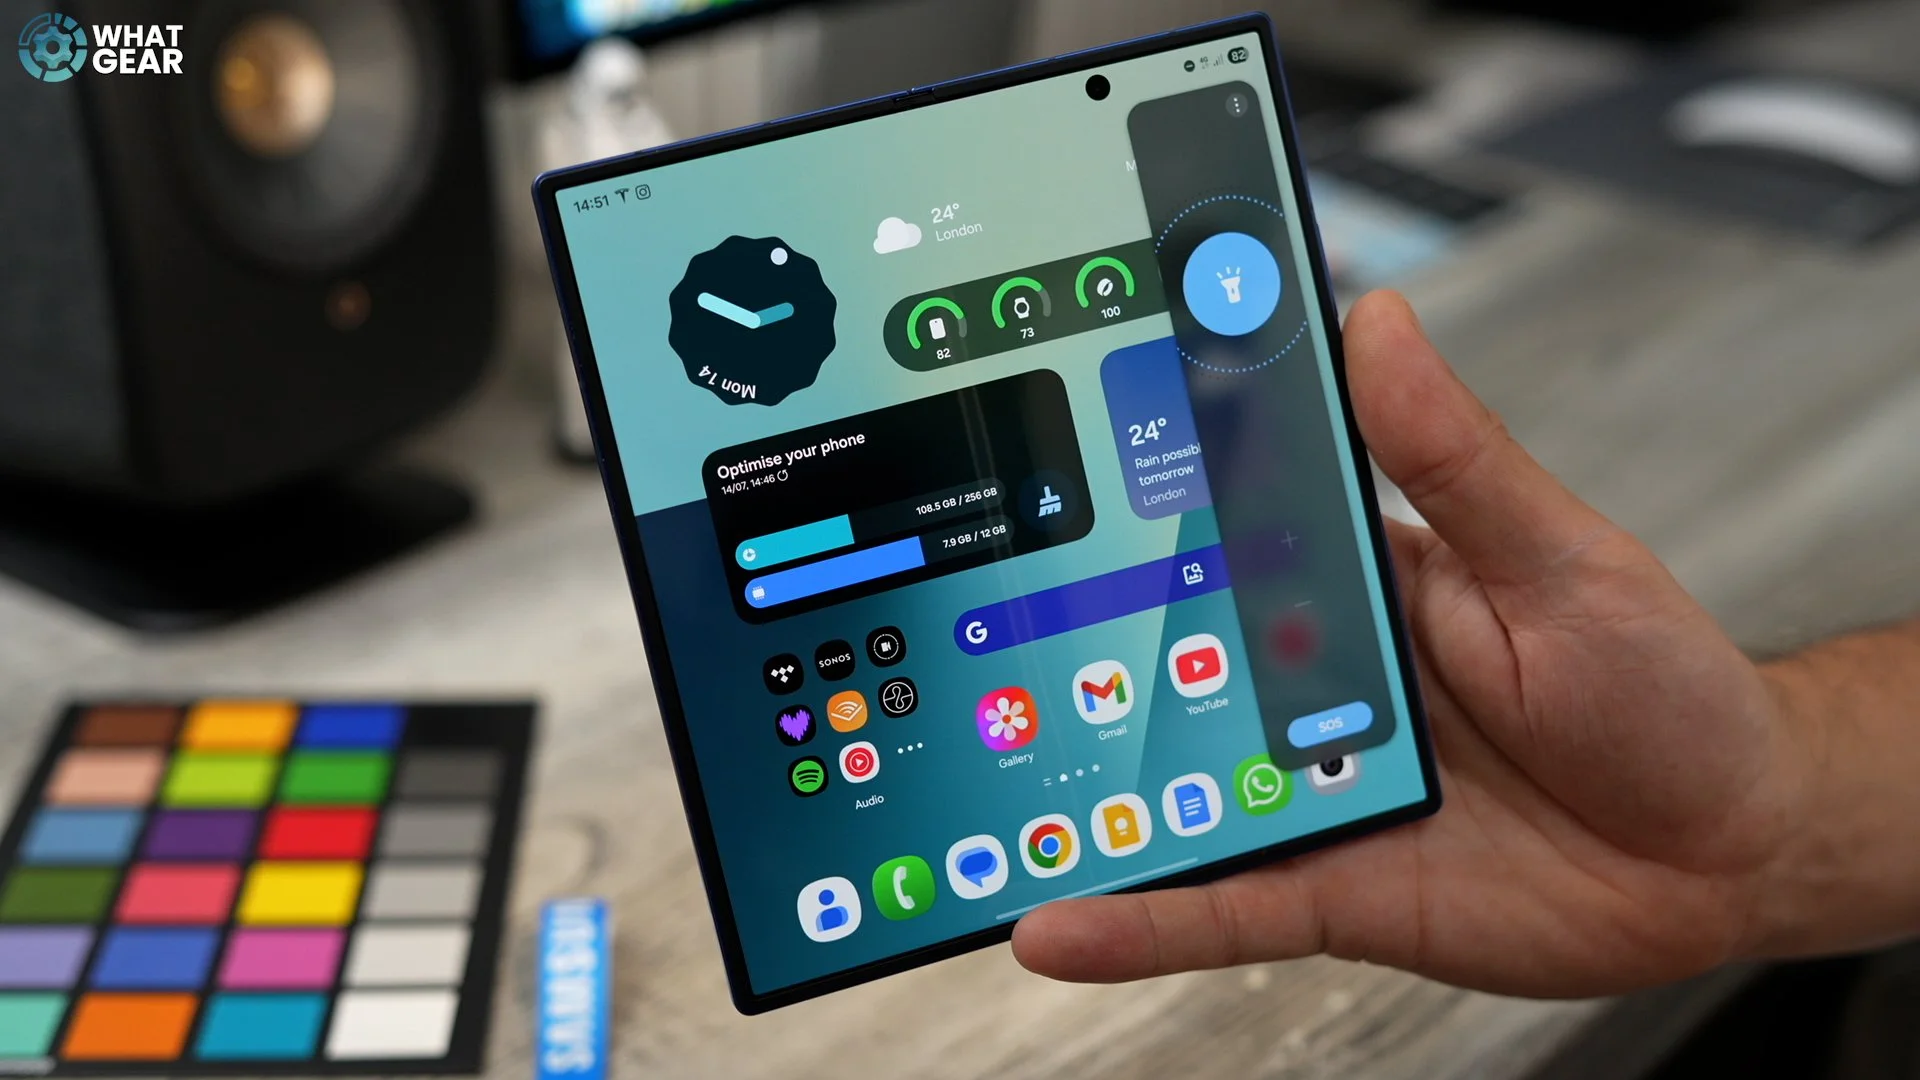
You've also got a surface level. If you want to check whether something is level. You can place your phone on it with the flat side. And then use your phone as a spirit level. And the last useful tool here is the ruler. So you can use this to measure things, which could prove to be useful at some point in time. I don't think I've ever seen this on any other phone. You can even switch this between inches and centimetres if you need to.
Custom handle
Now let's make using the edge panels even easier. So if you jump into your settings over here, go to display on the left side and then on the right side, if you scroll down until you see edge panels, right there should be switched on. Tap on that. Here are the settings for the edge panels. You can also access the tools that I just showed you from here as well. What we're going to do is tap here, which is handle. And here we have a bunch of customisation options for the handle bar. I've got it purple right now. So you can choose the colour of the handlebar. You can also lock the position if you want. You can also change the position if you want.

I do recommend keeping it slightly higher up on the screen because you don't want to access it by accident when you swipe between pages. You can adjust the transparency so you can actually make it almost invisible if you want to. You can change the height of the handlebar as well, and even the thickness. I personally keep this on thin so it's less distracting, and I do keep it quite transparent as well, so it's not catching my eye all the time. But I still want to see that purple colour a little bit. The other thing that you can do is jump into the colour swatches, remember how I showed you the Adobe colour complementary picker thing? You could paste your hex codes in here if you wanted to scientifically choose a colour to match the wallpaper. And you also got the colour picker tool down here, so you can grab colours from somewhere on the screen. We could add that now that matches the user interface, but it does sort of blend a bit too much with the background, in my opinion.
Hidden Edge Setting
So there is one more setting for the edge panels, which a lot of people don't know about. If you swipe it out, hit the pen at the bottom. This opens up the apps that you can add to the edge panel. But if the three dots in the top right corner, you can activate the show recent apps. So this I've found to be pretty handy. Particularly when it comes to creating split-screen app pairs or trios quickly.

Perfect Pairing
I'm just gonna show you very quickly how to create an app pair. There are various ways to do it, but here's one useful app pair that I think you might want to use a lot if you're doing research and things. So if you open up your Samsung Internet, let's say you're researching quantum computing and you want to take notes, well, what you can do is bring out your edge panel, drag the Samsung Notes app onto the edge and now you have this app pair.
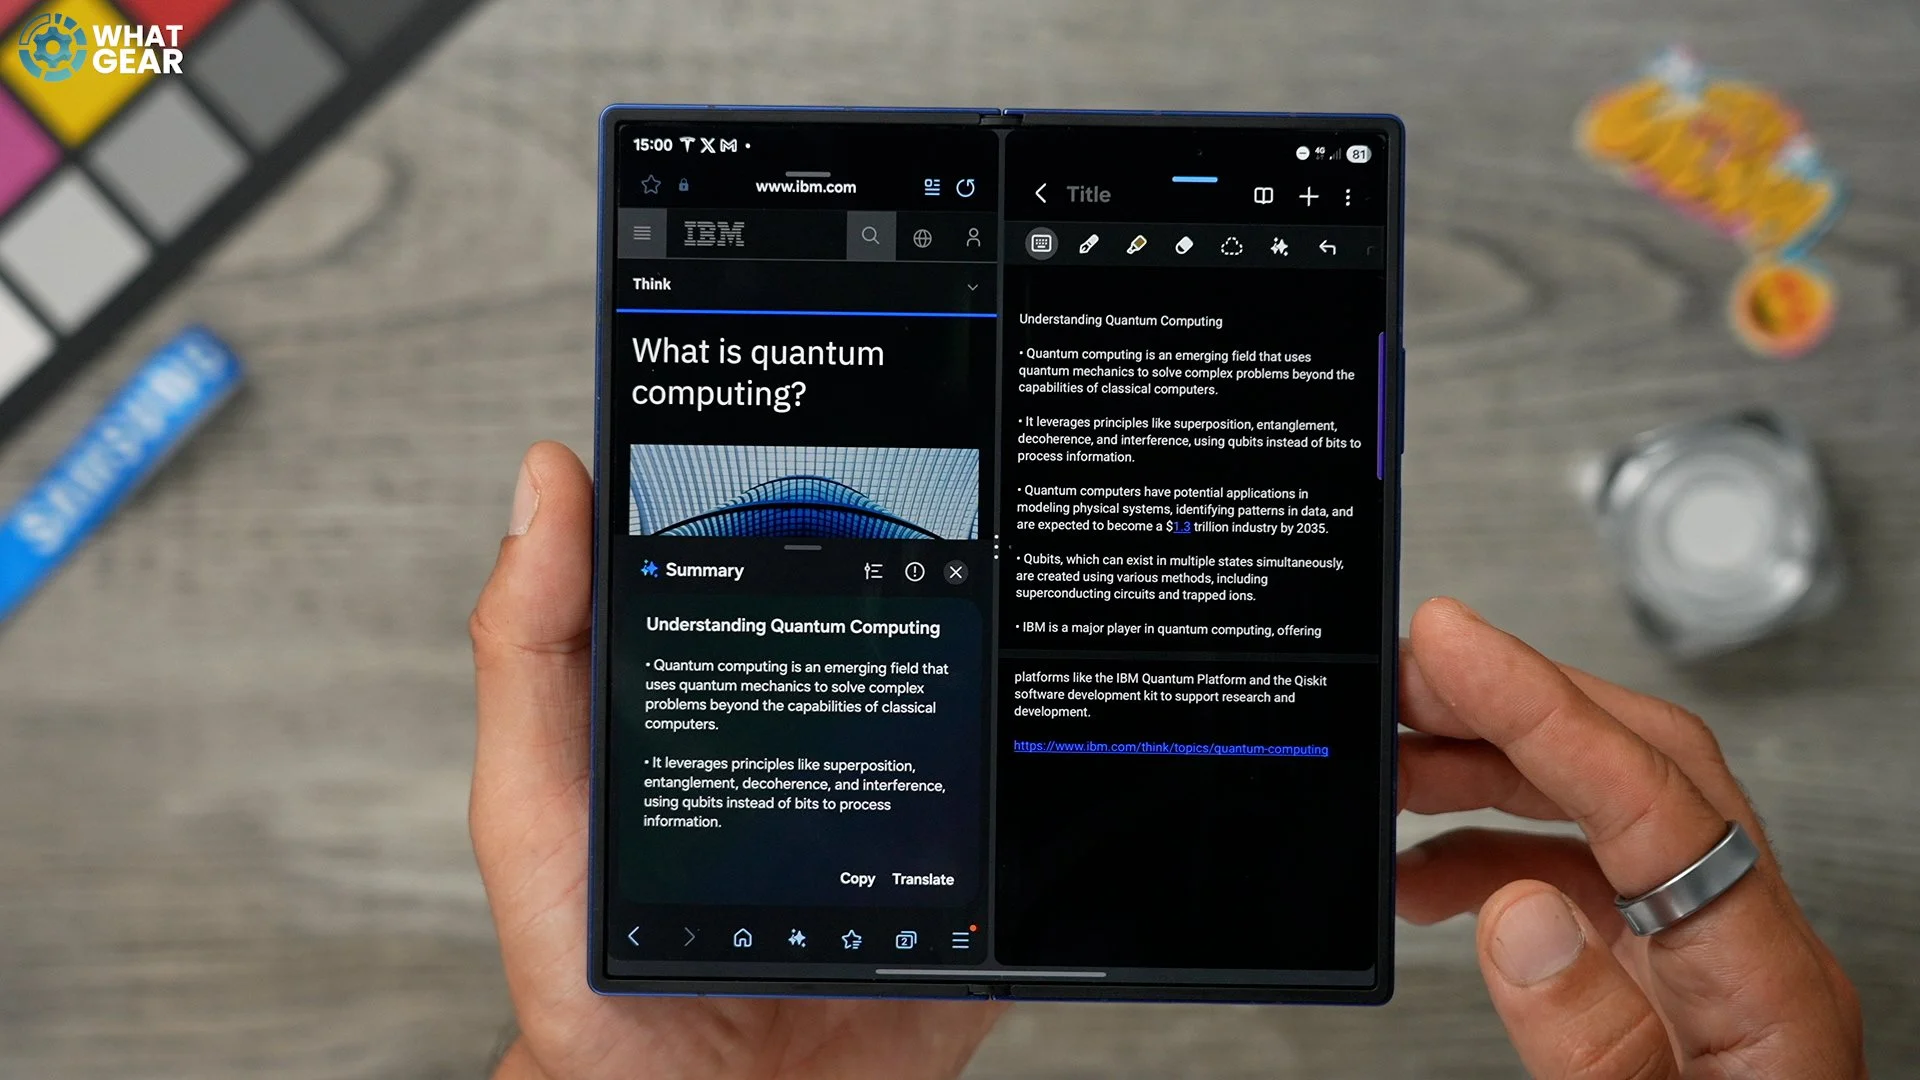
Both of these apps have AI tools within them, so it could be really useful to save this app pair. To do that, just hit the three dots in the middle and then hit this little star and add it to the edge panel. Now, what I want to show you here is how Samsung has improved this a little bit. So you can move that page off to the side and just tap it to bring it back and tap that one to bring it back, so you can switch back and forth between the two really quickly instead of having them split down the middle. That just makes this side a bit easier to read. Then, when you want to take some notes, you can just tap on the edge here to get back to your notepad. So that's a little bonus tip for you guys and a nice little app pair to set up. Maybe you want to save it to the edge panel, maybe you want to save it to the taskbar. But I do think that is probably one of the most useful use cases for an app pair.
Custom Notifications
Here's a nice little customisation trick that a lot of people don't know about. If you jump into your settings, scroll down on the left-hand side to where you see notifications. On the right side, go to the notification pop-up style. Here you can choose whether you just want a brief pop-up or an expanded, detailed pop-up. And now, what you can do here is add a lighting effect. There are various styles to choose from here. And one of the cool things about this is you can customise these even further. I do like the spotlight, it’s not too over the top, but just to show you guys what you can do, I'm going to use this glitter one. If you go to advanced, you can change the duration of how long that is. You can also change the width of how much shows around the edges, and even the transparency of that.

If you use some of the other options, which are static colours, you do get a few different options. For example, if you go with the heart option, you can choose different colours manually. If you want, you can use your colour swatches. Like I said before, with that colour palette that you've just found in Adobe Colour, you can paste that hex code in right here. And again, if you jump into advanced, you can make various adjustments to the transparency, width, and duration of the animation. My favourite effect is the spotlight. It's not too over the top, and you do get the option to adjust the colours of that as well. But there is an even more advanced step to this, which makes these animations even more useful.
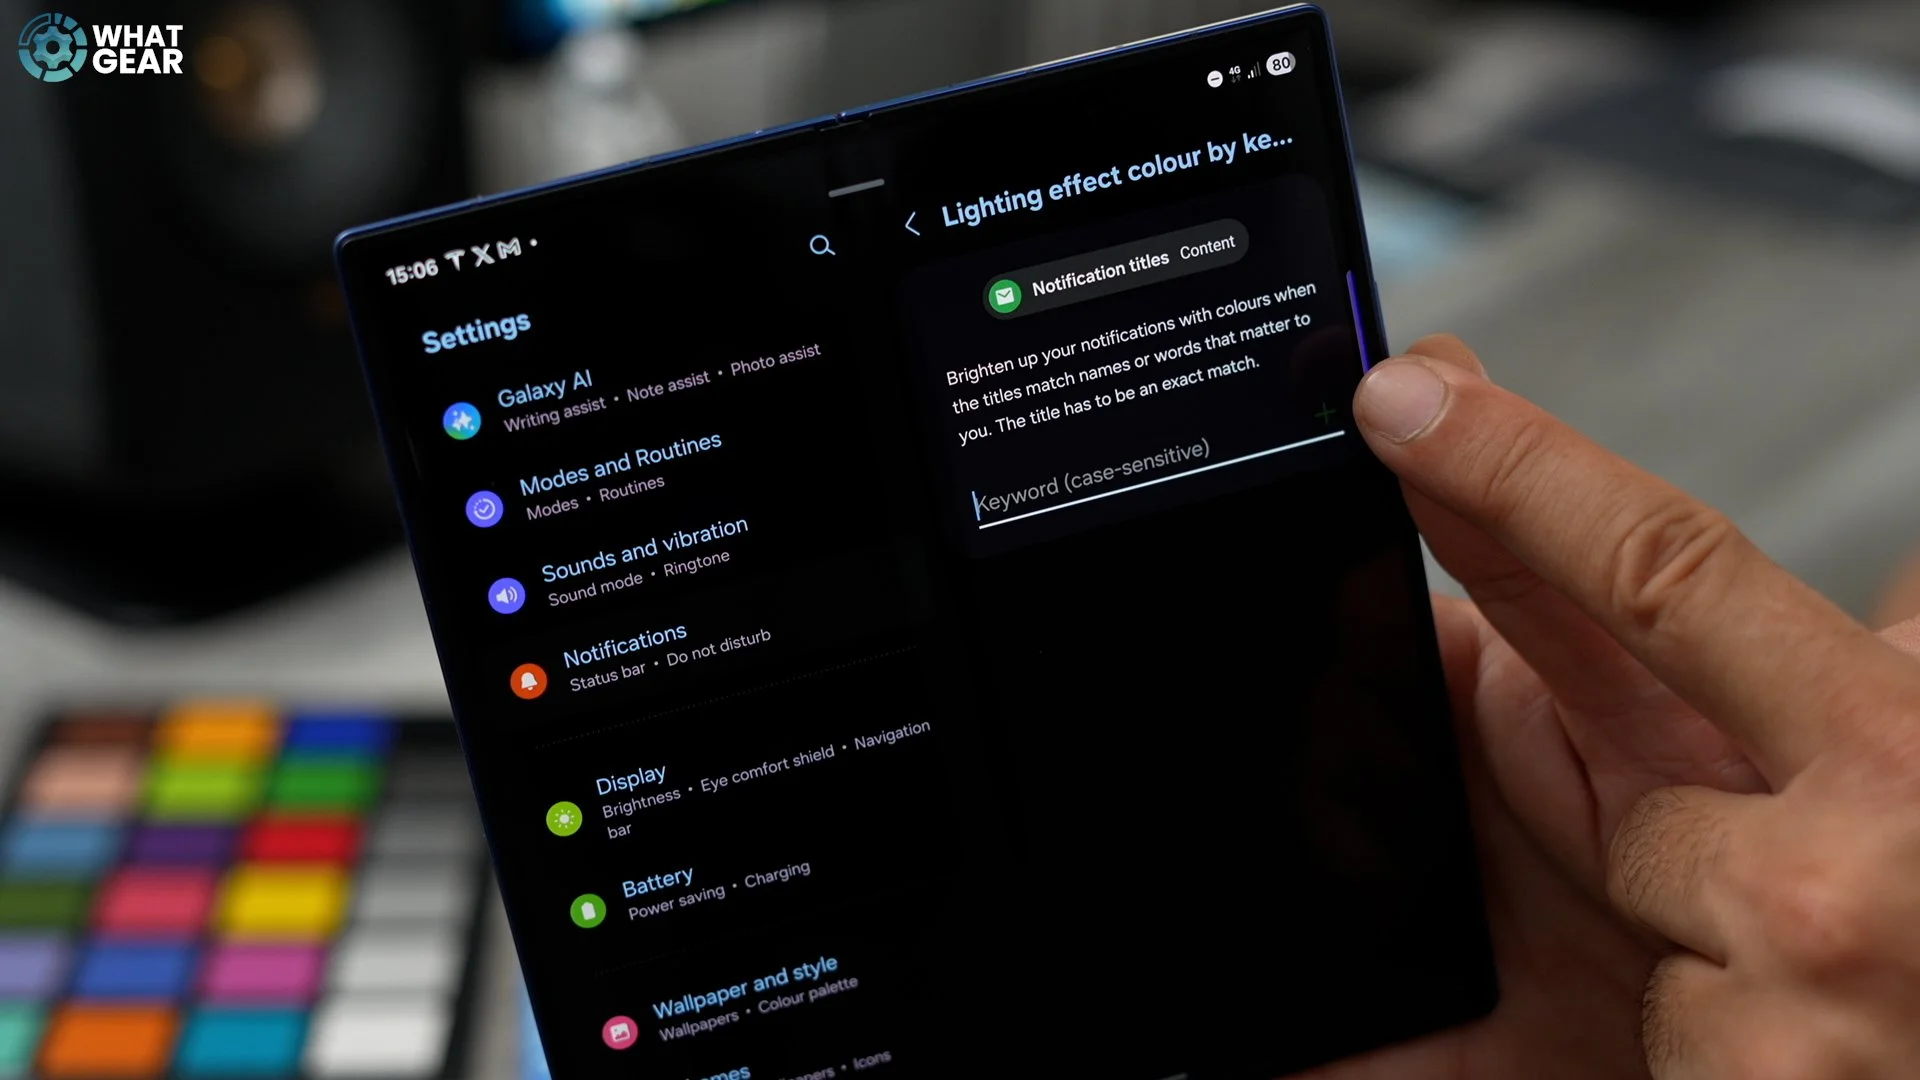
If you go to lighting effect by keyword, and tap on the text field right here where it says keyword. What you can do is type in people's names, exactly how they appear in your phonebook, and then assign a colour to them. Hit that a plus. Here you can access the colour swatches. And again, those hex codes which you discovered earlier could come in handy here because you can just paste them in or type them in to get that perfect colour match.
Taskbar
Here is a setting that some people might like and some might not. I'm going to show you what it is, and you can decide for yourself. Jump into the settings - Scroll down to display - Scroll down on the right-hand side. And here you'll see taskbar, and it will be switched on by default. Tap on that.
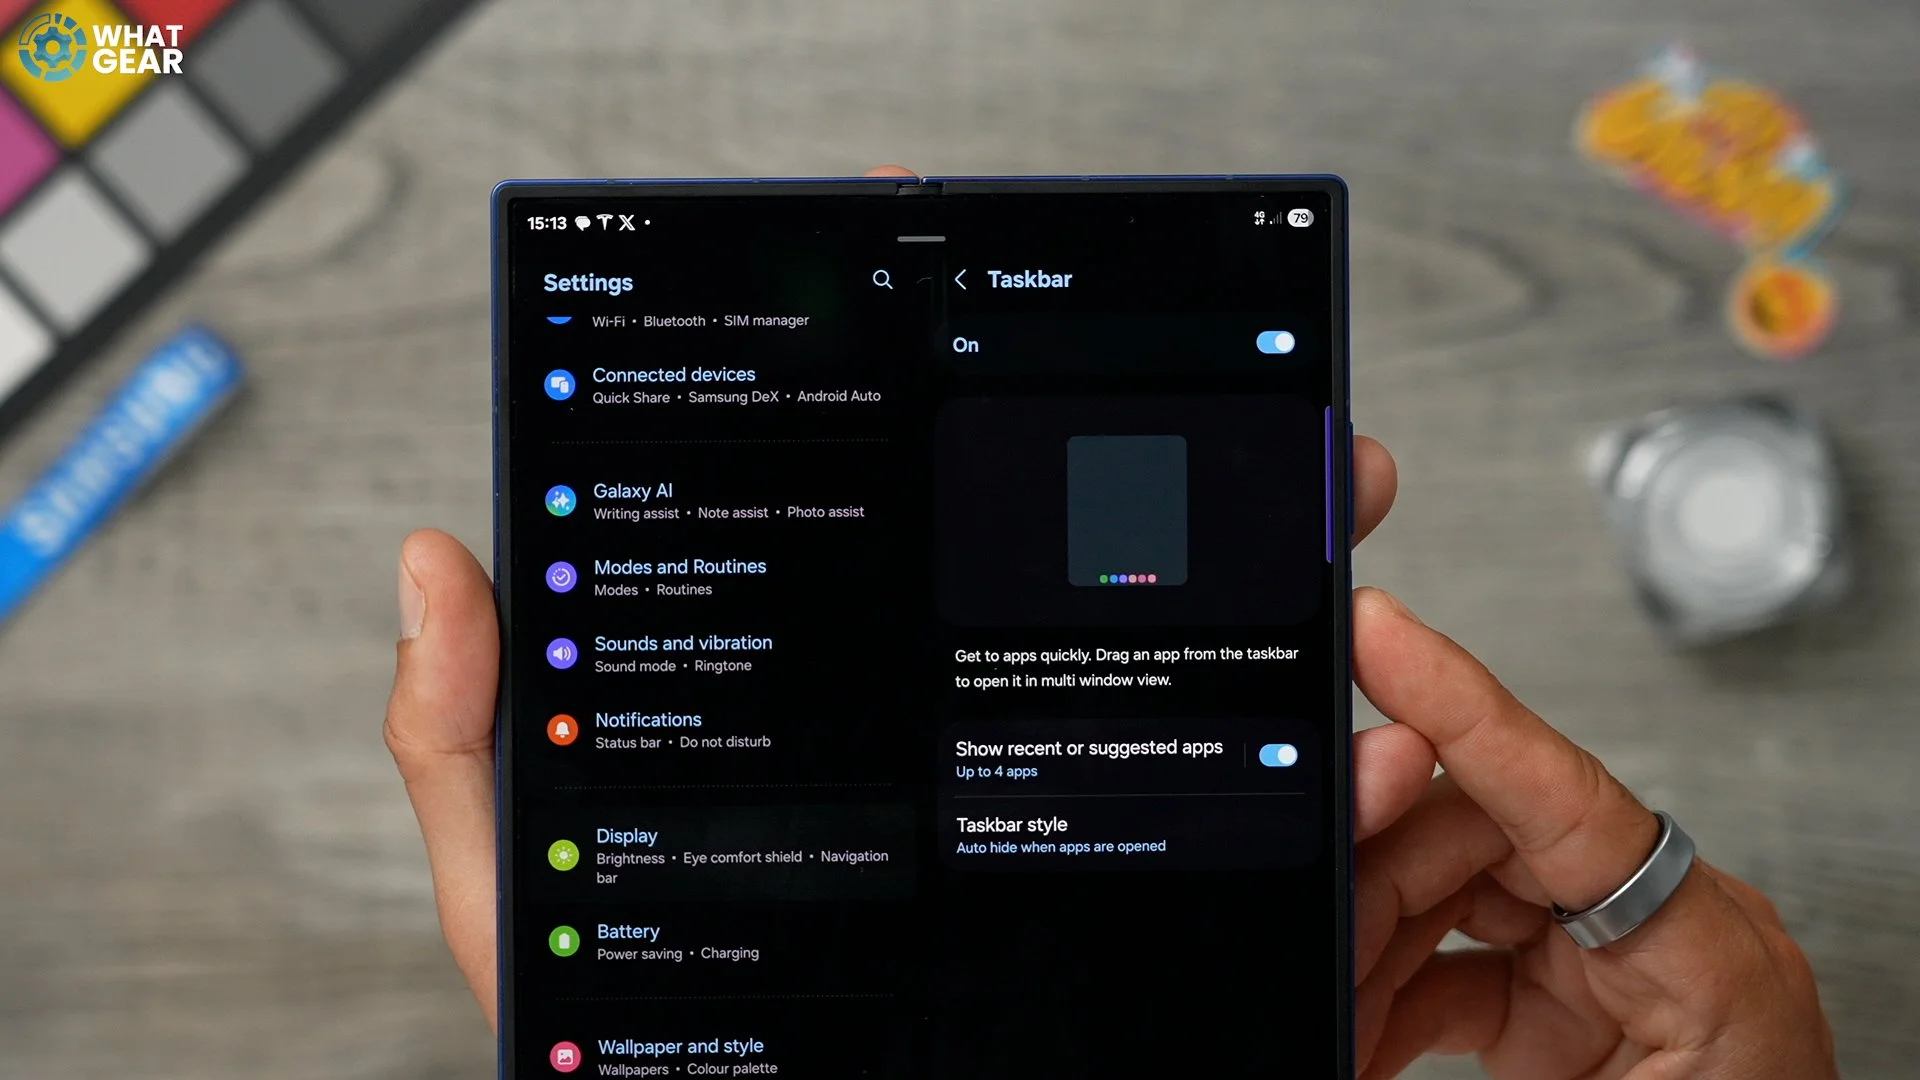
If you don't want to have to swipe up every time to access the taskbar when you're inside another app, you can tap here and switch it on permanently. Now, whenever you open any app, the taskbar will be available at the bottom. This does mean you can quickly create app pairs at any time. This way, maybe this is even easier than using the edge panel.
Now Bar Options
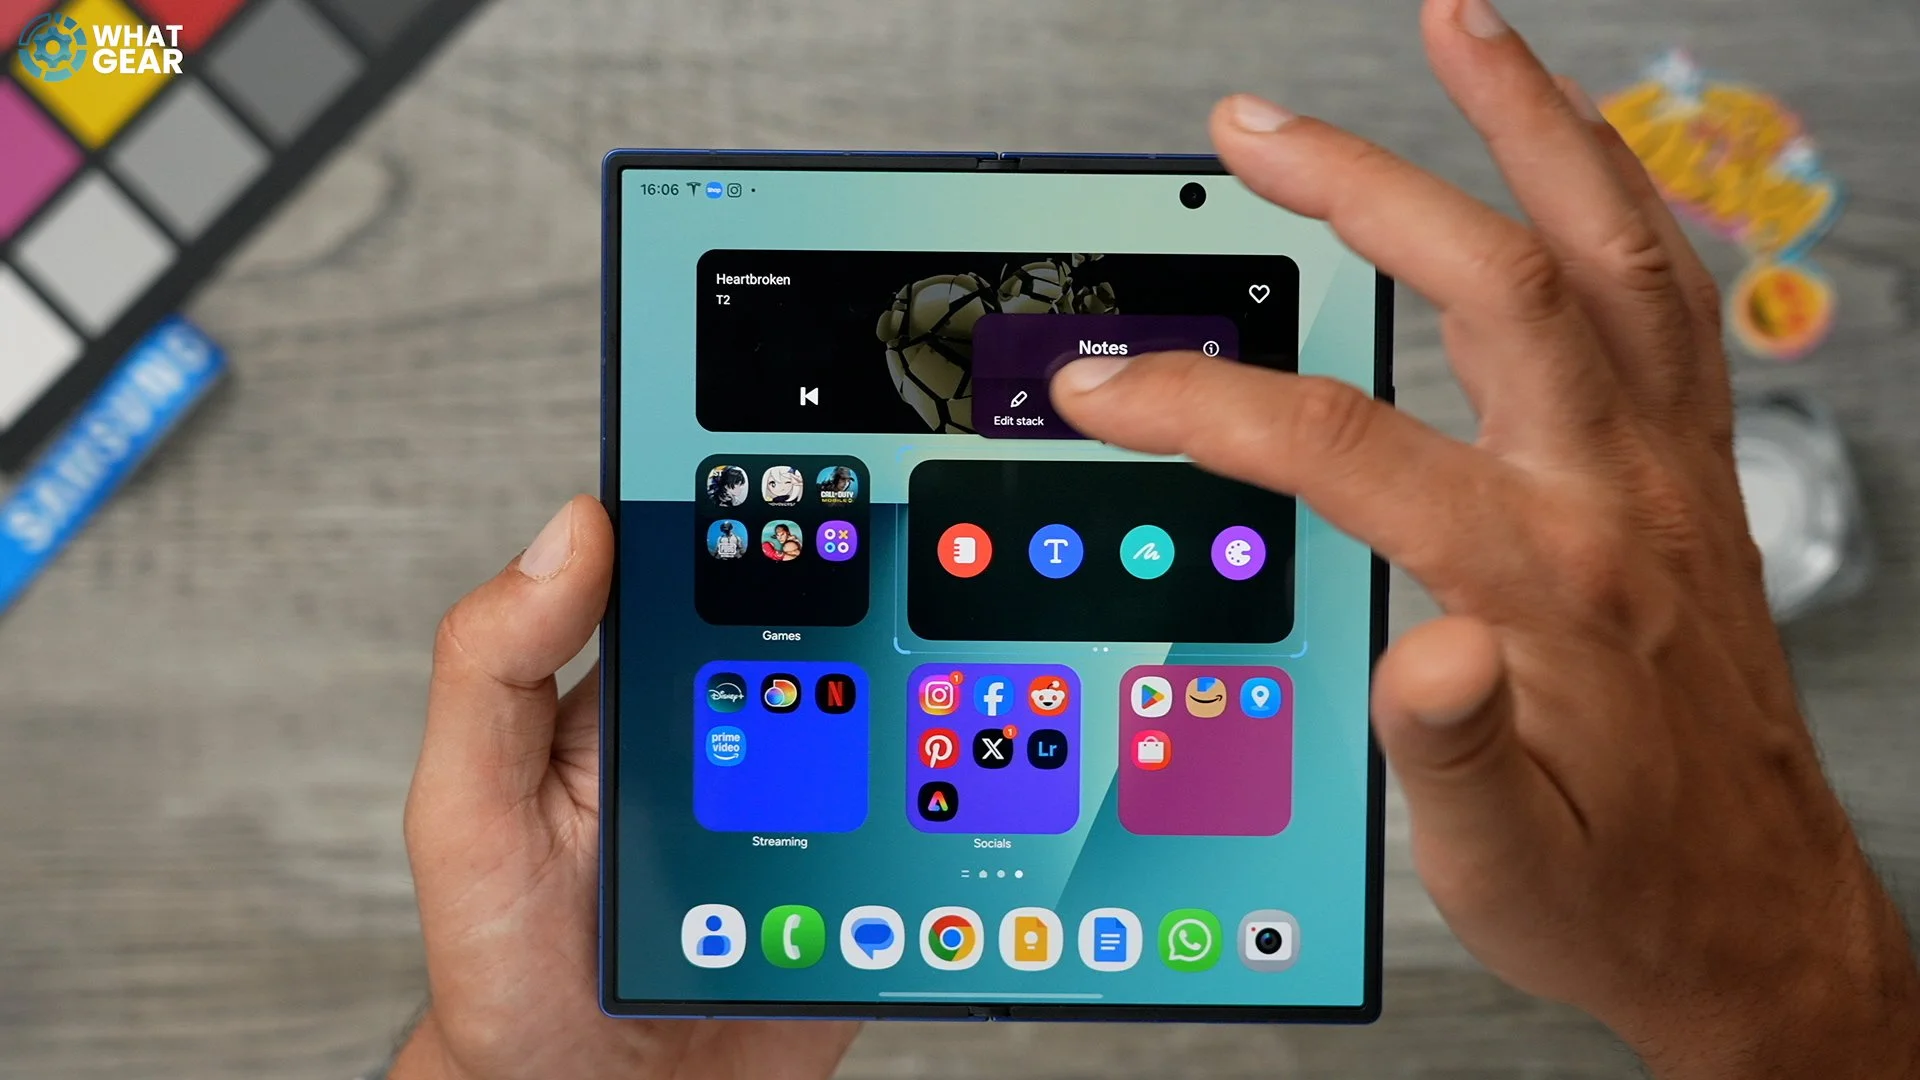
Something that is fairly new to One UI is now bar. So that's this little bar that pops up at the top. Various things can appear here, and it is even accessible on the lock screen. And you can swipe between them when there's more than one. But what some people might not know is that there are some settings that you might want to customise to make this a little bit more useful for yourself. So if you don't already have your now briefing widget on your home screen, you can add it very easily just by pinching - Going to widgets here, going to now brief right here and then dragging it onto the screen. You've also got two different sizes to choose from. What I've done is add it to a widget stack. So, if you hold your finger down on a widget that you already have, go to Edit Stack and then if you go all the way to the end, you can hit the plus and then add it this way.


Now, once you've opened this up, there are a couple of settings that you want to look at. Scroll down on the now brief, allow your Google Maps. At the top of the now brief, you can also go to settings to allow it to include photos and moments from your gallery and even use it to find your parking spot. So if you lose your car in a car park or something, you can use now bar to get back to it. And you can even turn on YouTube to get recommendations from your subscriptions. So, spend some time setting up your. Now breathe with the stuff that is most useful to you. Get rid of the stuff that isn't useful at all.
New Routines
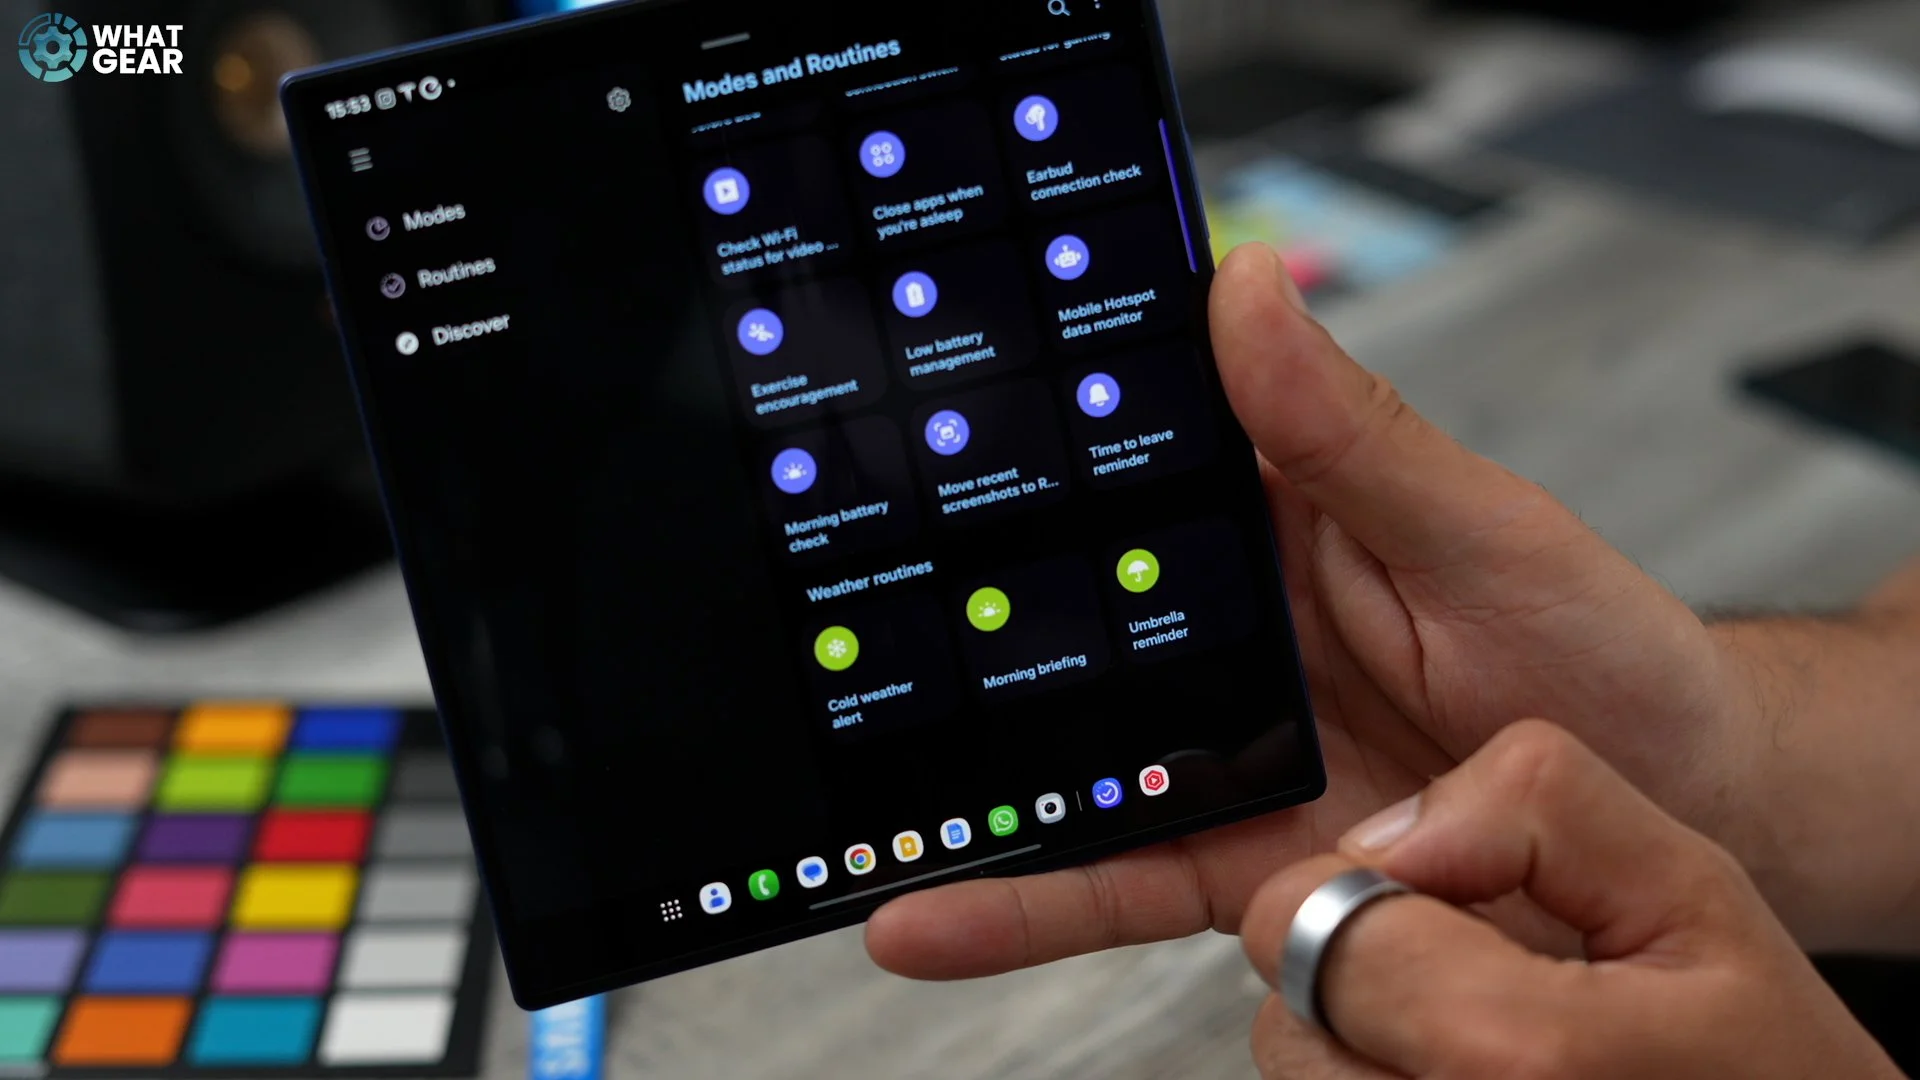
If you do this, you can get a little bit of an advanced heads-up on how the day is going to be. What you need to do is swipe up from the bottom. Type in modes and routines. Now, once you're within the app, you want to go to the discover section and scroll to the bottom. Here you'll find three brand new routines that can help you out in the morning. You've got a cold weather alert, a morning briefing, and an umbrella reminder, which is particularly handy if you live in the UK.
Now, something you need to know is that these routines do rely on the Samsung clock. So you have to set your alarm that you want to use to trigger these alerts. So I'm just going to use this one. Make sure you hit save on these so that they're fully set up. Now, when your alarm clock goes off in the morning, you will get a readout of what's going on outside.
Floating Notifications
If you jump into your settings on the left side, we're going to go to notifications. On the right side, if you scroll down to Advanced Settings here, you can change the floating notifications to smart pop-up.


And here you can choose which apps will send you the smart pop-up view options. So, essentially, when you get a notification, you could tap it, and it opens up in a little window. So, for example, maybe the Eufy cameras could be a good one if I want to see what's going on quickly. Whenever my camera's triggered little floating notification will pop up. I can tap it and expand it very quickly.
Notification Sounds
Another notification setting that you might want to customise on day one is this. Go to Sounds and Vibrations on the main menu. And go to Notification Sound. There are a bunch of different options here. What you'll find is that most people will just use the default one. And then when you're in a room with loads of people with the same phone, everyone will be looking at their phones every time that notification sound happens.


And there is something else you could do here, if you go to the notification vibration pattern, you can sync it with the sound that you've chosen or you could choose a specific type of vibration pattern. The idea here is to just make your notifications a bit more customised.
Custom Ringtones
Staying within Sounds and vibrations. Another thing you want to customise is your ringtone. Again, just like before, a lot of people will just leave this on the default, and it will sound just like everybody else's phone. So I do recommend you take a look at this. I just scroll through, test out some of these other ones and actually, if you do have any music on your phone that you prefer to use instead of these, just hit the little plus at the top, and then that will give you access to the music on your device. If there is any. And I do recommend that if you work in a noisy environment, you switch on vibrate while ringing.

Feel the Vibes
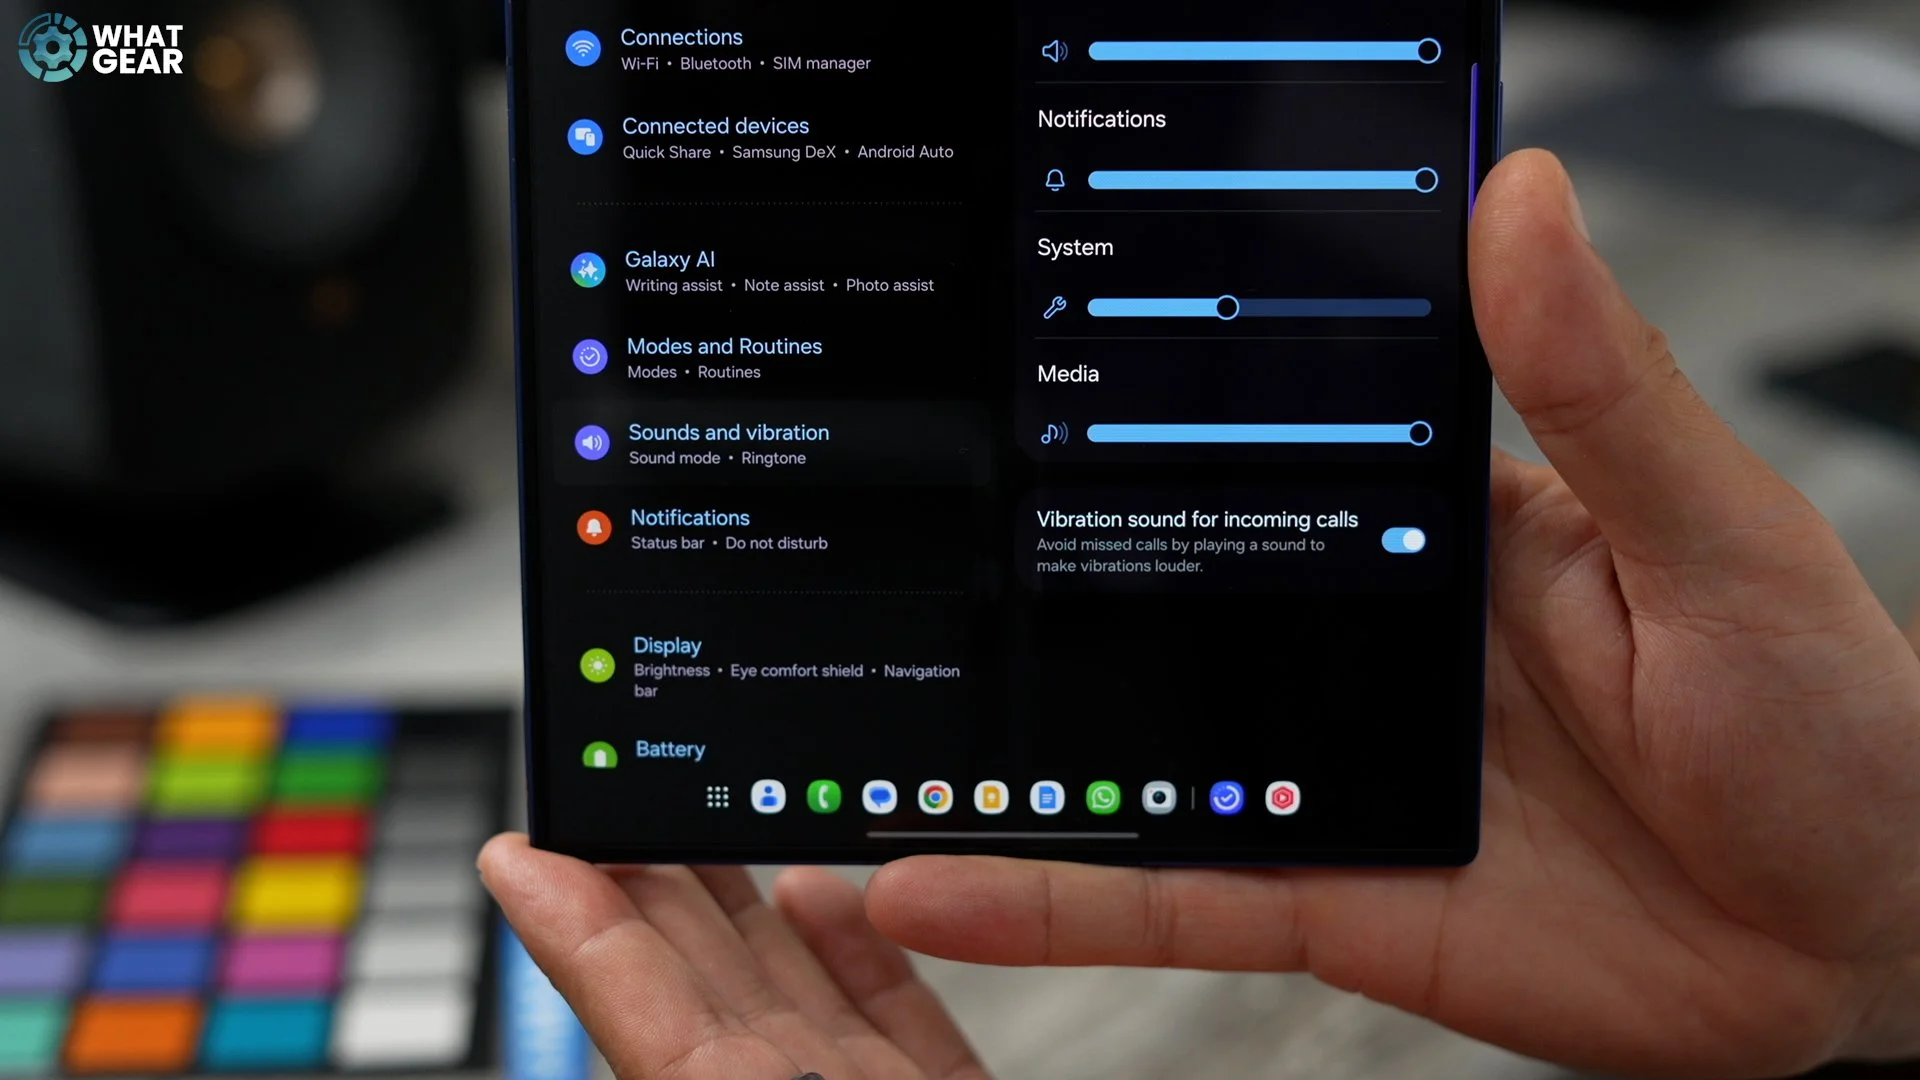
There is one more setting that you can switch on to improve your notifications even more. If you jump into your settings again. On the left side, go to Sound and Vibrations. On the right side, go to vibration intensity. At the bottom here you'll see the option for vibration sound for incoming calls. So this uses vibrations to enhance the loudness of your ringtone.
Custom Sound
Since we're talking about sound, here's another quick one that can improve the sound quality coming from your device. So if you struggle with your hearing at all, then you want to do this. Go to settings - Sound and Vibration - Sound Quality and effects. Here you see a bunch of different options. You got Dolby Atmos at the top is set to auto. I recommend you leave it on auto. You've got an equaliser if you want to adjust the EQ, but here are the ones that I think will be most useful to some people. Sometimes it's just how a movie or video content is mixed.


But what you might find from time to time is that the dialogue, the voices in certain types of content, get washed out. So you do have the option to boost dialogue here, and even activate a tool that balances sound so you're not blasting your ears by accident. And there is something that's really quite advanced. If you do want to calibrate and EQ specifically for your type, if you go to adapt sound, you can go through a little hearing test set-up and then create an EQ, which is tailored specifically to your hearing abilities. So if you do want to customise the sound, this is probably the best way to do it.
Custom Widgets
I haven't spoken that much about widgets and how to create widget stacks. So let me show you that really, really quickly. So, to create a widget stack, all you need to do is hold your finger down on the widget, and then you will see Create Stack. You then have the option to add widgets from your device, and you can add pretty much anything you want, as long as it's roughly the right size. Now, once you've created a widget stack, you can swap back and forth between them, and if you hold your finger down on it again, you can go to Edit Stack.
There's a little plus button here where you can add even more. But you can even do a bit more customisation today. So, for example, let's say this battery widget. I hold my finger down on it, and go to settings. This brings up the settings for this specific widget. Here we can remove the background entirely if we want. We can also have it match the light mode or the dark mode, or just adjust the transparency a little bit. I like how this looks without a background. So I'm going with that. Now I've got the battery life of my Galaxy devices visible, but with a background. And I think that looks pretty nice.

And do keep in mind you have different customisation options depending on the shape of the widget. So these square ones right here, if you want to get down on those, go to settings right here. Here you can change various shapes. And then you won't be able to get rid of the background entirely. But you can make it more transparent, and you can also switch it to light mode or dark mode if you want.
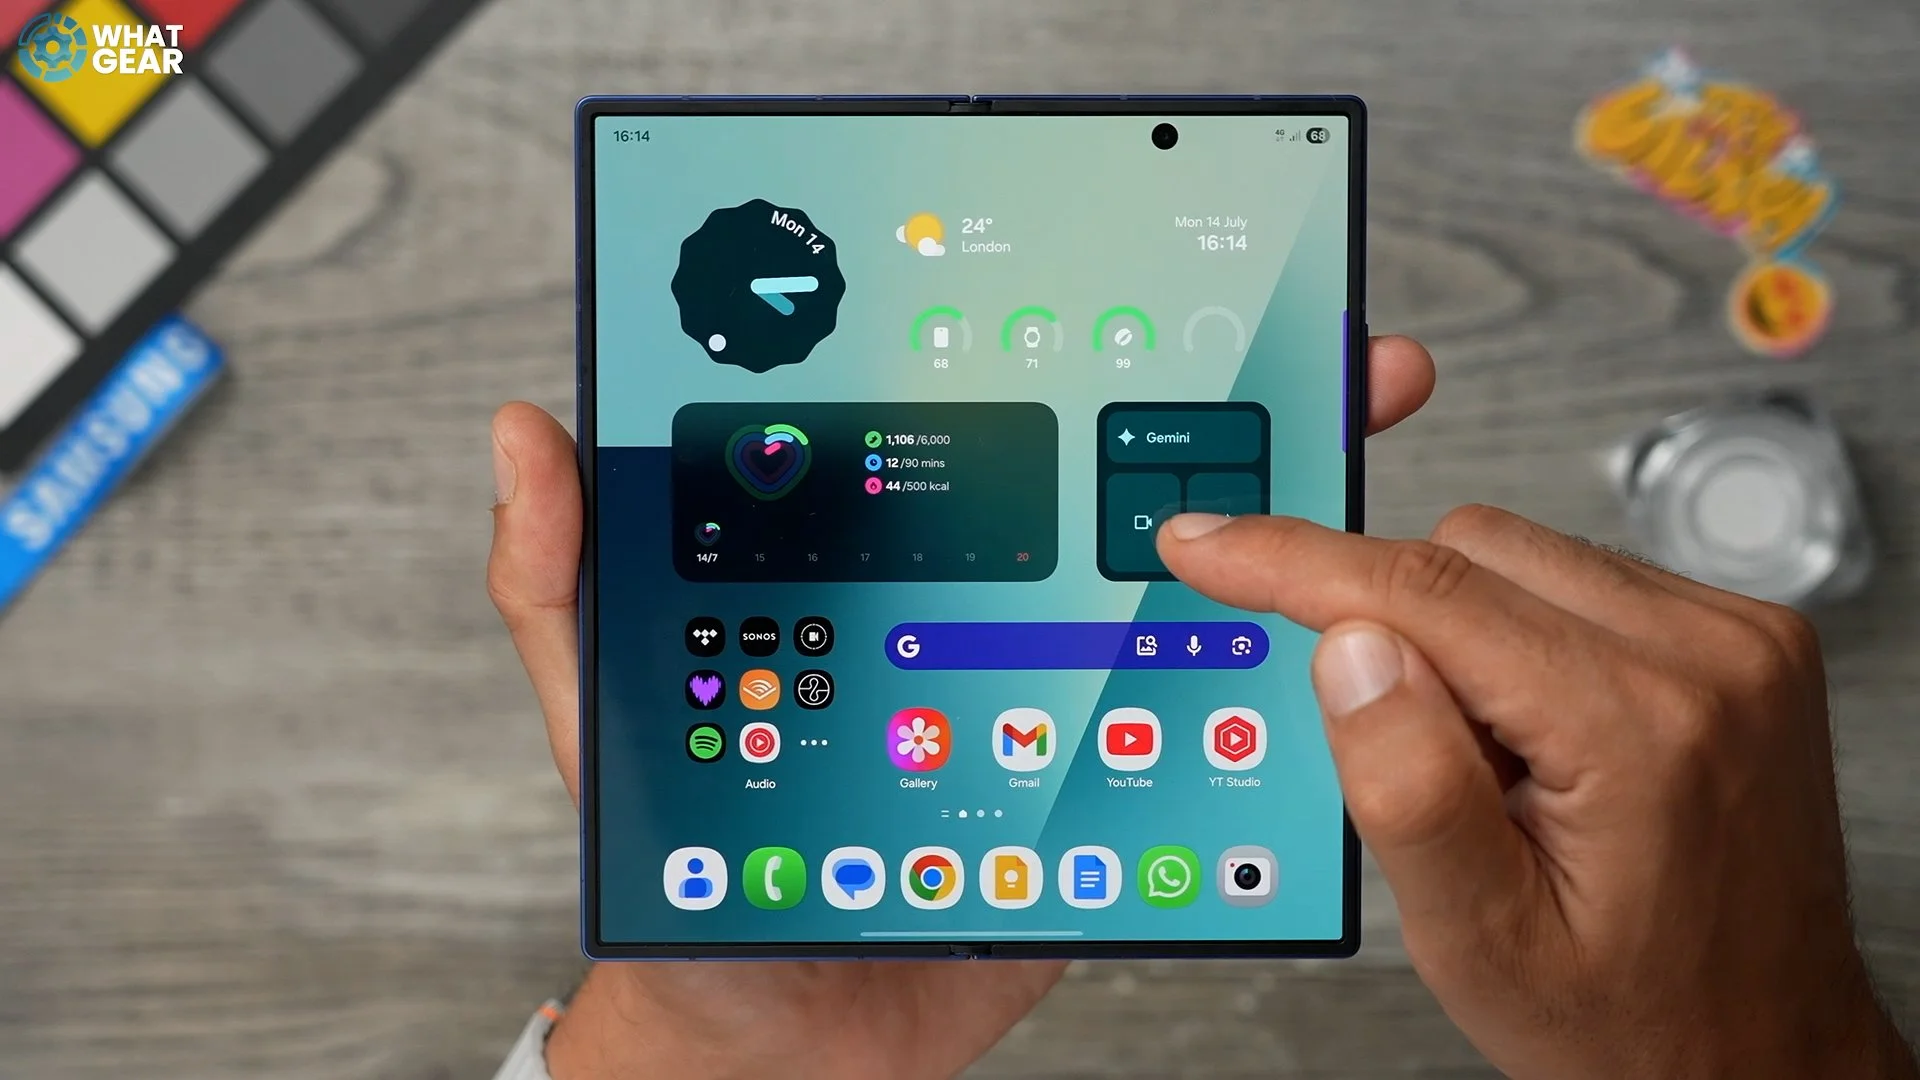
One widget is extremely powerful widget is the Gemini widget. Because you've got the live chat right here, but you've also got the camera tool right here. And when you activate this, you can point your camera at something and ask questions about it.
‘‘ For example, what are you looking at?’’
‘‘I'm looking at a stormtrooper figurine. Do you have any questions about it?’’
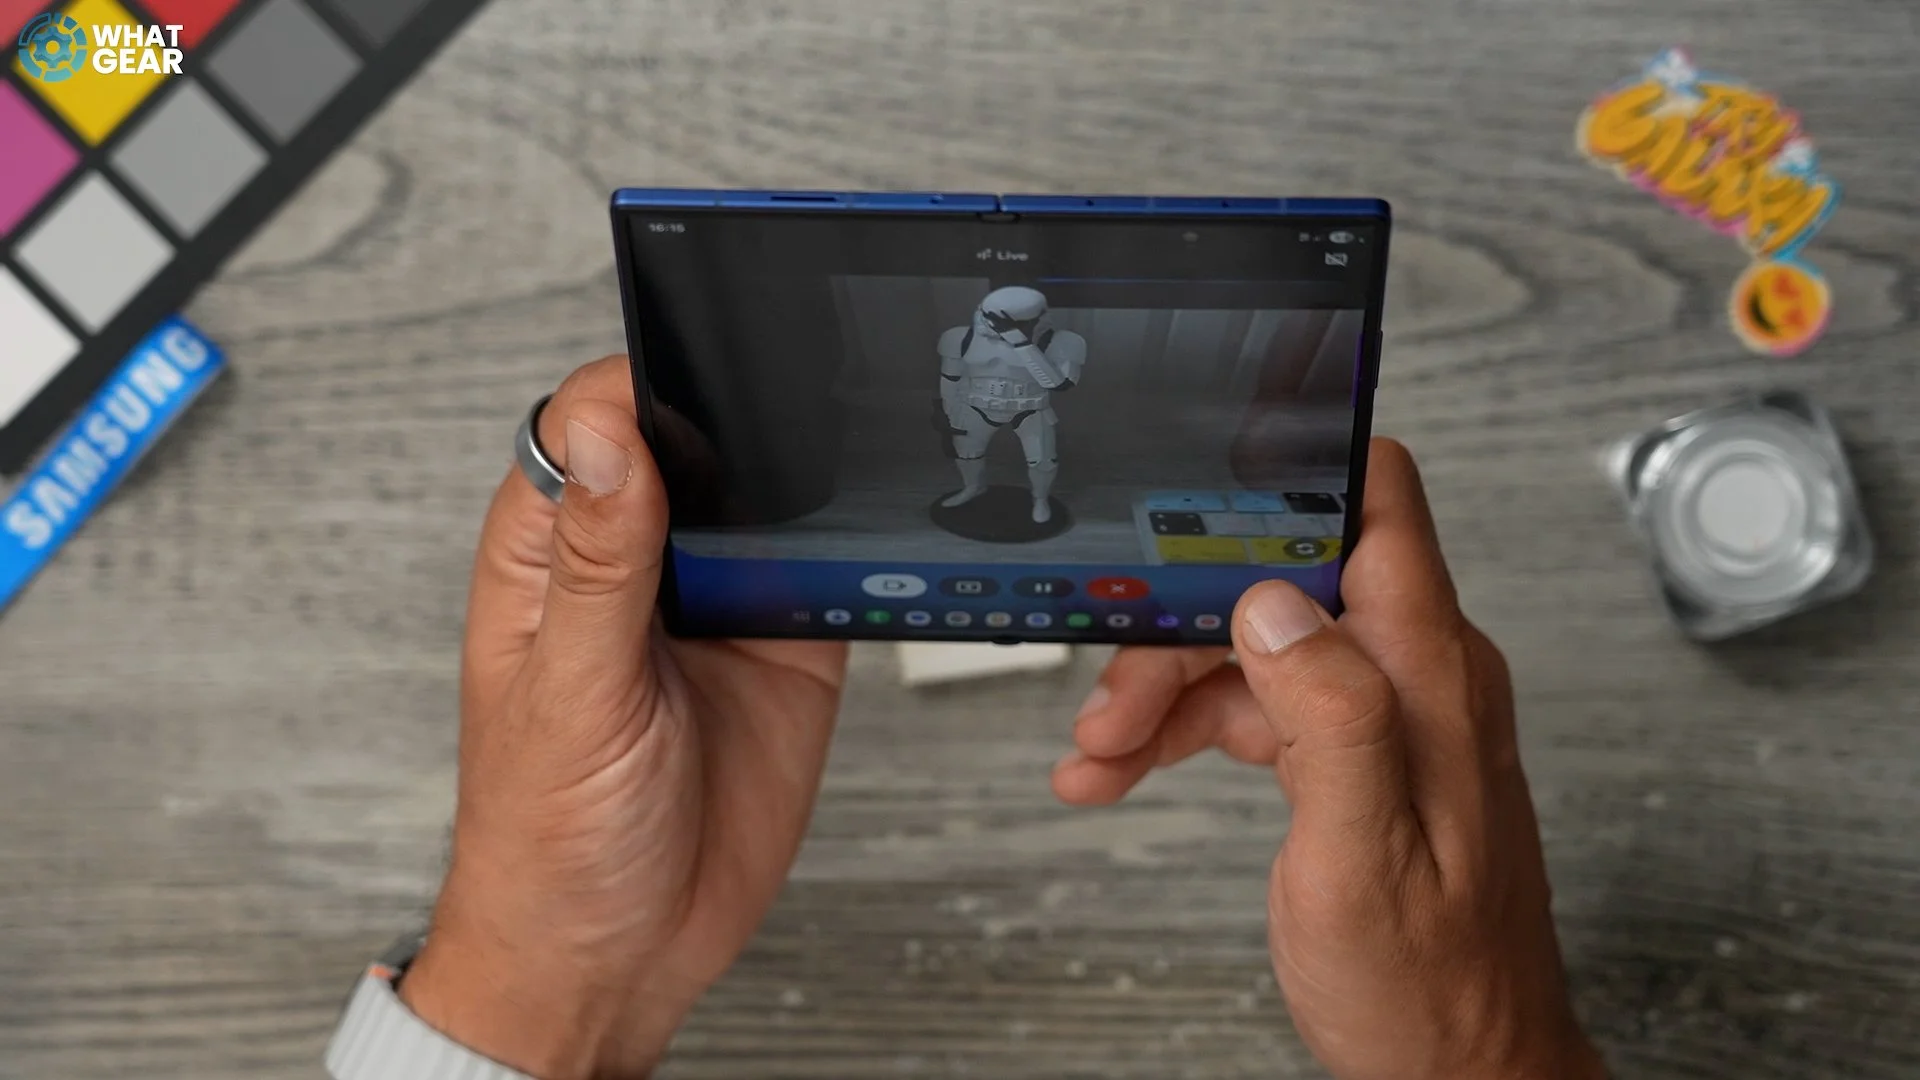
What's the pose? This figure is pulling?
It looks like the Stormtrooper is doing the thinker pose with its hand up to its helmet, as if it's pondering something. Is there anything else I can help you with regarding the figurine?
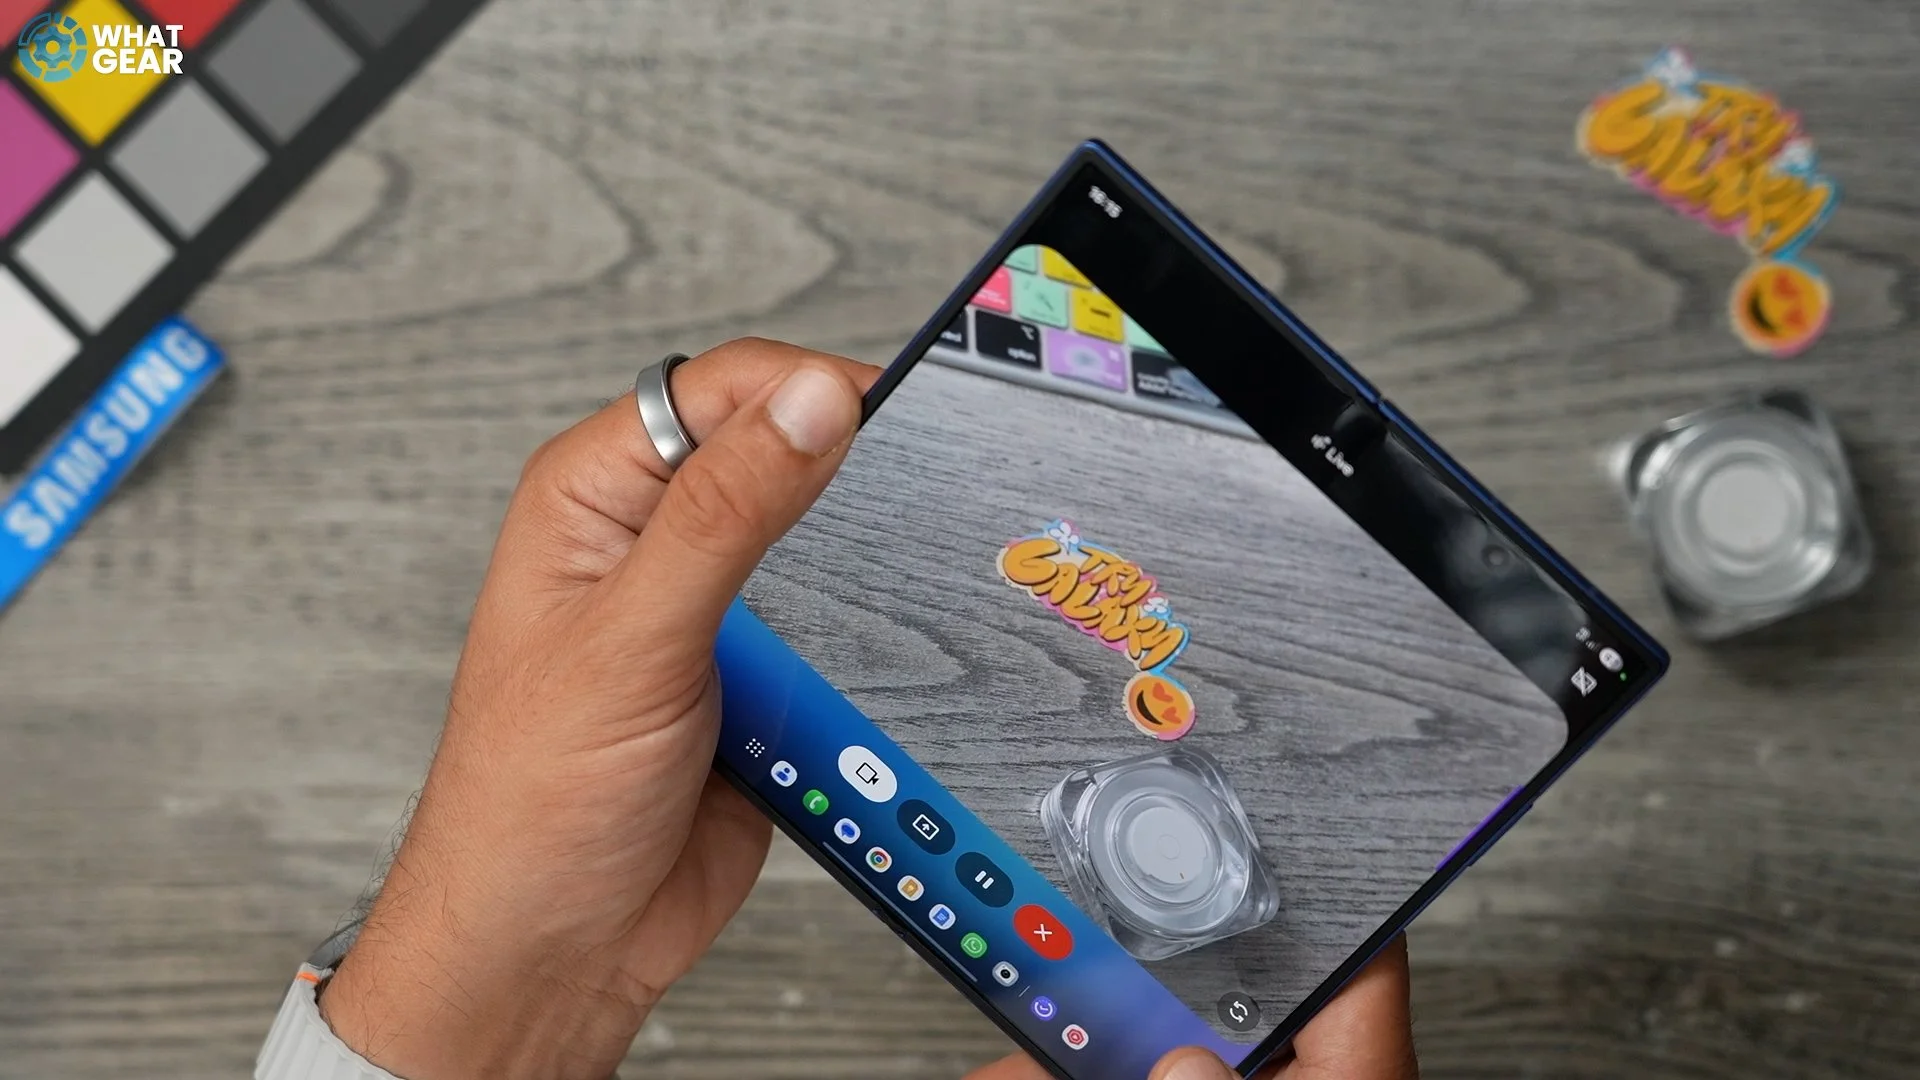
No, but what about this? What's this all about?
Those look like some fun stickers. The big one says Try Galaxy and the smaller one has a smiley face.
What's this over here?
That's a data colour spider checker 24 colour chart. It's used for calibrating colours in photos and videos. Do you have any questions about colour calibration or how this chart is used?
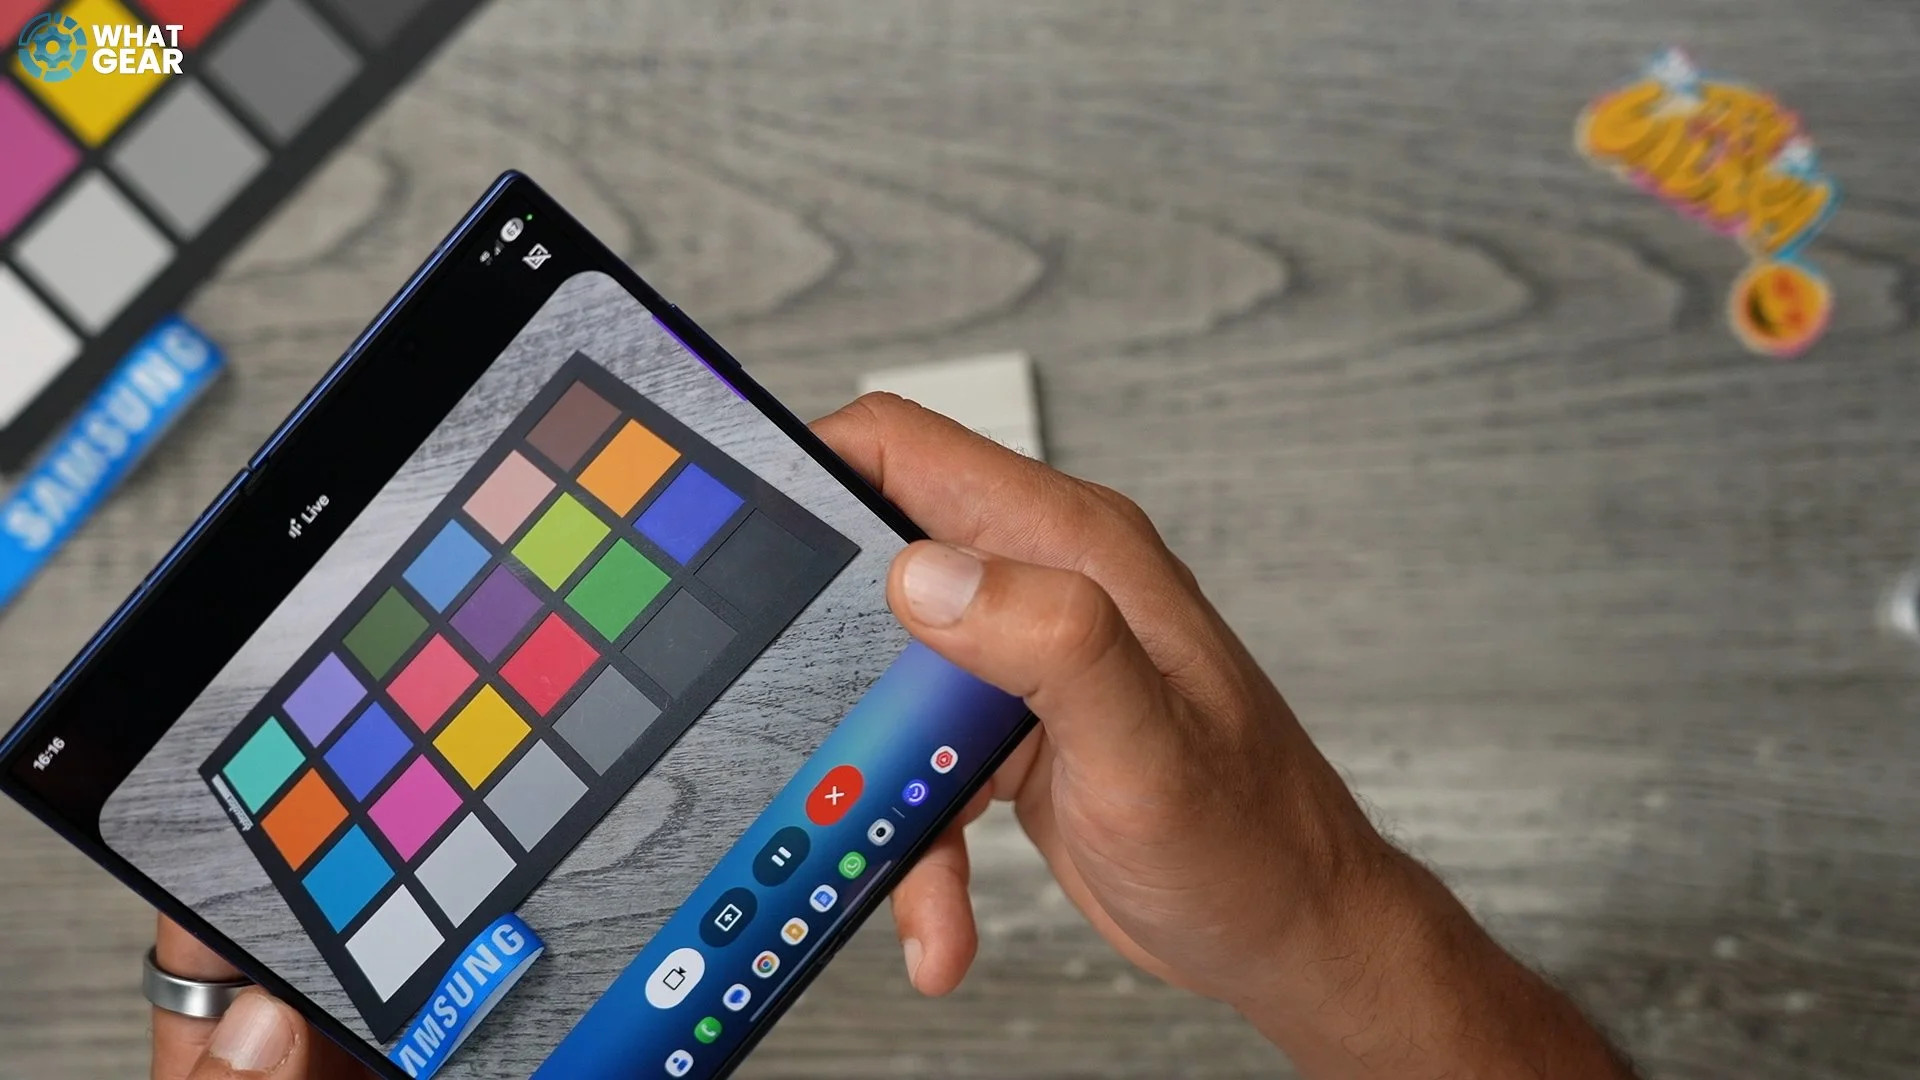
So you get the idea. The camera tool is so, so useful on this phone, and in fact, it's probably even more useful on the Galaxy Flip.
Lockscreen Widgets
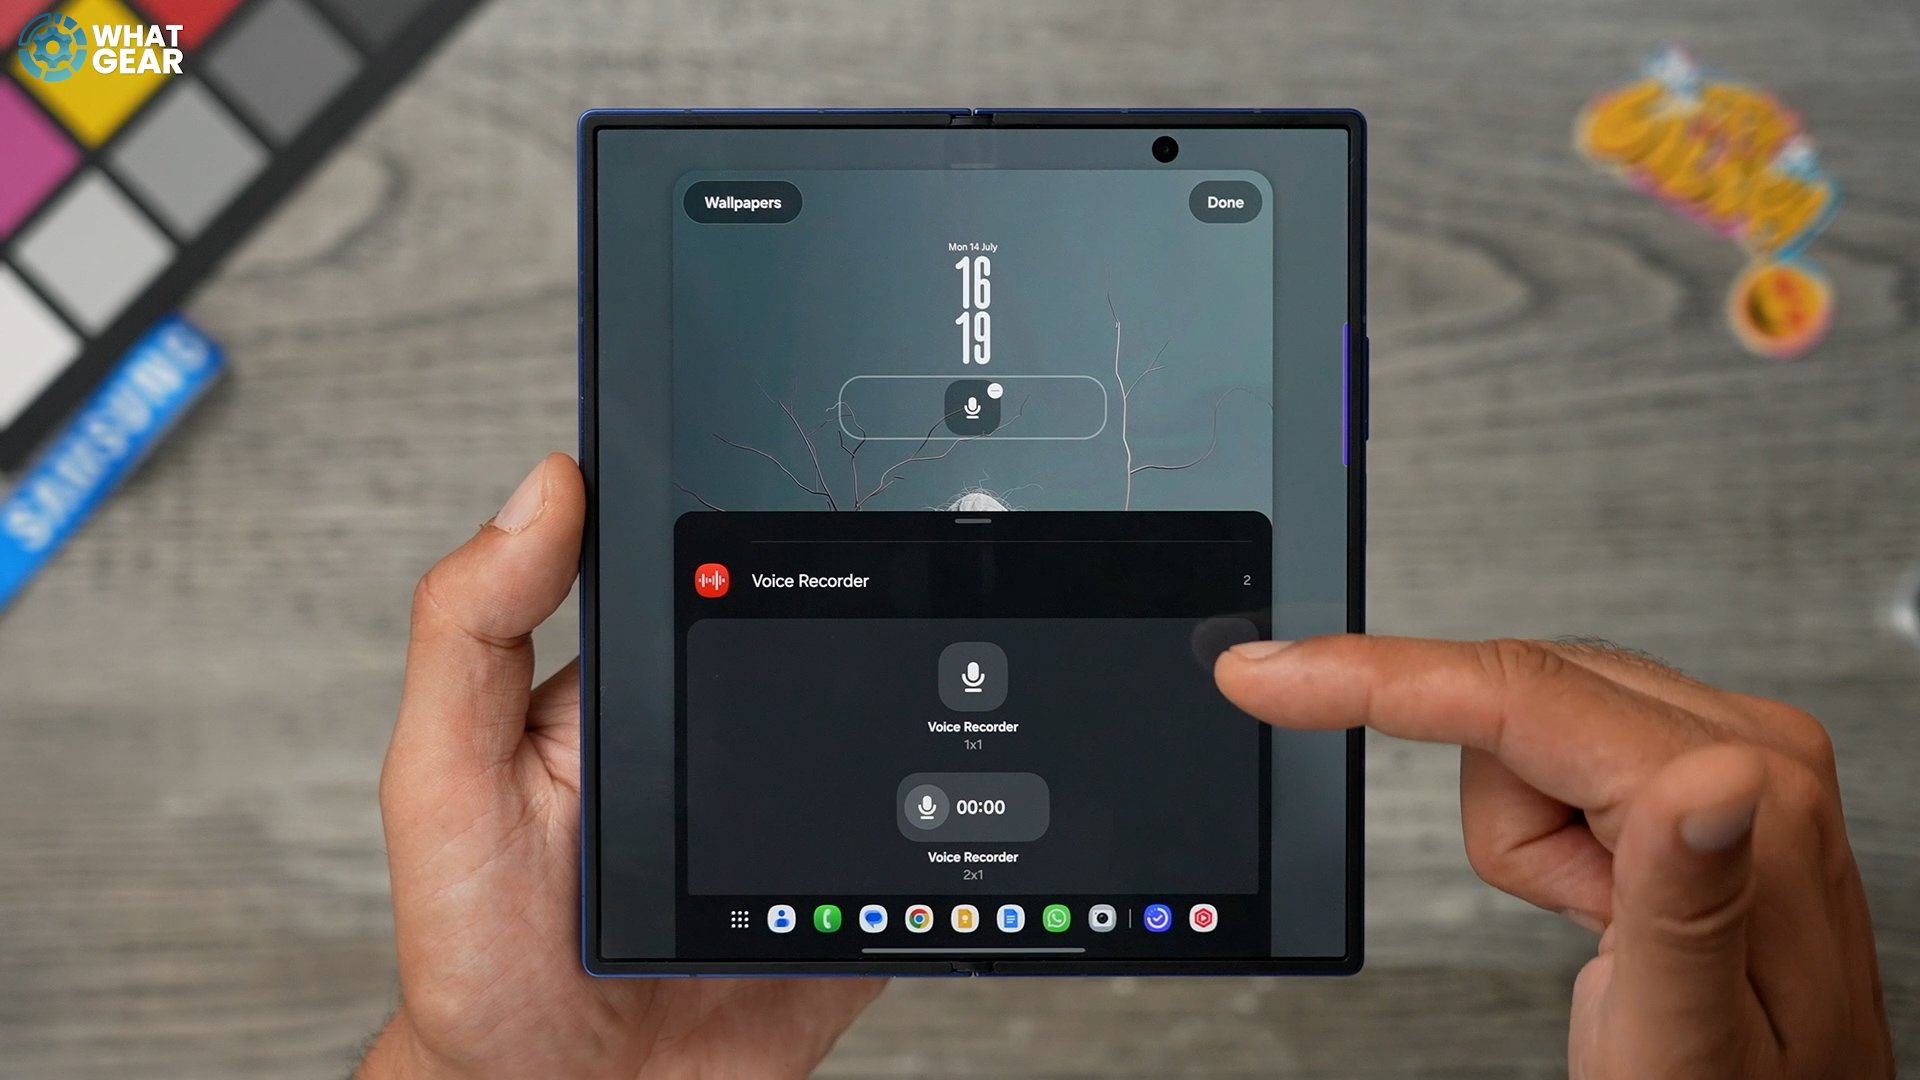
Since we're talking about widgets, let me show you how to add them to your lock screens. And do keep in mind you have two separate lock screens, one here and then one on the cover screen. So if you already finger down on the lock screen and unlock your phone, this is a quick way to jump into the lock screen settings. Here you can tap the clock and adjust the style of the clock. But what I want to show you is this section right here, the widget section. So you can customise this however you want, just by tapping on them. So one of the ones that I always use is the recorder. The reason is that you can activate the recorder from the lock screen without having to unlock the phone.
One of the reasons this is so powerful is because now you can auto transcribe three hour recordings and then summarise them. Before, it was literally like ten minutes. Something else that I like to add, because I have a bunch of Samsung stuff, like the ring and the watch and the earbuds, is the battery widget as well, so I can keep an eye on some of my battery levels. You can customise these as much as you want. You only get four spaces, so do make use of those.


A couple more things you might want to customise are the shortcuts for the phone and the camera. If you want to change these, just tap on them, and then you get all of the different options right there. The widgets are kind of locked to the clock, but they will shift if you move them to the left or right-hand side. And just to show you how these look on the lock screen here, you can access the recorder, and you see it start down here, and you can expand it, and you can stop it here if you want.
Useful Wallpapers
Pinch the home screen, go to wallpaper and change wallpapers, and in here go to Photo Ambient. Make sure you allow local weather updates. Go back to photo ambient - choose a wallpaper that you want to use with this added effect. Now, if you hit play, you'll see exactly what this does. It essentially adds contextual animations to your lockscreen. So you know what the weather's like outside before you even look out the window. Once again, something that's important to remember is that this lock screen on the inner display works independently from the lock screen on the cover display.

So on the cover display, you have to kind of do the same thing. Jump into the wallpapers - go to Photo Ambient again. Different image for this one, and choose the Stormtrooper. Once again, you'll see the dynamic effects. And this feature makes your lockscreen wallpaper useful.
More Clock Options
So let's say you like the new clock, but maybe you want something even more unique. Well, there is another way to access even more options. And you can do this by going to an exclusive Samsung app, which you can only find in the Galaxy Store. It's called Good Luck. Once you've downloaded and installed this app, there are a bunch of little additions like extra apps within this app that you can play around with. The one I want to show you right now is this clock face - tap on that.


Here, you have so much more access to so many more clock faces. It's insane. This is very, very unique. I guarantee you most Samsung users will never even look at these customisation options. if you want to be unique and you are a little bit creative, you can go to my clock here and create your own clock using GIFs and images, and you can choose your text.mIt is quite a complex set-up, but if you've got time to spend on it, you can create something unique. If you want to, you can even create watch faces. If you have a Galaxy Watch.
Custom Slider
So at this point, you've probably already customised your palette. And that's affected all of your system UI. And you've also got a custom colour on the volume. Did you know you can customise this bit even further with the Good Lock app. This time we're going to go to Sound Assistant - Hit continue. Give it the permissions that it needs.


And at the top of this page, you will see make your own volume panel colours. And here are a bunch of different options and different lighting effects that you can choose. So just switch this on. I think the purple and blue go quite nicely with the colour scheme. Now that that's done, whenever you adjust volume, you have this nice animated effect on your volume slider.
Custom Keyboards
Here is another pro tip from Good Lock. We're going to check out Keys Cafe this time. This gives you a bunch of options to customise your keyboard. Now, here you can tap on the style your own keyboard. You'll find a bunch of pre-made keyboards that have effects linked to them. And if you hit this icon, you can see how these effects look.

And if you want to customise the effects, you can choose different patterns, different animations and all that stuff. And you can even customise the sound of the key presses.
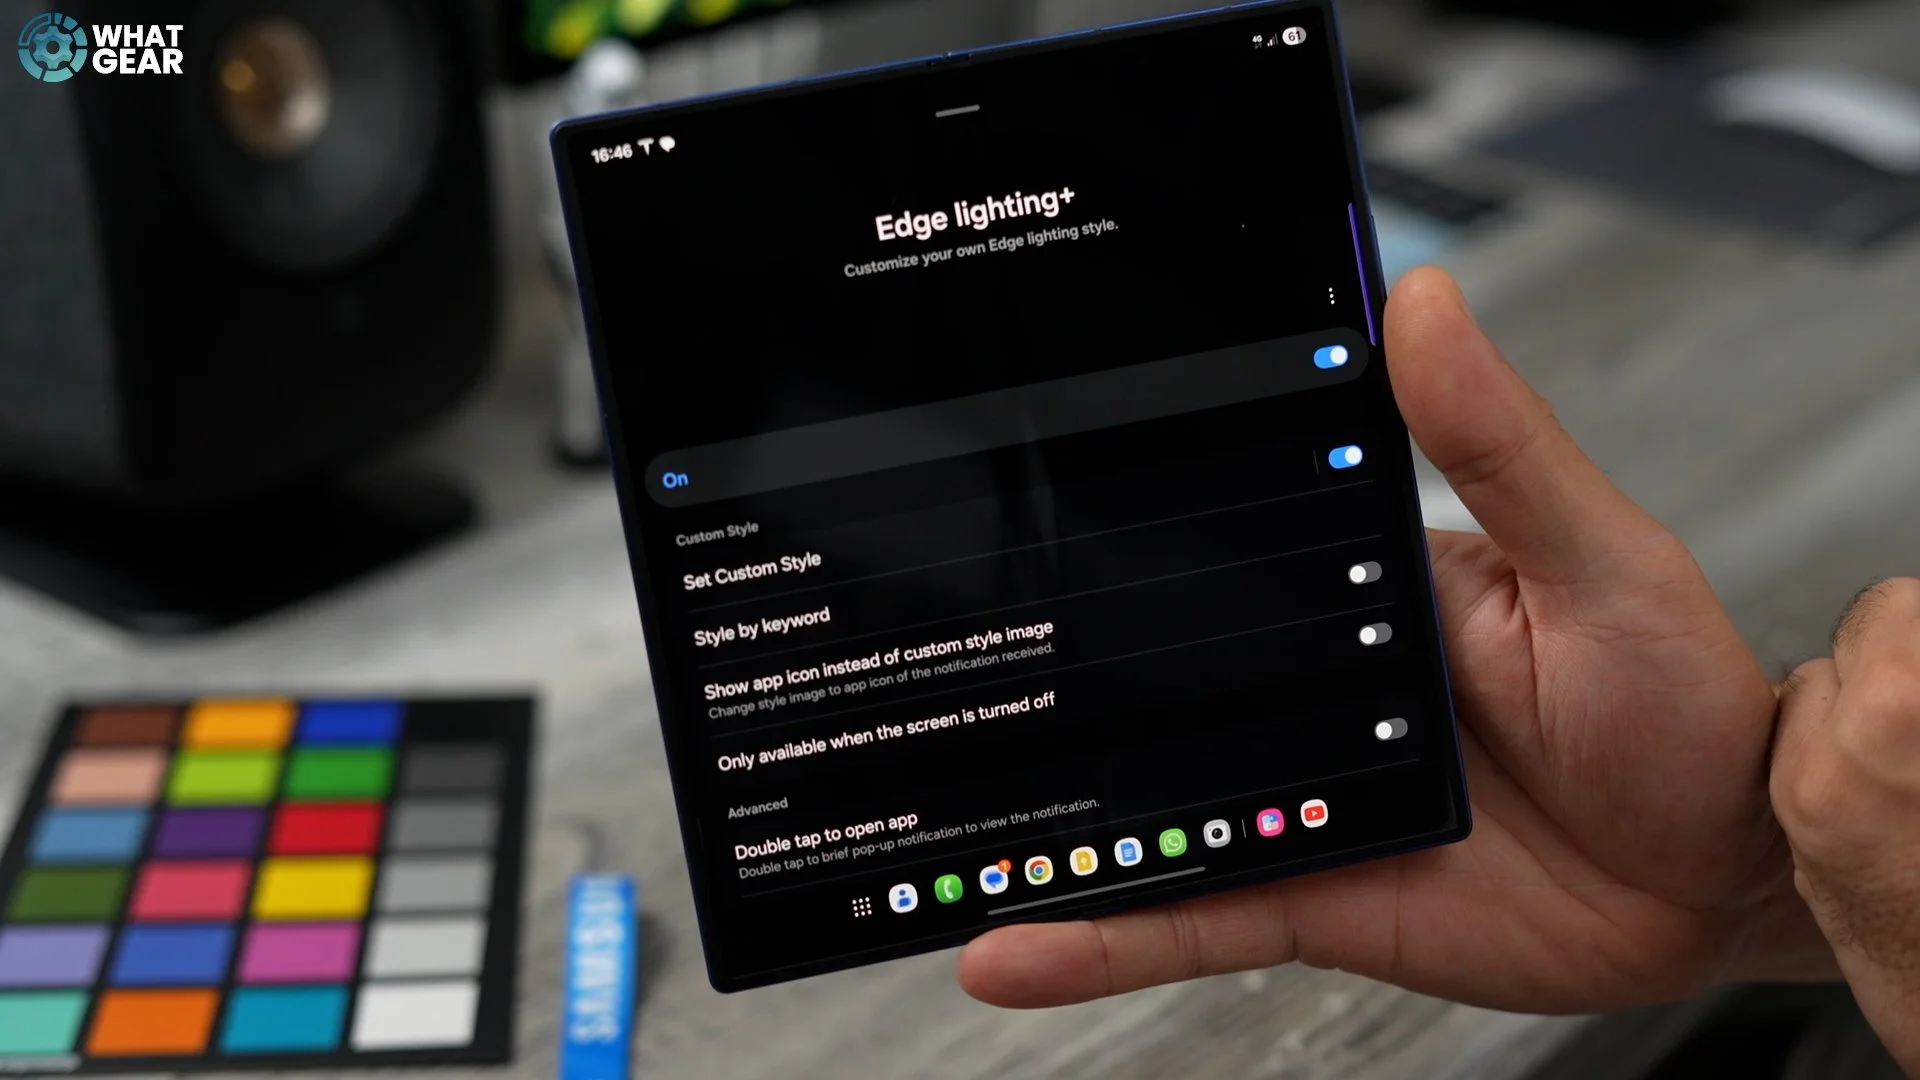
Extra Edge Lighting
If we go back into Good Lock again this time, we're going to go to Edge Lighting Plus. If you haven't installed it, just install it. It will be there in the list. Now, remember how we set up the keywords for certain people and different colours to pop up, and different animations when those people message? Well, this is a more advanced approach to that, with more animations and more options. If you go style by keyword, you can choose what title triggers the animation, and you can separately choose what content triggers the animation.
So, for example, notification titles. This works well with the names of people in your phone book.
So that's how my work phone number appears in my phone book. And this is case sensitive as well. Remember, if you tap here where the little flower is, you can unlock the new animation options. And there are some really fun ones here. Some of them are quite girly, to be honest, but this one here is the one I'm going with. Once you've chosen your animation, you can go to colour and choose a specific colour. You've got to make sure this little tick box is on for this to work. You've also got the colour picker as well. So, going back to that Adobe colour tool, which I showed you, you can use the hex code again here if you want to. If you go to advanced, you can add different shapes and things, and you can even adjust the size and how long they animate and if they rotate as well.
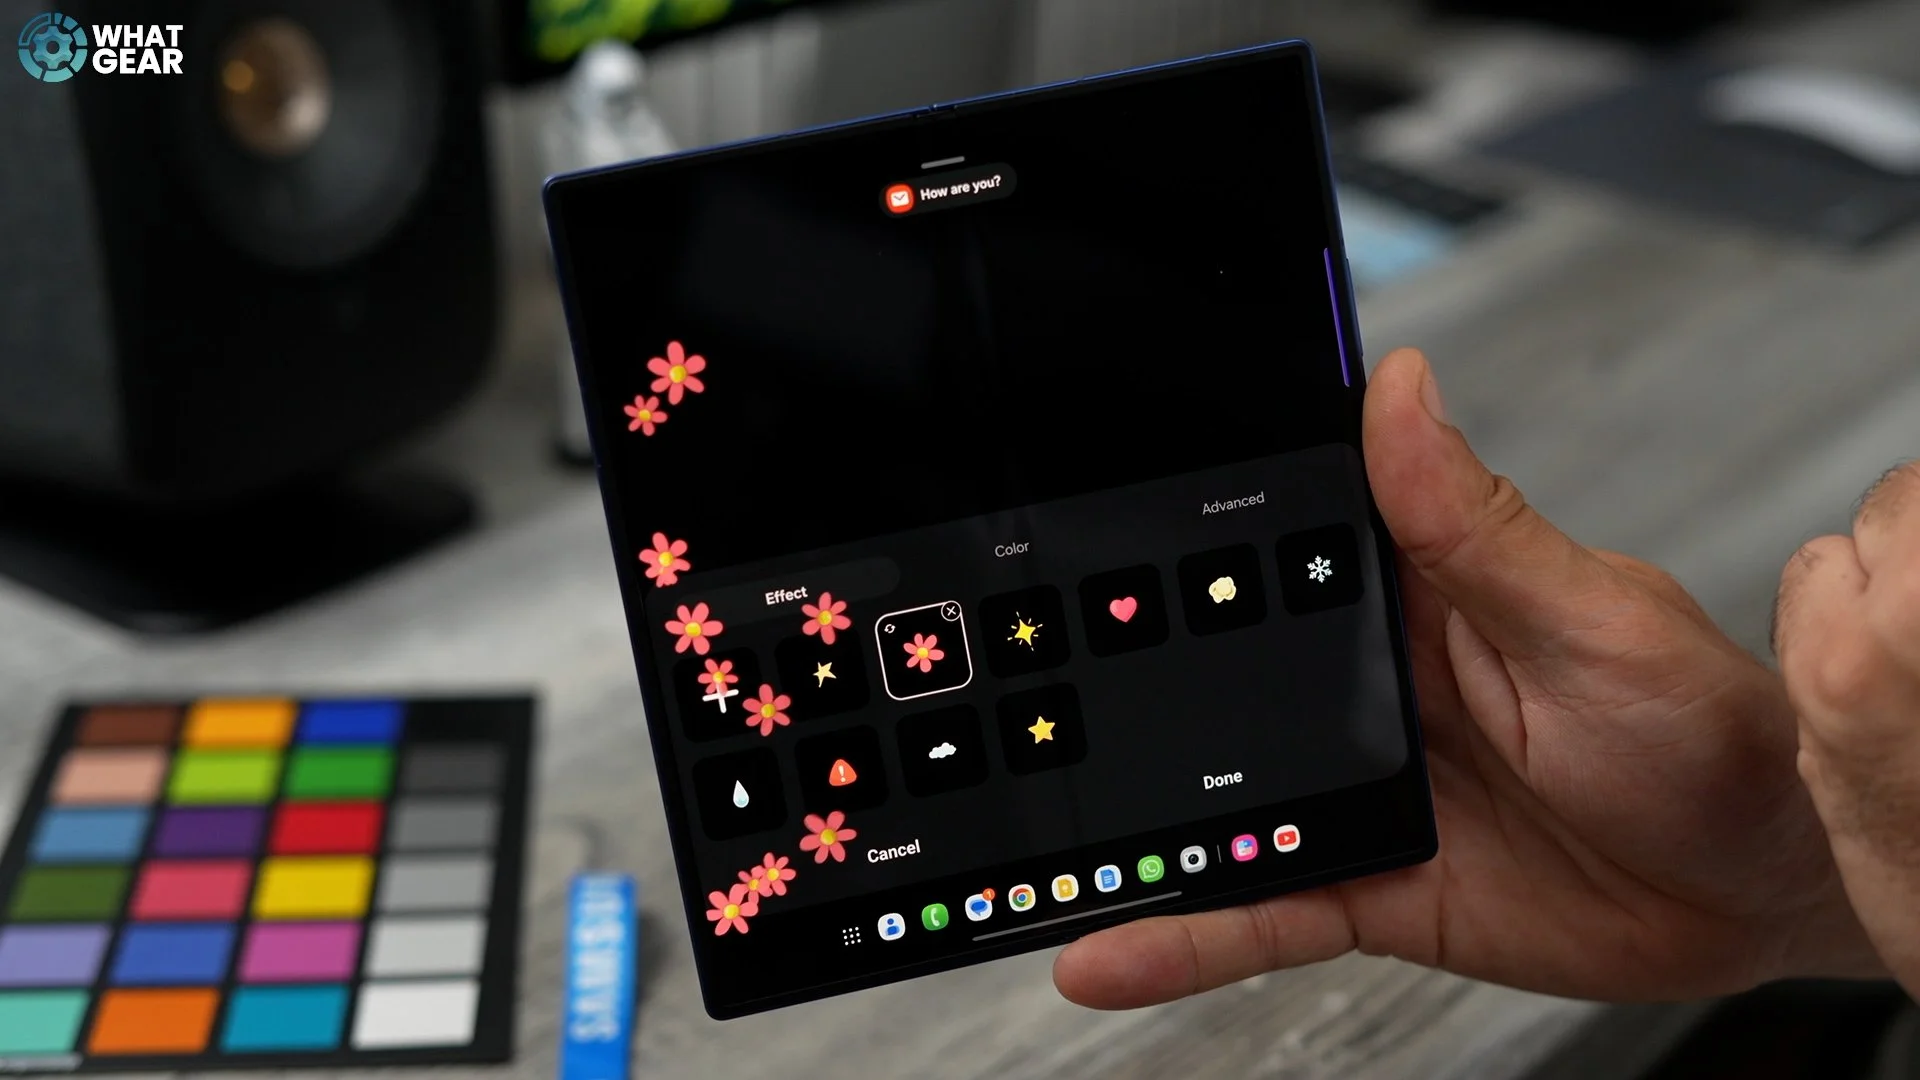
Now, the other thing you can do is separate from just using this for contacts and things, is to use it for content. So let's say someone messages you with a keyword, and you want that keyword to trigger an animation. You could do that as well. So you just type in that keyword, how it would be spelt in a message, and it sets up a custom animation for that. And here's how it looks now when I get a message. I probably should have changed the colour because it matches the wallpaper. And I can't see all the little sparks that much. So, going back to the importance of the colour picker thing that I showed you. Use those recommended colours because they would contrast nicely against the background.
