
Nintendo Switch 2 - 18 Settings You NEED TO KNOW!
If you just got a brand new Nintendo Switch 2. Congratulations, you now own one of the greatest hand-held gaming consoles ever made. It's an exciting time, but don't rush in, as you don't want to immediately mess up the Switch 2 settings and end up having to factory reset or, worse, break something on day one. You want to maximise your Switch 2's potential and make it the best it can be right out of the gate.
You can achieve this by unlocking hidden features and gaining a deeper understanding of the settings. Additionally, you should secure your investment to prevent tampering. If you have kids, that is the best excuse to buy one for yourself. However, you also probably don't want them to be able to convert your life savings into Fortnite V-Bucks. Well, if any of what I just said applies to you. You're in the right place because I've created this video specifically for you to get it right from the start. So now, in the words of Super Mario… lets-a-go.
How to connect to the TV


Connecting the Switch 2 to your TV sounds simple. And it is, but some people might make this mistake. Check the back of your TV and see if you have an HDMI port marked as a high-speed 120Hz port.
Some TVs will only have one or two of these. You just need to make sure you're using this for the Switch 2. So, you get 120Hz support, but also ALLM.
How to get the best picture / TV resolution 4k / RGB range full / Adjust HDR


Once you've hooked up the HDMI and fired up the Switch 2, all the best settings fall into place on their own. But there are actually a few things to look out for. If you're going to be playing on a relatively new 4K screen display.
Do this: Settings / Display and lock in the 4K resolution if graphics are the most important to you. However, at 4K, the Switch 2 dock only supports 60Hz. If faster frames are a priority, you can lock in FHD. And if your TV supports 1440p, that's the middle ground.
More Display Settings
There are three additional settings to consider if you want the best possible picture. If you have a new TV or a good Gaming monitor, you can change the RGB range to 'Full Range' for better colours. Double-check that 120Hz and Auto Low Latency mode are on.
I recommend changing the HDR output to compatible software only if you plan to play older Switch games. Leaving this 'always enabled' might cause crushing or over-brightening of colours on unsupported games.
BONUS TIP - How To Adjust HDR

If you plan to use the Switch 2 on various TVs or monitors. Remember where this next feature is.
Settings / Scroll to the bottom / Adjust HDR.
This runs through the HDR calibration setup so you can get the picture dialled in perfectly for your display.
4. How to enable HDMI CEC
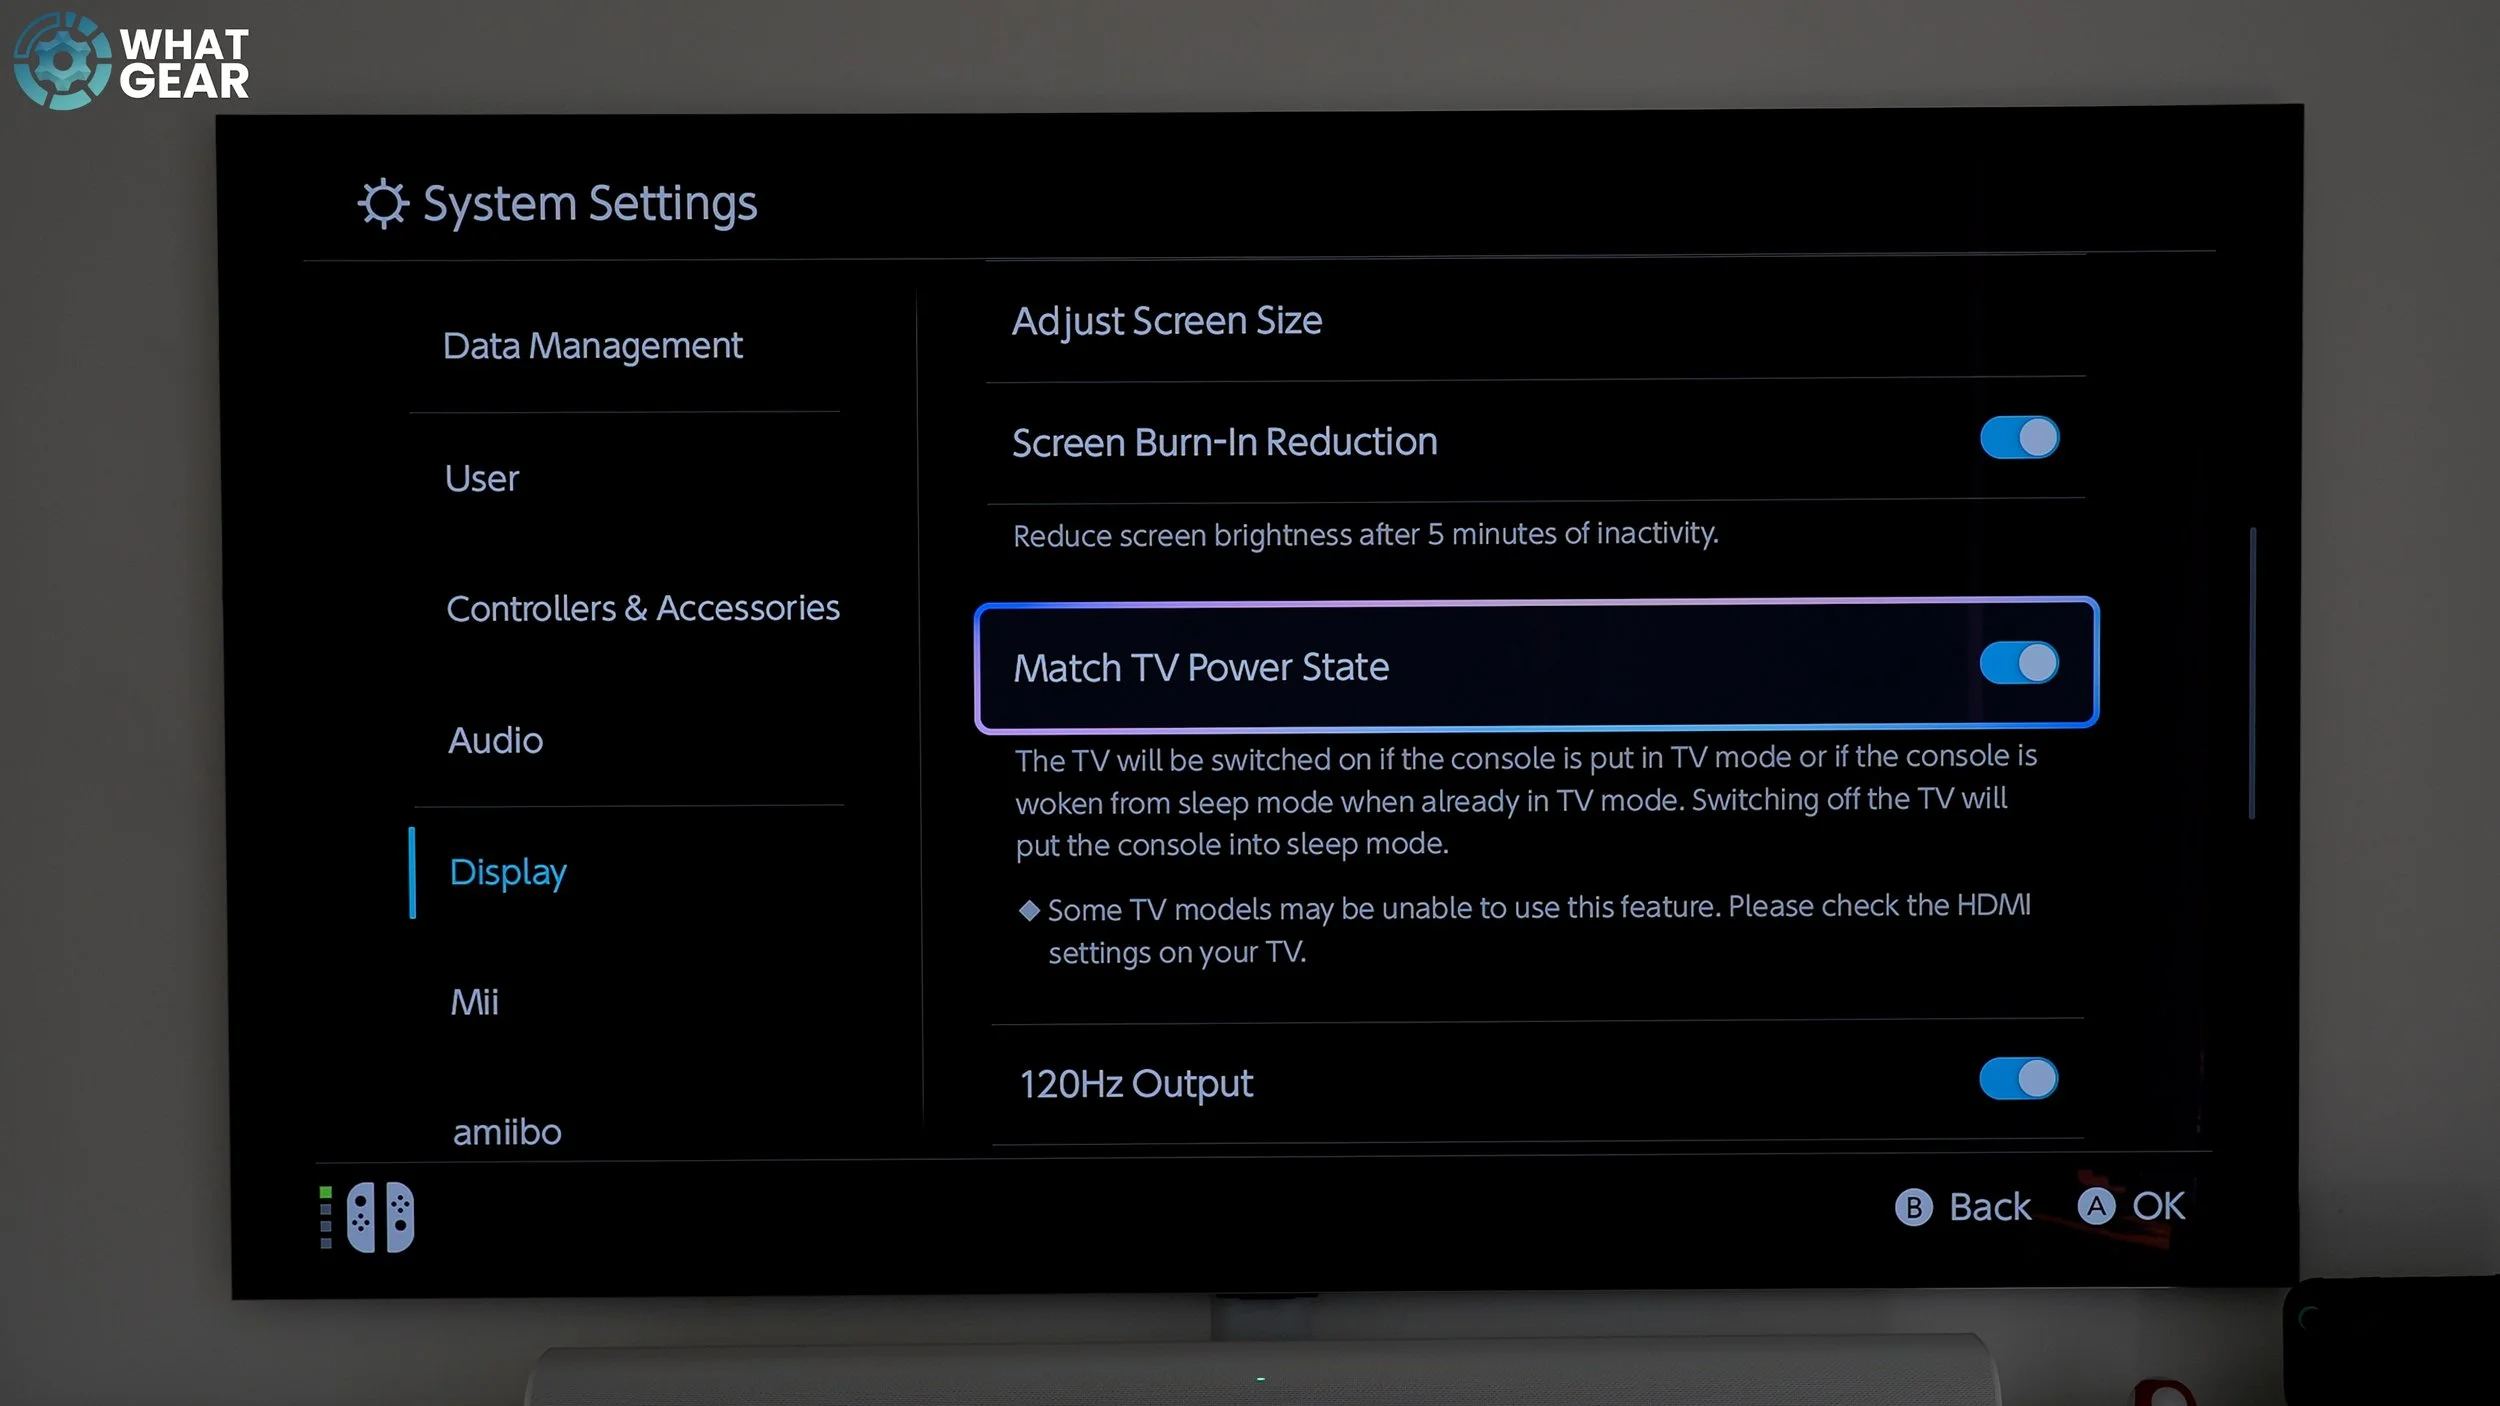
This setting should be enabled by default. Again, go to settings/display. Check that 'Match TV Power State' is on. Some people love it, while others hate it. Put simply, if your TV is off and you switch on the Switch 2 with a controller, the TV will wake automatically.
Also, if your Switch 2 is on and your TV is off, simply drop the Switch 2 onto the dock, and it will automatically wake the TV.
5. How To Save Some Power Dark Mode

If you plan to play handheld mainly, this minor adjustment can save a little power. Go to settings/themes / Basic Black.
This enables the UI to switch to dark mode, which looks better. When hand-held, it reduces the amount of white light when navigating home screens and settings menus, saving power.
How to Improve Audio Sound Settings
If you want to get the best audio from your Switch 2 when playing on a big screen, especially if you have a soundbar, surround setup, or Hi-Fi speakers connected to your TV or monitor. There's a setting you need to look at.

Settings / Audio / TV Sound
If your sound setup is 5.1, then lock that in here by switching this to 5.1 Channel Linear PCM. This is the best quality audio signal the Switch 2 can deliver. While we are here, I'd also suggest making sure 'console speaker virtual surround 'and 'Headphones Virtual Surround' are on. This utilises a clever EQ to create an Atmospheric effect through the stereo speakers and headphones if connected.
How To Pair Bluetooth headphones

Here's how easy it is to connect headphones or a Bluetooth speaker. Go to Settings > BT Audio, ensure your headphones are in pairing mode, and then click Add Device. Scan and tap on your headphones, and that's it.
Something to be aware of is that you'll get the best BT audio quality from headphones or speakers that support BT LE. If your headphones don't worry you, they'll still work, but older headphones may feel out of sync at times. If that is the case, I'd recommend using the headphone jack.
Best Battery Protection Settings

Ok, this is specifically for you if you mainly play on the Switch while it's docked and also if you're the type of person who leaves the Switch on the dock for extended periods.
Go to settings/system / stop charging around 90%
This will protect your battery's capacity in the long run. Since mine stays on the dock all the time unless I travel, I'm switching this on. I'm also switching on the battery percentage…as a little reminder to come back here and charge it to 100% before I go on holiday or take a long journey.
How to Import Old Games
Ok, now let's talk about Games. If you're watching this, you own the Switch. This means you already own some games.
Physical Games
If you have physical game cards, you can drop them in with the cover image facing towards you, and they install super quickly.
Bonus Tip 2 - How To Set up a Nintendo Passkey

Before I explain digital games. This is a Bonus tip that's going to save a ton of time in the future. On your phone, go to the official Nintendo website. Log in,
Account Overview / Account Settings/Sign and Security settings/Passkey
If you haven't already, set up a passkey. This will use your Face ID or Biometric Fingerprint to verify your details, so you won't need to worry about typing in your password every time, and it's going to be a lot during the setup process.
Digital Games.
If you purchased games online on your old Switch, here's how to re-download them without transferring them. On the home screen, go to 'Virtual Game Cards', choose the account, and you'll see all your digital purchases here. Simply tap and load to the console. And here, you'll also see the option to lend to family or friends if you're feeling generous.
How to transfer old game saves
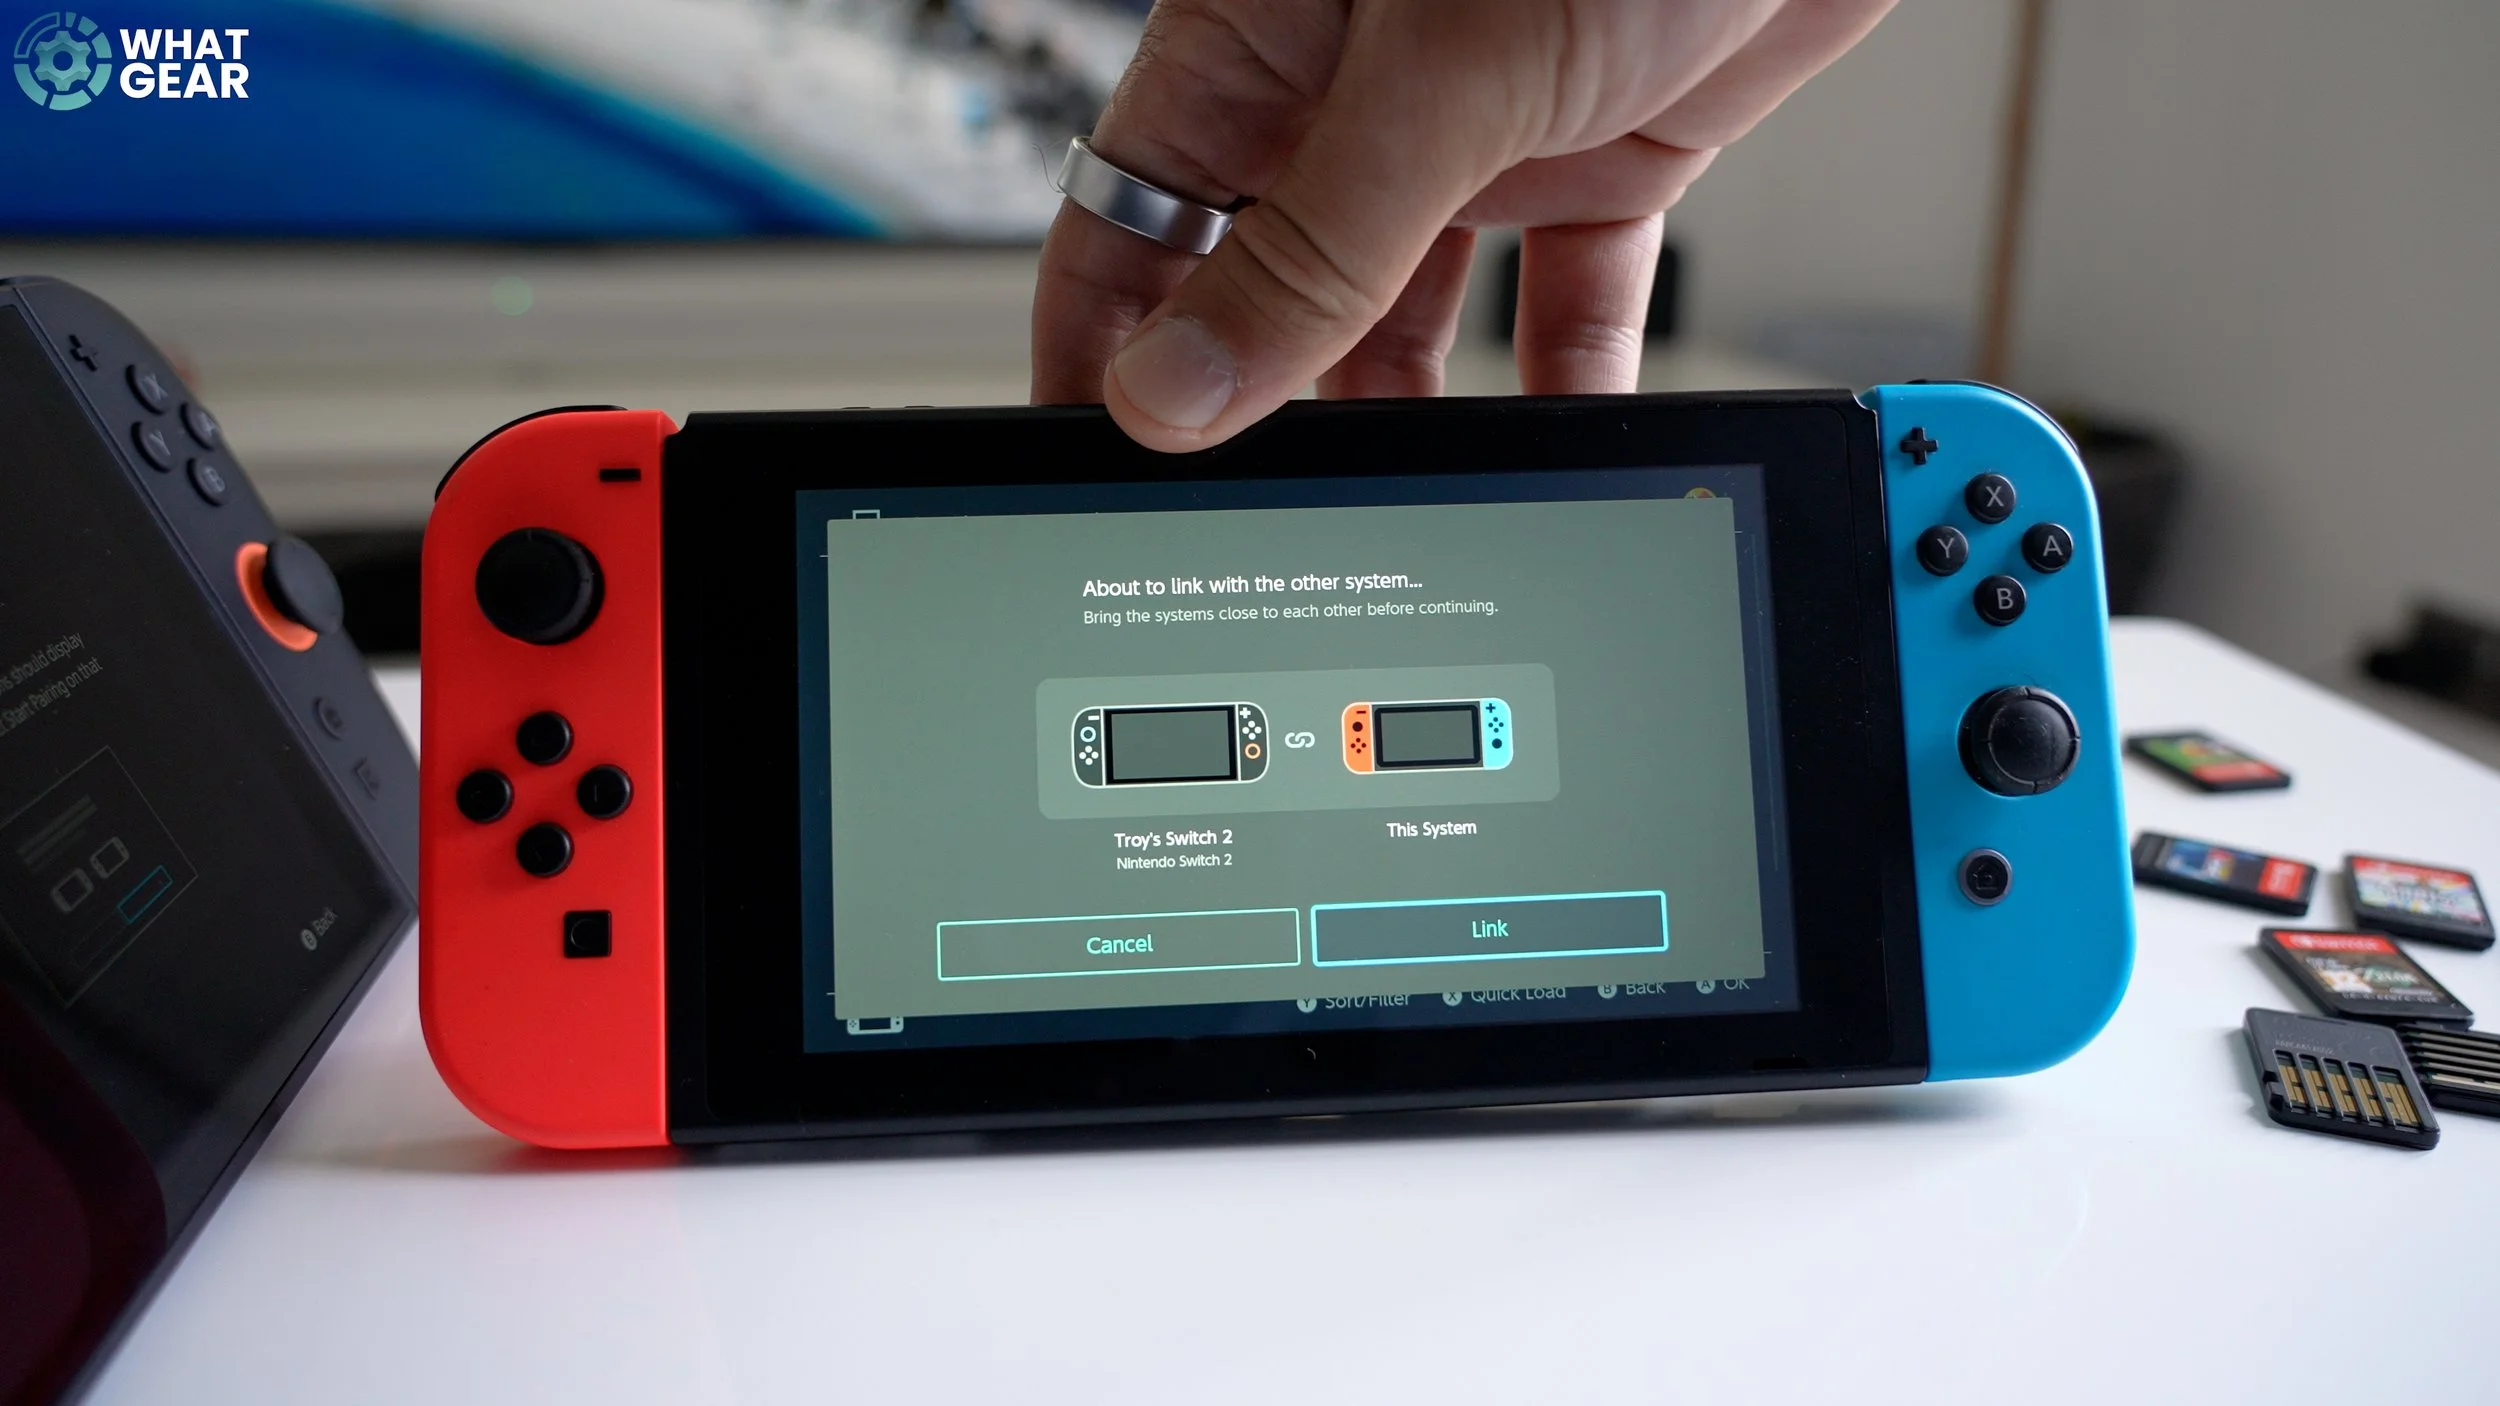
Here's one way to transfer your old game saves.
Go to settings/data management / transfer your saved data / receive save data
Now, get your old Switch. Repeat the same steps, but choose 'send save data to another console. And while we are here, this settings page is where you delete old game saves if you ever need to.
Correct Memory card for backup

Now, there is another way to do what I've just shown you, but it does involve a fairly expensive SD Express card. I can't emphasise enough the importance of getting the right one. It must be an SD Express card. ( Show the one I ordered )Once you have one of these, you might wonder where you put it. Well, the SD card slot is well hidden behind the kickstand.
The shape of the SD card is marked out here to ensure you insert it correctly. Once you're in, you use this to transfer software data without needing to download anything. And this same card can also be used to expand your storage on Switch 2, of course. It's essential to know that the MicroSD slot is spring-loaded, so you simply push it inwards to eject it.
How to download games

This is actually the first thing most people will want to do, and it's super simple. Here's how to download games. Go to the Nintendo eShop, scan the QR code, and use your passkey. And here is the whole Library of games. There are a couple of things I'd recommend doing first. Check out the free Game Updates for Switch 2. This will enhance the games you already own. There are also HDR updates for Zelda Tears of the Kingdom and Breath of the Wild.
Those cost a little bit of money but well worth it if you play on the big screen. It seems like a waste, but it might be worth paying for the welcome tour. There are several games that currently support or will soon support mouse control. There's a list on the screen if you want to test them out. Also, I recommend getting the Nintendo GameCube classics; however, you need the online extended membership for that. It's worth it for the Zelda Wind Waker game.
How To Attach The Wrist-strap thing
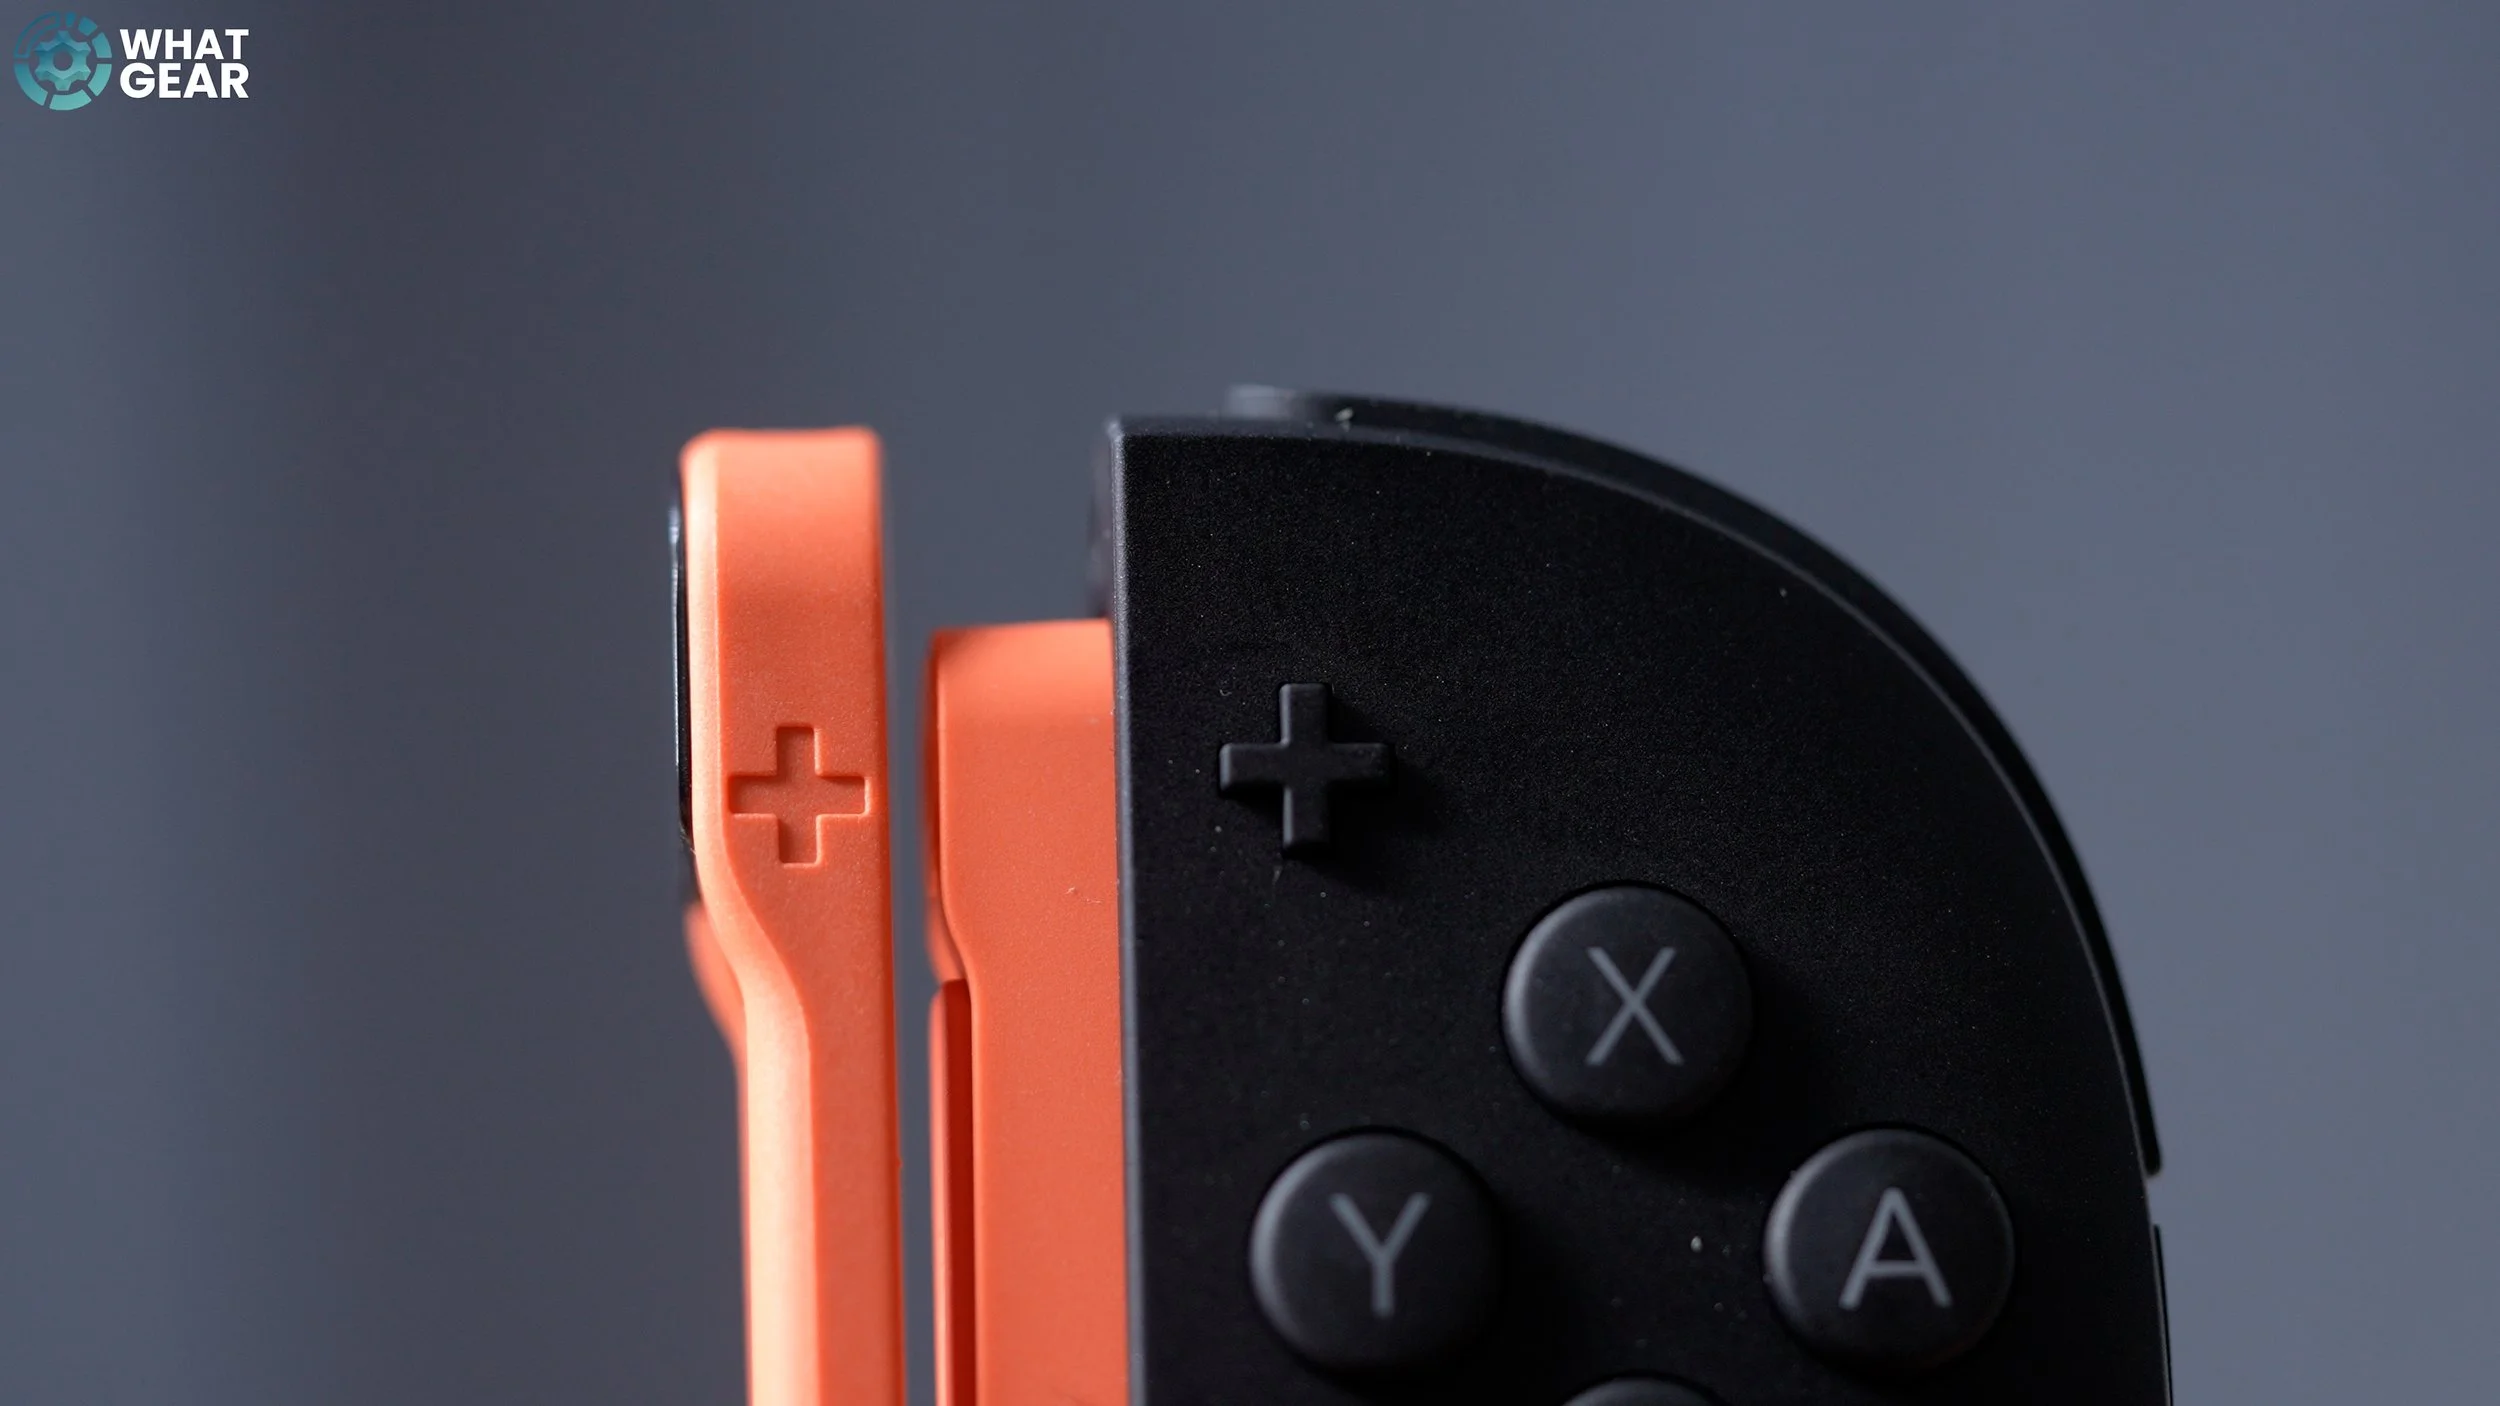
Now let's look at the controls. The JoyCon 2 wrist strap attachments are all improved, but they're not invincible. Here's an easy way to ensure you're putting them on correctly.
Match up the Plus with the Plus & the Minus with the Minus. The lower edge hooks on first.
How to add more controllers
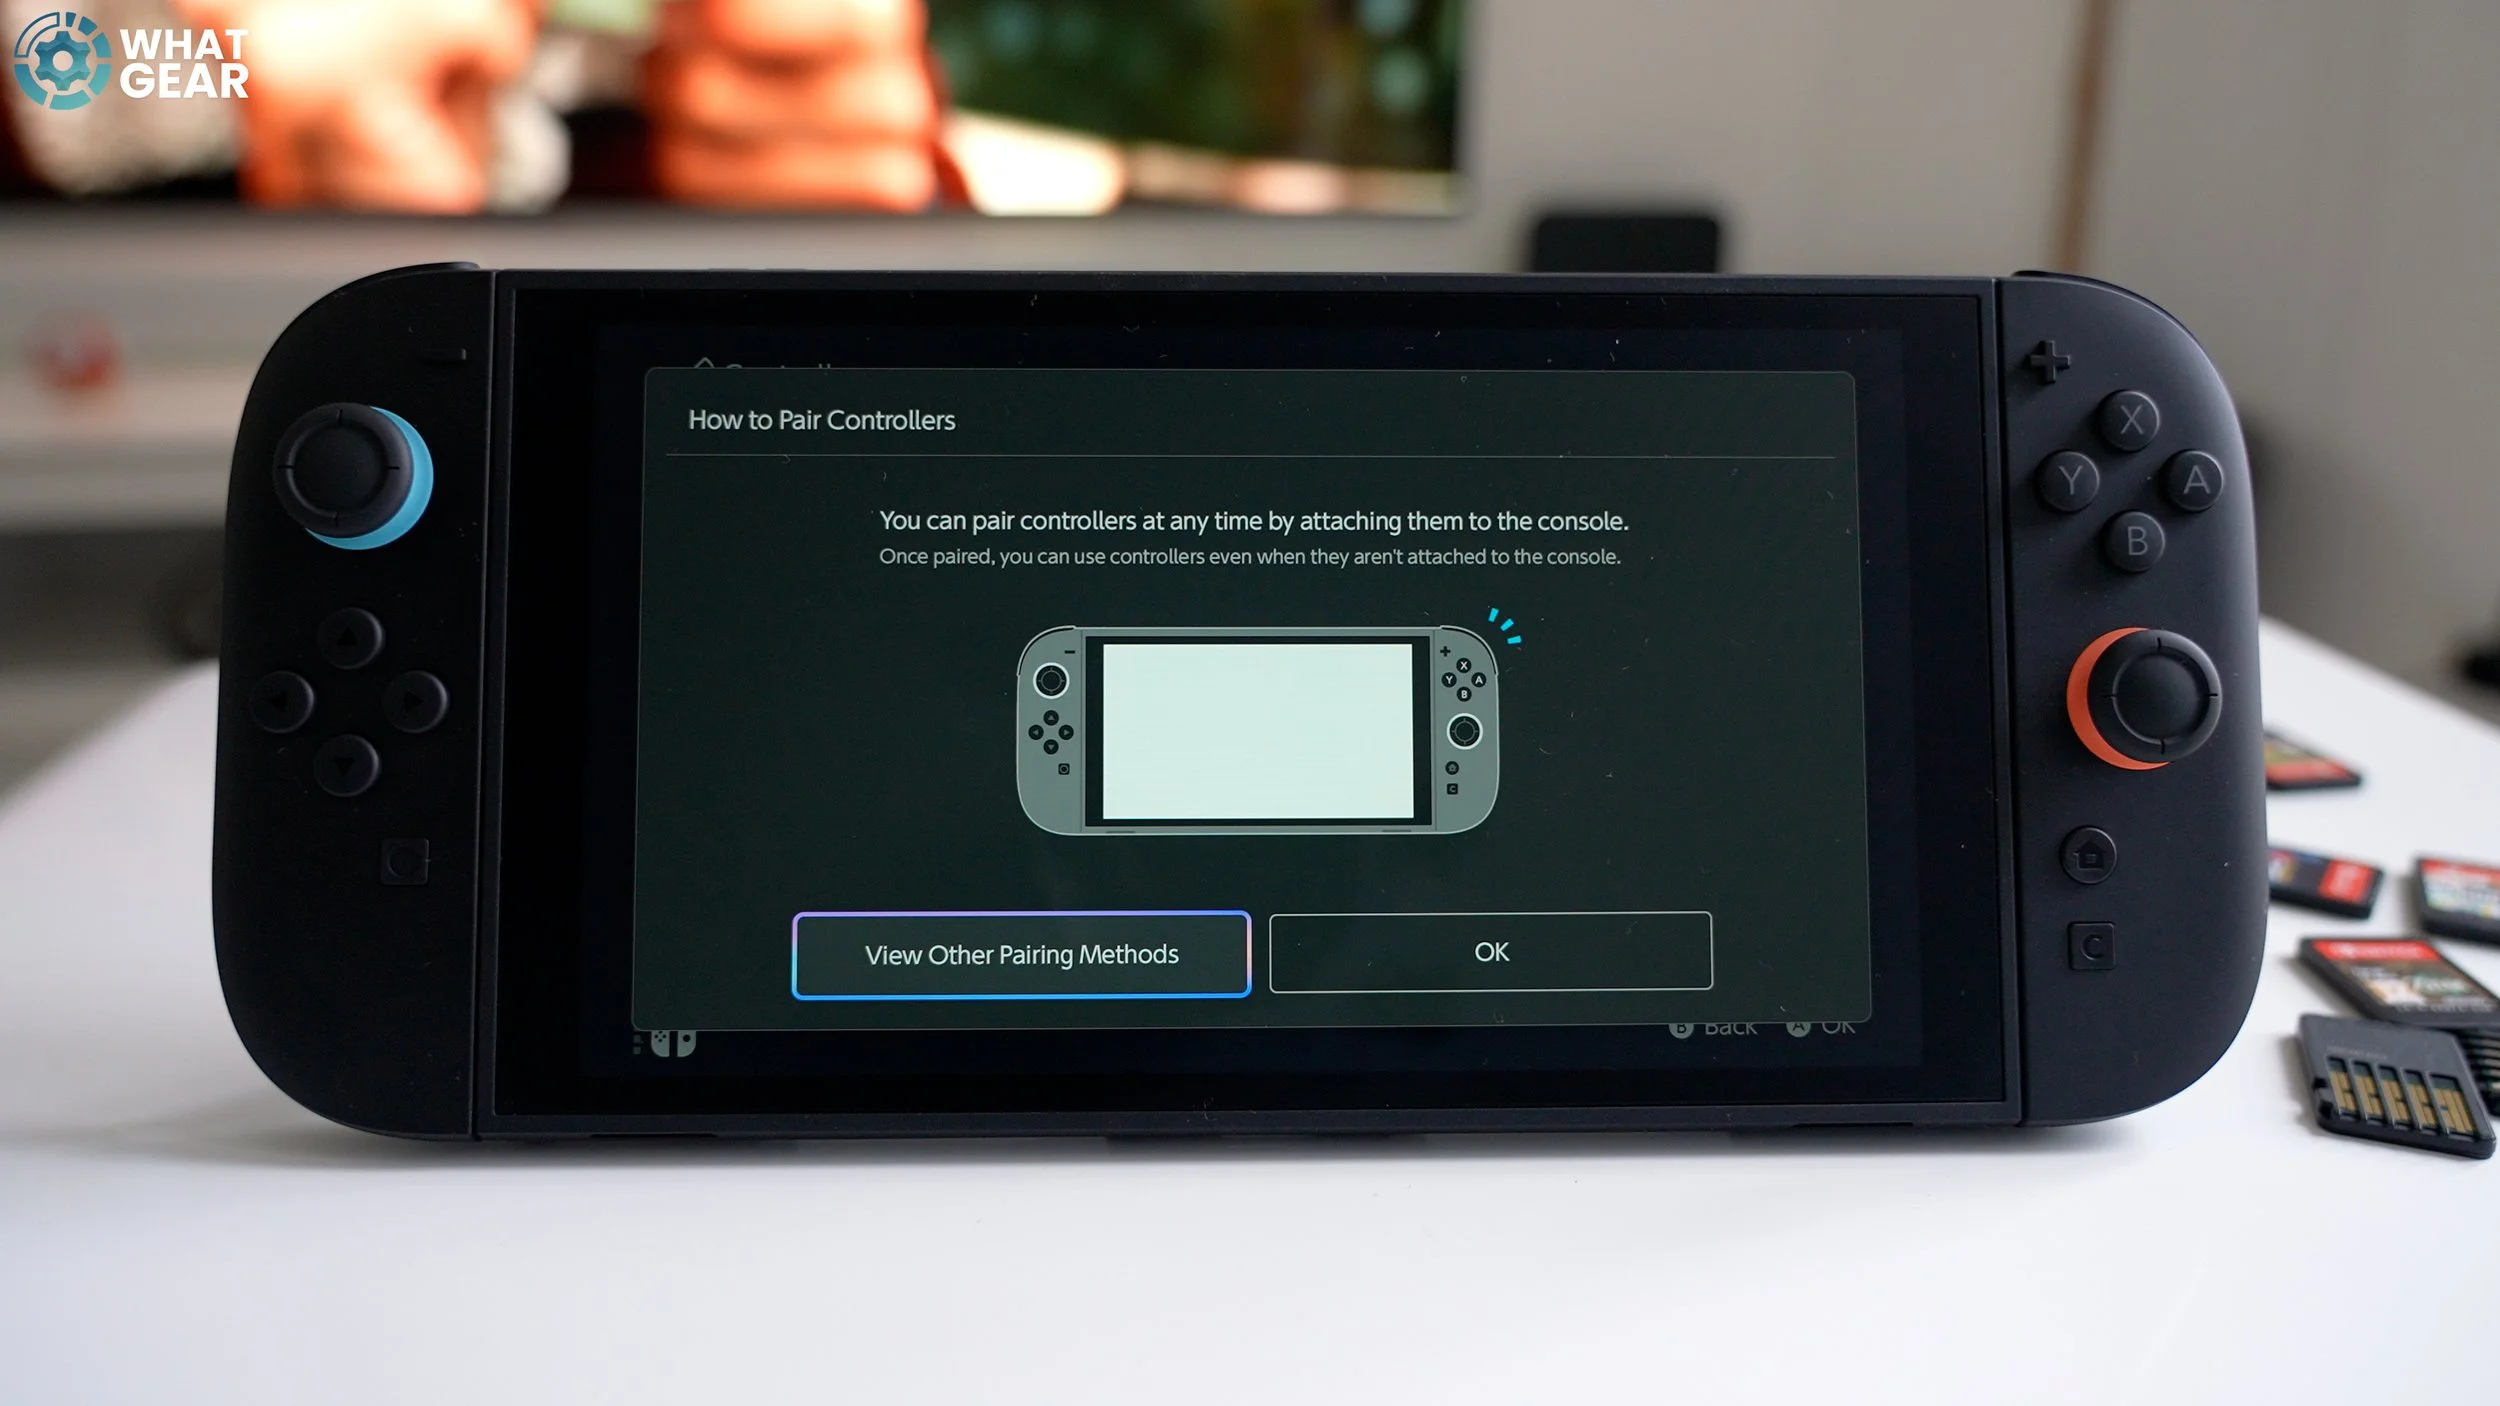
Let's say you bought more Joy-Cons for your Nintendo Switch 2. Quick question: can you pair up to 10? Anyway, here's how easy it is to add them. Tap the 'controllers' icon at the bottom of the home screen. Go to how to pair.
The simplest way is to simply connect them to the console, but you can also use a USB cable from the Pro Controller or press and hold the sync button on the regular Joy-Con to pair. The sync button is also an option on the pro-control.
How to Find Lost Controllers
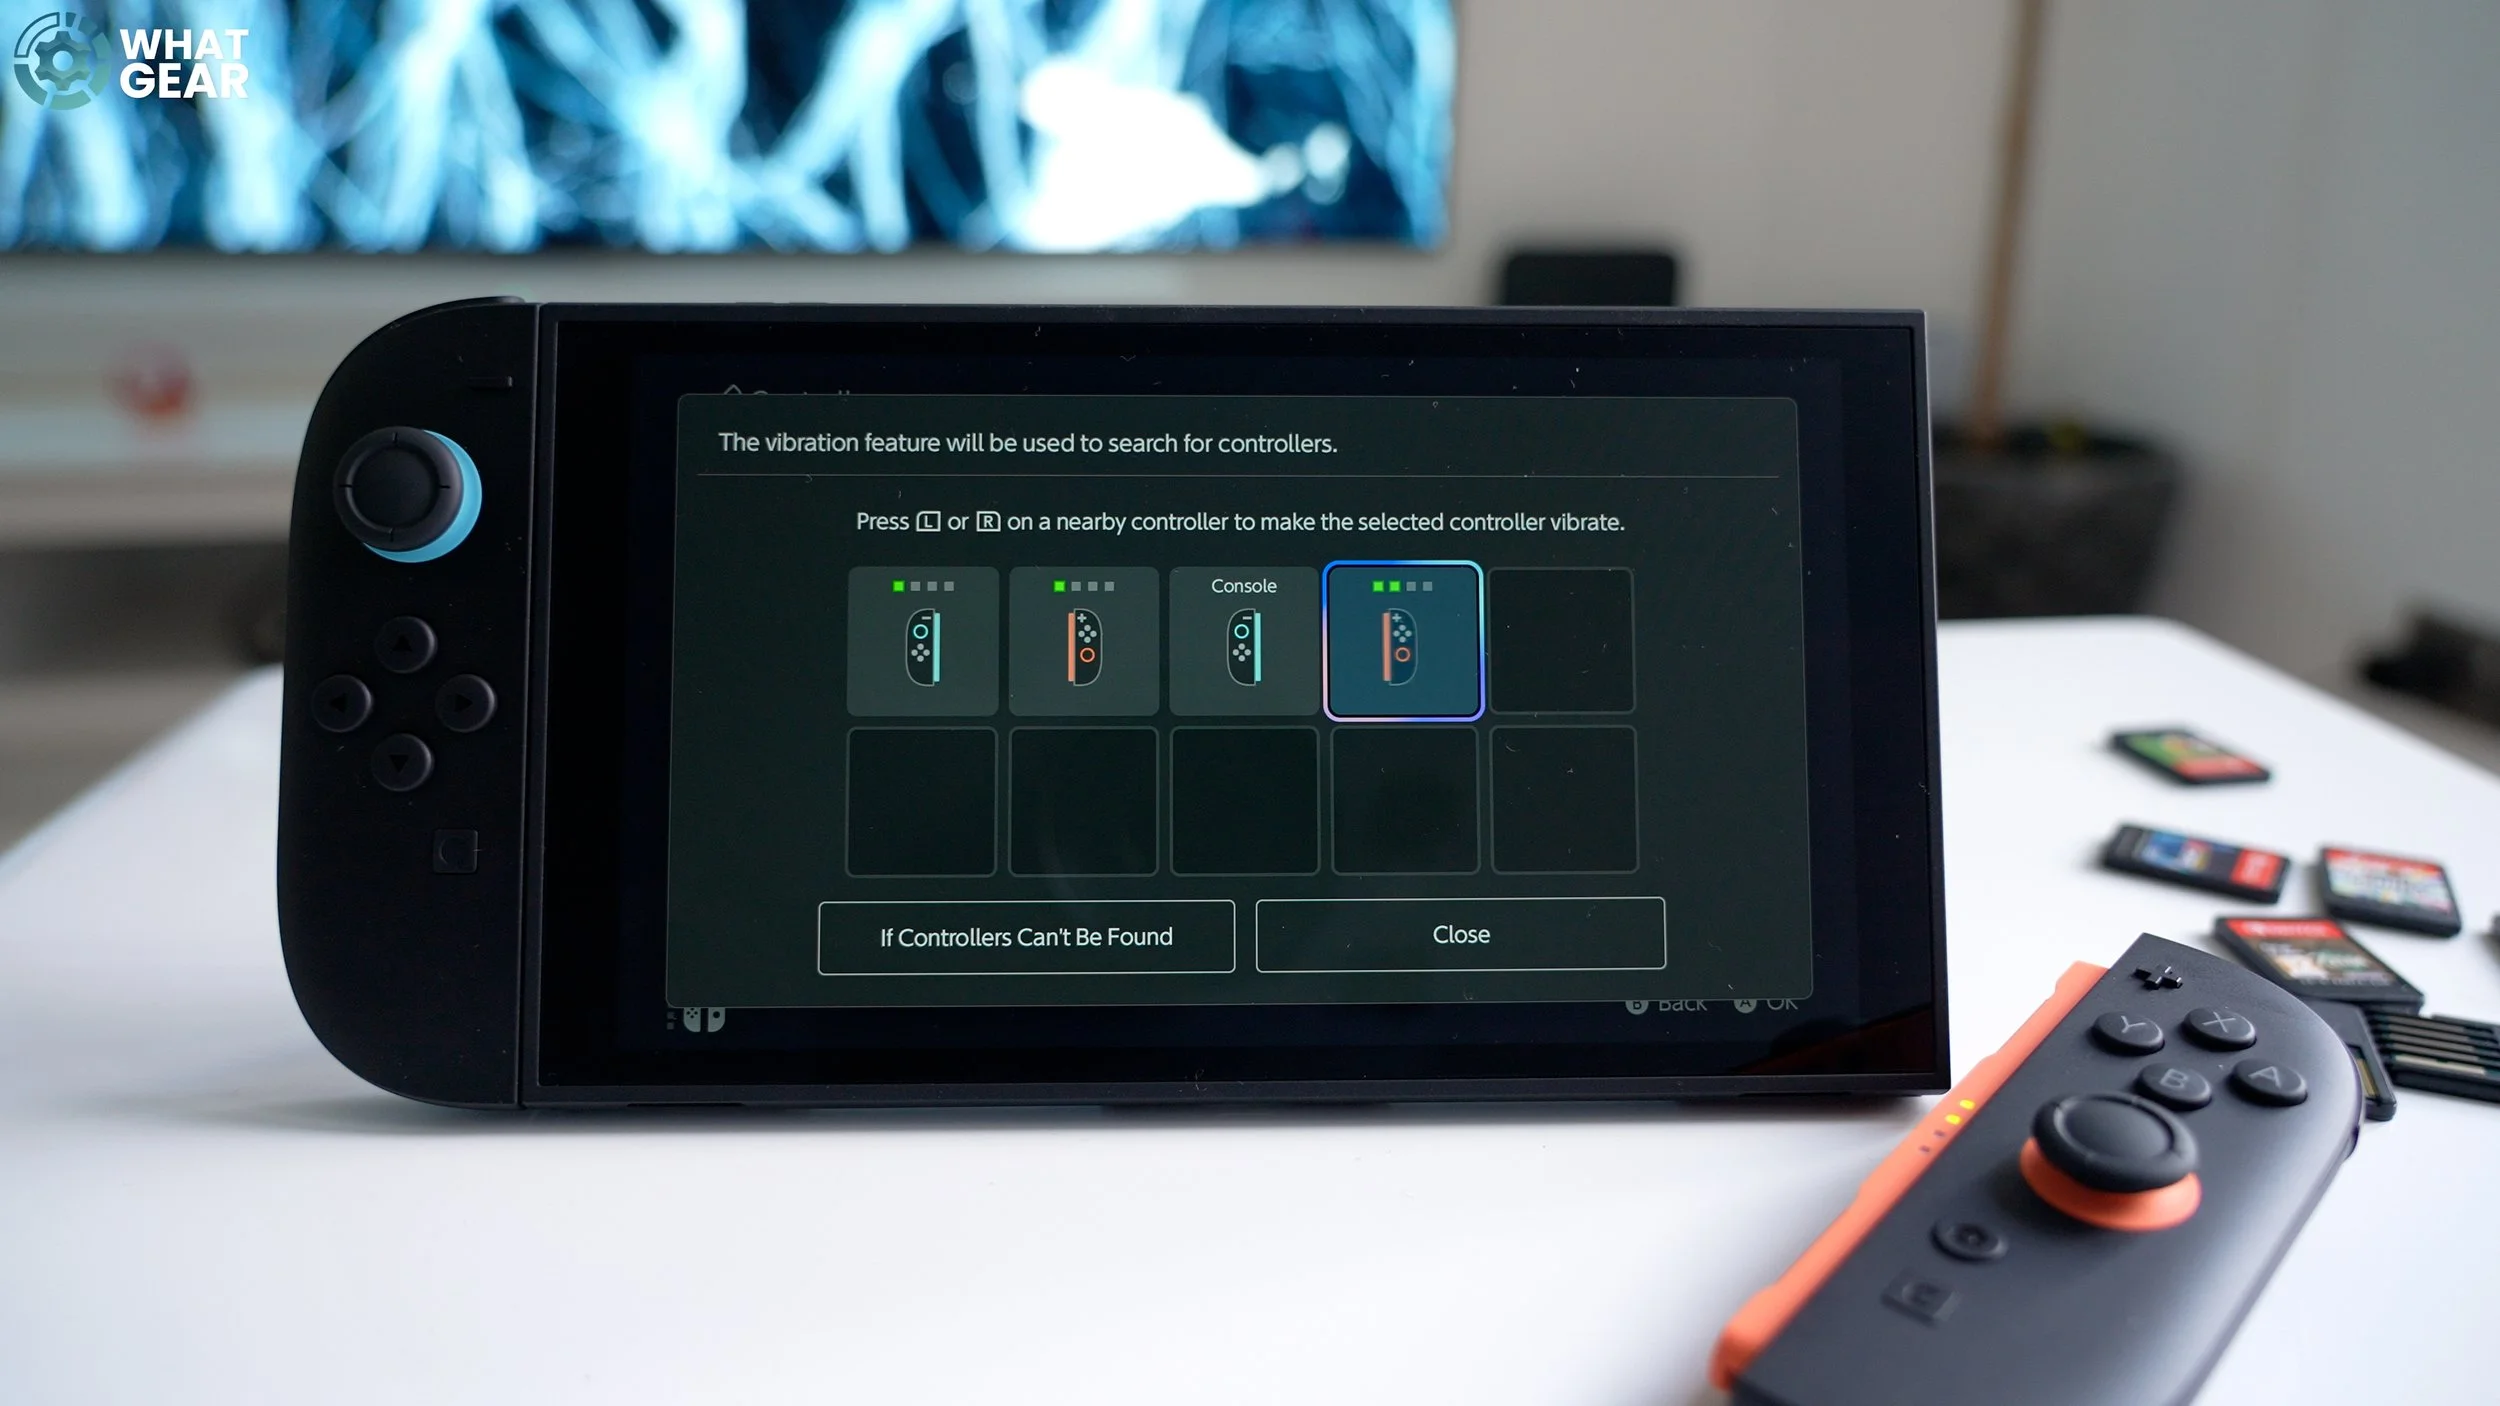
Ok, this is a fun and handy tip. Let's say you do have 10 JoyCons. You're inevitably going to lose one down the side of the sofa one day.
There's a handy tool on the Switch 2 that will help you. Tap 'Controllers' on the home screen and go to 'Search for Controllers'. Here, you can tap on the 'lost control'. Hold that down, and it will beep and vibrate, allowing you to locate it.
Bonus 3. How to charge controllers
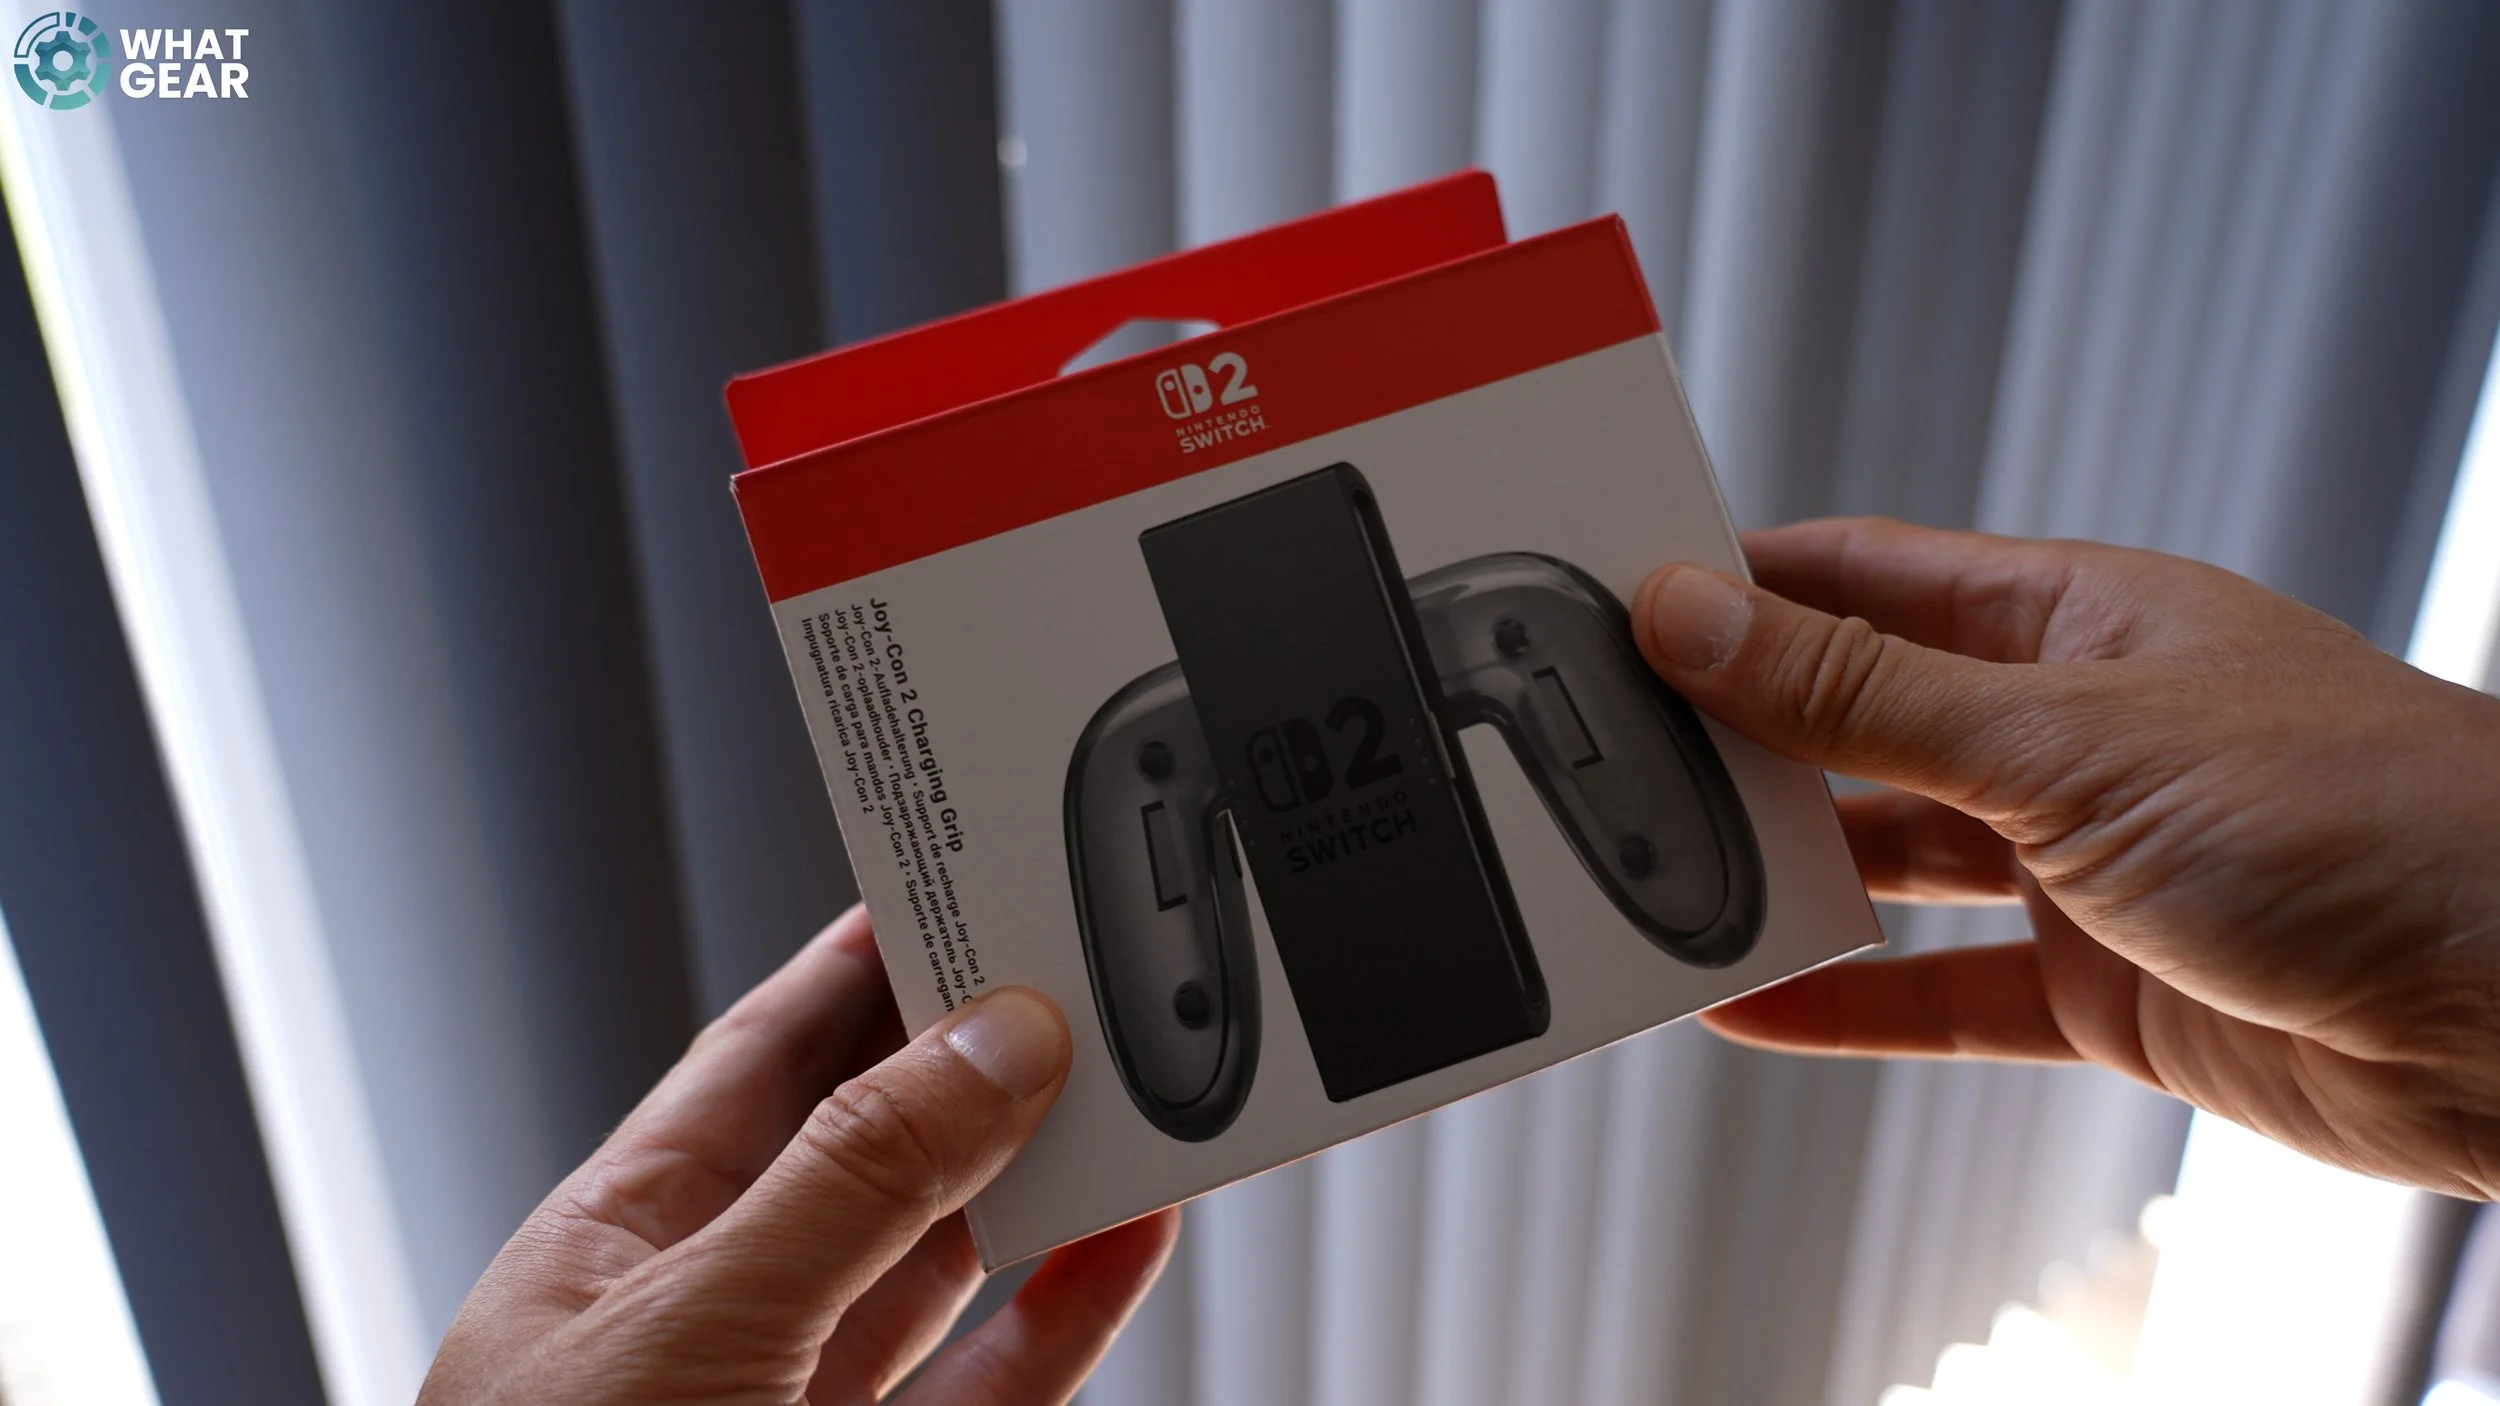
Here's just a quick bonus tip for the controllers. A question I know some people will ask is, 'How do you charge the Joy-Cons?' Well, the easiest way is to connect them to the console.
Alternatively, you can purchase a charging grip or charging dock. The charging grip is almost identical to the grip you get for free with the Switch 2, which has a charging port.
Bonus 4. Check power levels
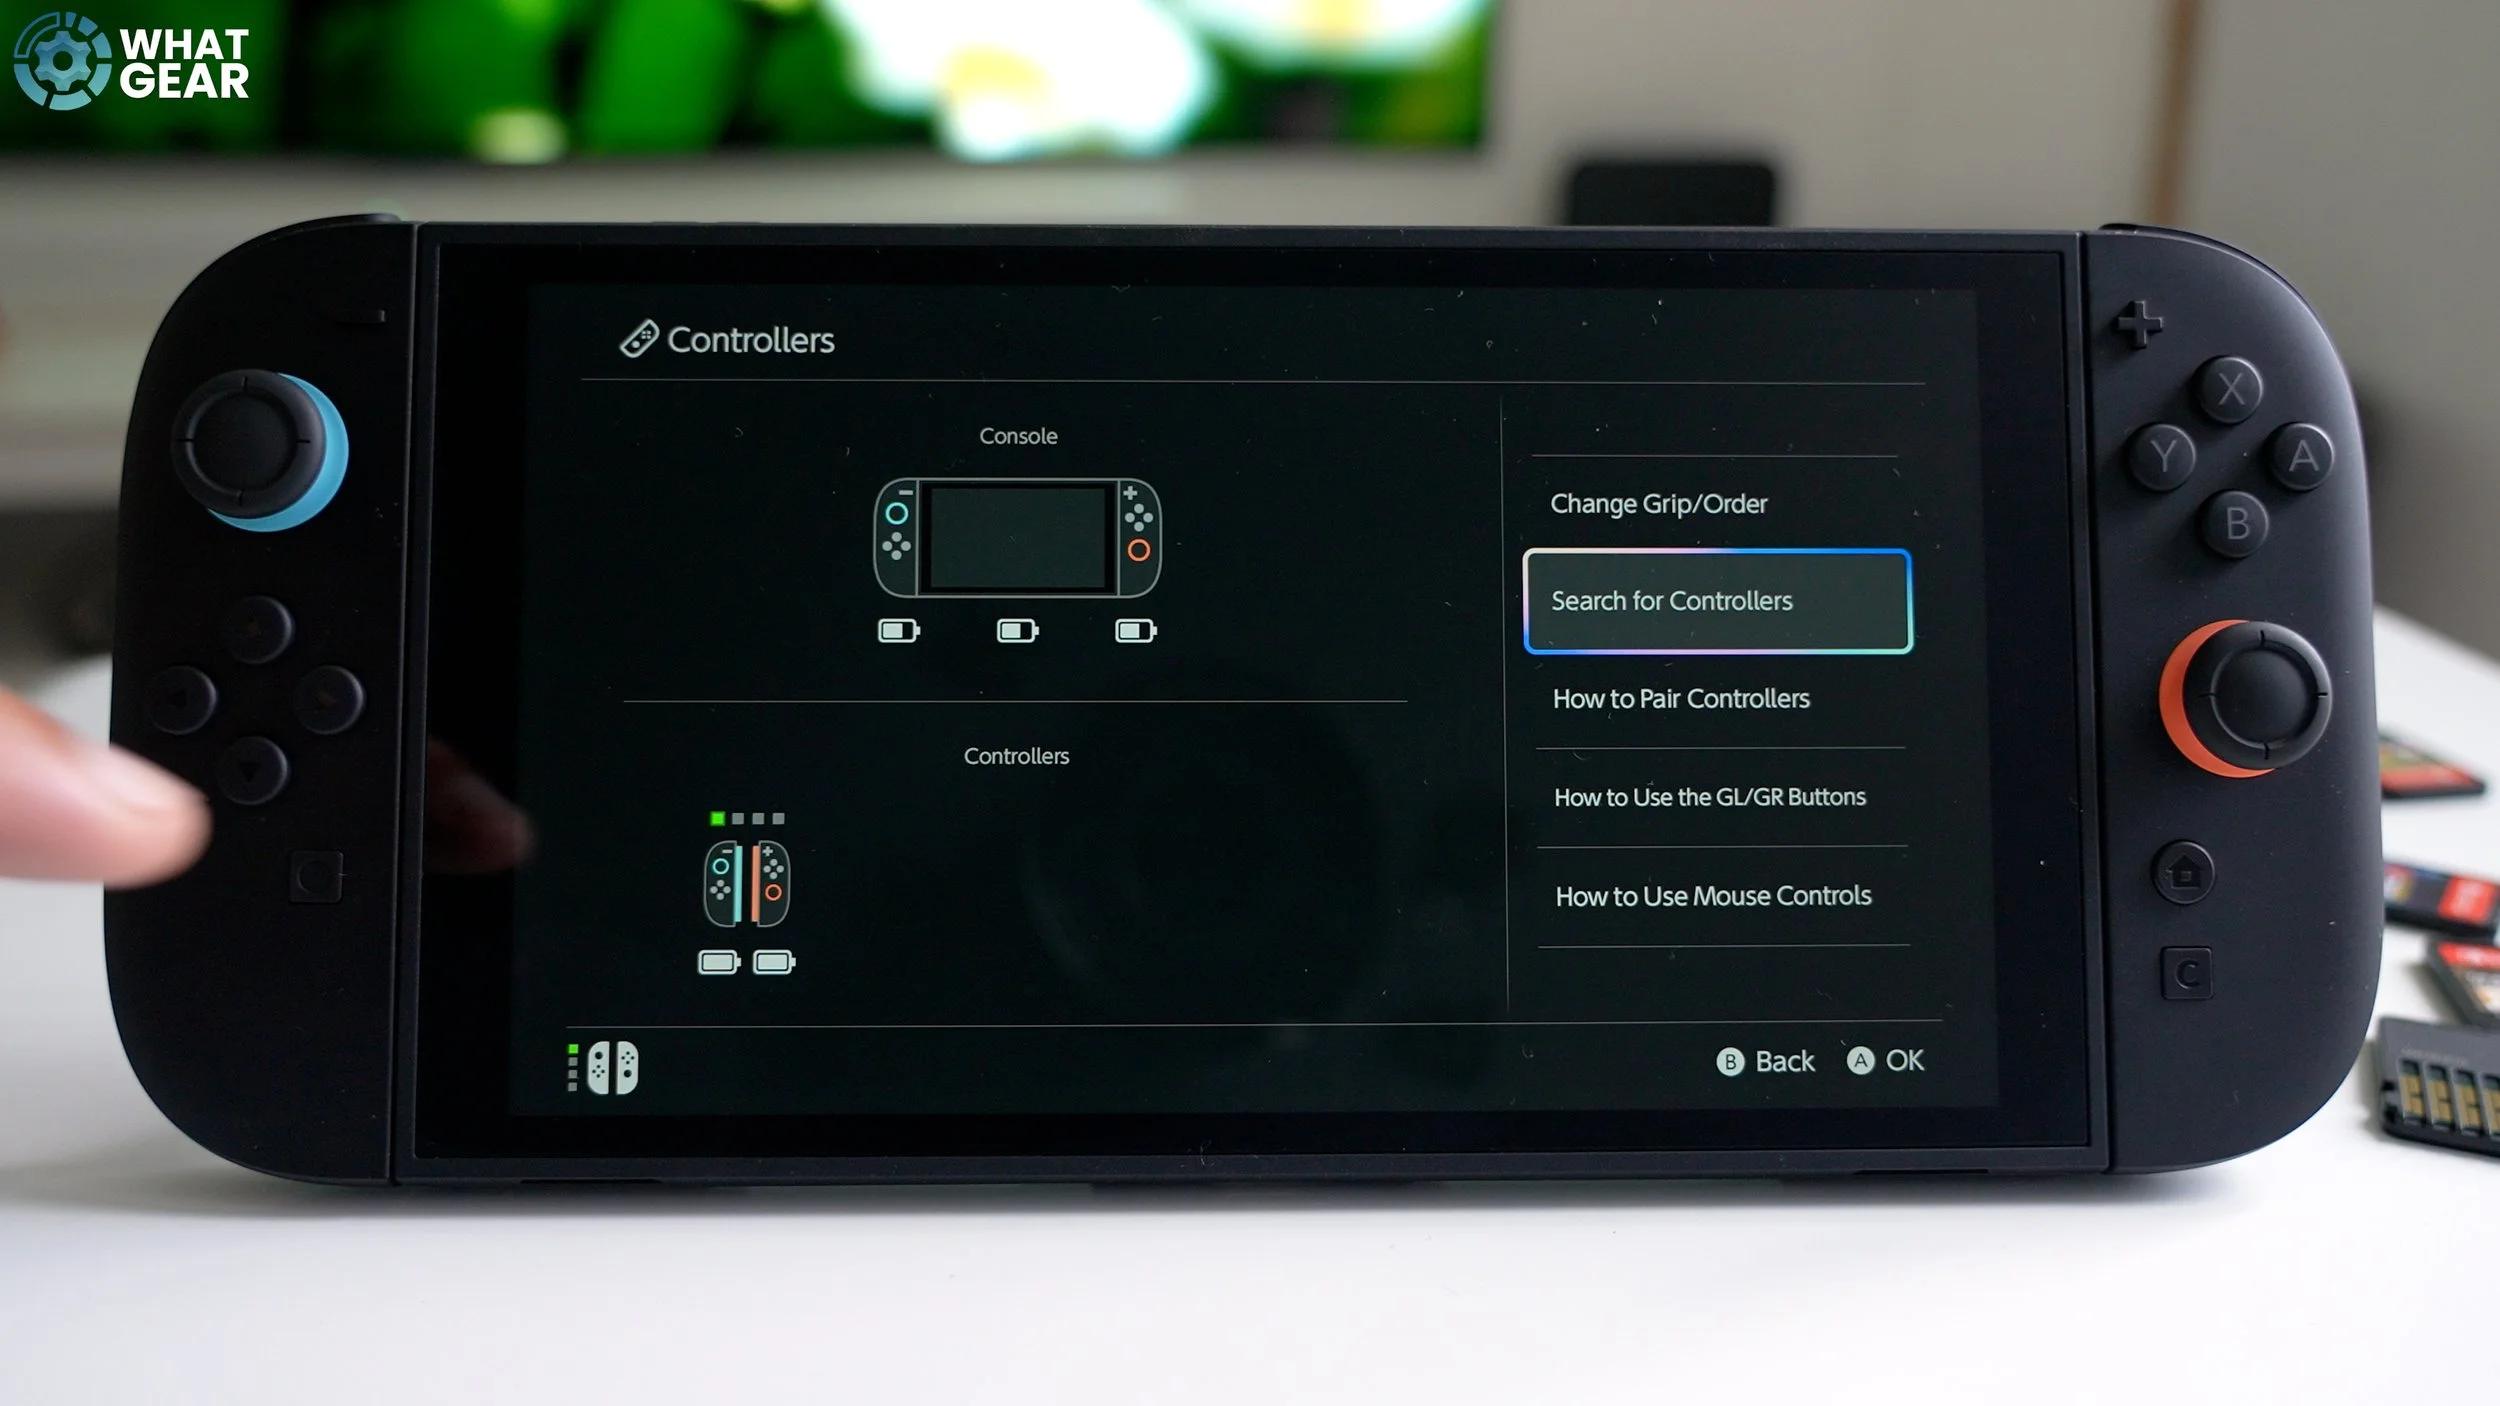
If you need to check all the battery levels on all your controls all at once. Simply tap 'Controls', and here you will find all your Joy-Con battery levels.
Bonus Tip 5. How to update JoyCon
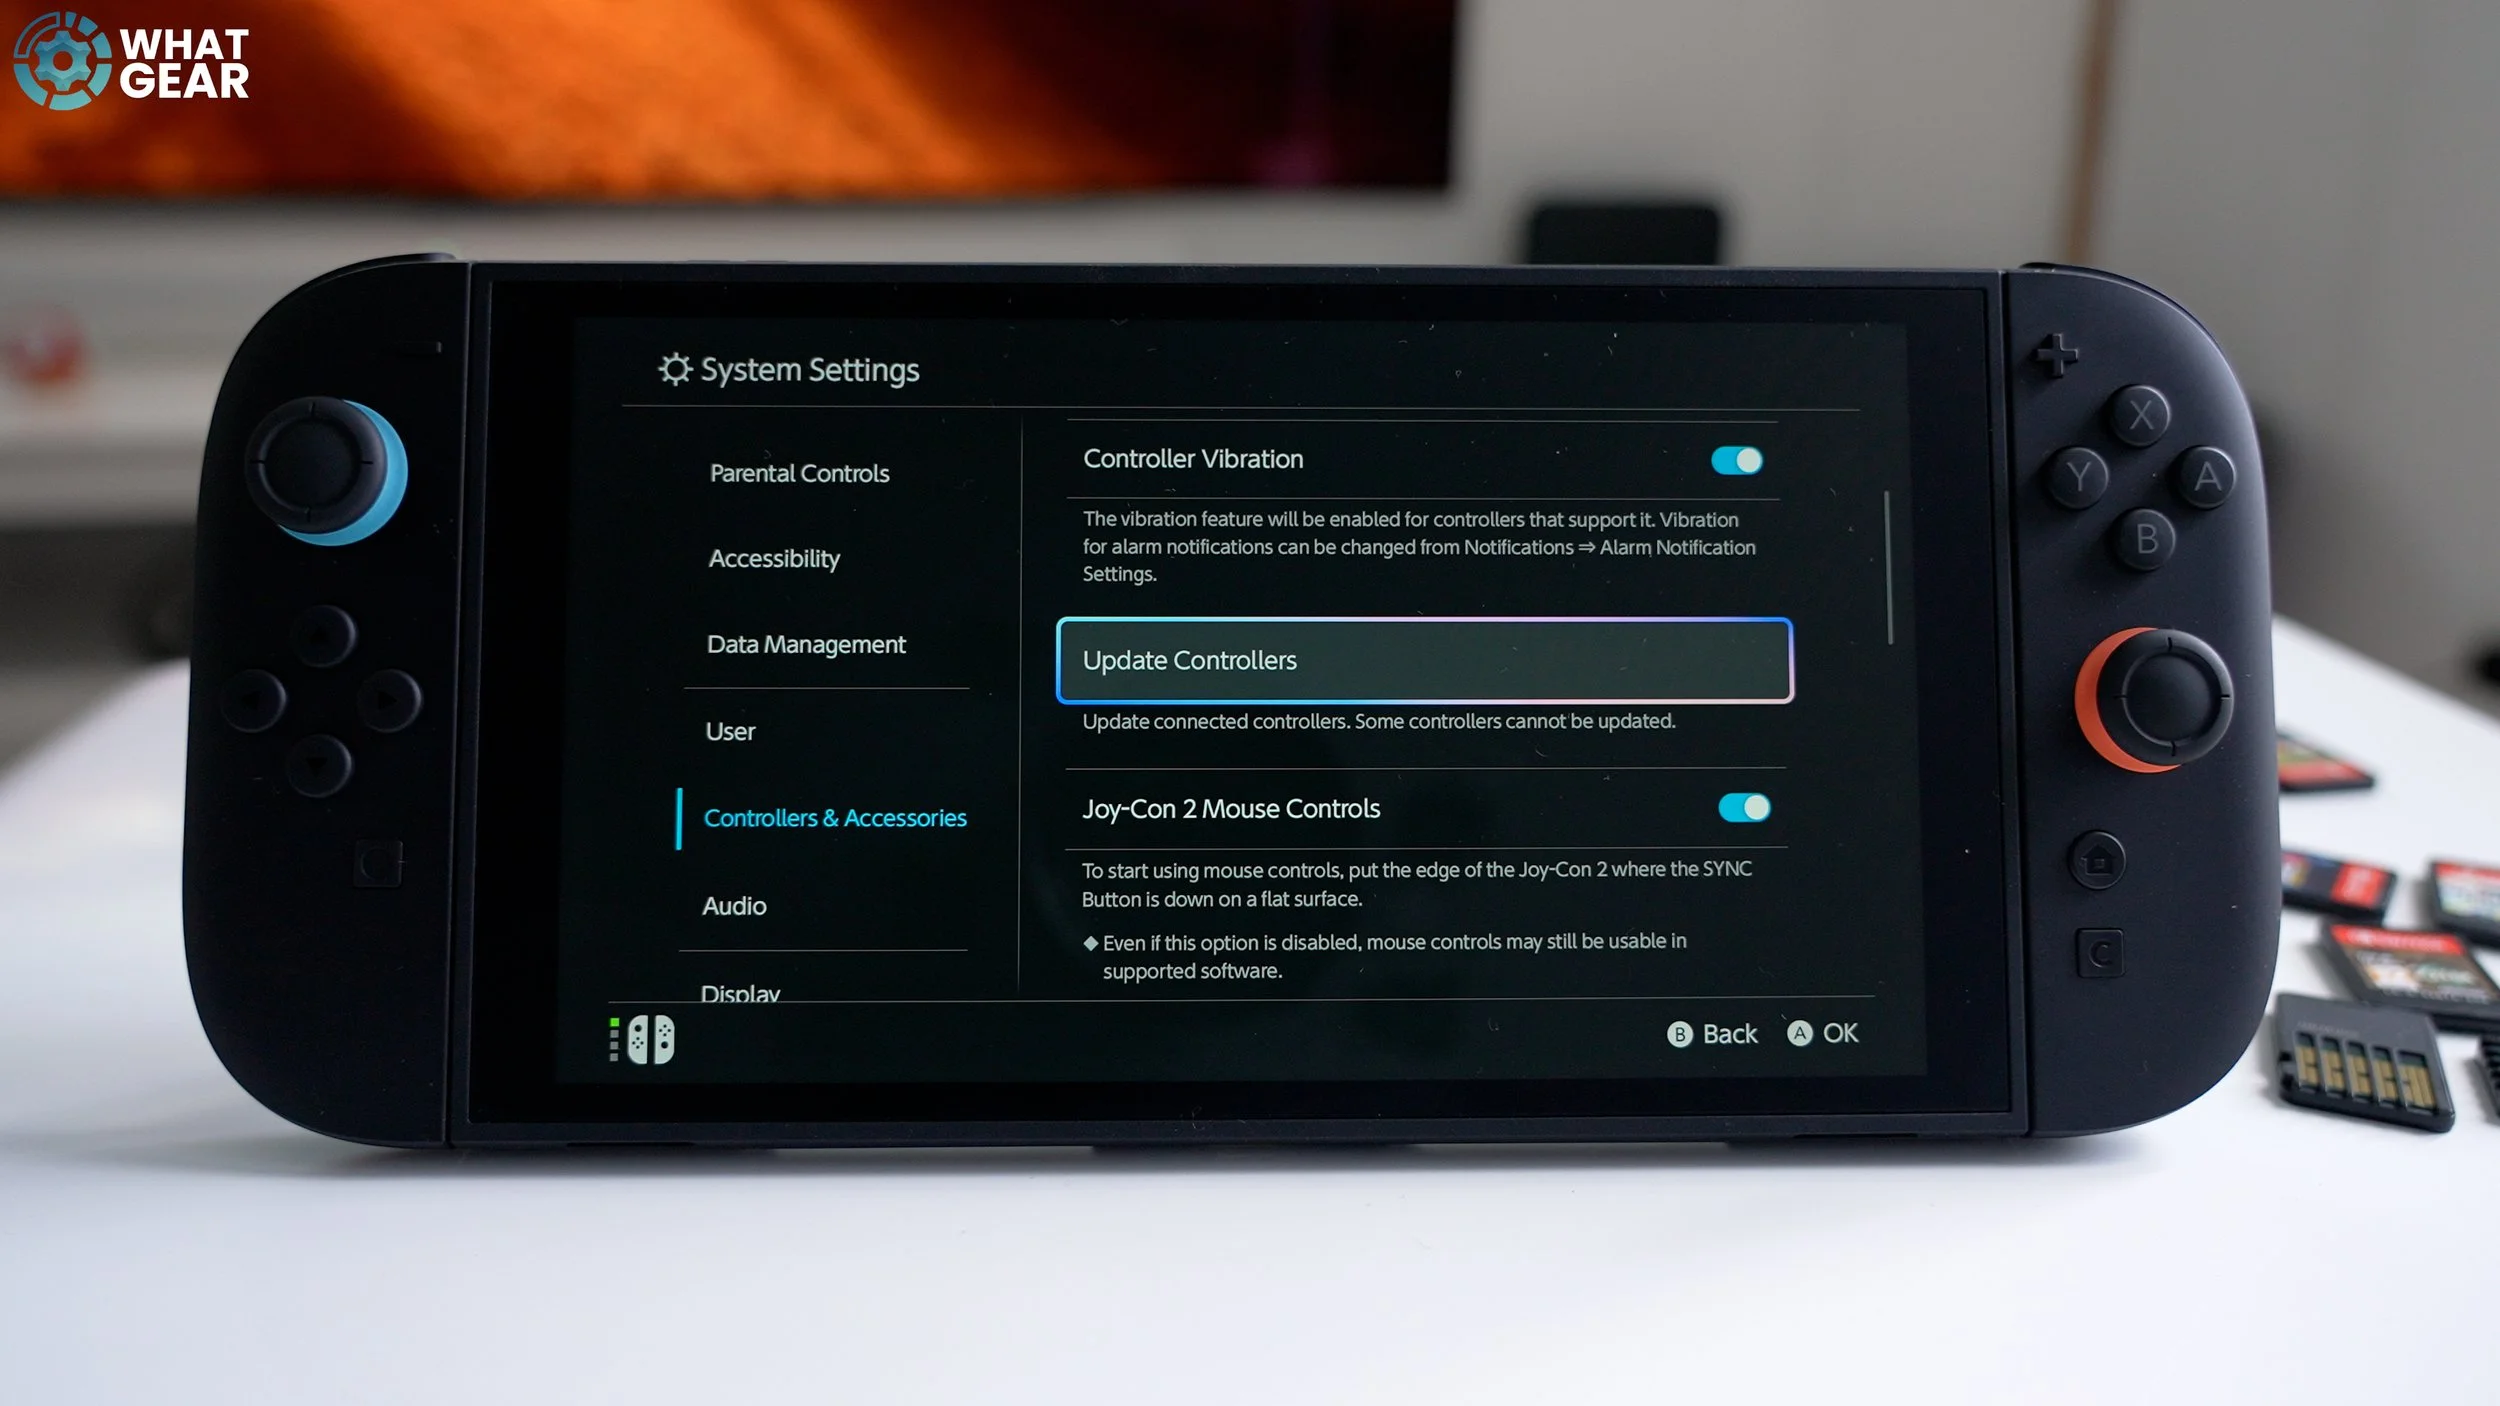
And here's another one. Something that doesn't always happen automatically is this. Go to Settings> Controller & Accessories> Update Controllers.
How to create a console lock pin
Ok, now let's discuss gamer profiles and security settings. If you are the only person playing and you don't want anyone to mess with your Switch 2's settings, games, and game saves. There are two settings you may want to consider changing.

Go to Settings/System/Console Lock.
And set up a pin. That way, only you can fire up and unlock switch 2 when you're good and ready. Also, if you are going to do this, it means you can go back to the Nintendo eShop, and this time, when you see the annoying sign with the QR code, you can simply click the 'Skip Verification' tick box. So now you're permanently verified.
But if you do plan to let someone else play with your account. Then you should leave this unticked. You'll have to continue verifying every time, but the good news is that if you follow my earlier advice, setting up your Nintendo Account Passkey will be extremely easy, making it barely an inconvenience to get past the QR codes.
How To Create login profiles

There's a better way to let someone play on your Switch 2. And that is to create an account for them. You can have several accounts. Here's how to create one. Go to System/Users and add a user.
Now, you need to head over to the Nintendo Website and create an account. But hold fire before you do that because there's a secret trick you'll want to see first.
How to set Parental Controls - Mobile App
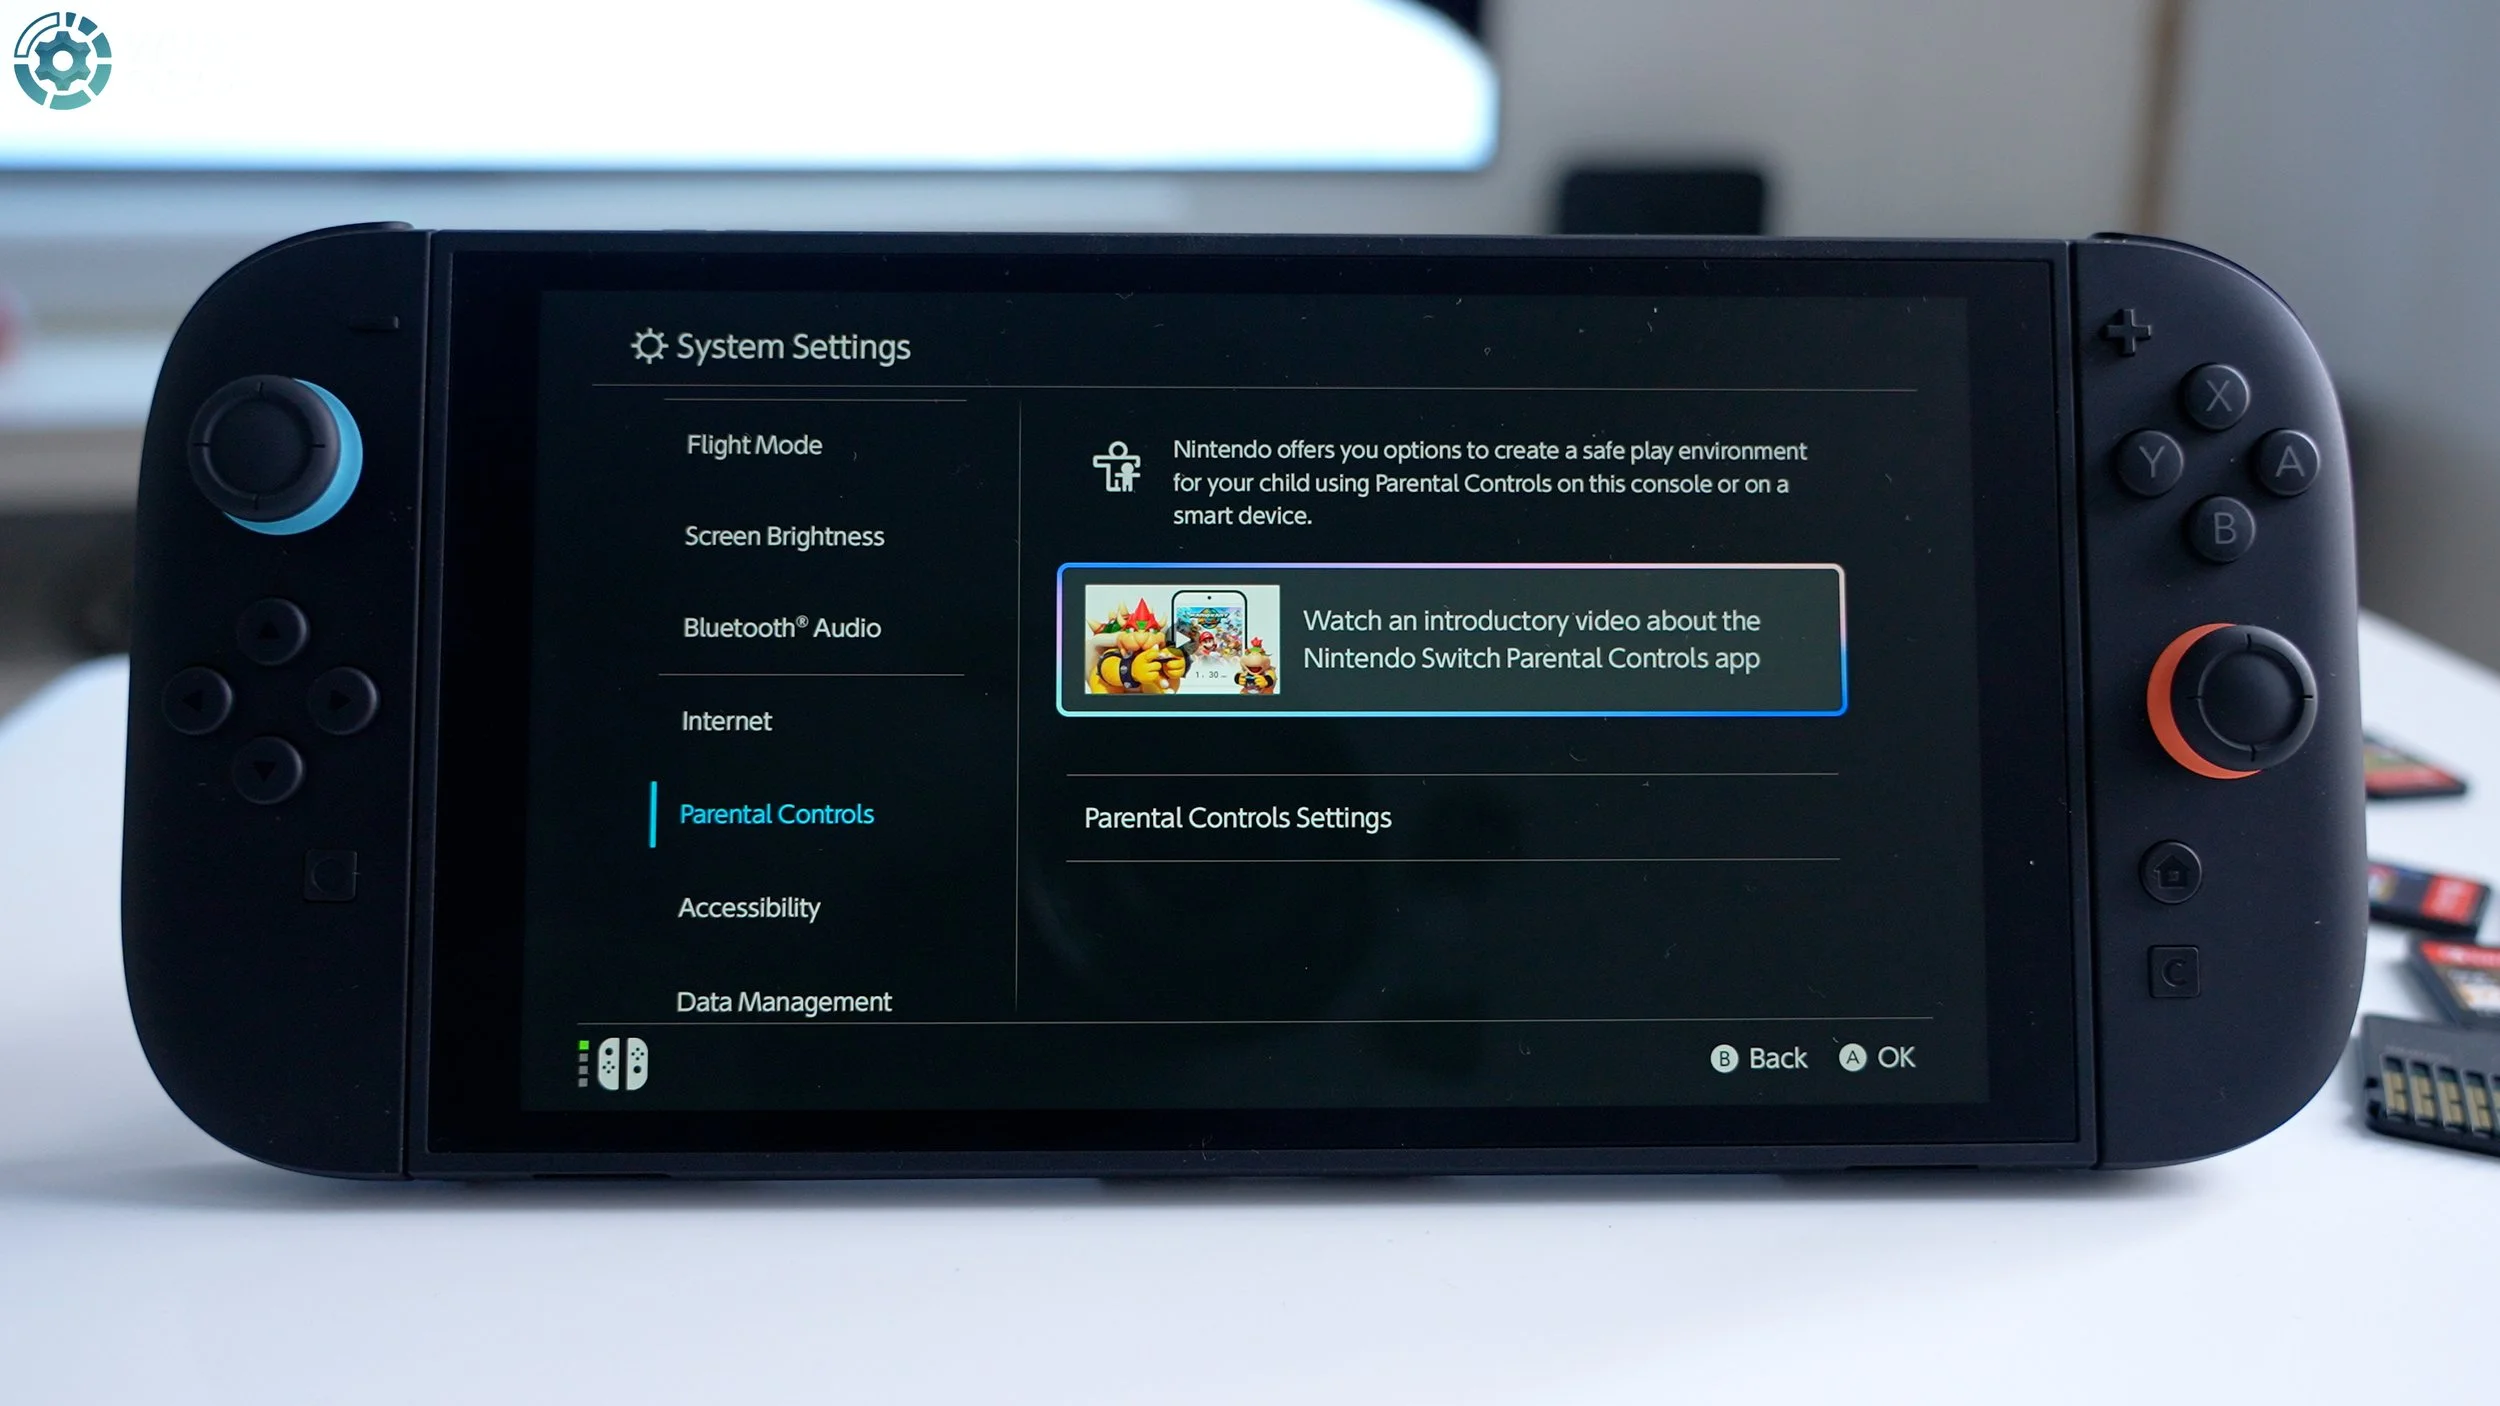
But first tip number 20. This one is for the parents — and maybe some girlfriends. If you want to restrict the playtime on the Switch 2 with the granular controls. Does this go to setting / parental controls.
There's a really nice animated video here that can explain this better than I ever could. Put simply, there's an official Nintendo Switch Parental Control app. You can set timers for specific accounts and keep an eye on things… It's really quite clever.
Bonus Tip 5 - How To Access Quick Settings
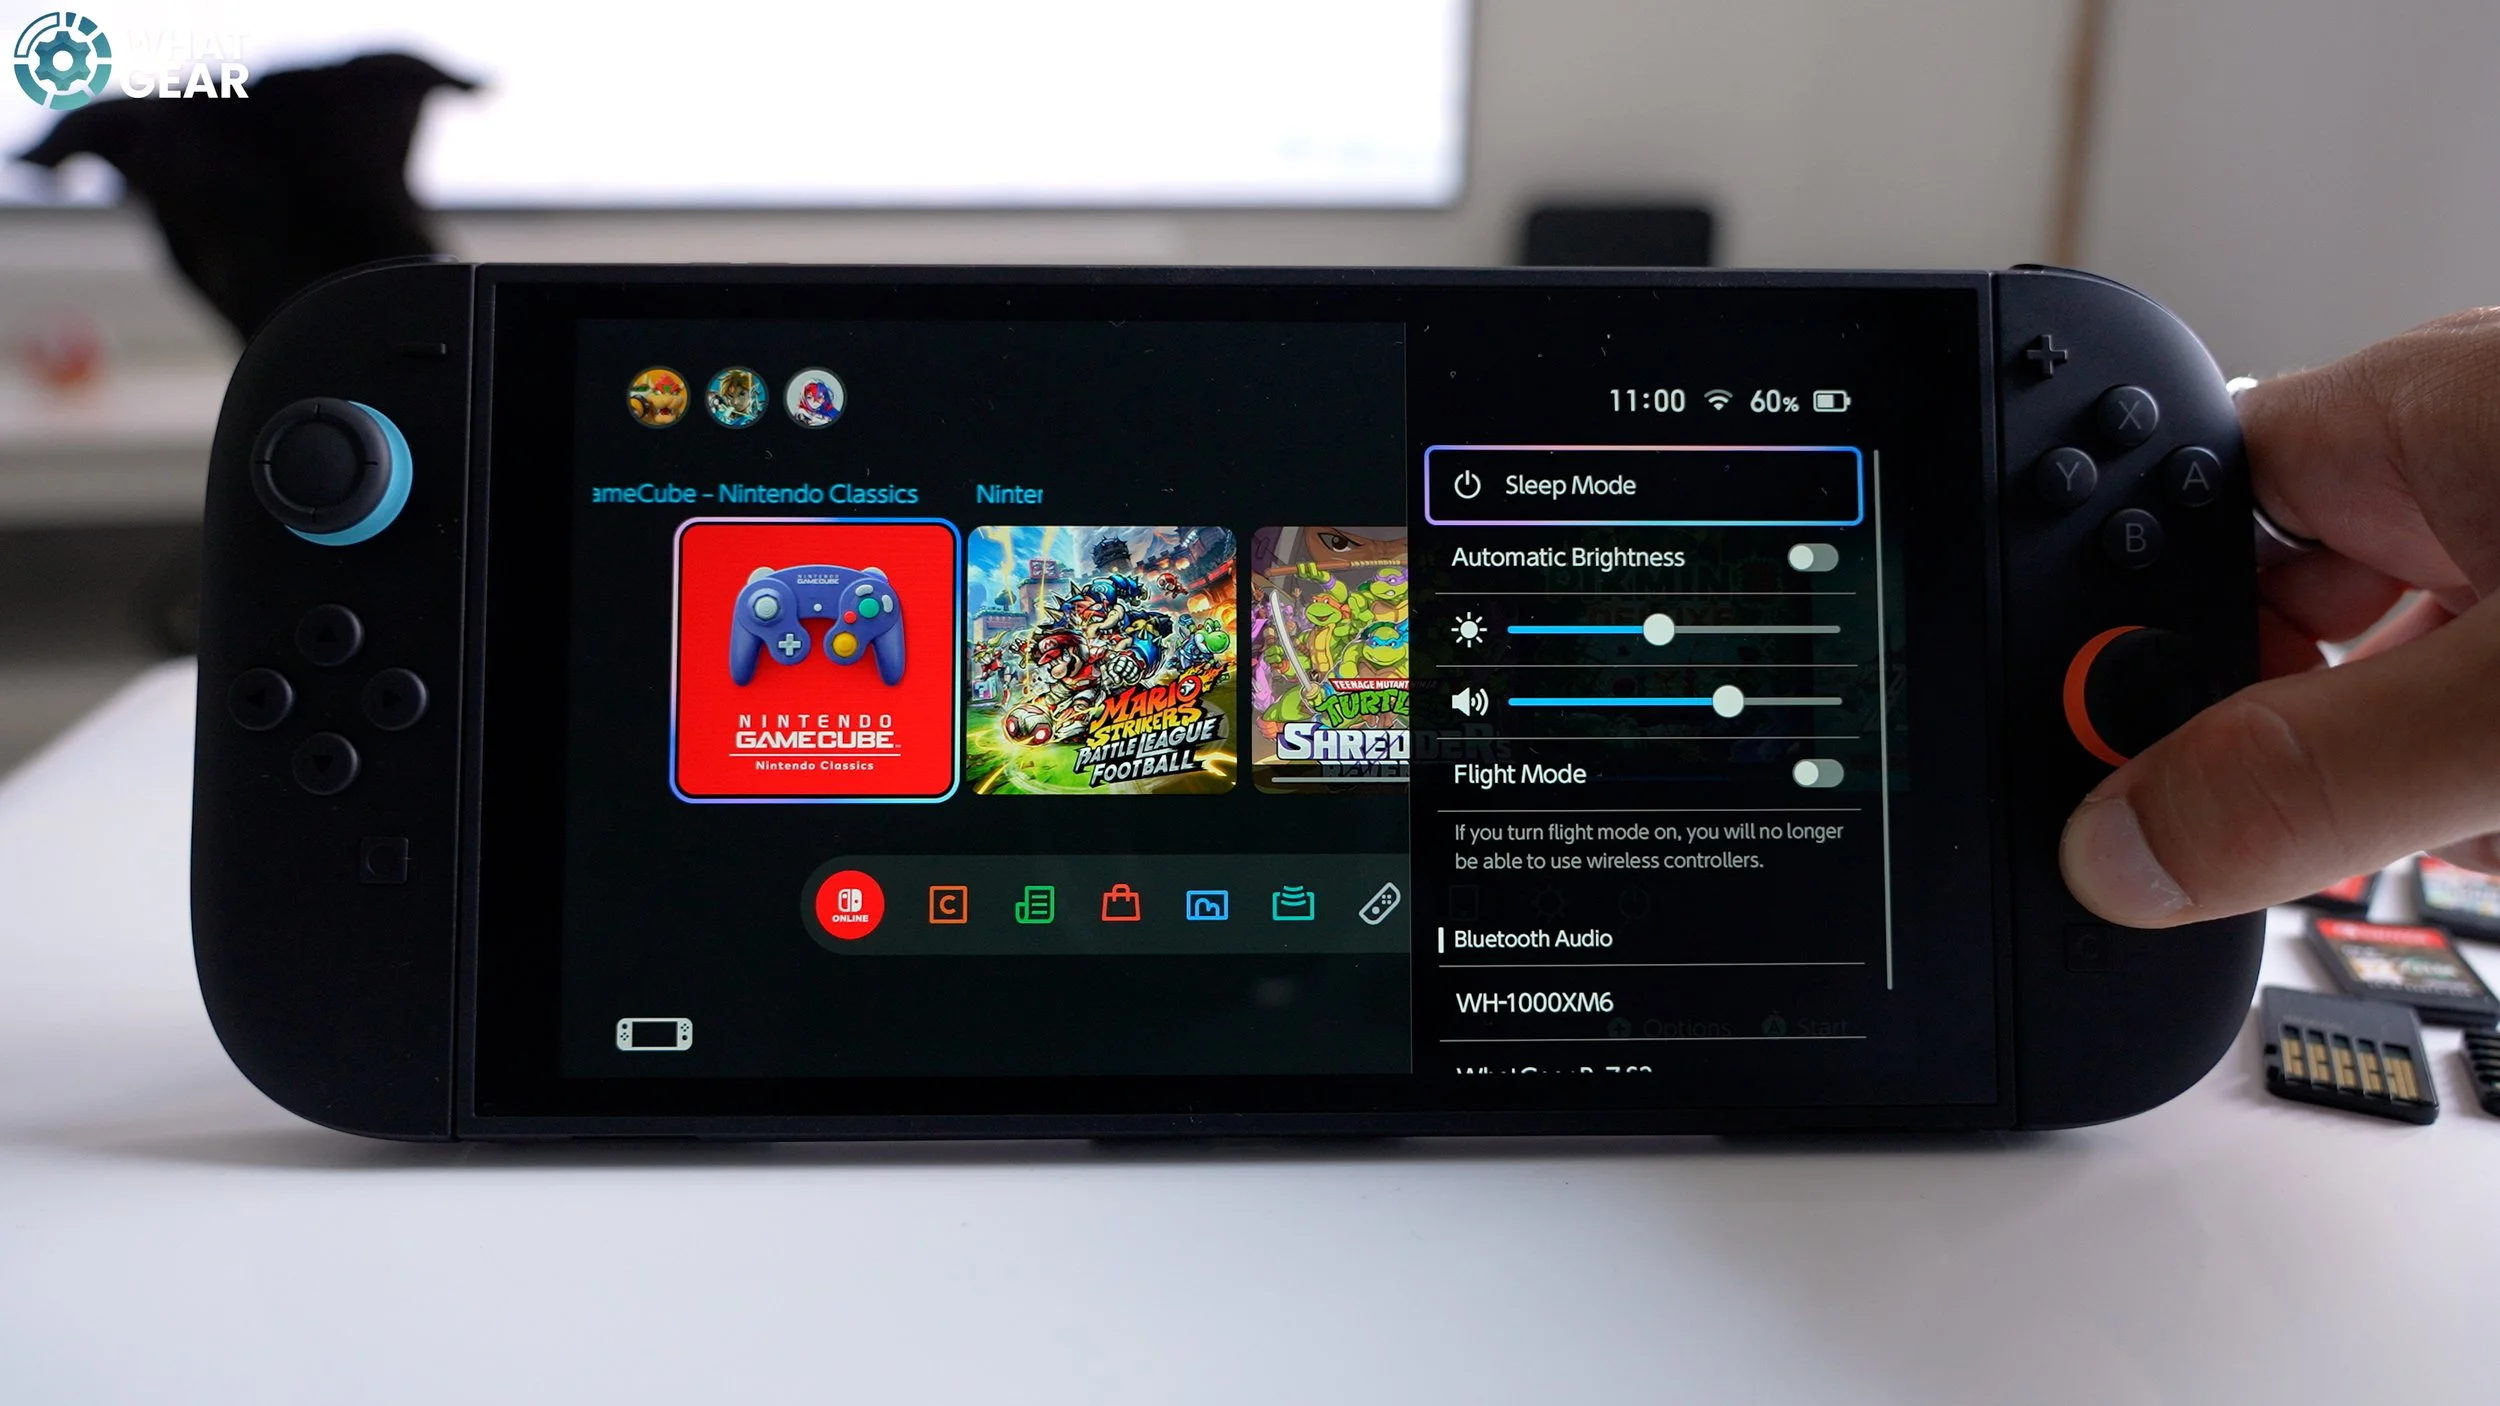
Alright, so I made it! and I have a few little bonus tips for you. One is the quick menu. If you hold down the Home button, a quick menu pops up, allowing you to make quick adjustments without leaving a game. You can also pair quickly with previously paired Bluetooth devices.
Bonus Tip 6 - How To Switch OFF your Switch 2

The power button on the home screen does not fully power down the console. It just hibernates. So let's say you're going on a long-distance journey and need to save every last bit of battery. Well, then, you should fully power down when not in use. To do this, you must press and hold the power button on top until you see the power menu, where you can then power down.
Bonus Tip 7 - How To Factory Reset
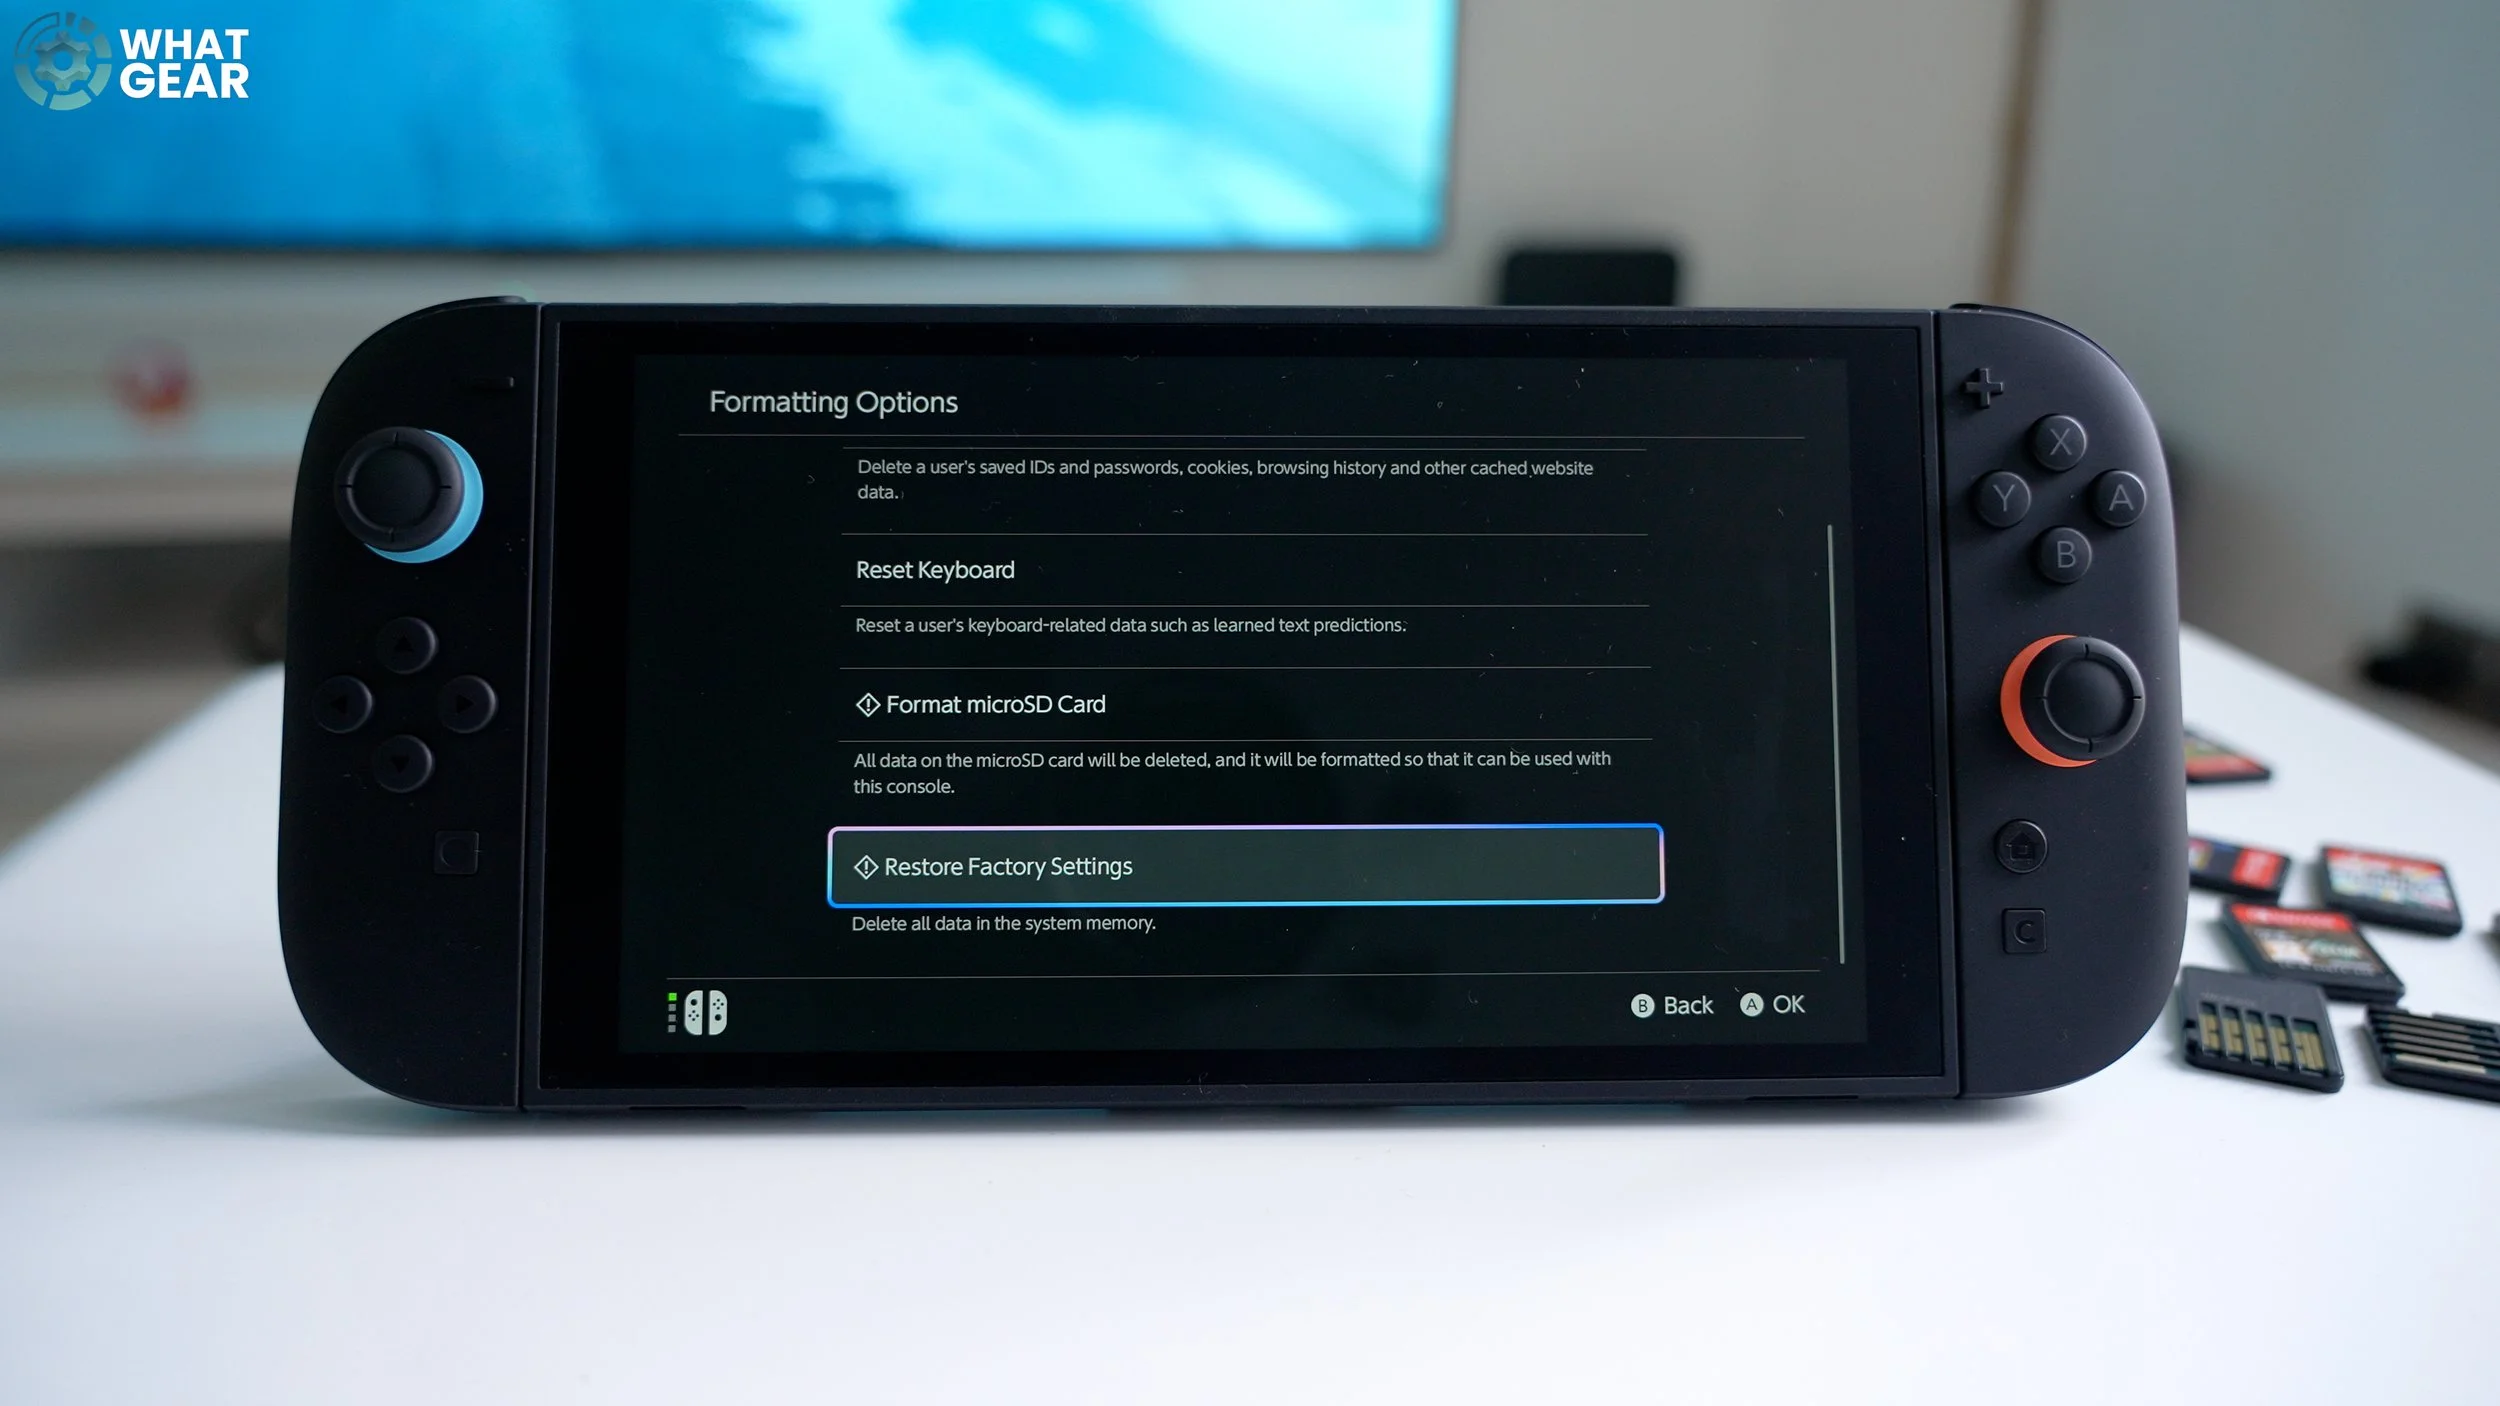
Ok, maybe one day… maybe when the Switch 2 OLED comes out, or if you just want to start fresh. You may wish to factory reset your Switch. Here's how to do that.
Settings / System / formatting options / restore factory settings
Bonus Tip 8 - How To Get Japanese Games


Ok, that's a secret tip I mentioned when discussing profiles. So, when you register your Nintendo account on the official Nintendo website if you set your country to Japan. When you access the Nintendo Store, you will be able to purchase and download Japanese games. Since Nintendo is a Japanese corporation, they often release new content first. For example, here in the UK, we can't get the Donkey King game just yet, but you can obtain it from Japan. Once installed, you can share the game with other users registered on your Switch. Knowing a little Japanese would be helpful, and if all else fails, you can use Google Translate via Google Lens.