
Oppo Find X9 Pro Camera Vs Hasselblad Tele-Converter Lens Kit ( CAMERA TEST )
I have the Hasselblad Teleconverter Kit for the Oppo Find X9 Pro. And while I’m sure you’ve seen plenty of videos on this already, I have a feeling not many of them have actually told you what’s inside this thing and how good the build quality really is. So I’m going to explain that in a moment, and I’m also going to show you how it compares to simply using the already very impressive 3× lossless 200MP camera built into the phone itself.
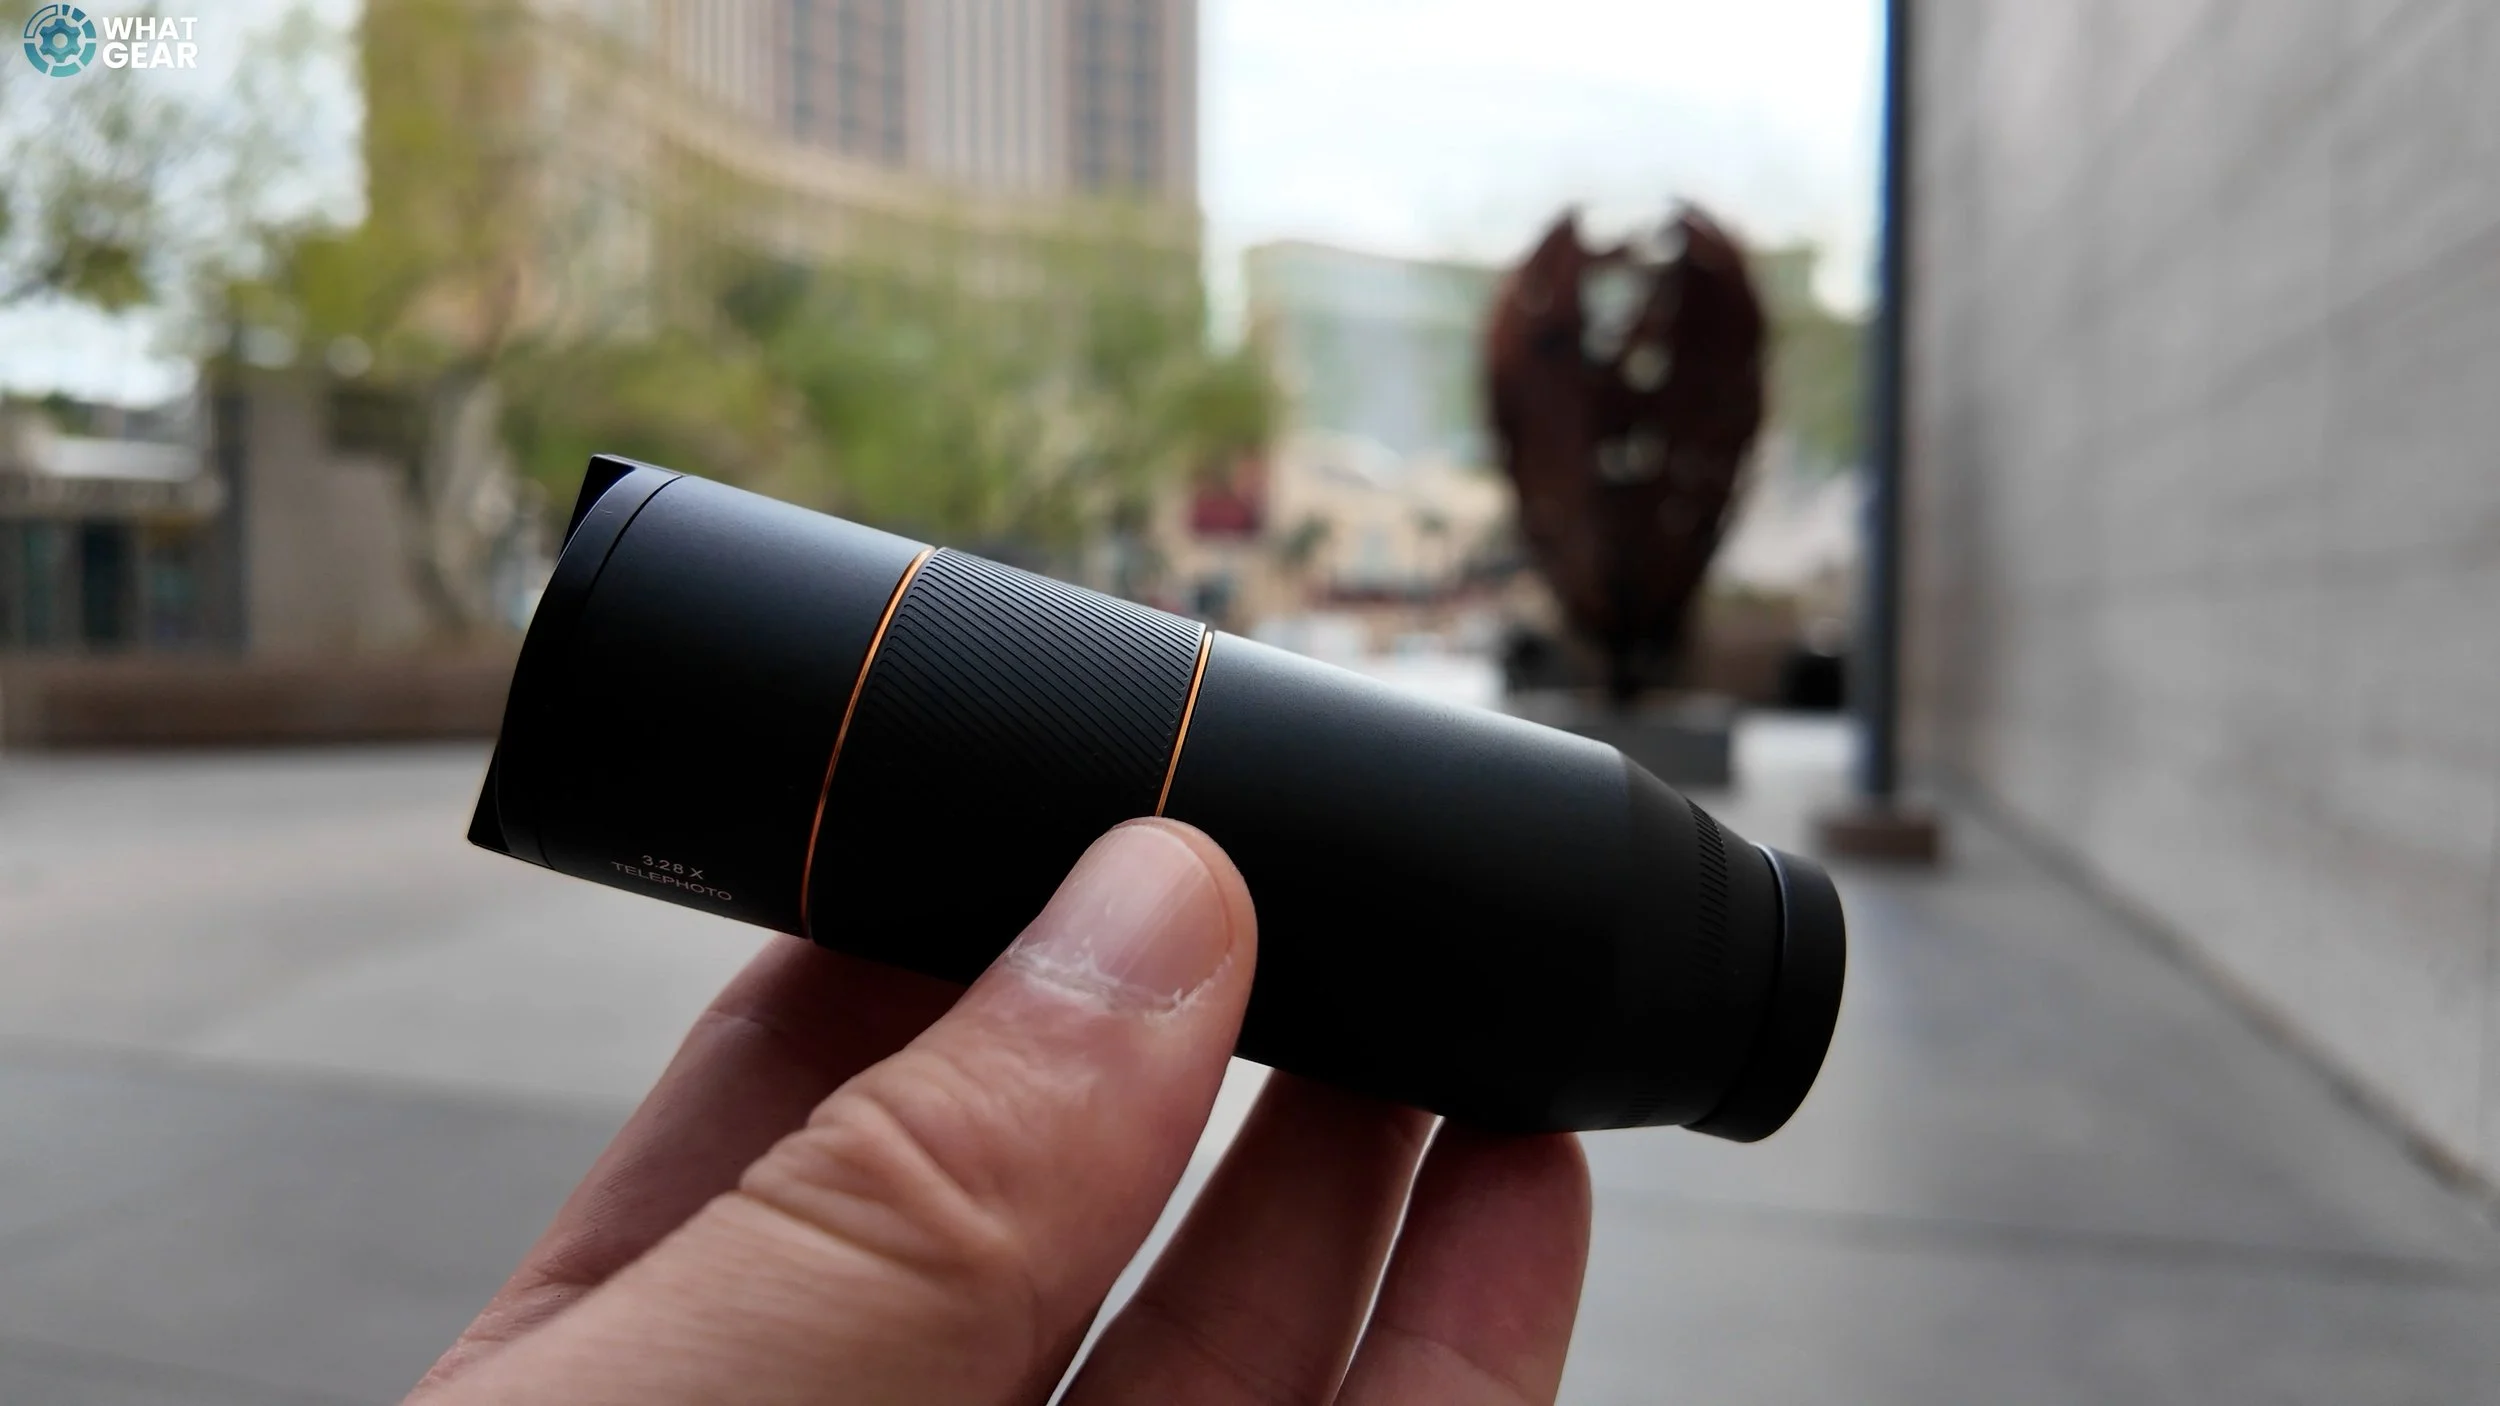
Build Quality & Lens Design
The majority of the lens is built from anodized aluminum. It has a nice textured area around the top of the lens, which helps when it comes to holding it. There’s a gold accent wrapped all the way around, some copper branding, a little bit of Hasselblad branding, and you get a proper Hasselblad lens cap that you pinch to remove. On the other side, there’s another small cap that prevents dust from getting in.
Now, you might not know this, but most smartphones actually use plastic lenses internally. These, however, are glass — and there are a lot more of them. There are a total of 13 lenses inside the Hasselblad Teleconverter Kit, some of which are spherical, separated into three layers throughout the assembly. This setup is known as a Kepler lens, named after the famous German astronomer. So yes, this lens configuration is inspired by an actual telescope used for looking into space.
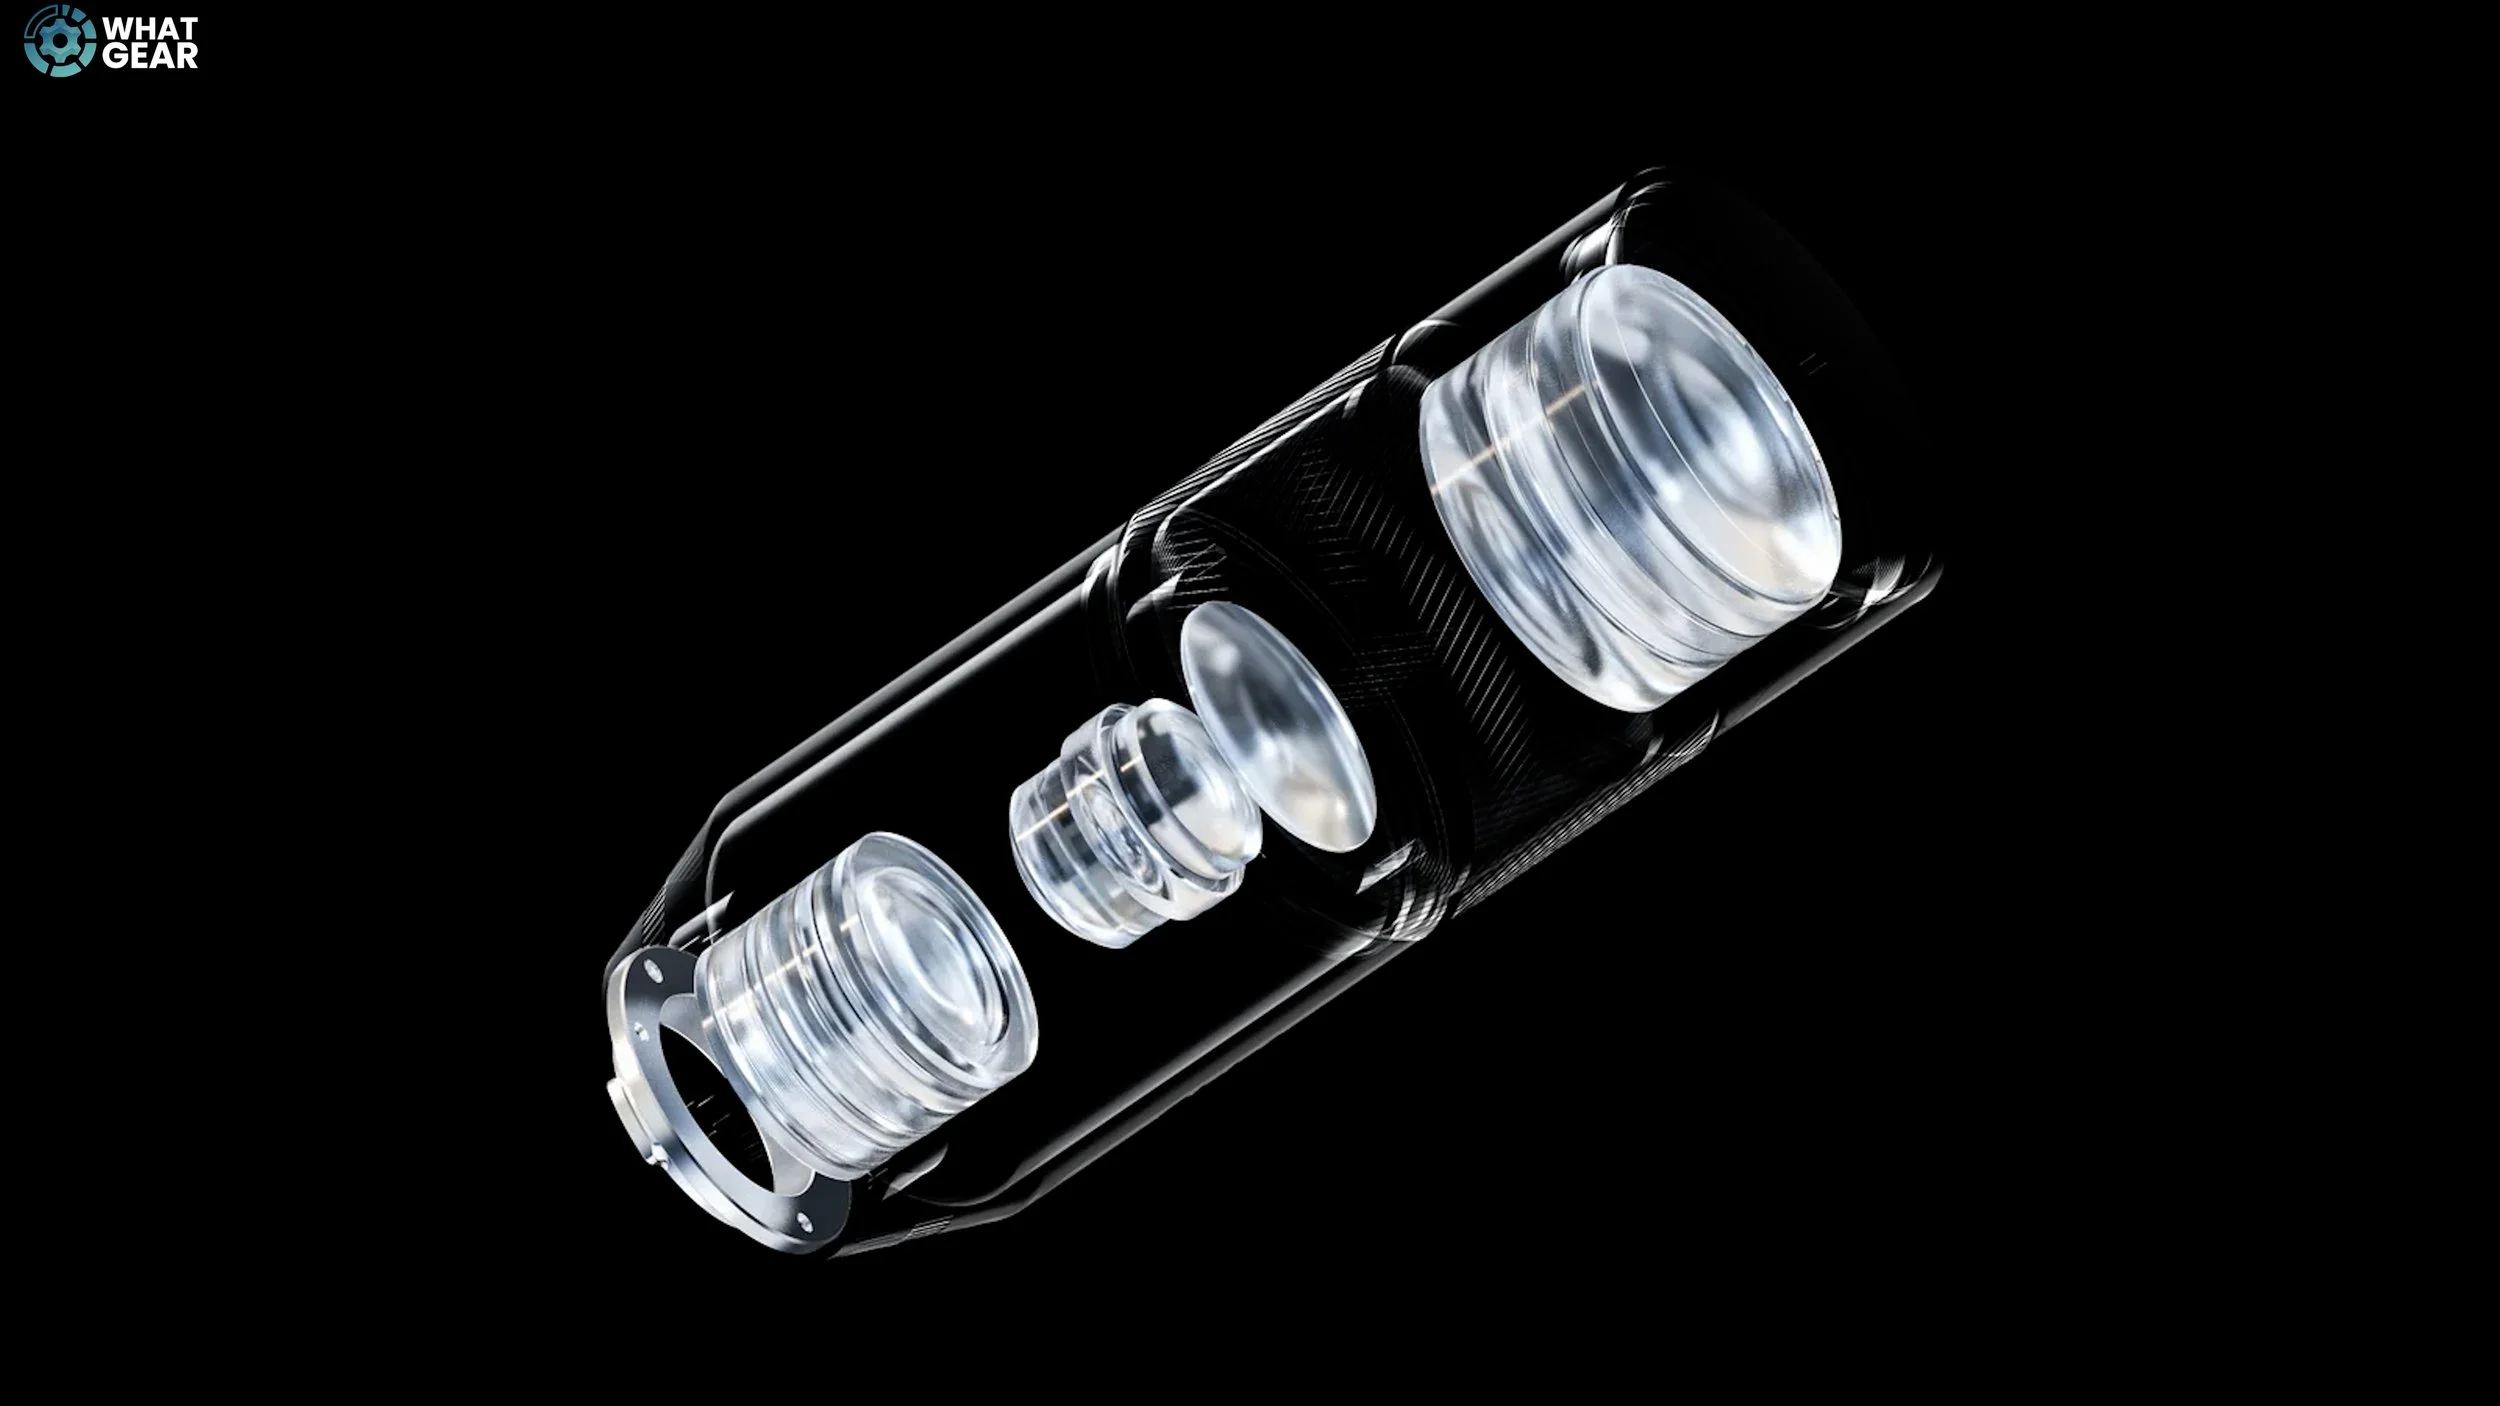
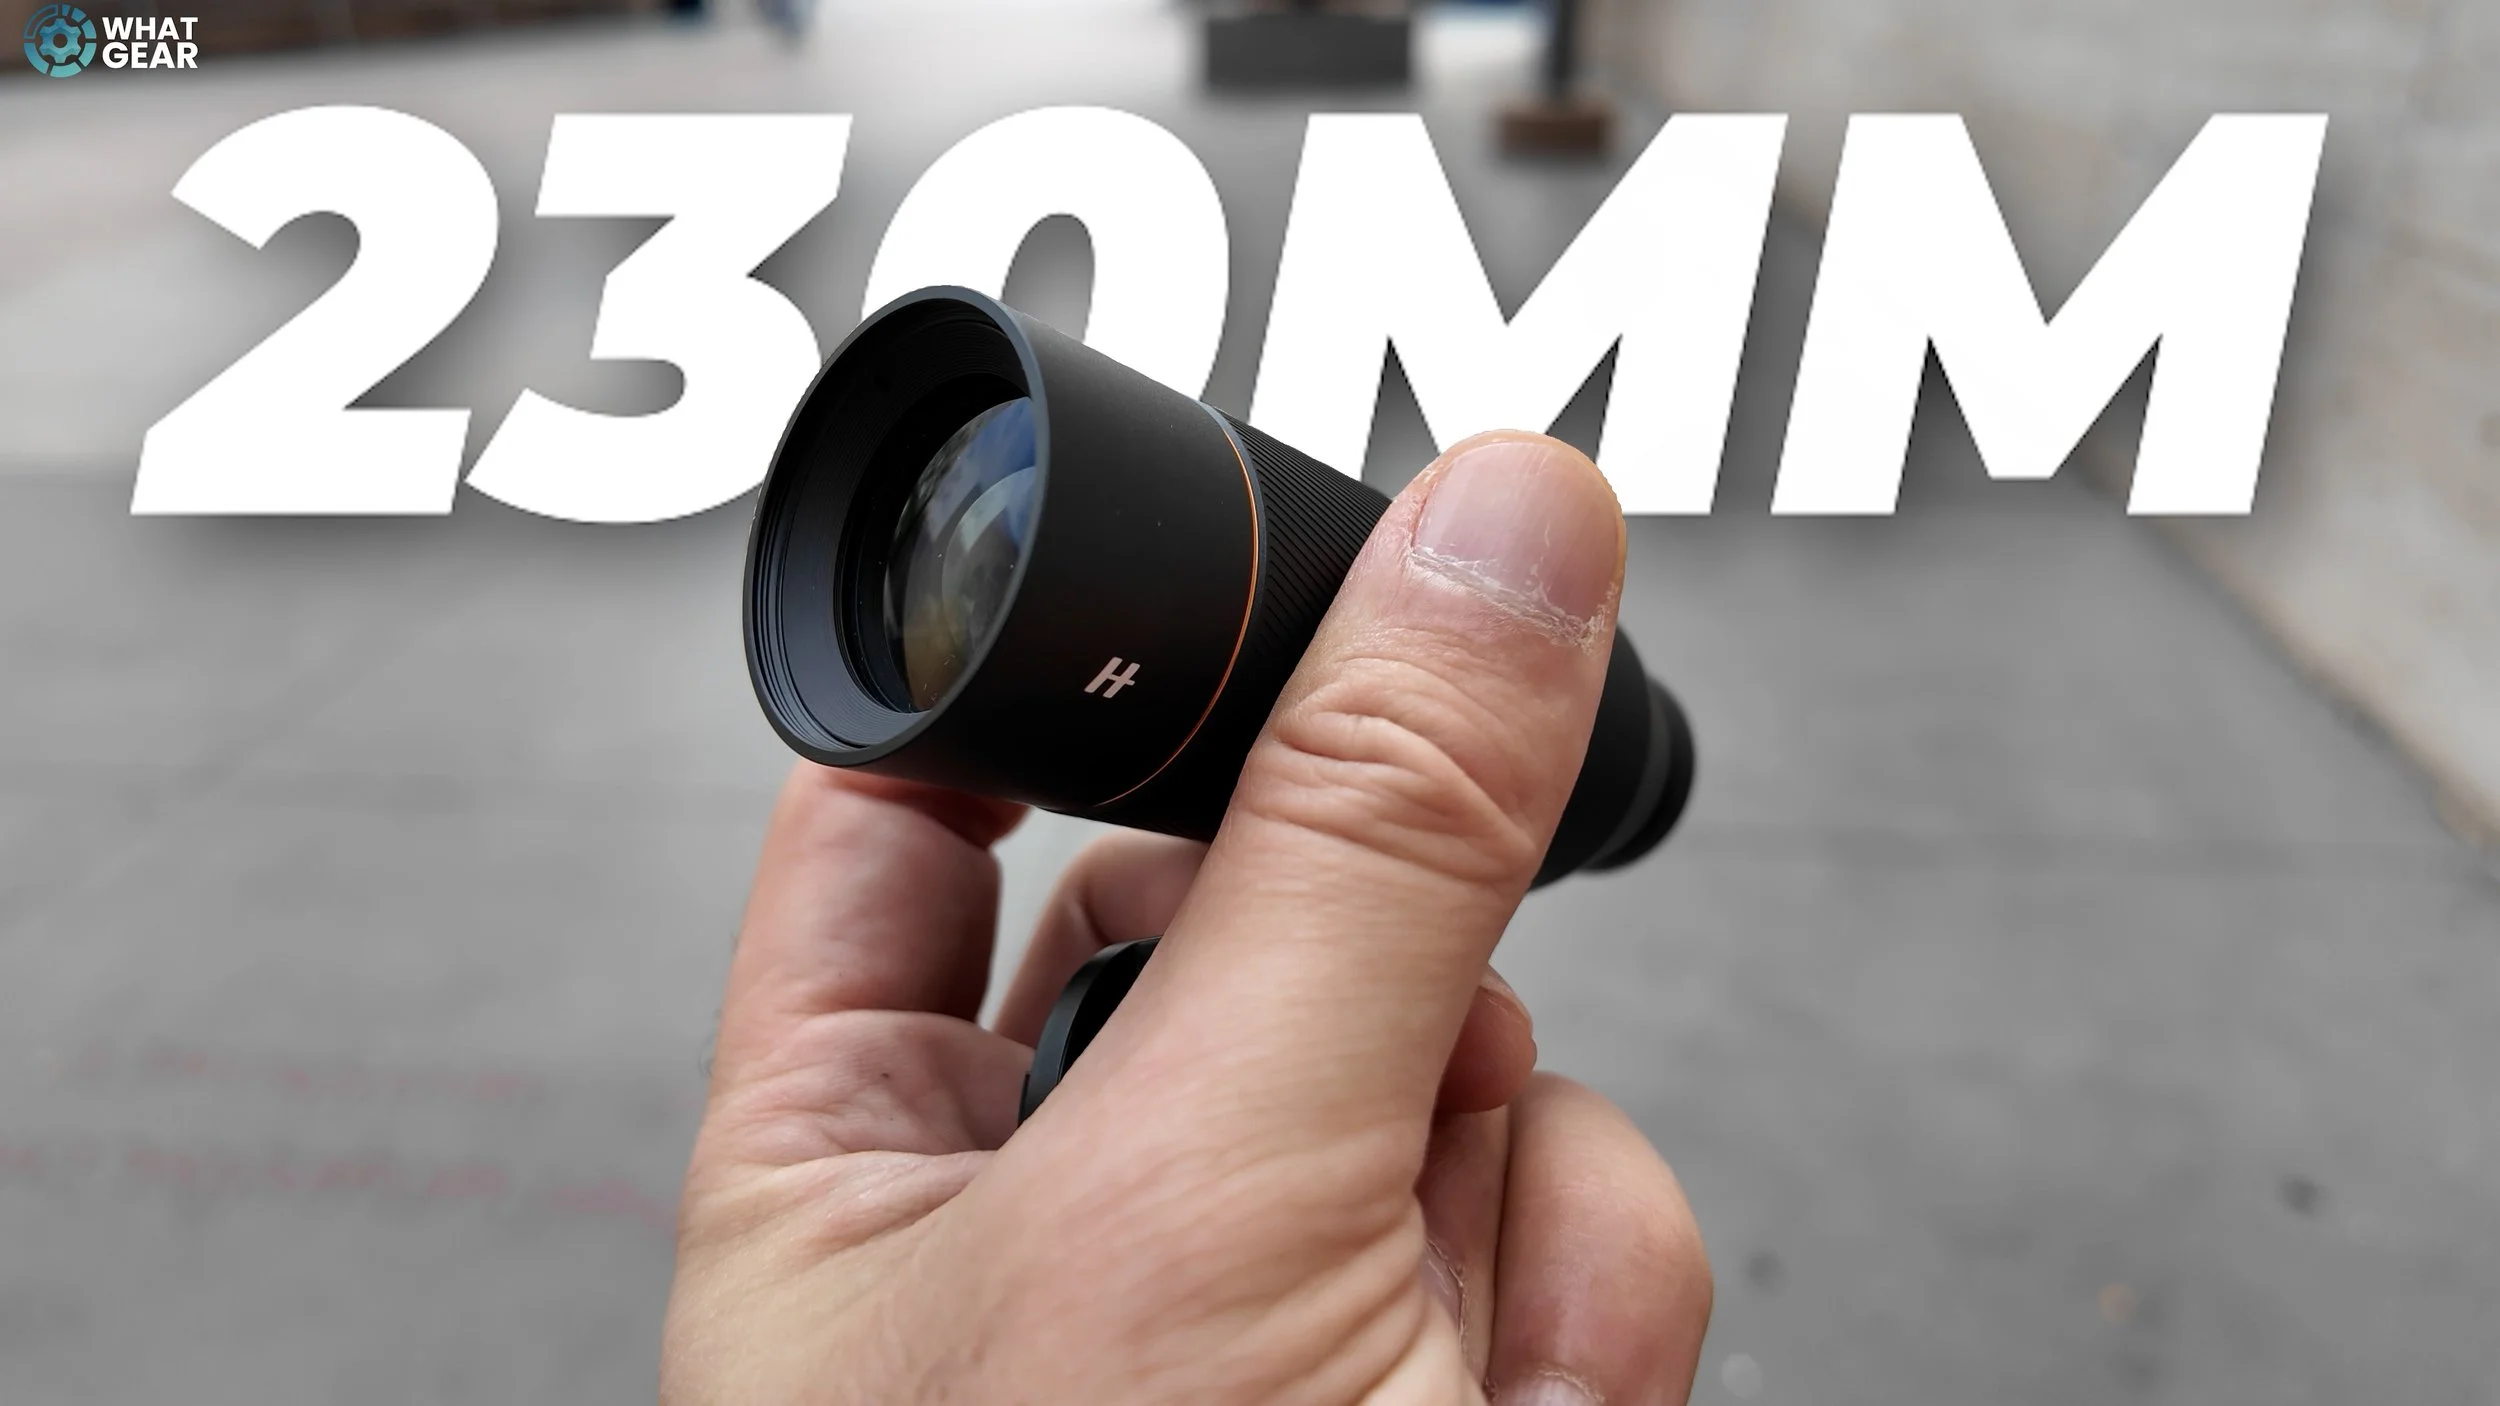
The focal length here is 230mm, and if you were buying a DSLR lens with the same focal length, it would probably be three or four times the length and significantly bulkier. So Oppo and Hasselblad have done an impressive job scaling this down. What you’re about to see now is the difference that having proper optical glass makes when compared to digital host enhancements using computational photography.
Blind Camera Comparison: Optical vs Digital
To make this more interesting, let’s do it in WhatGear-style blind camera comparison format. One of these images was captured using the Hasselblad Teleconverter Kit. The other was taken using the built-in periscope zoom on the Oppo Find X9 Pro. The focal length here is 230mm, also known as 10×, which is the shortest available option when using the lens attachment. Before I tell you which is which, here are a few observations.
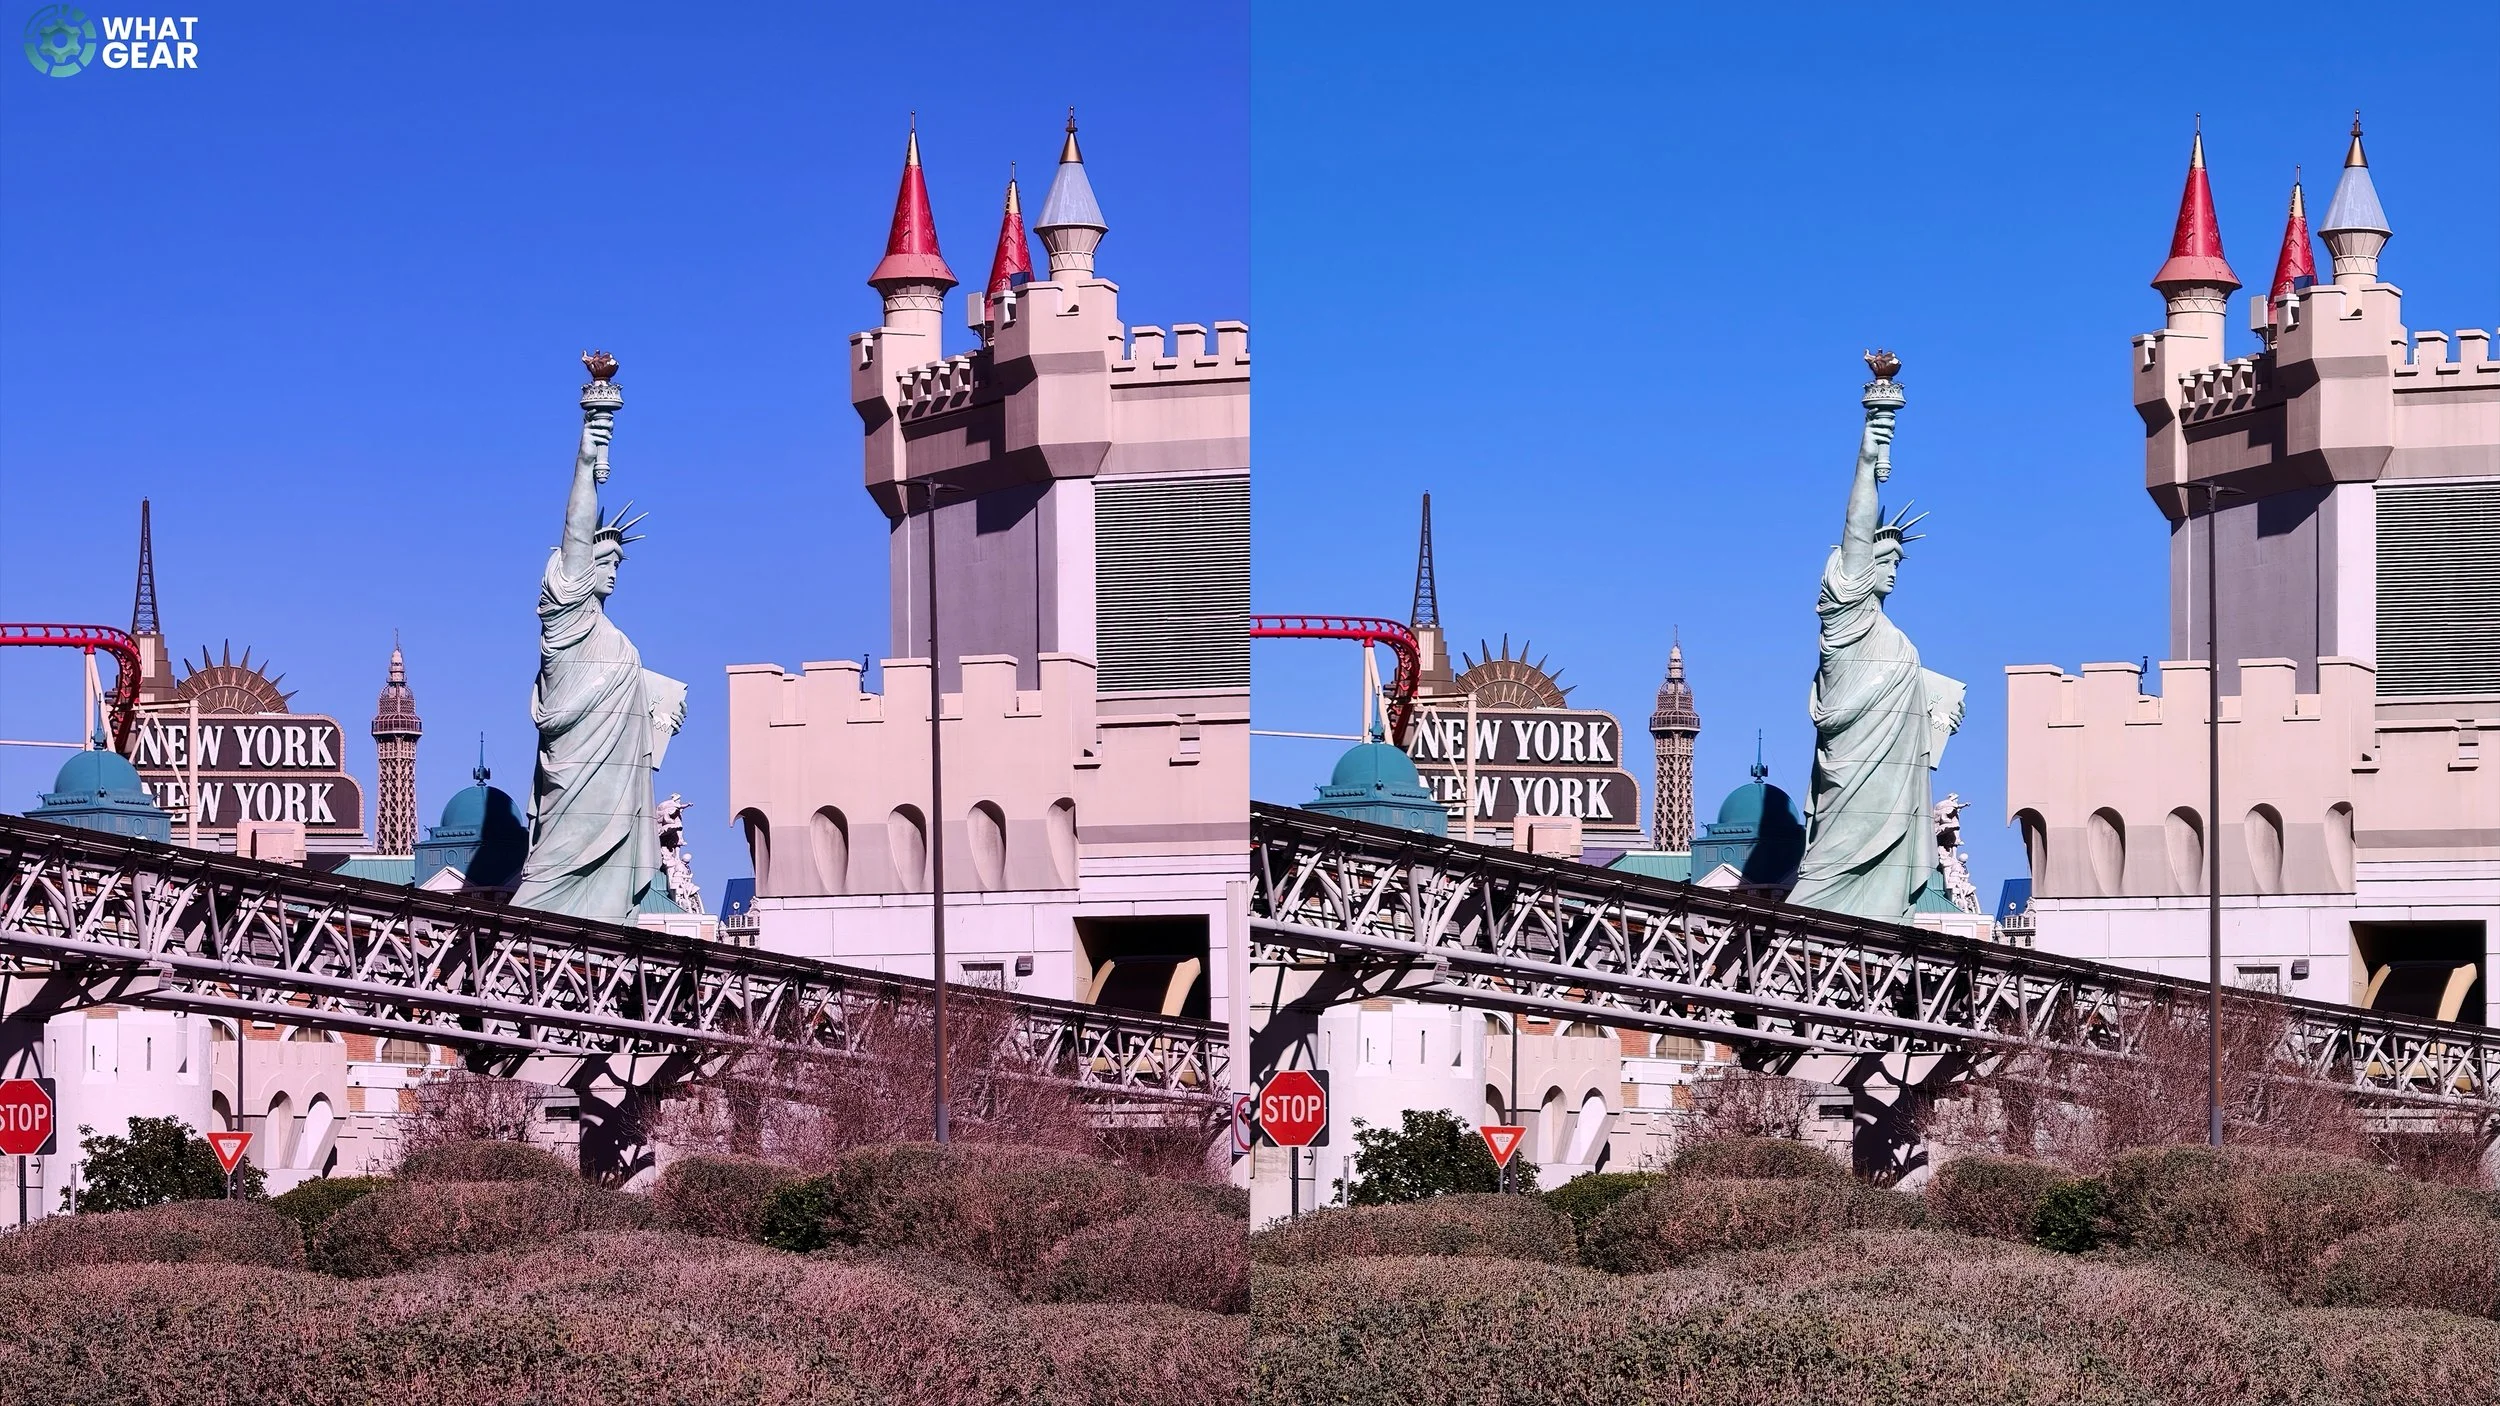
The image on the left significantly boosts red tones, which might not be obvious until you view it side by side with the other image. You’ll notice this most clearly in the hedge in the foreground. While both images appear sharp at first glance, it’s only when you zoom into the focal point — the New York-New York Hotel’s replica Statue of Liberty — that you’ll see the image on the right has much better, more natural-looking detail. This is likely due to oversharpening in the image on the left. If you guessed that the image on the right was taken using the Hasselblad Teleconverter, you’d be correct. These photos were taken at the lens’s native 230mm focal length, meaning very little AI enhancement was required.
Pushing Beyond Native Focal Length
This next photo was taken at the maximum focal length available on the Teleconverter, matched against the in-camera periscope lens. Because this goes beyond the lens’s native focal length, the phone uses a hybrid approach, combining sensor cropping with additional post-processing. You may notice a significant difference in shutter speeds here. I’ll explain why in a moment.
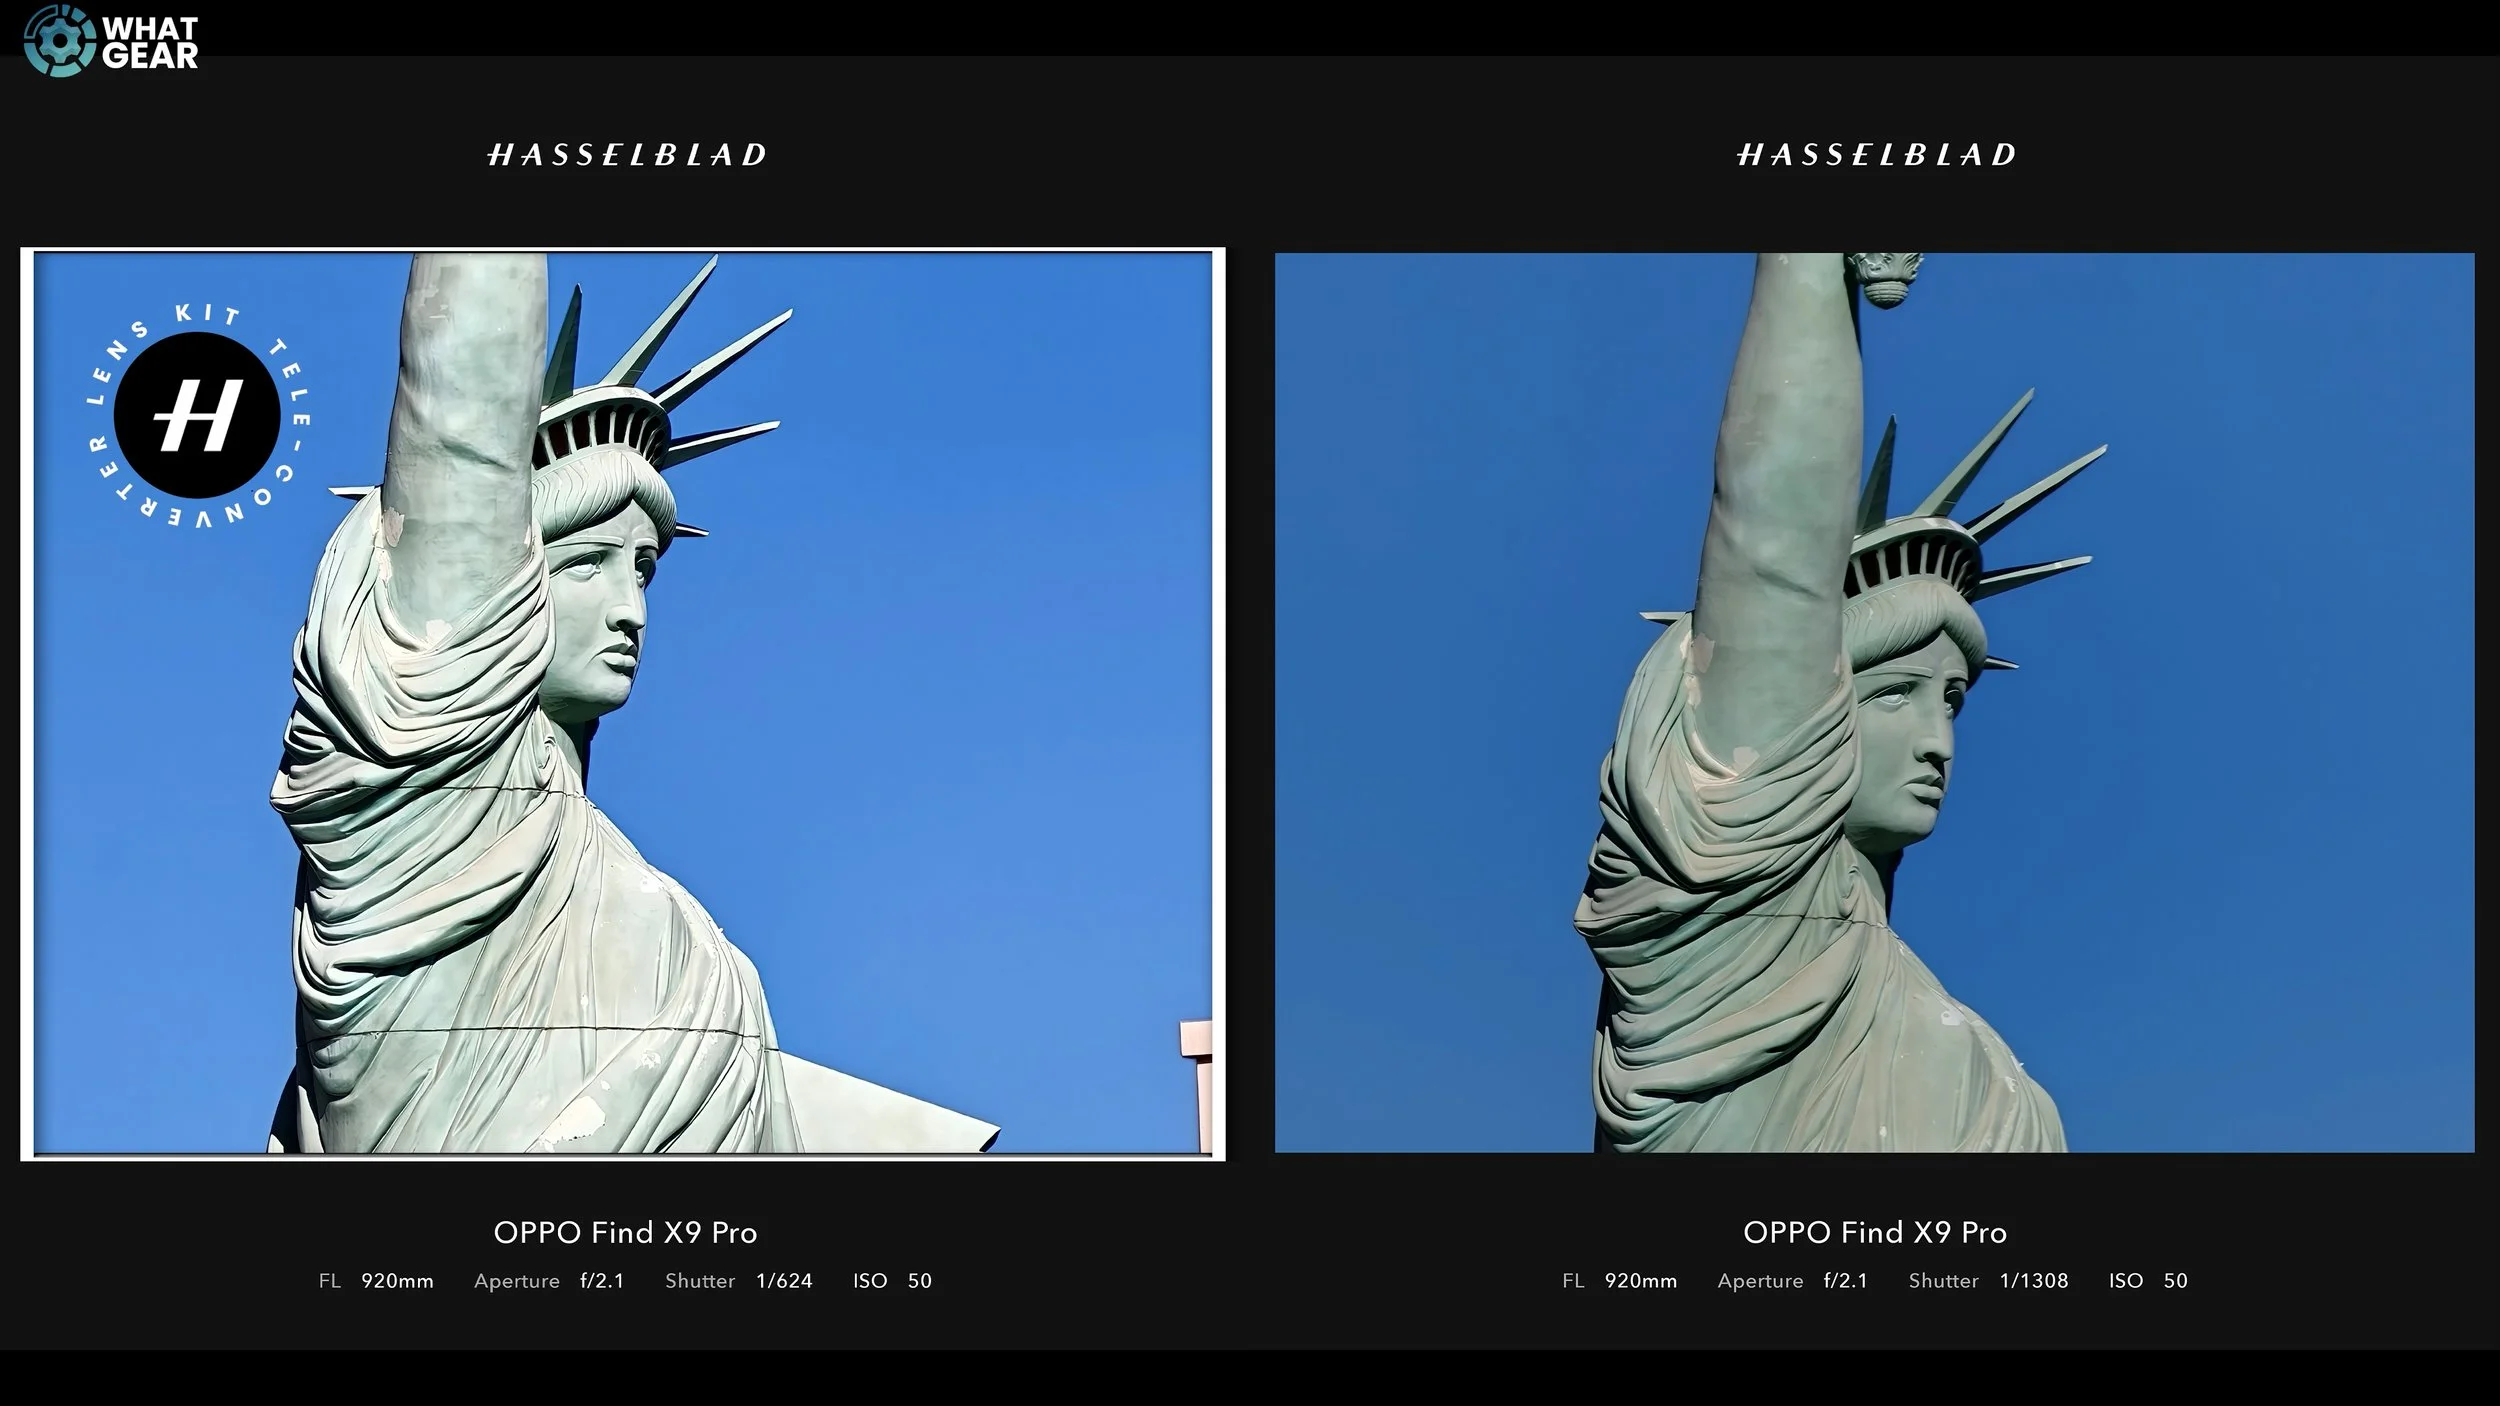
The image on the left is clearly more accurate and realistic — and yes, that is the Hasselblad lens photo. The slower shutter speed is due to light needing to pass through more layers of glass. This is sometimes referred to as a light tax. Both setups rely heavily on image stabilisation, especially when using the Teleconverter, but despite this, the colours, details, and overall image quality from the Hasselblad lens are undeniably better.
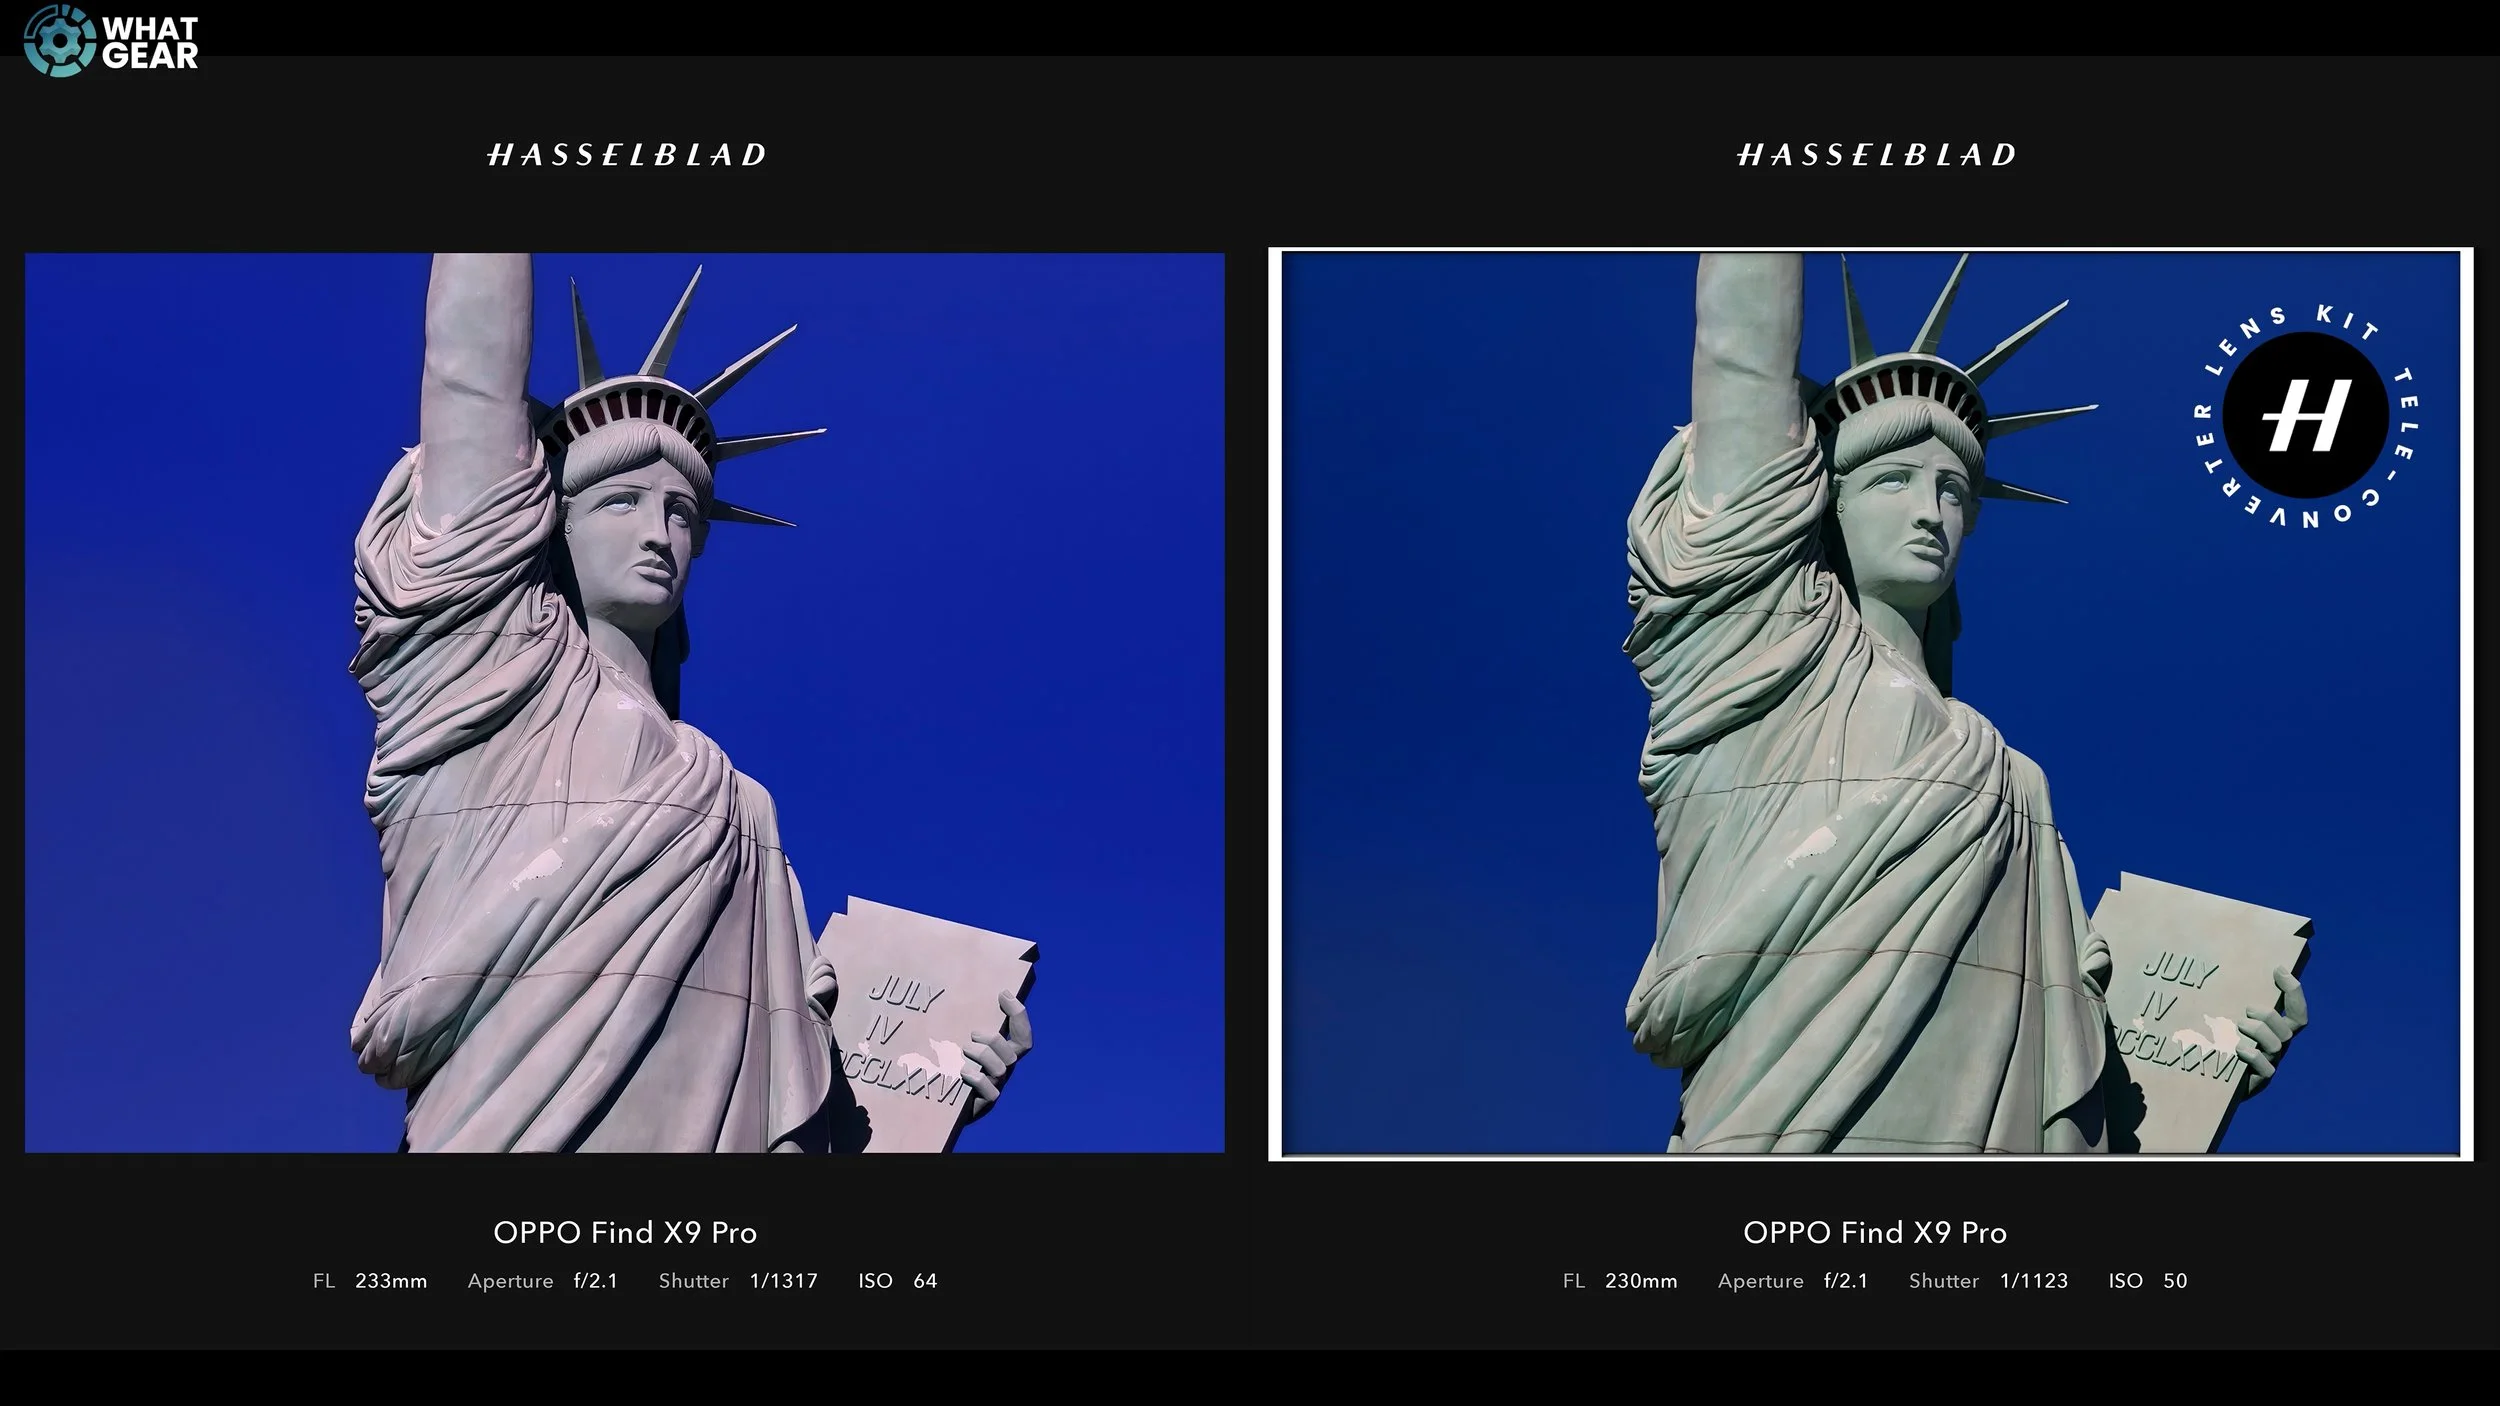
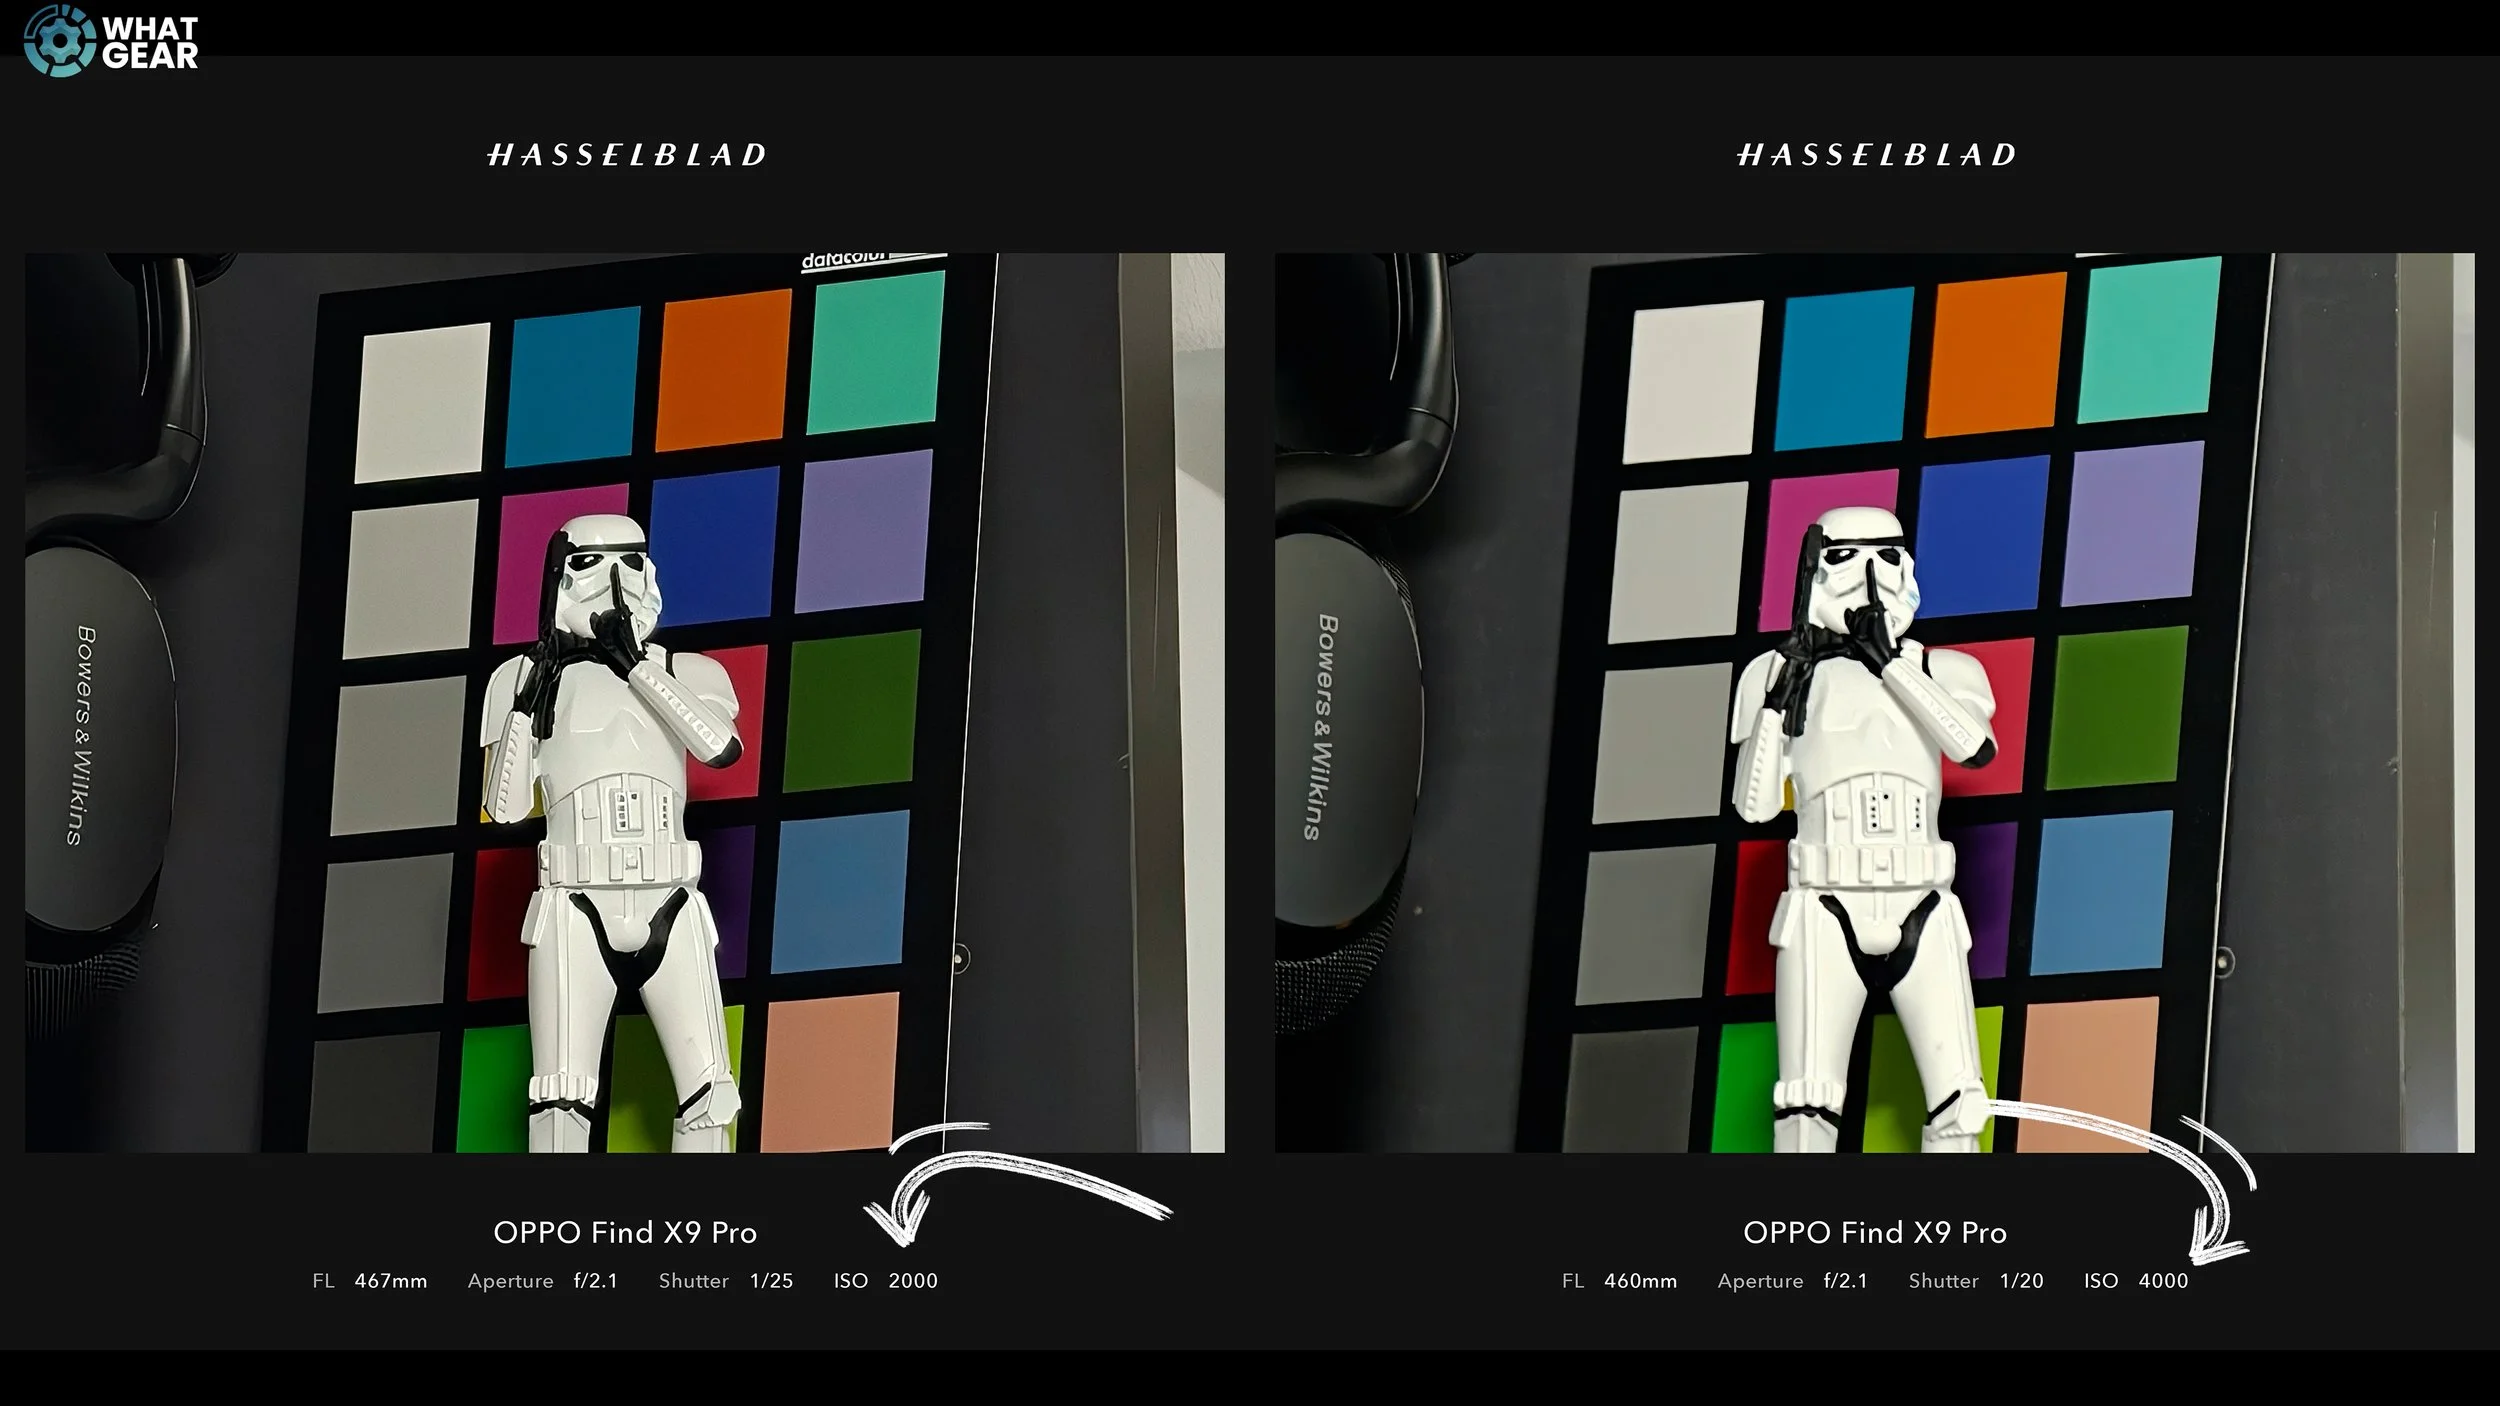
Closer Range & Obvious Giveaways
This next image of the Statue of Liberty replica was taken from much closer, again at 230mm (10×). This one should be easier to identify. One of the biggest giveaways is the excessive red tones in the left image. The image on the right is far more accurate. Another clear indicator is the focal length — the built-in periscope camera overshot slightly to 233mm, something that cannot happen with the Teleconverter, which locks into fixed focal lengths.
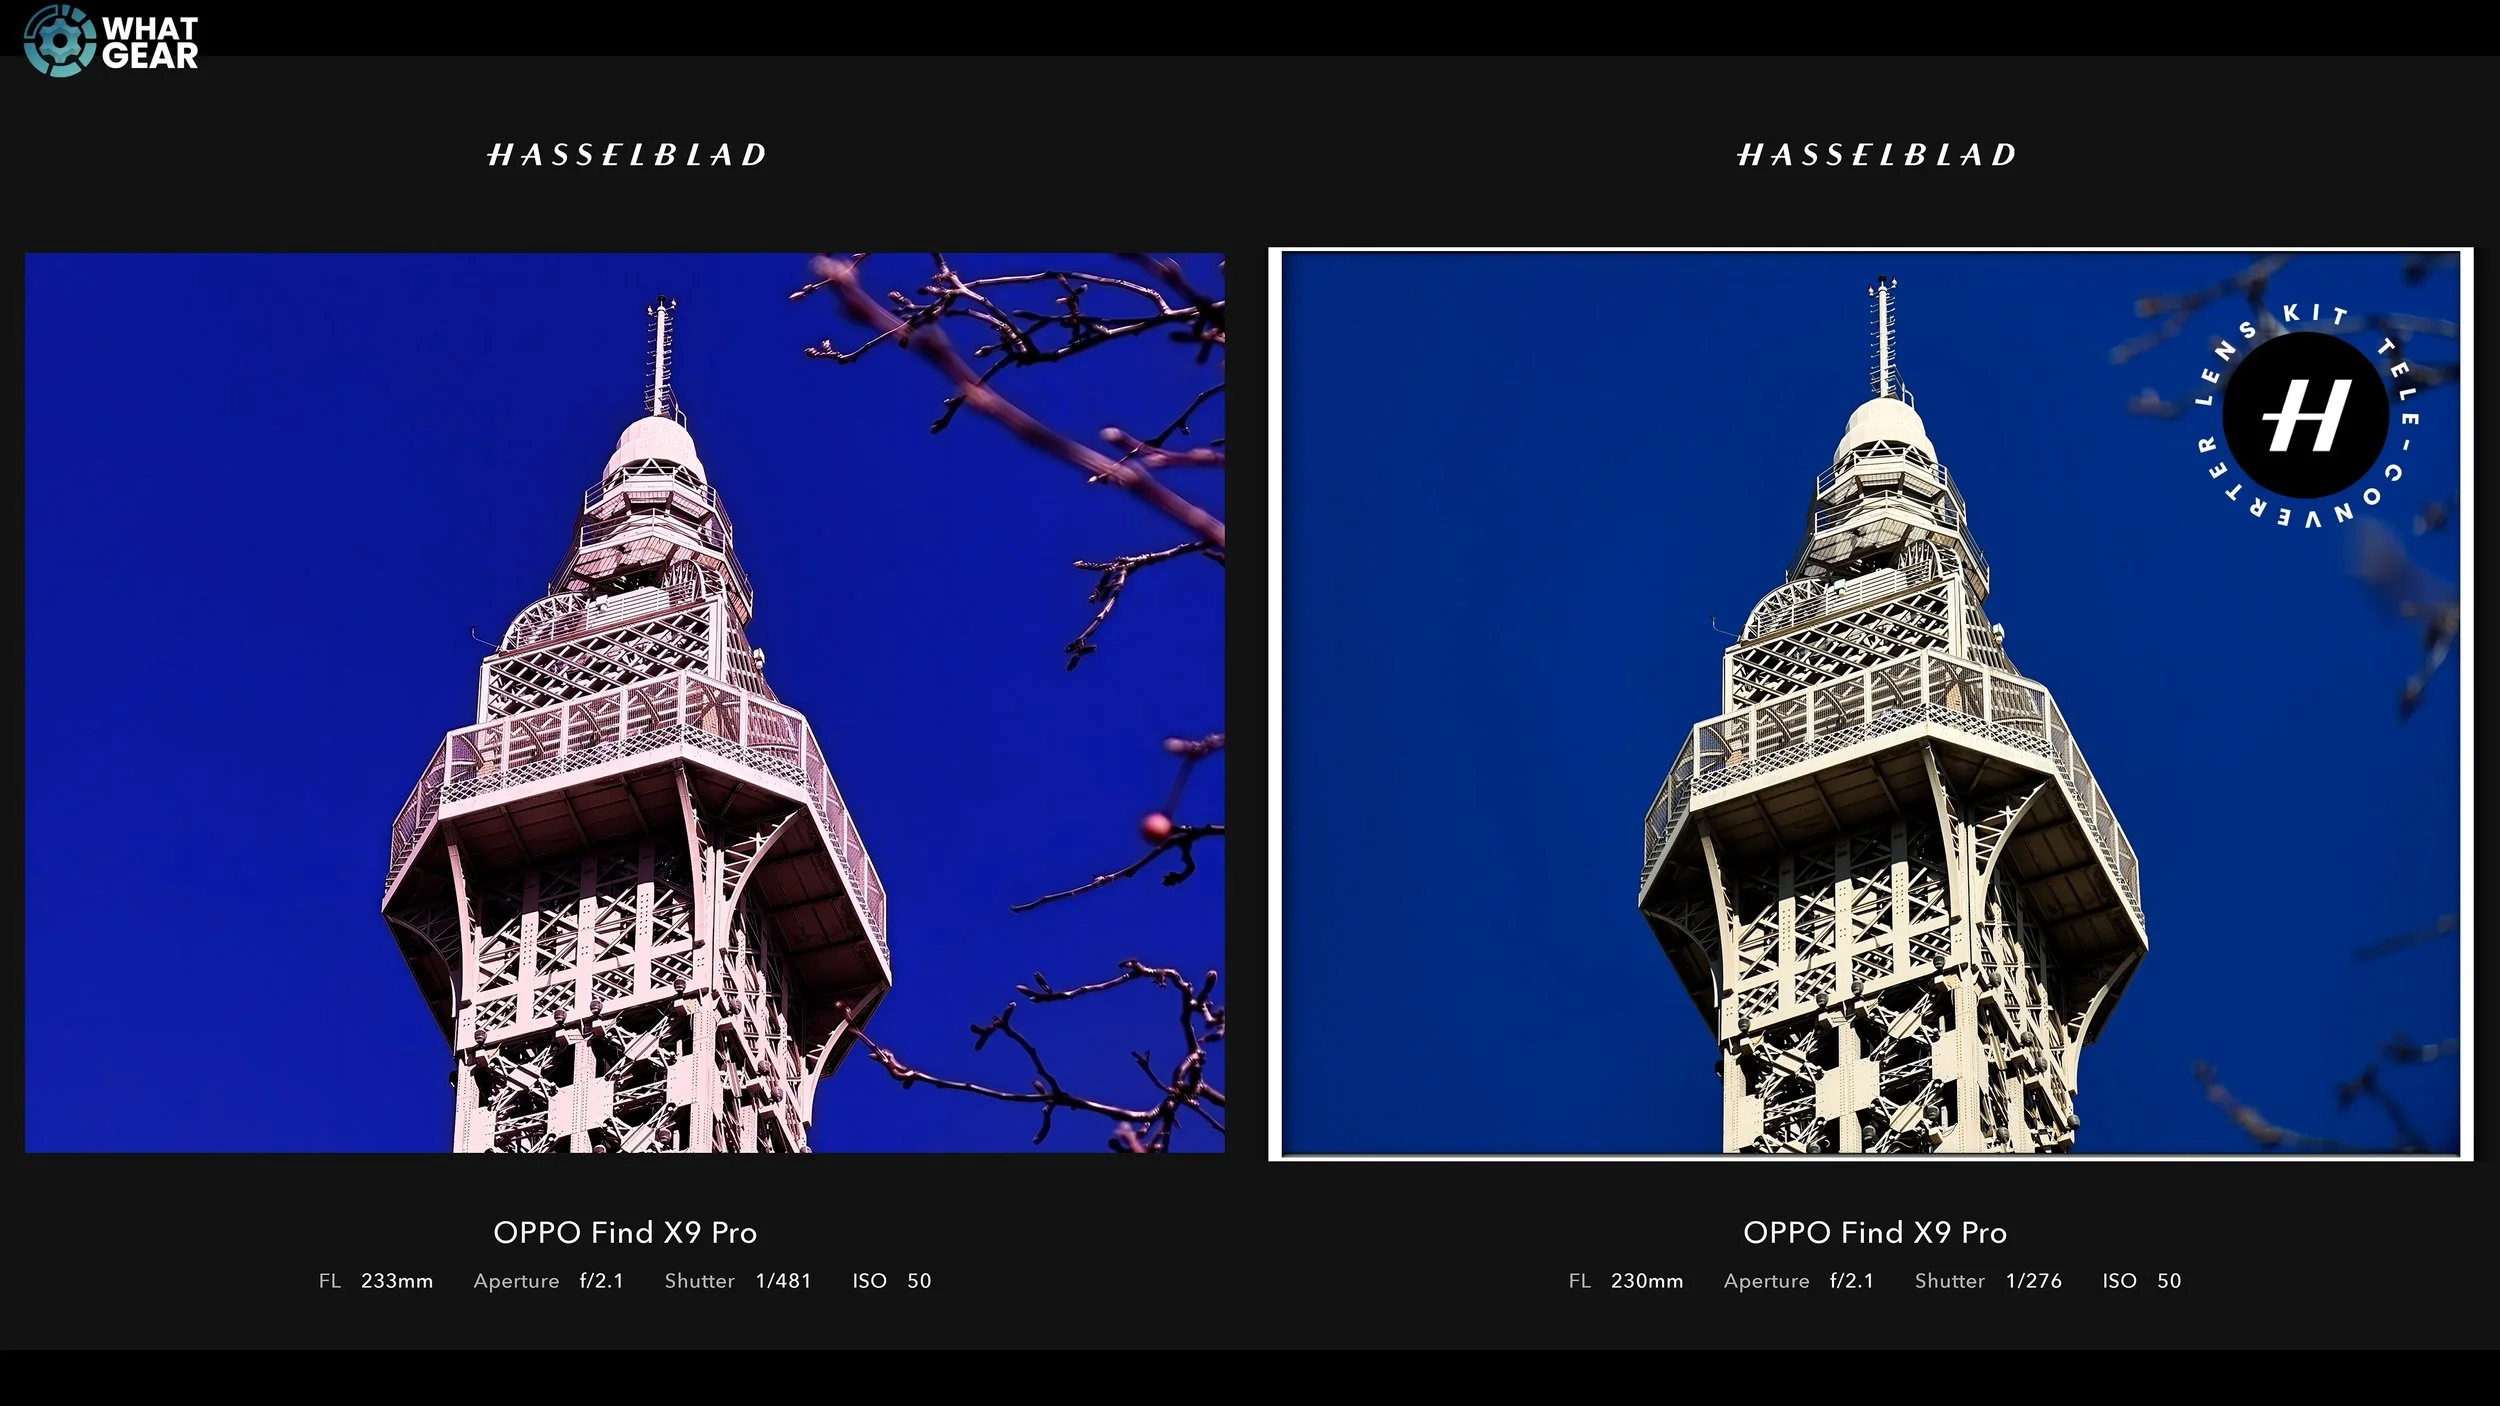
Shadow Detail & Dynamic Range
Here’s another shot of the Eiffel Tower replica in Las Vegas. The colours might give this away instantly, but pay attention to the shadow details. Once again, colour accuracy and dynamic range are major wins for the lens kit image. Shadows are more detailed, more natural, and the overall image quality is significantly better.
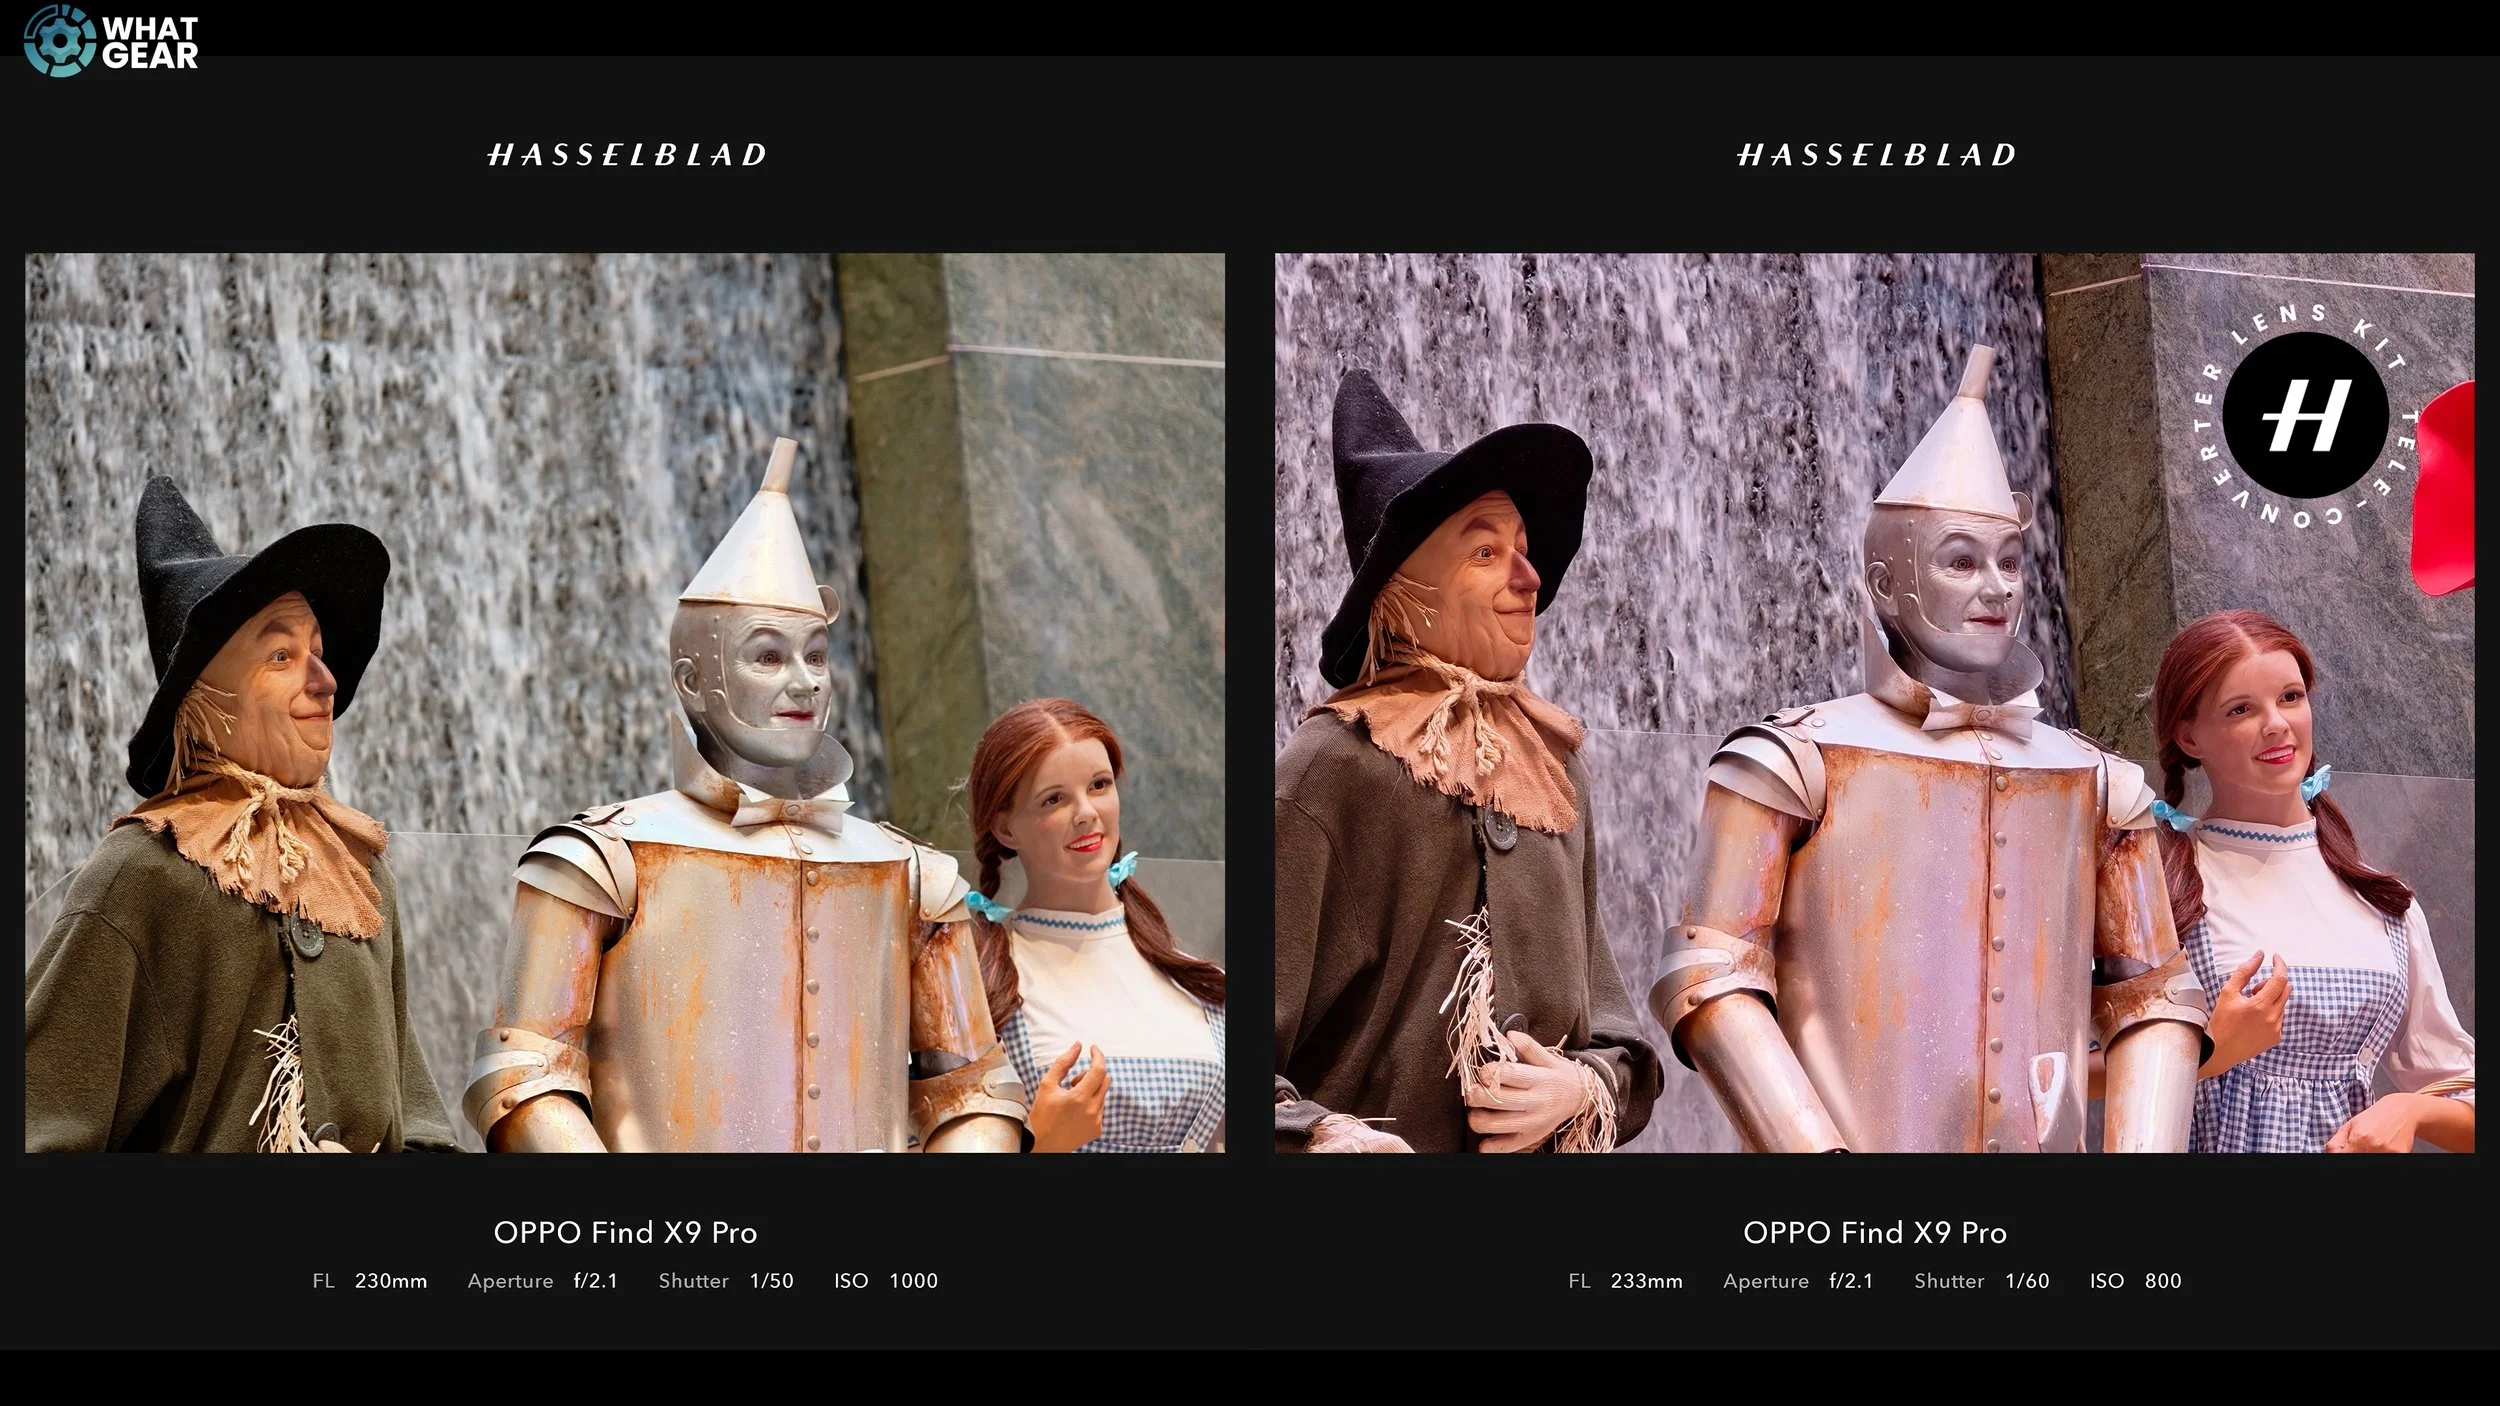
AI Artifacts & Oversharpening
This next image features characters from The Wizard of Oz, taken inside the Venetian. The lighting here wasn’t as harsh. One thing to look out for is an unnaturally sharp line that looks almost artificial, along with the massive difference in skin tones on Dorothy. This should be an easy one to identify — or should I say, a walk down the yellow brick road?
Real-World Zoom & Screen Recording
Here’s a quick screen recording showing how Zoom behaves using the built-in periscope versus the Teleconverter. When you compare the final images side by side, despite both using high ISO values, the image on the left has more noise, oversharpening, and smoothing artefacts. At a glance, some people might prefer the left image because it appears sharper, but it’s not actually more detailed — it’s just more processed.
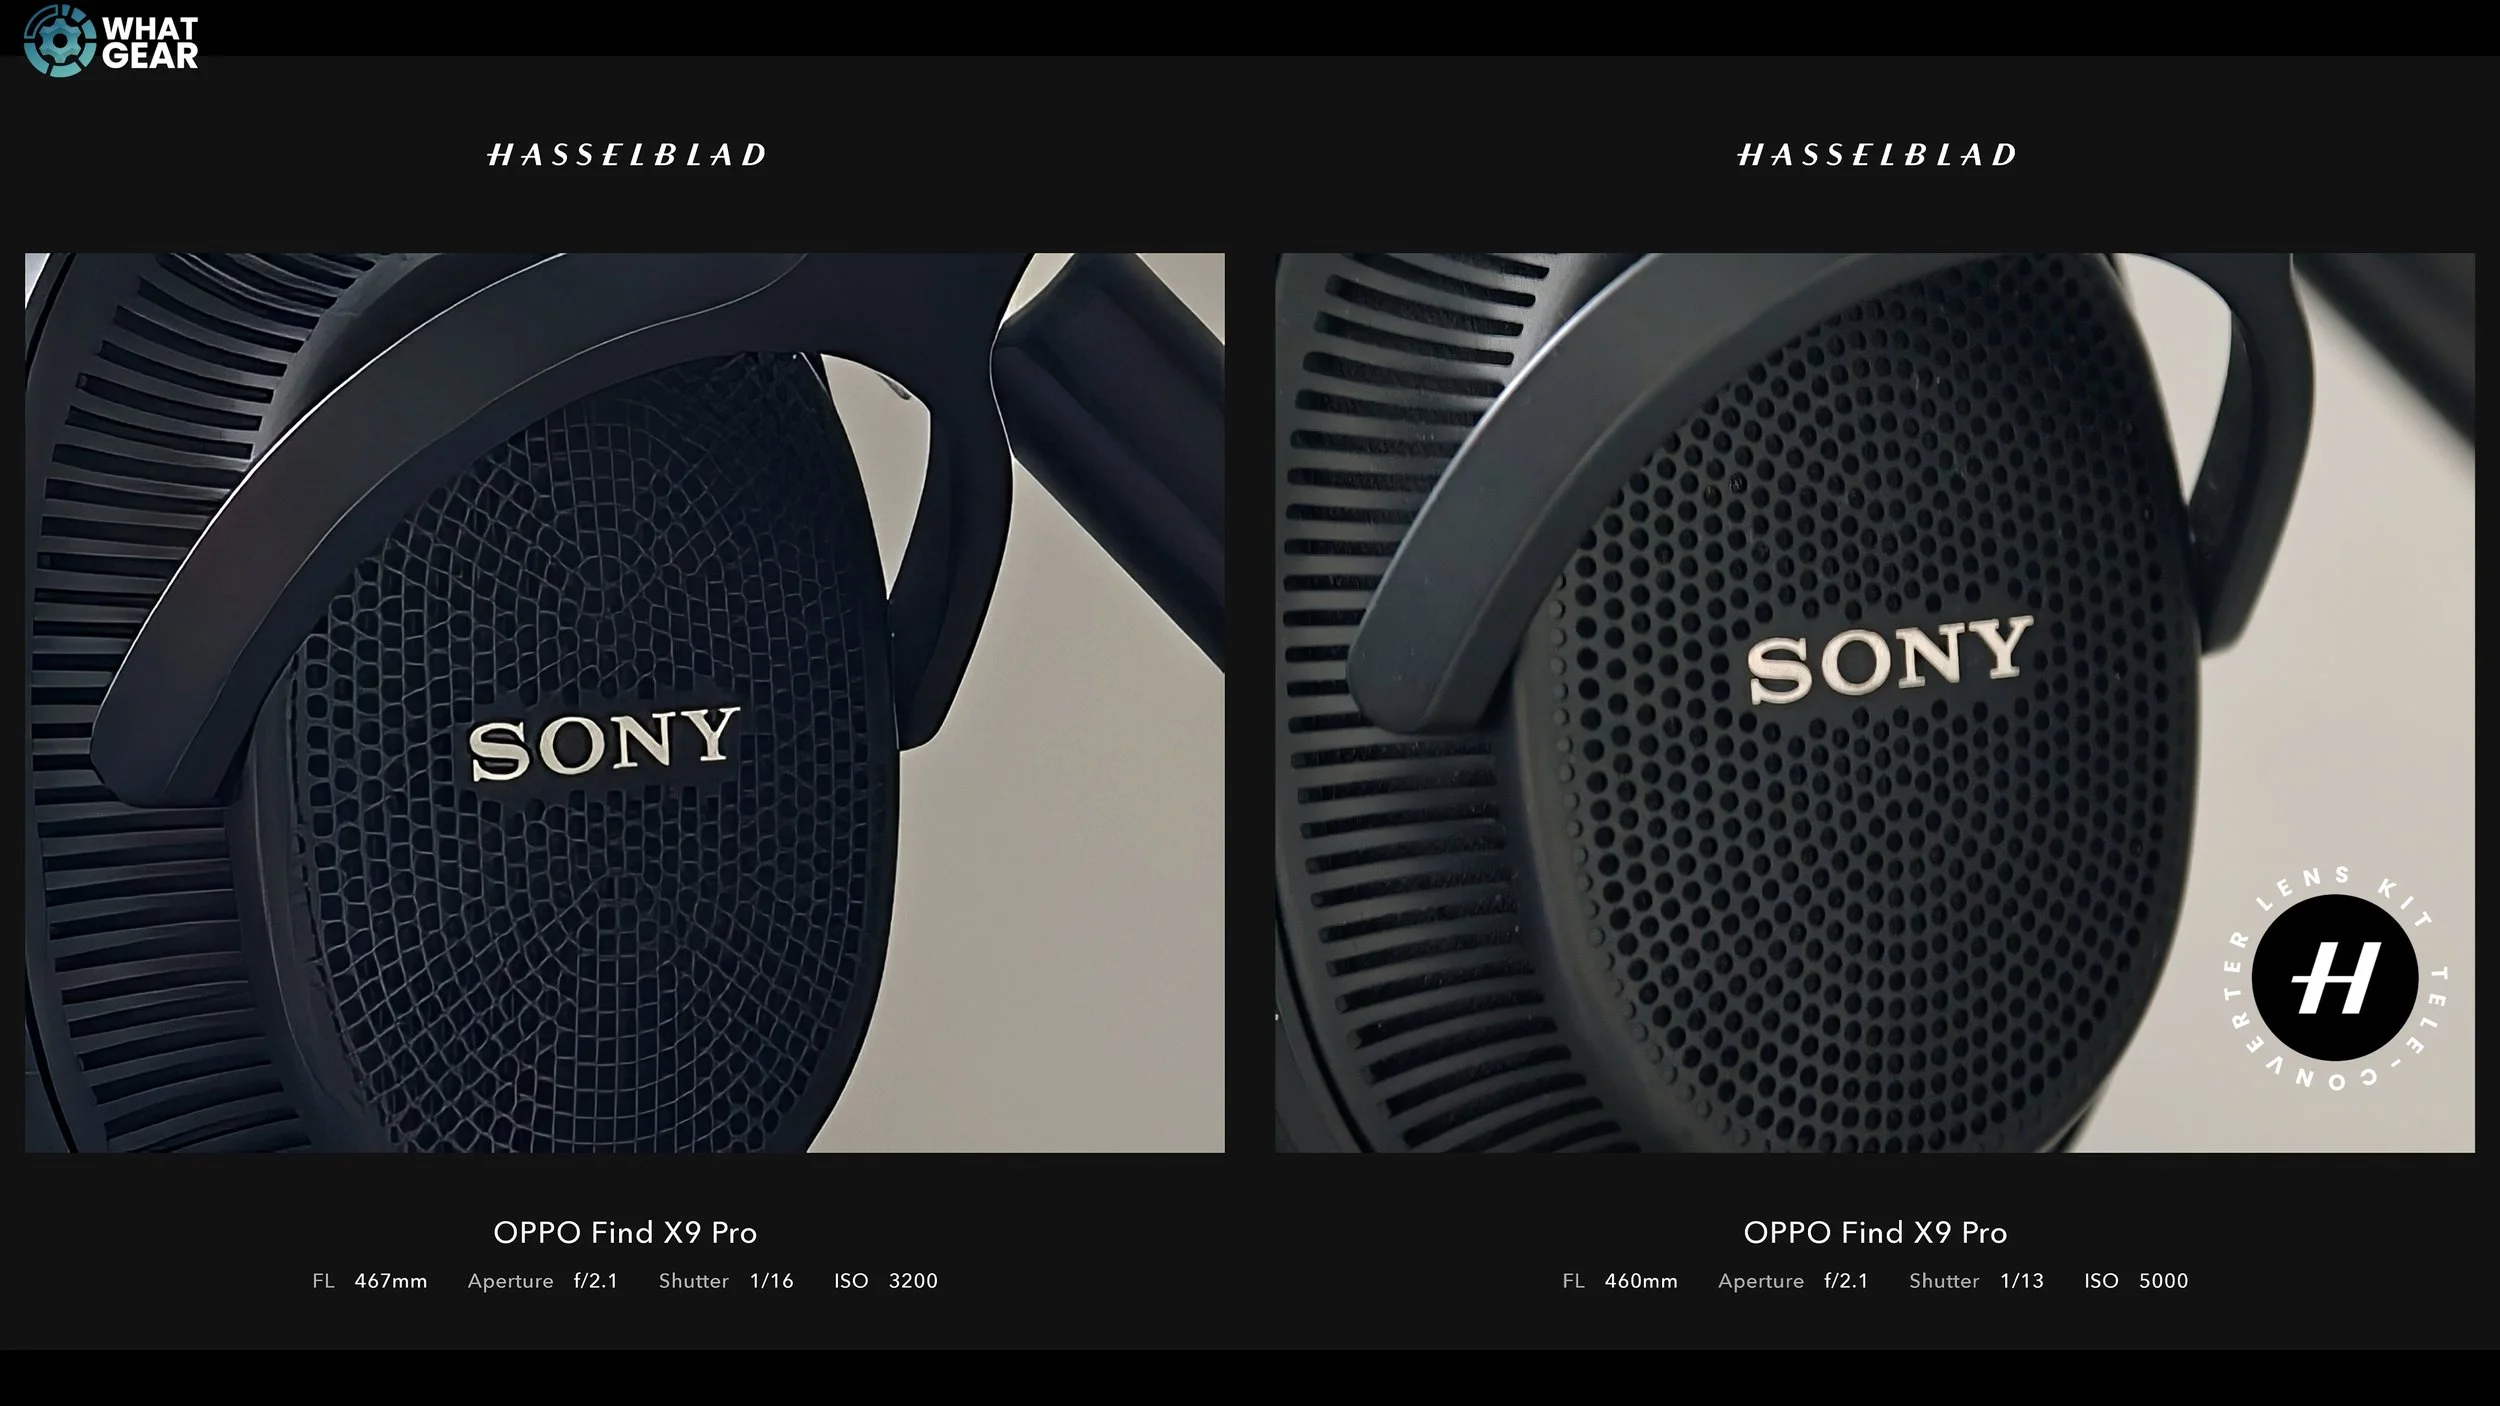
When AI Gets It Wrong
Here’s a 230mm shot of Sony open-back headphones. When zoomed further, AI pattern recognition completely misinterprets circular perforations, turning them into distorted shapes and creating an oil-painting effect. It even removes foam details behind the mesh. The image on the right — the Teleconverter — looks softer but far more realistic.
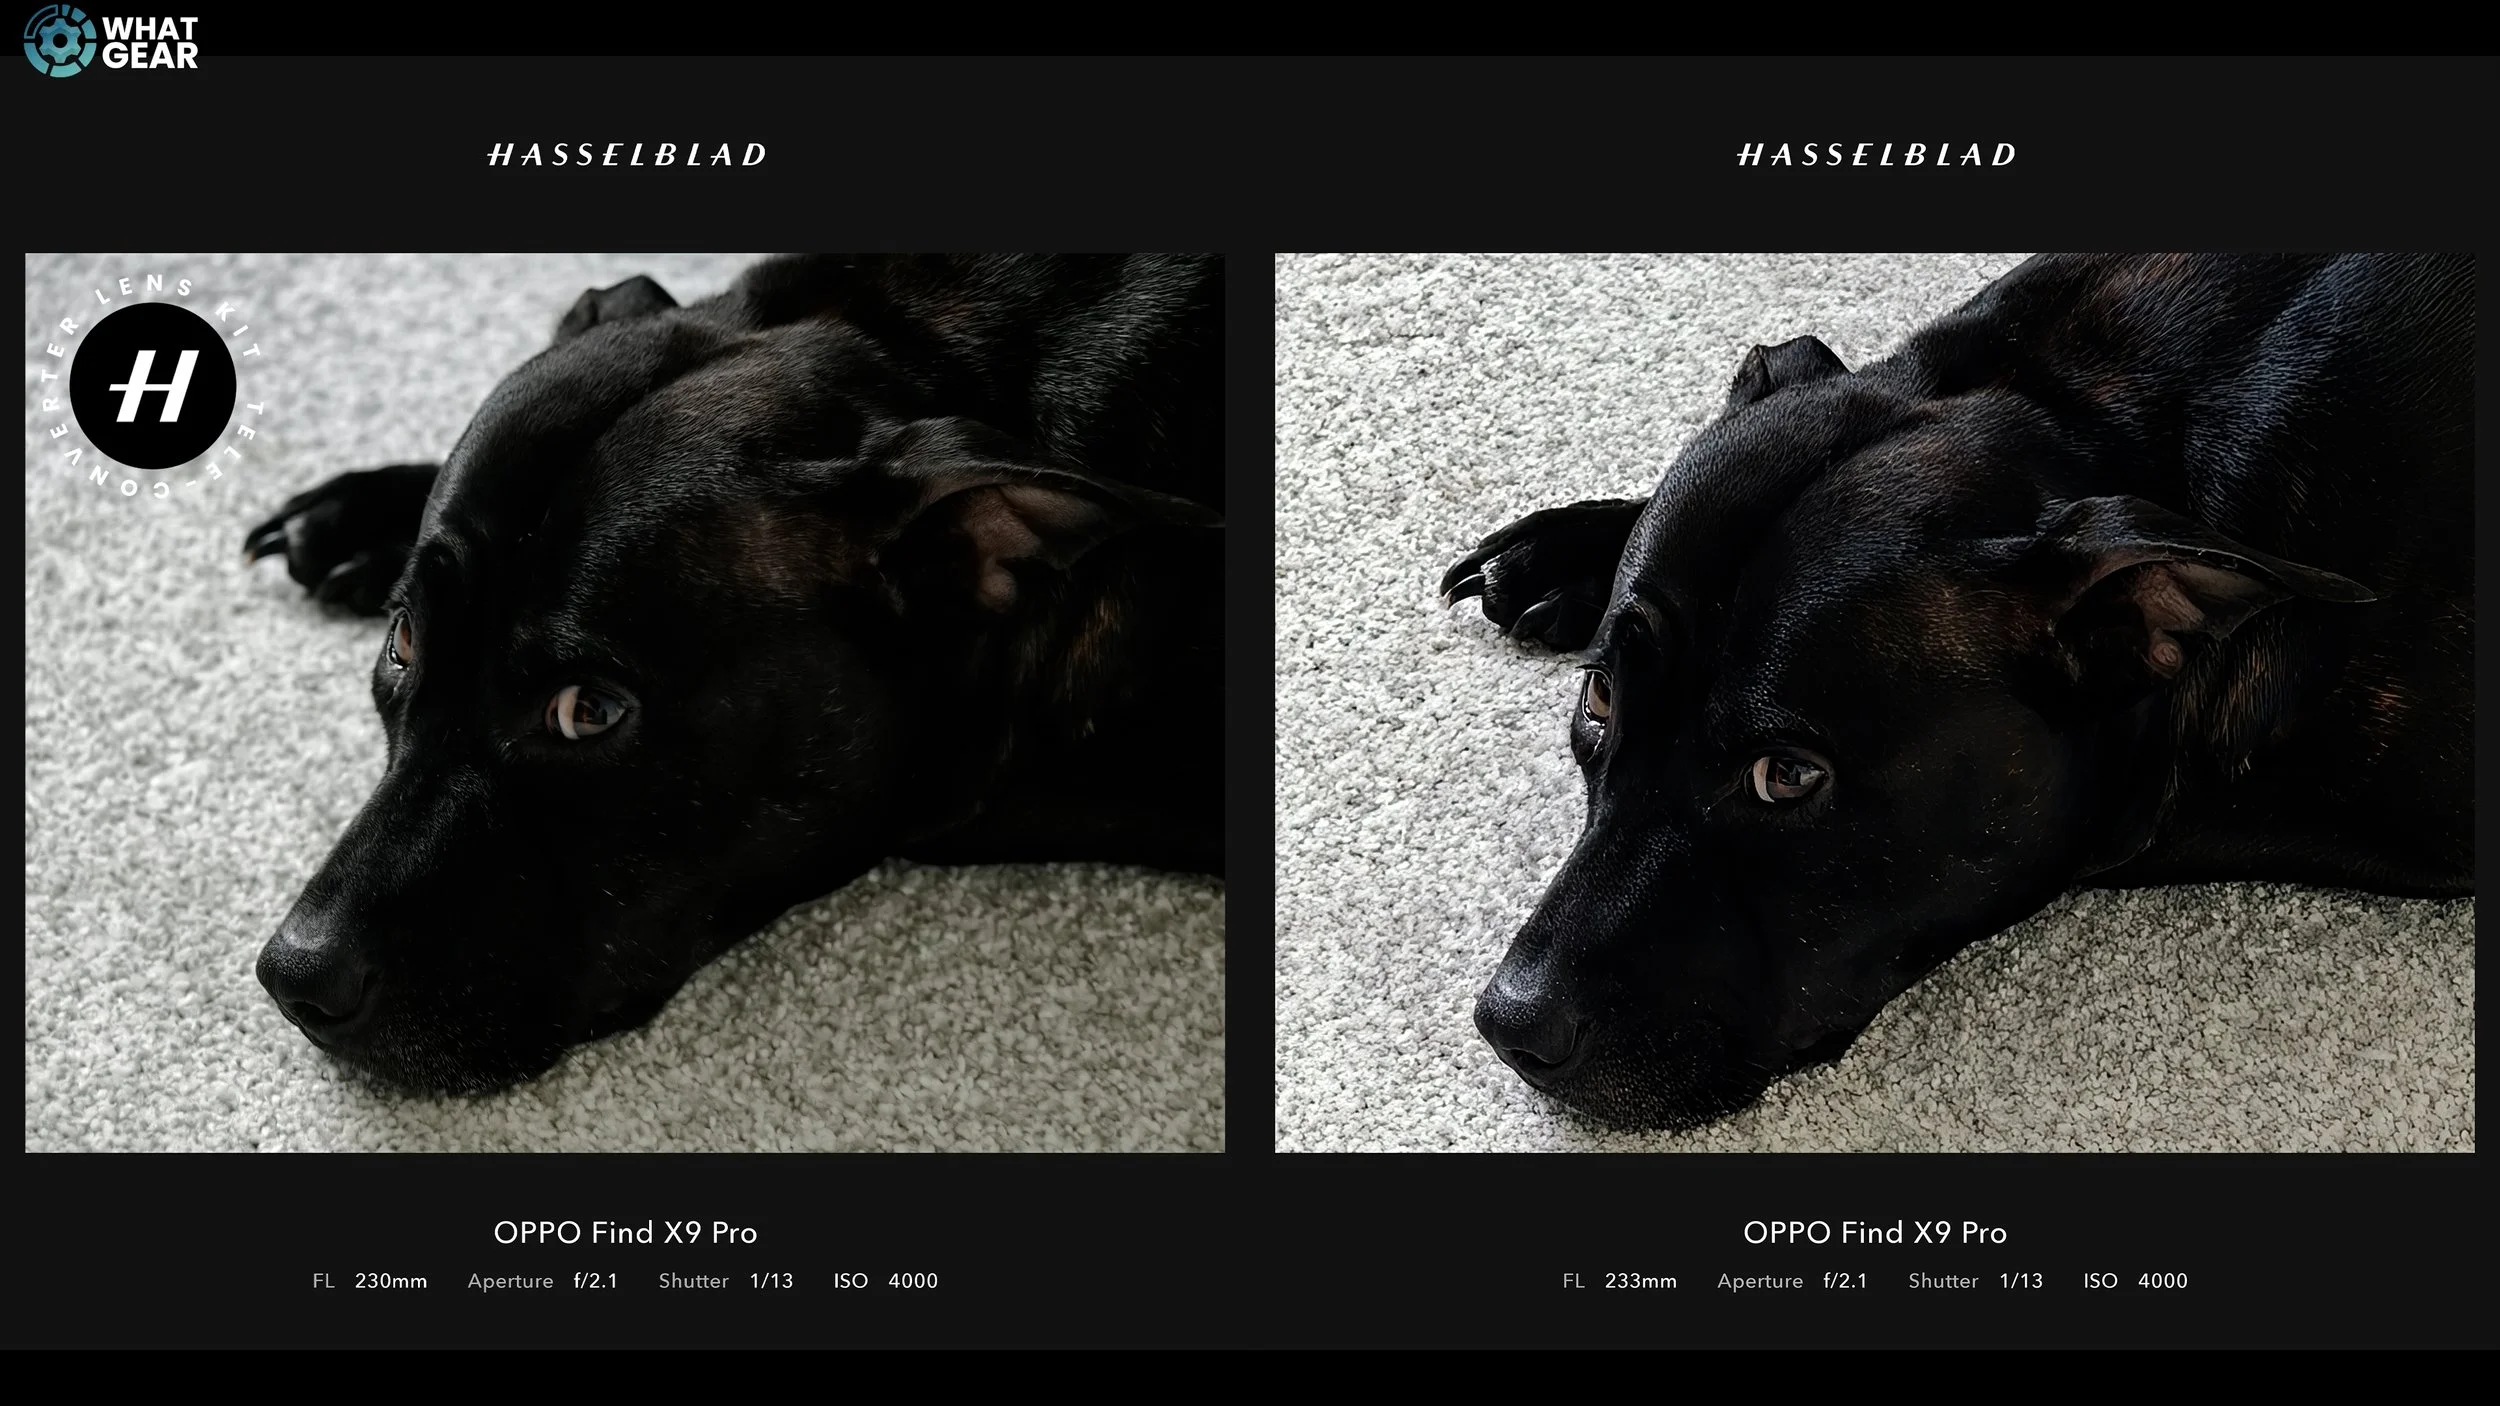
The same thing happens with pets. AI sharpens fur unnaturally and misinterprets fine hairs as dust particles. While the processed image might look sharper at first glance, it’s far less true to life.
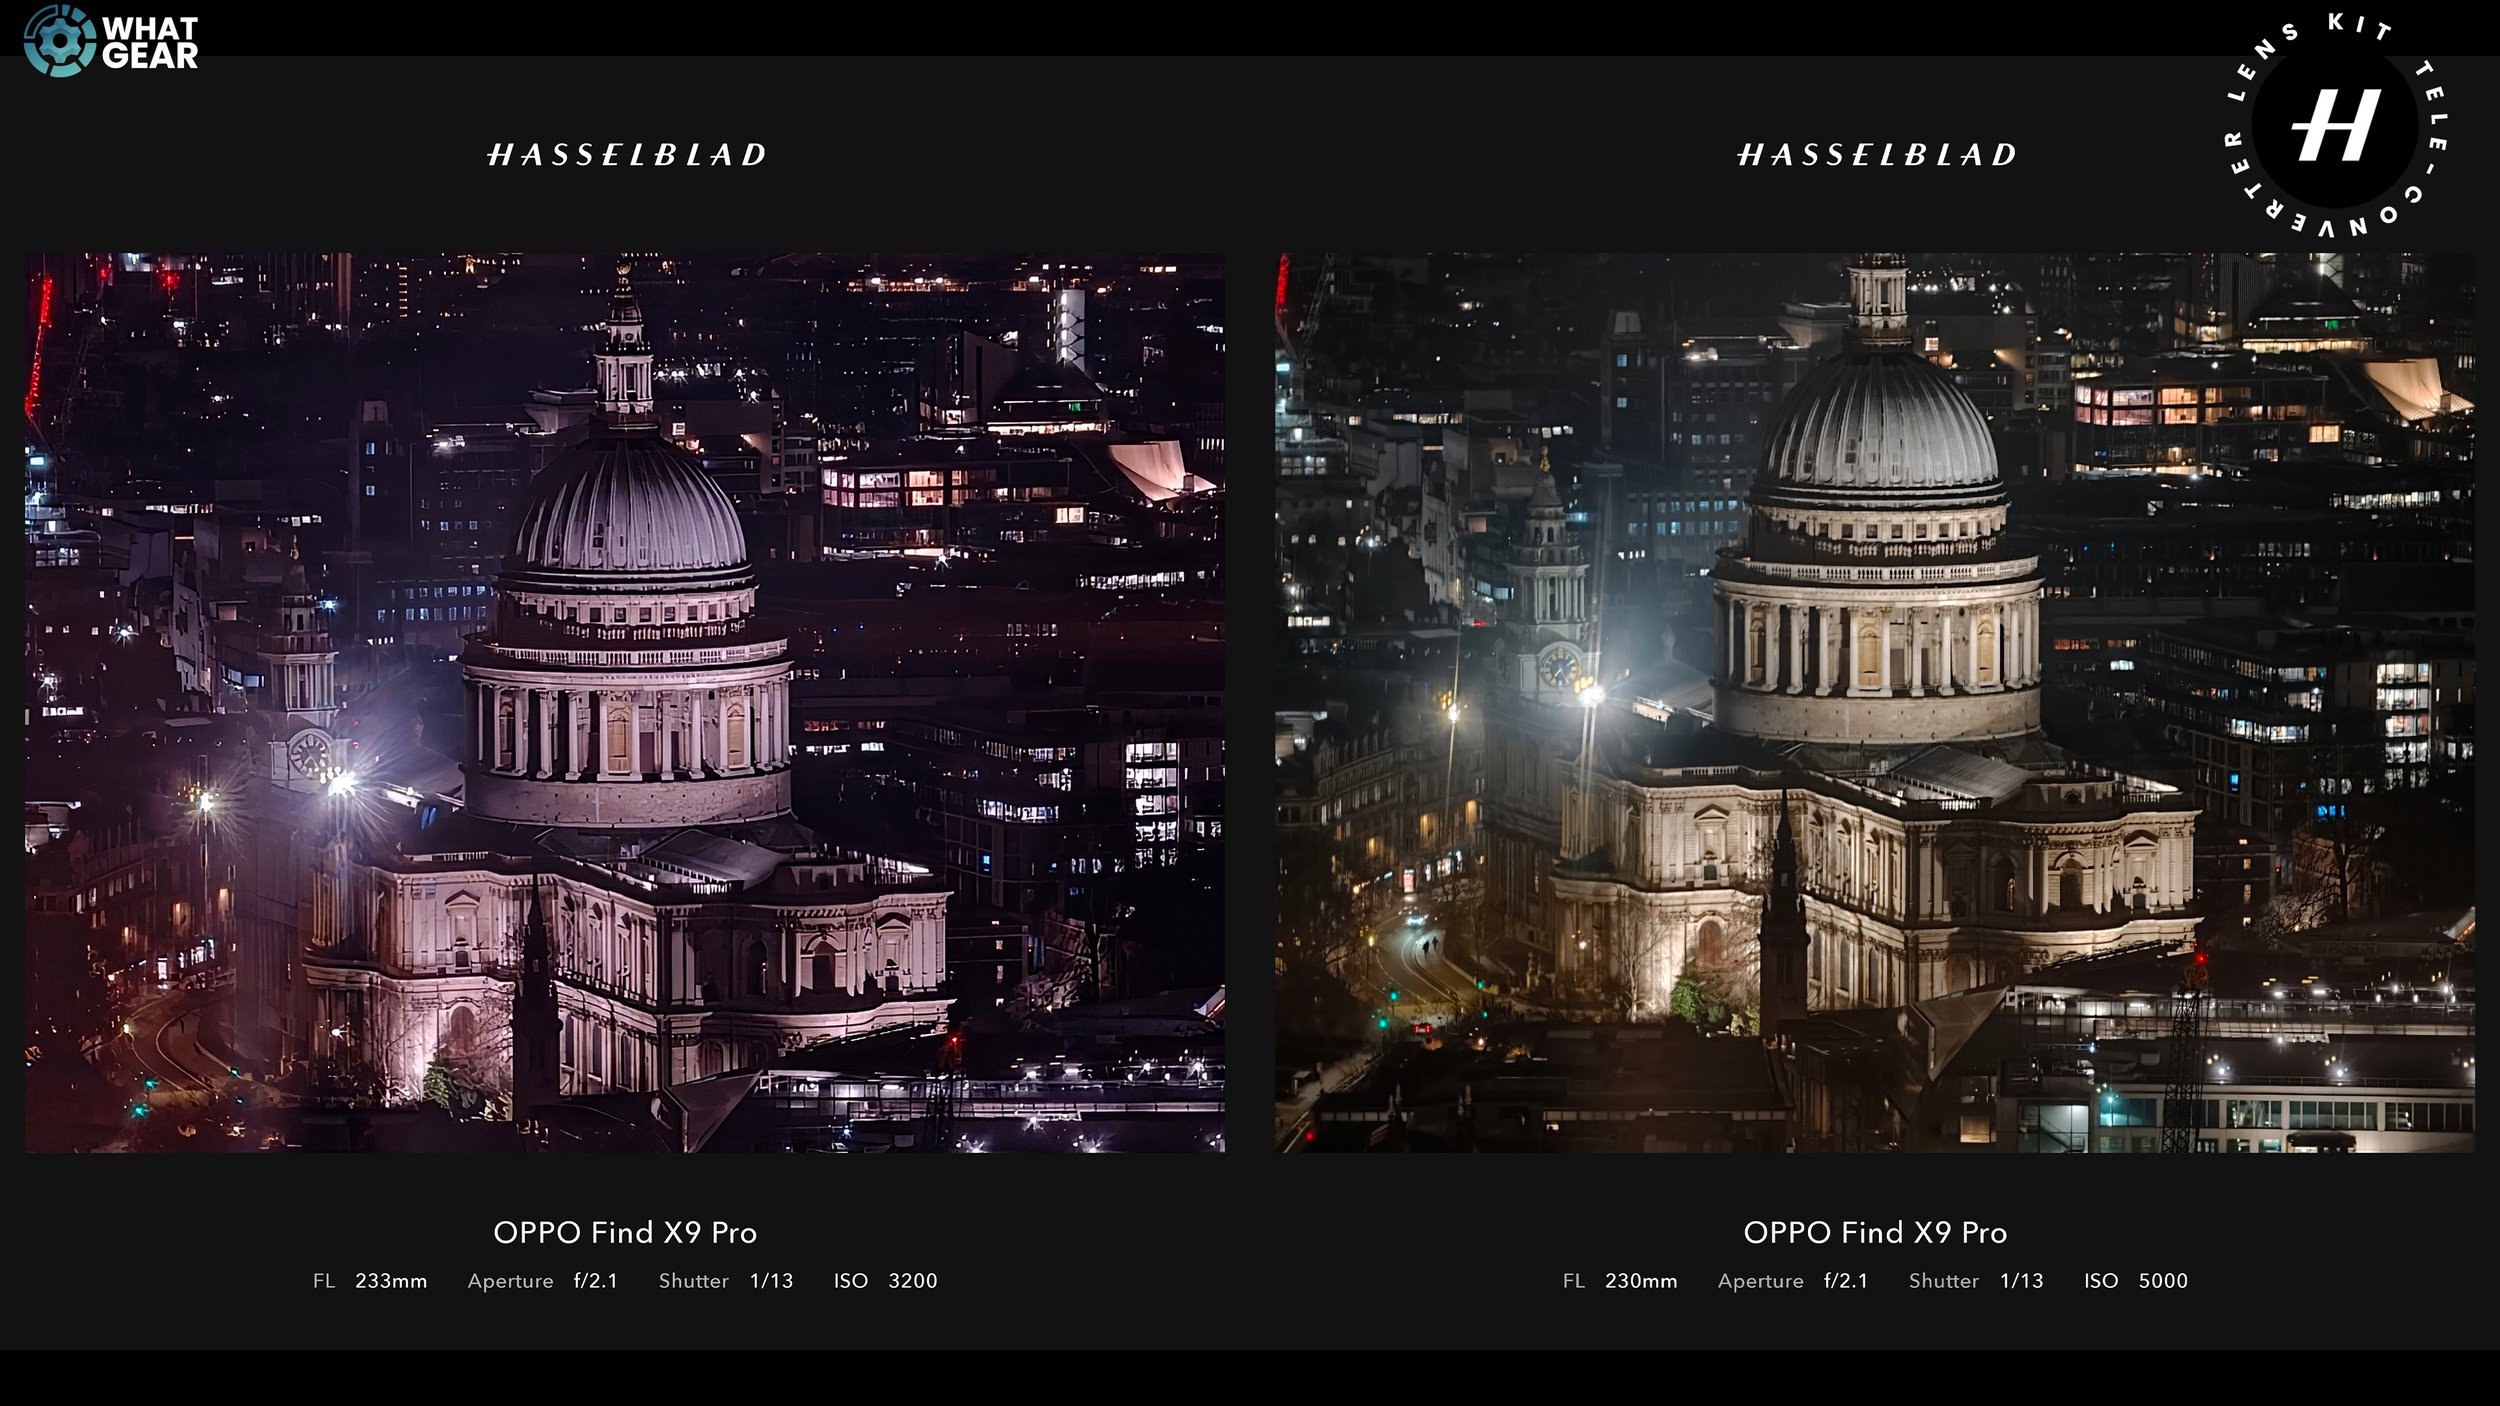
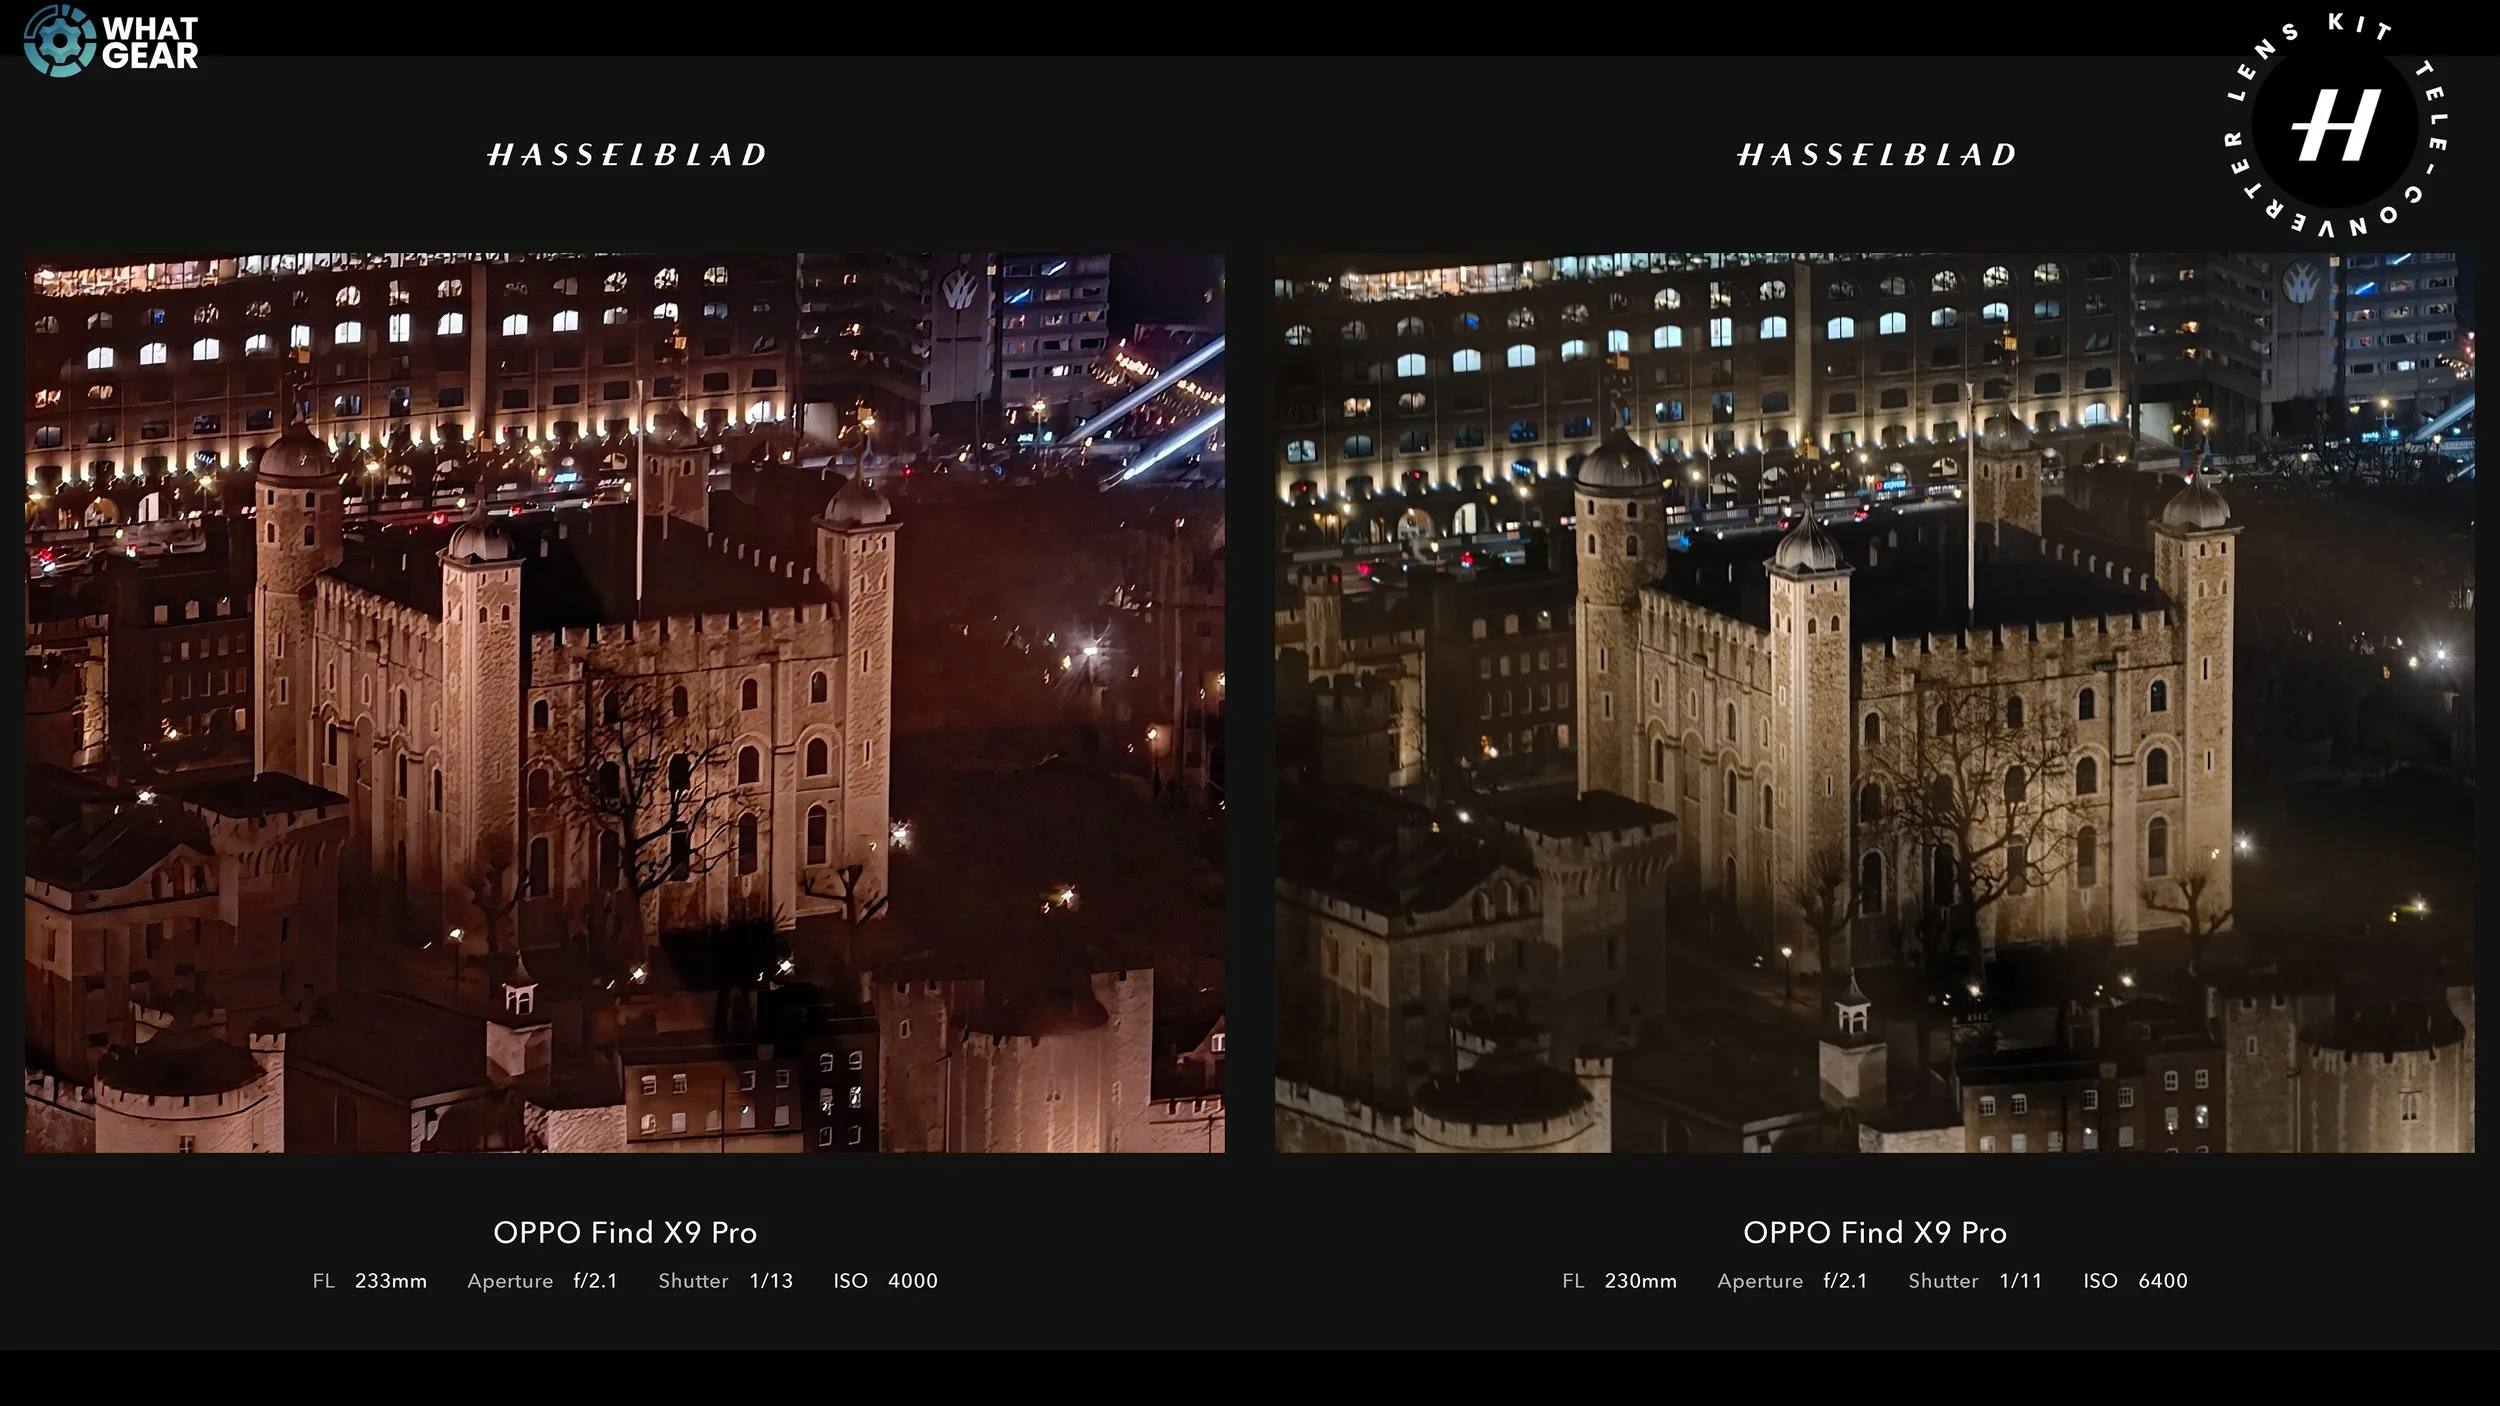
Night Photography
This night shot of St Paul’s Cathedral was taken through glass from the London Sky Garden. While AI processing can sometimes help at night, the Teleconverter still produces better colour, detail, lens flare handling, and dynamic range. The same story applies to this final night shot of the Tower of London.
At this point, it becomes clear what AI is really doing to many smartphone photos — often without users realising it. Is the £200 Hasselblad Teleconverter Kit worth it? That depends on the type of photographer you are. If you only use Zoom to read signs at the airport, save your money. But if you care about natural colours, optical realism, and better dynamic range, then yes — it could absolutely be worth it. That said, carrying extra kit isn’t always convenient. I kept thinking how amazing it would be if Oppo could design a telescopic version that retracts when not in use. Let me know what you thought of the results. Did you learn something new about optical lenses versus computational photography? Or did you know exactly how this would play out from day one?