
Samsung Galaxy Security Settings They DON'T Want You To Know About ( 15 Tips & Tricks )
When it comes to privacy and security on your Galaxy phone, some settings and features fall into place automatically. However, this might make you crazy to know, but there are some features and settings that might leave the door open to unwanted advertisers, prying eyes, and thieves. That's exactly why I'm about to show you how to level up your security.
NO PEEKING
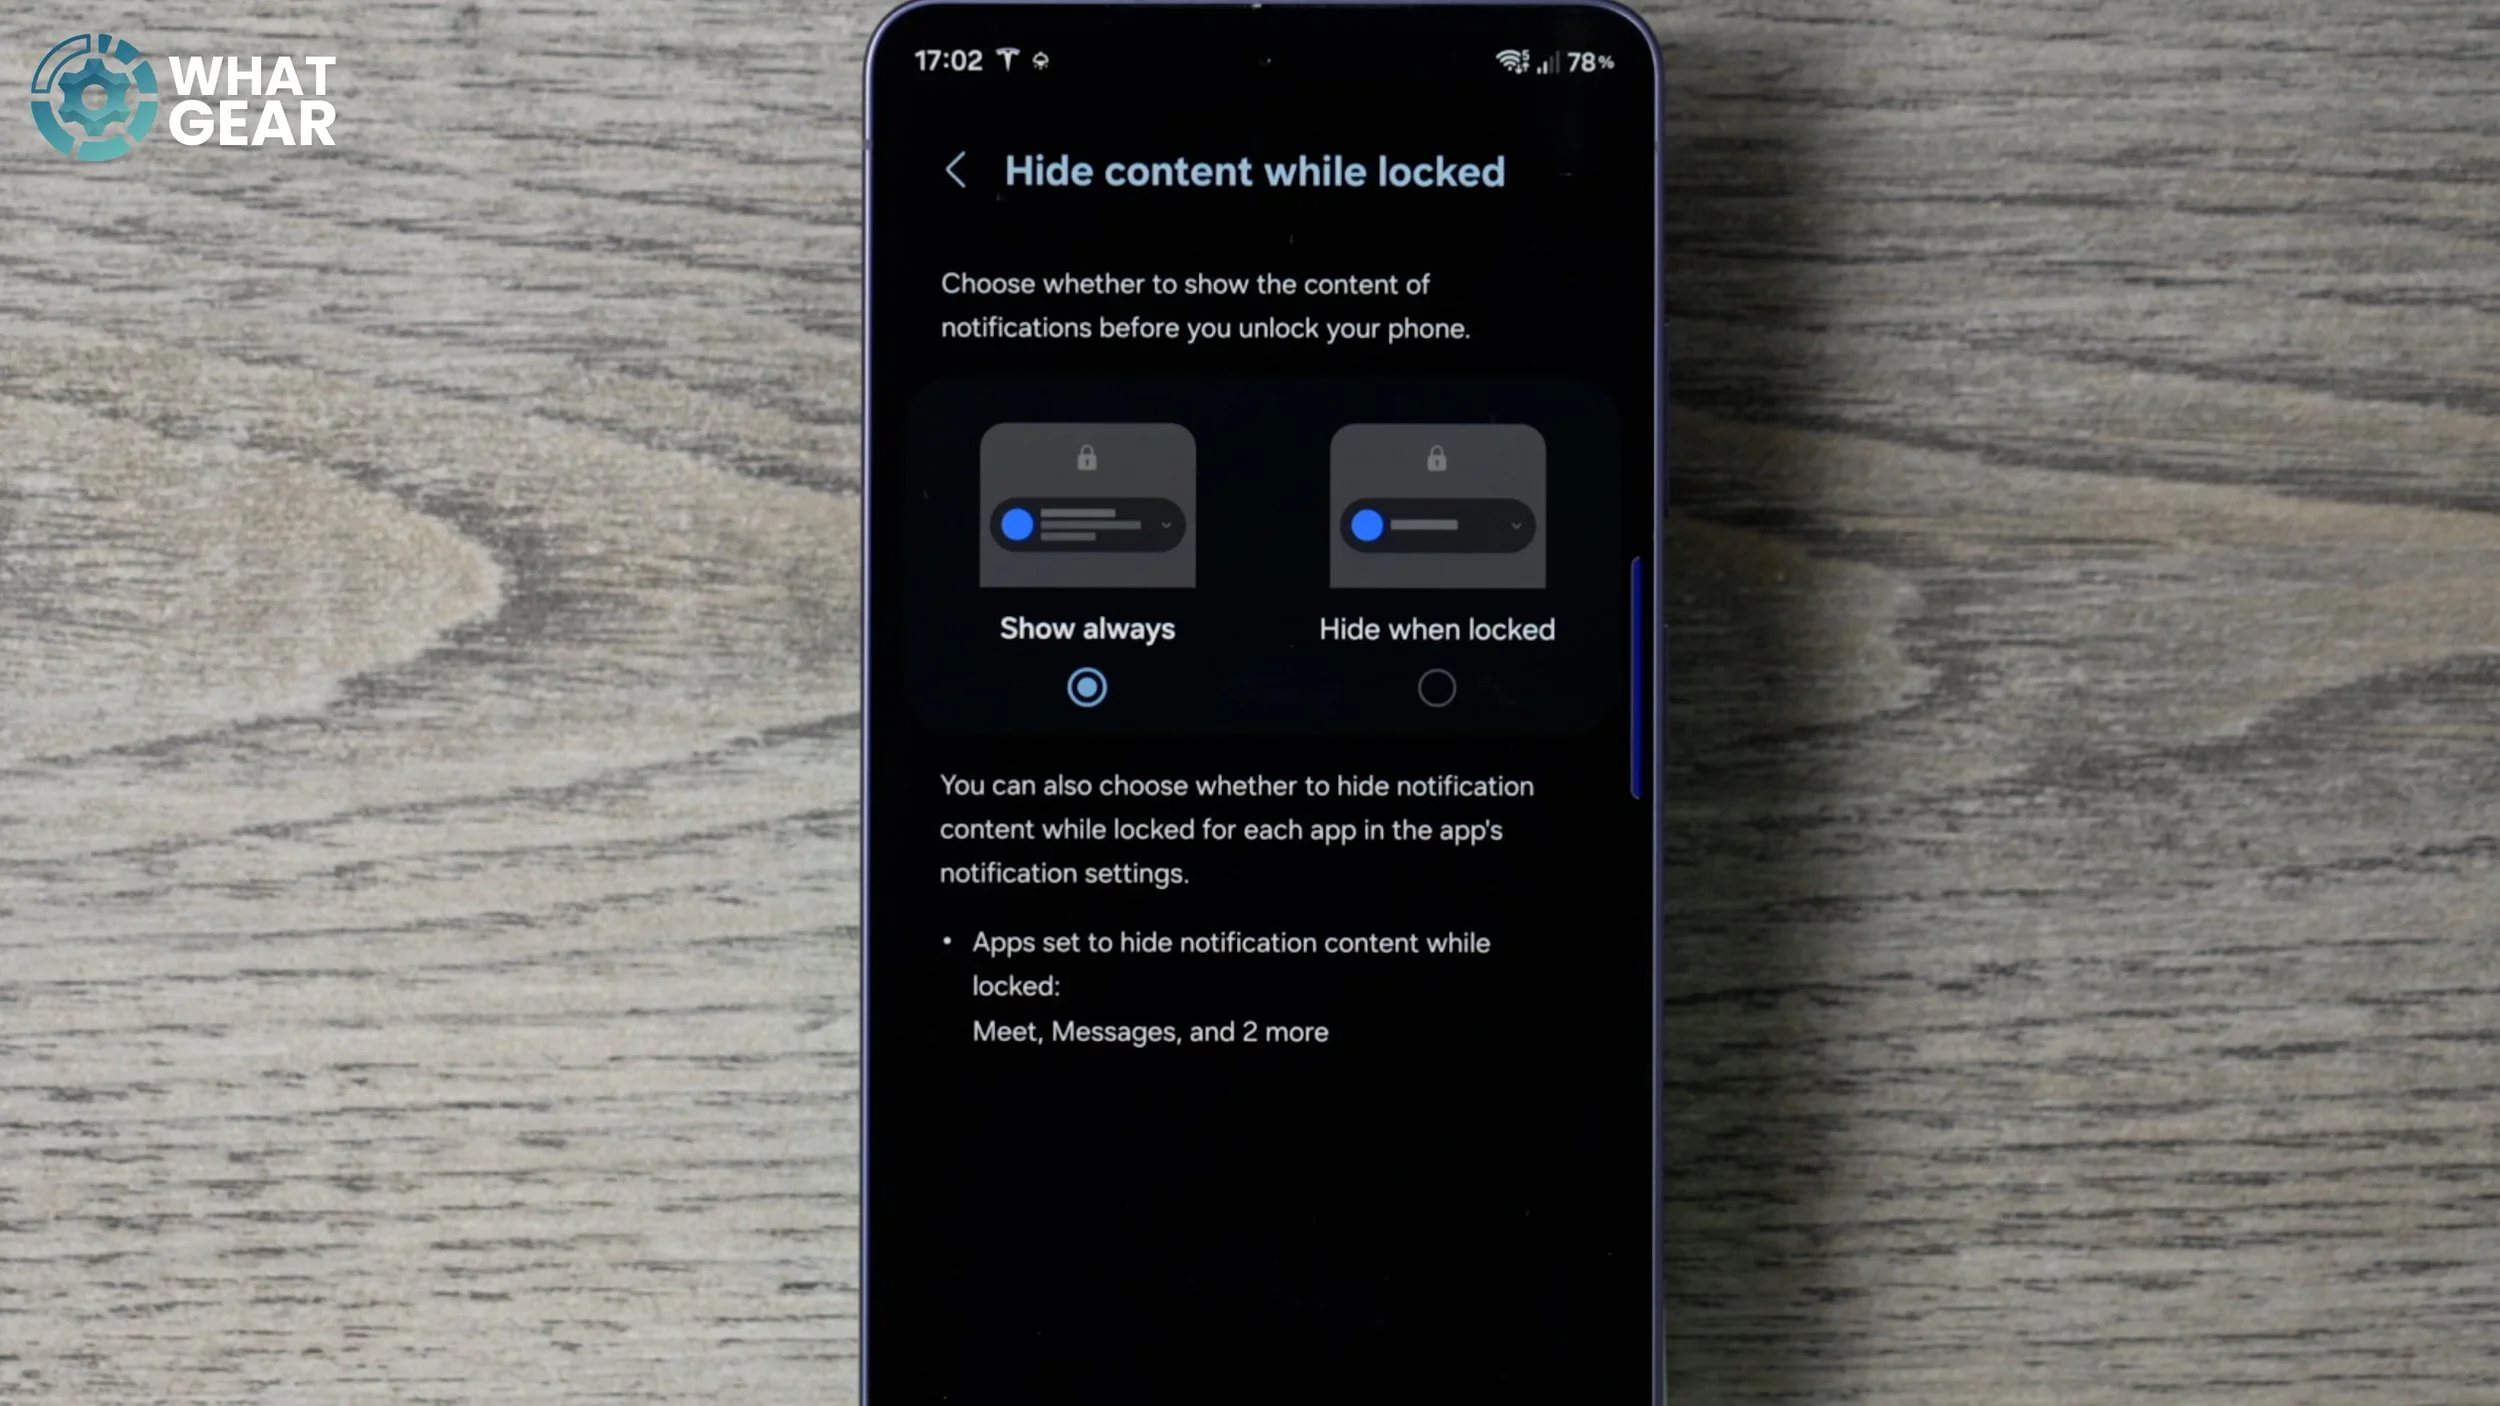
You don't want people to be able to read your private notifications and messages, right? Well, if that's the case, then you definitely want to do this. Go into your Settings and then scroll down to Notifications. Right near the top, you will find Hide content when locked. Tap on this and make sure you enable Hide when locked. With this on, you'll still be alerted to notifications, although they won't be able to be read until you unlock your device.
DON’T BECOME PHISH FOOD
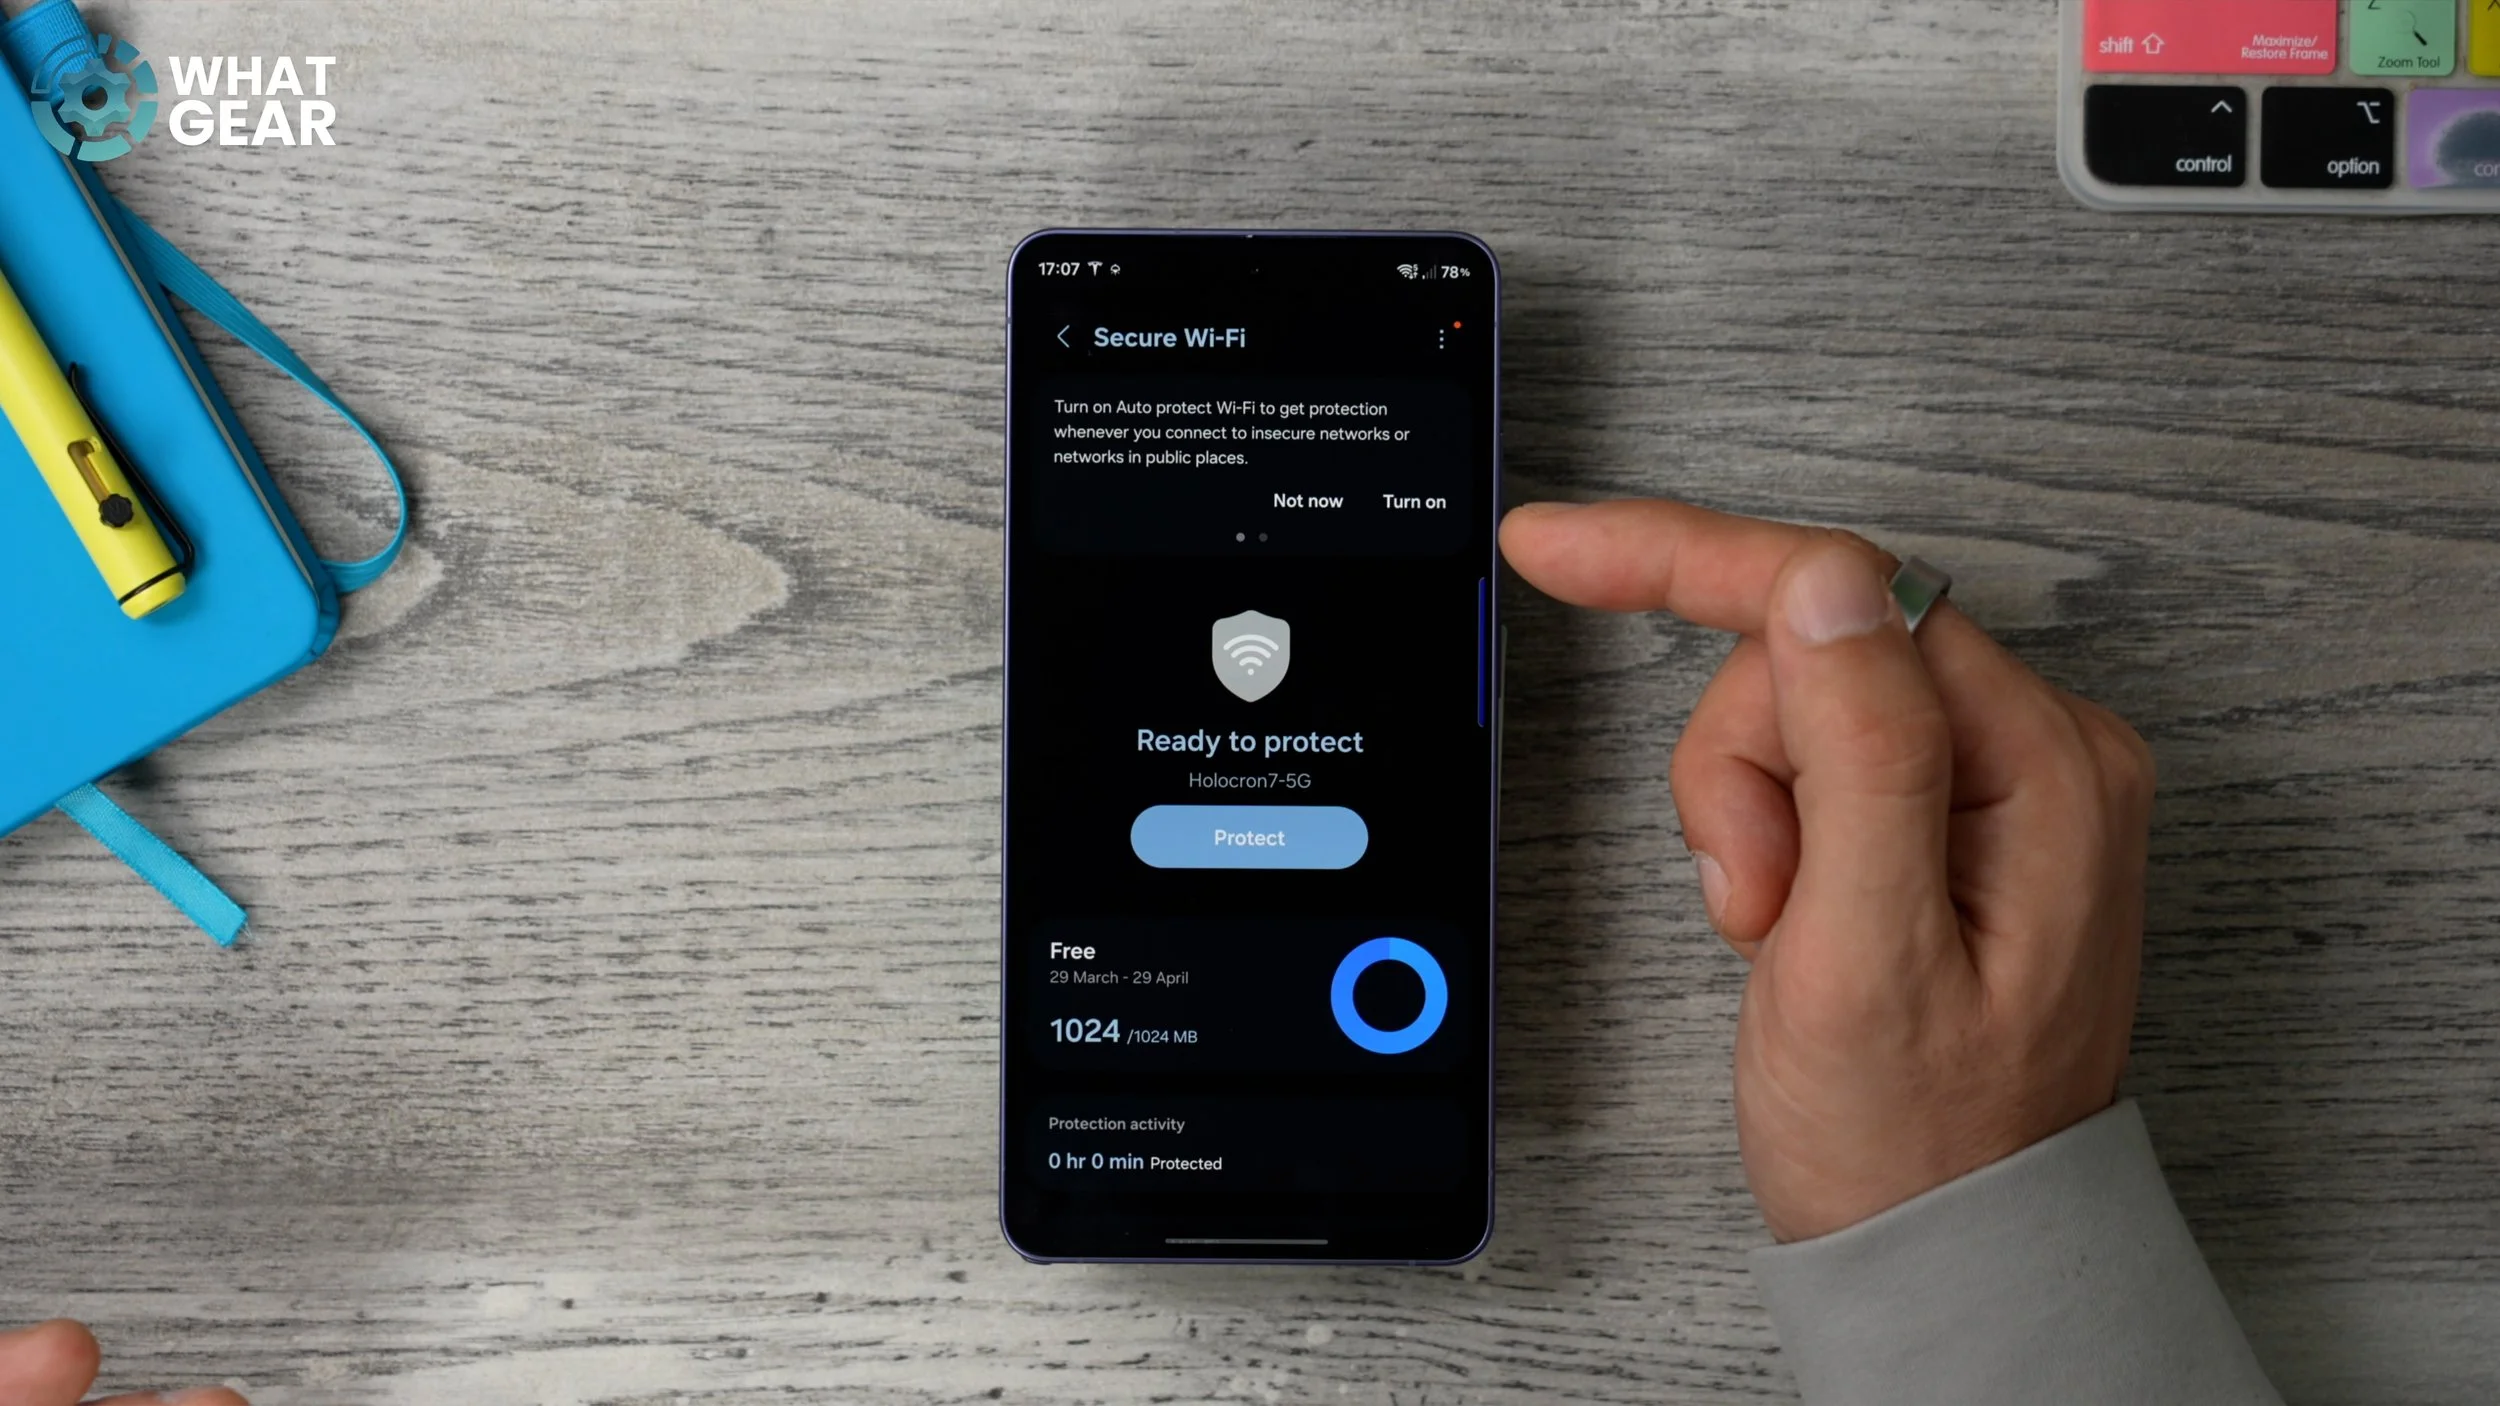
So I'm assuming you do know that whenever you connect to someone else's Wi-Fi or a public hotspot, your data can easily be intercepted by anyone else on that same network. Well, it is true, but it won't be if you use this pre-installed Samsung security feature. Here's how you access it. Go into your Settings. Scroll down to Security and Privacy. On this page, scroll all the way down until you see More security settings, and right at the top of this page, you will see Secure Wi-Fi. If you tap on this, essentially, what this is is an official Samsung VPN that's free to use. Although this is completely free to use for Samsung owners, there is a data cap, and that data cap is 1GB. And it's for that reason I don't recommend you turn on the Auto Protect Wi-Fi feature, because you'll burn through that 1GB super quickly.
So what I recommend you do is bring down the quick settings, hit the pen at the top, and at the bottom of this screen, you will see Add control. If you tap on this, scroll down until you see the Connection section, and here you will find the Secure Wi-Fi button. Add this to your quick settings. If this sounds like it's going to be a feature that you're going to be using a lot, you could make it bigger, and you could drag it near the top of your quick settings. That way, it's much easier to find in the future. And then next time, whenever you connect to a coffee shop hotspot or Wi-Fi hotspot or anything like that, you can switch on your Secure Wi-Fi very quickly from your quick settings. Essentially, what this does with your private data when you are using these Wi-Fi networks is that it will KEEP IT SECRET.
LOCK THE DOOR
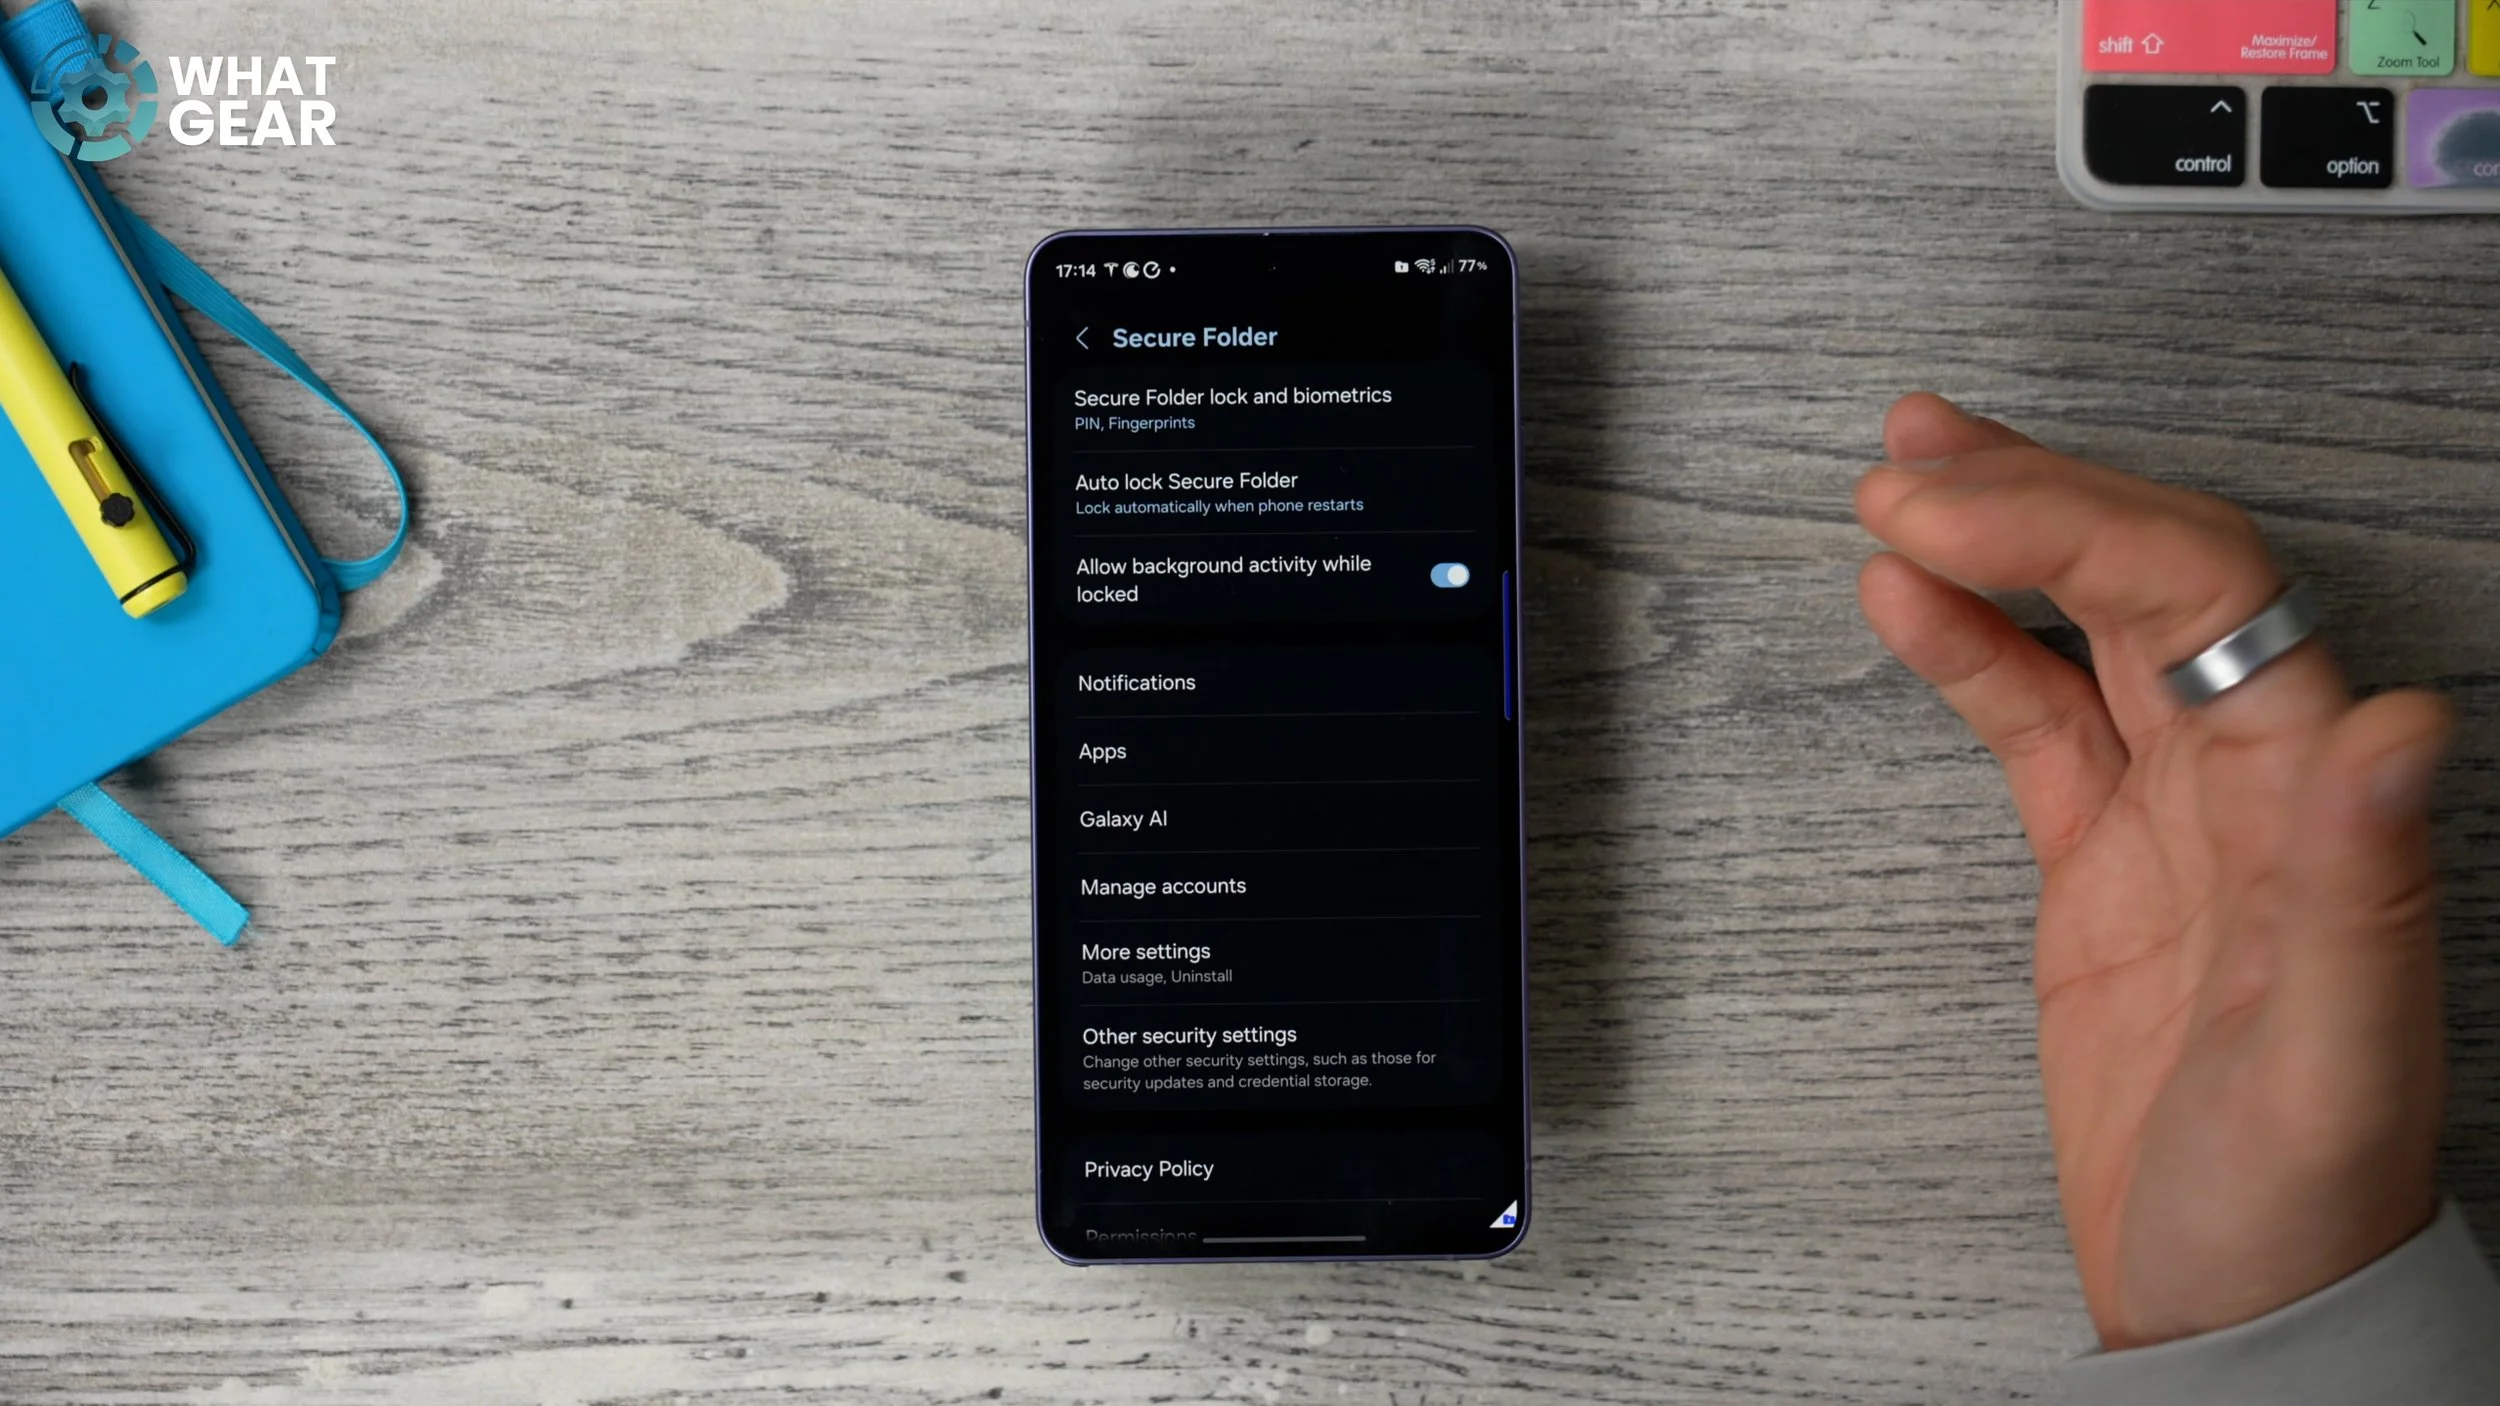
Do you have important documents, for example, backup codes or other sensitive information, on your phone? If the answer to that is yes, then you absolutely, positively need to be using this. Jump into your Settings again. We're going to scroll down to the Security and Privacy section. Again, we're going to scroll down till we see More security settings. And then right here you will find this: the Secure Folder. This essentially creates a folder on your device which has a secondary PIN number that adds an extra layer of security to your most private and personal files. Now, once you've entered an exclusive PIN number for your Secure Folder, what I recommend you do at the top is enable biometrics. This will just make it much easier to access in the future, so make sure you enable that. And then once you've done that, come back to your home screen. Now you might be wondering, how do I access the Secure Folder? How do I put files into the Secure Folder? Well, there are a couple of ways to do it. The easiest way by far, in my opinion, is this: just like we did before with Secure Wi-Fi, if you bring down your quick settings, hit the pen here, and go to Add control. Within this list of quick buttons, you should see the Security section. If you keep scrolling down, you will eventually find it, and you will find the Secure Folder quick setting. Again, you can make this a bit bigger and move it around on your quick settings page so that it's easy to get to. Once you've done that, hit Done.
Now that you've set up the Secure Folder, here's how you can move things into it. So there are a couple of methods. Let's say it's a photo or video. What you can do is go into your Gallery, find that photo or video, and hit the three dots in the top right corner, and then go to Move to Secure Folder. And it now exists behind lock and key within that folder. Now, let's say it's a document you want to move, like a PDF or a text file that has code on it. What you need to do is use Samsung's My Files app. It will look like this. It is pre-installed on your device. You might want to add it to one of your home screens. Jump into this. So, for example, let's say it's a document like this, a PDF. What you need to do is hold your finger down on that PDF, and then at the bottom, you'll see the three dots. Hit that, and here you will see the option to Move to Secure Folder. Very important: you know that if you copy to the Secure Folder, the original stays in place. But if you move it, it actually moves the file entirely into the Secure Folder so that it's not accessible through the regular My Files app anymore. And via the same app, you can actually move photos and videos as well. You can locate them via the browser or by tapping on internal storage.
COPY ALERTS
Have you ever copied a passcode or a PIN code to paste it into an app or web page to log in again? If you've answered yes, you need to take a look at this. Go into your Settings. Once again, we're going to go down to Security and Privacy. And this time, we're going to scroll all the way to the bottom to where you see Controls and Alerts.
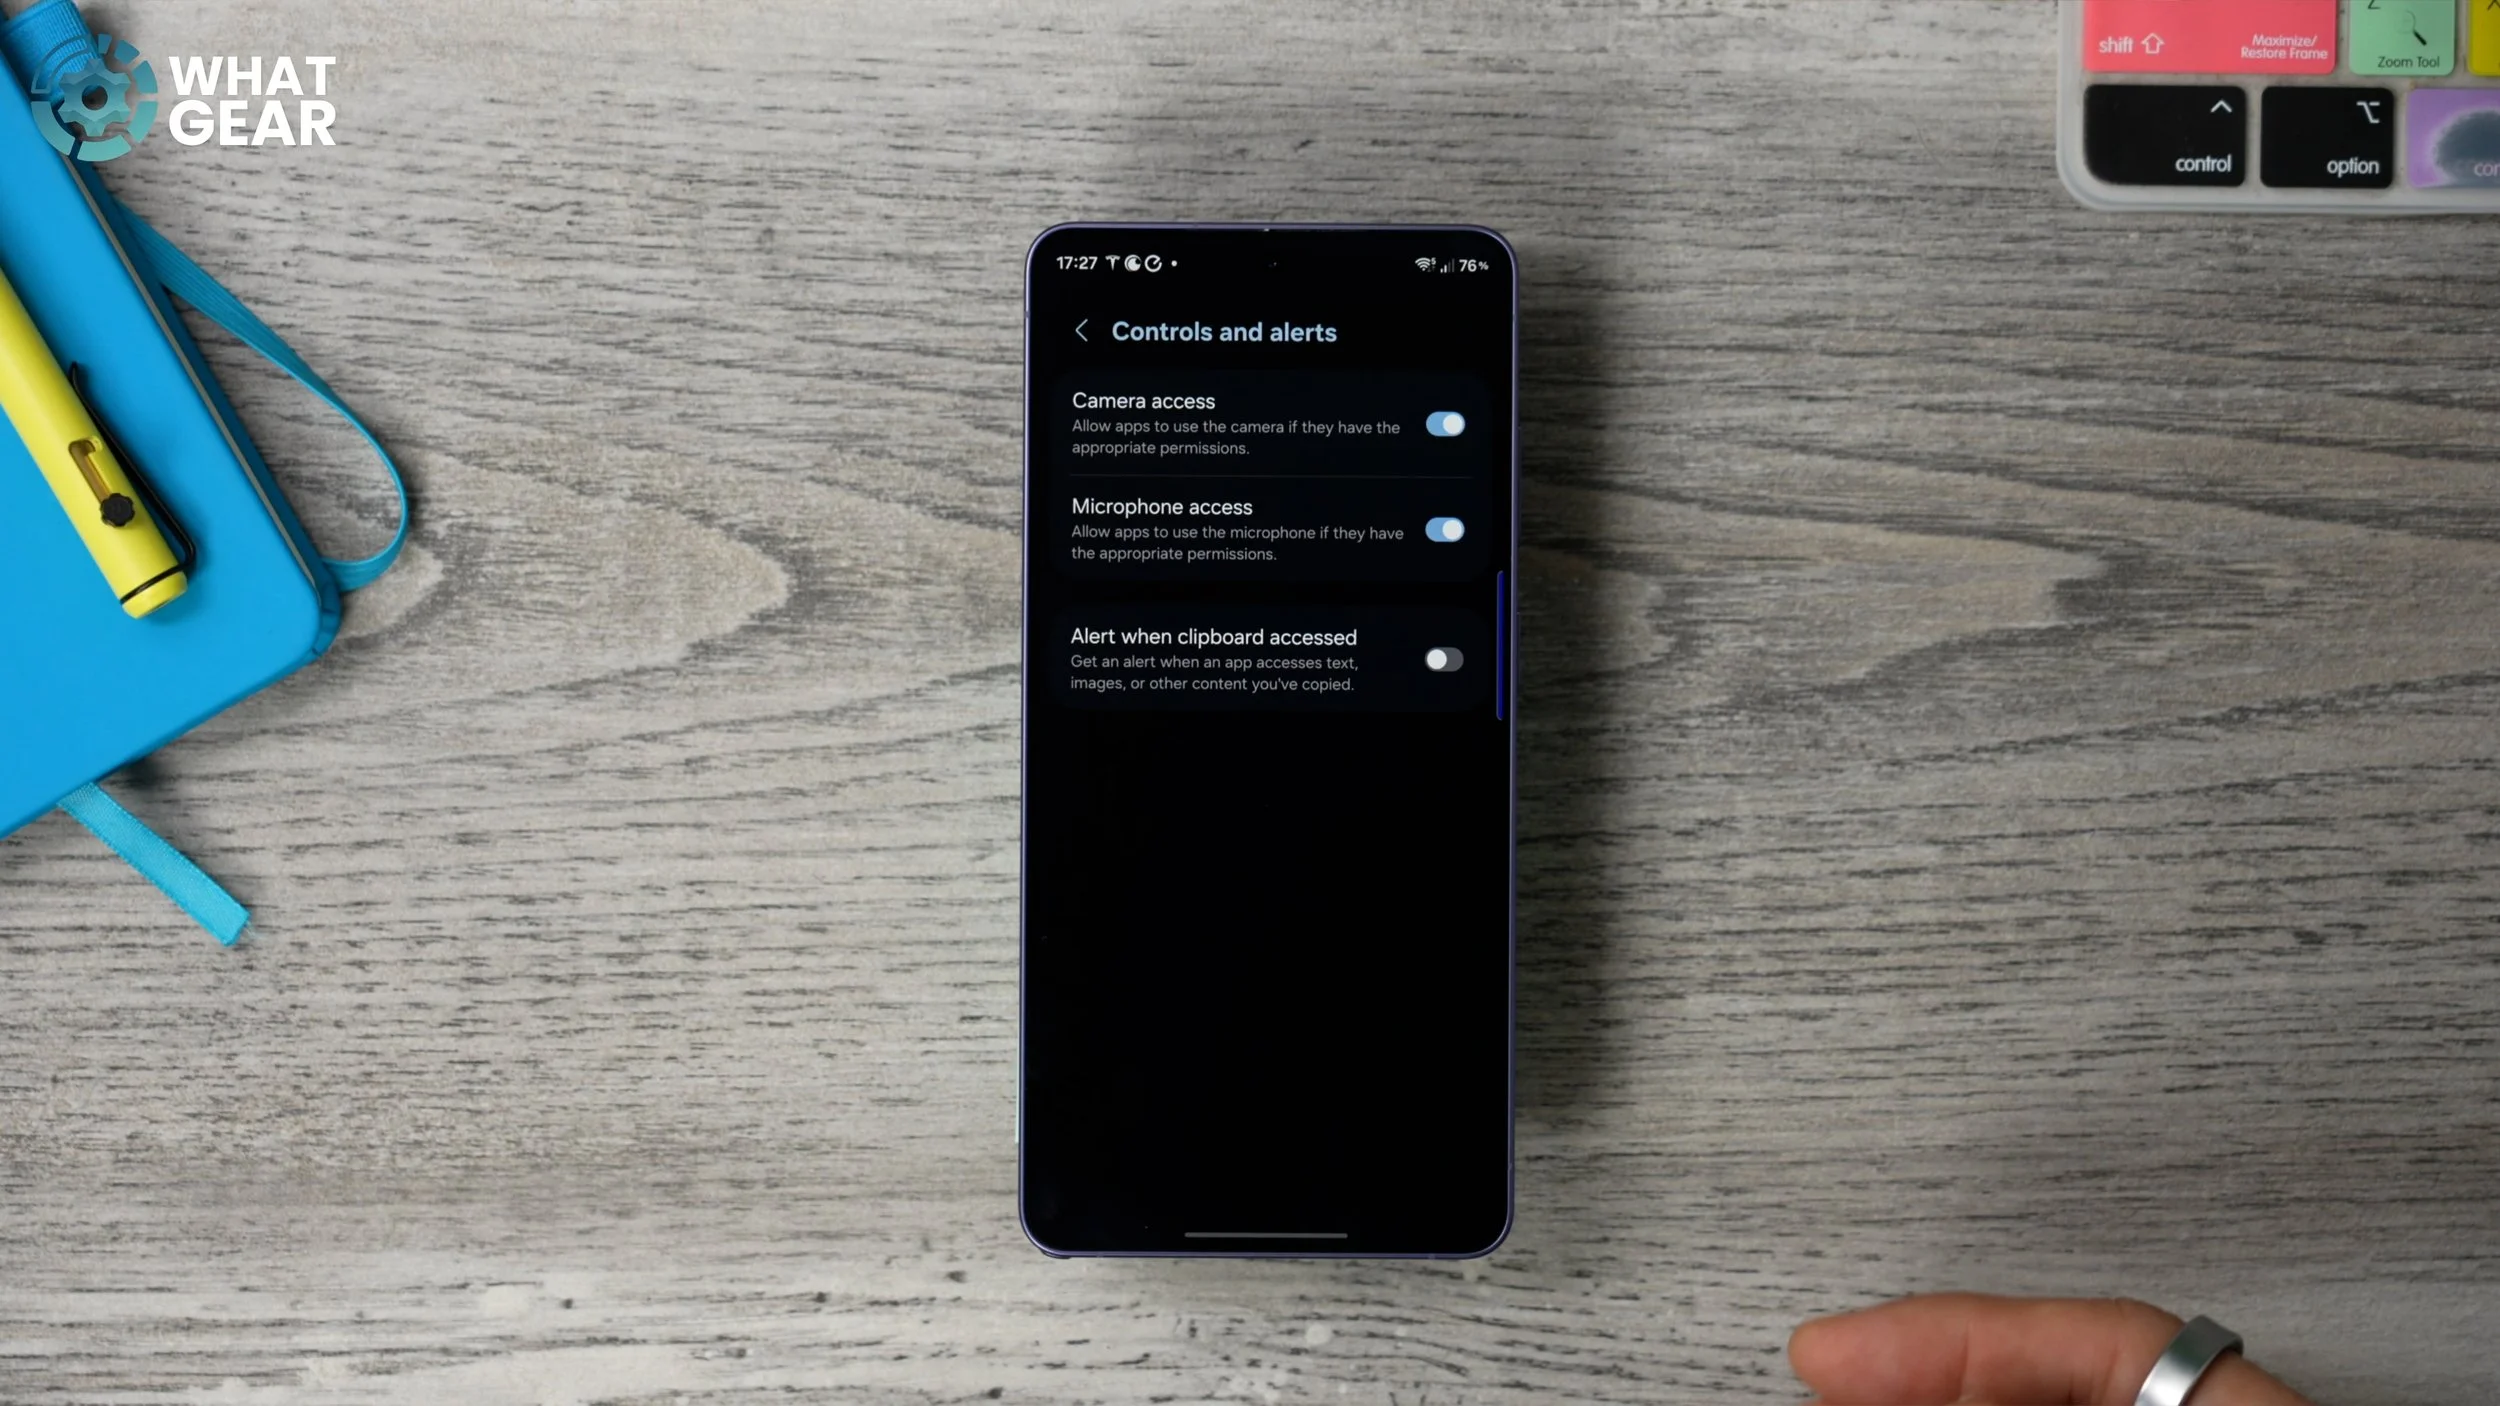
Some people might not know this, but when you copy stuff to your clipboard, it actually remains there for a while. And this can pose a risk if someone can access that copied data. And that's exactly why you might want to switch this on. In fact, I don't see any downside to switching this on: Alert when clipboard is accessed.
STAY READY
Have you ever heard the saying that you need to stay ready so that you don't have to get ready? Well, here's a serious question for you. I think what I'm saying is that sometimes shit happens. Someone has to deal with it. And who are you going to call? So here is how to get ready and be prepared for the worst, so that in the blink of an eye, you can send out the bat signal when you need some backup. Go to your Settings and then scroll down to Safety and Emergency. Go to Emergency SOS. At the bottom of this page, you'll see Send SOS to emergency contacts. Now, I don't know what country you're watching this in, but if you're in the UK, you probably know you're more likely to get arrested for a social media post than for the police to show up and help you if there is an actual emergency. So you might want to add more than one contact here.

So to do this, you just need to go to Emergency Contacts. Add all your contacts here, where it says Add emergency contacts. Also, if you scroll down, you'll see the option to Share during emergency calls and texts. Essentially, what this does is it sends all your medical information to your emergency contacts. Let's say you've taken a fall or you've been in a car crash or something like that — that's when that could be handy. Now, if we go back, there are some more steps to this, which are optional. So if you want to, you can add Attach pictures. So when you trigger this SOS feature, it will capture photos and even recordings if you switch these two on. You do have to give it permissions, so definitely think about doing that if you are more security-conscious. Now, most important of all is that you know how to activate this SOS feature. You can do it by simply pushing the power key five times in a row in quick succession. So familiarise yourself with how to activate this, and also have a think about who you are going to call.
ARE YOU BEING TRACKED?
Now, there was a time when location trackers were huge and not hard to find, but nowadays they're so small and discreet, and they're commonly used by professional car thieves to track down and steal expensive vehicles. But did you know there is a Galaxy feature that could give you an early heads-up if someone is trying to track you or your vehicle? And, of course, any other property that could be stolen. Here's how to check that the tool is active, and how to activate it if it's off. Now, this one is so well hidden that the easiest way to find it is to use the search bar at the bottom and type in Unknown trackers.
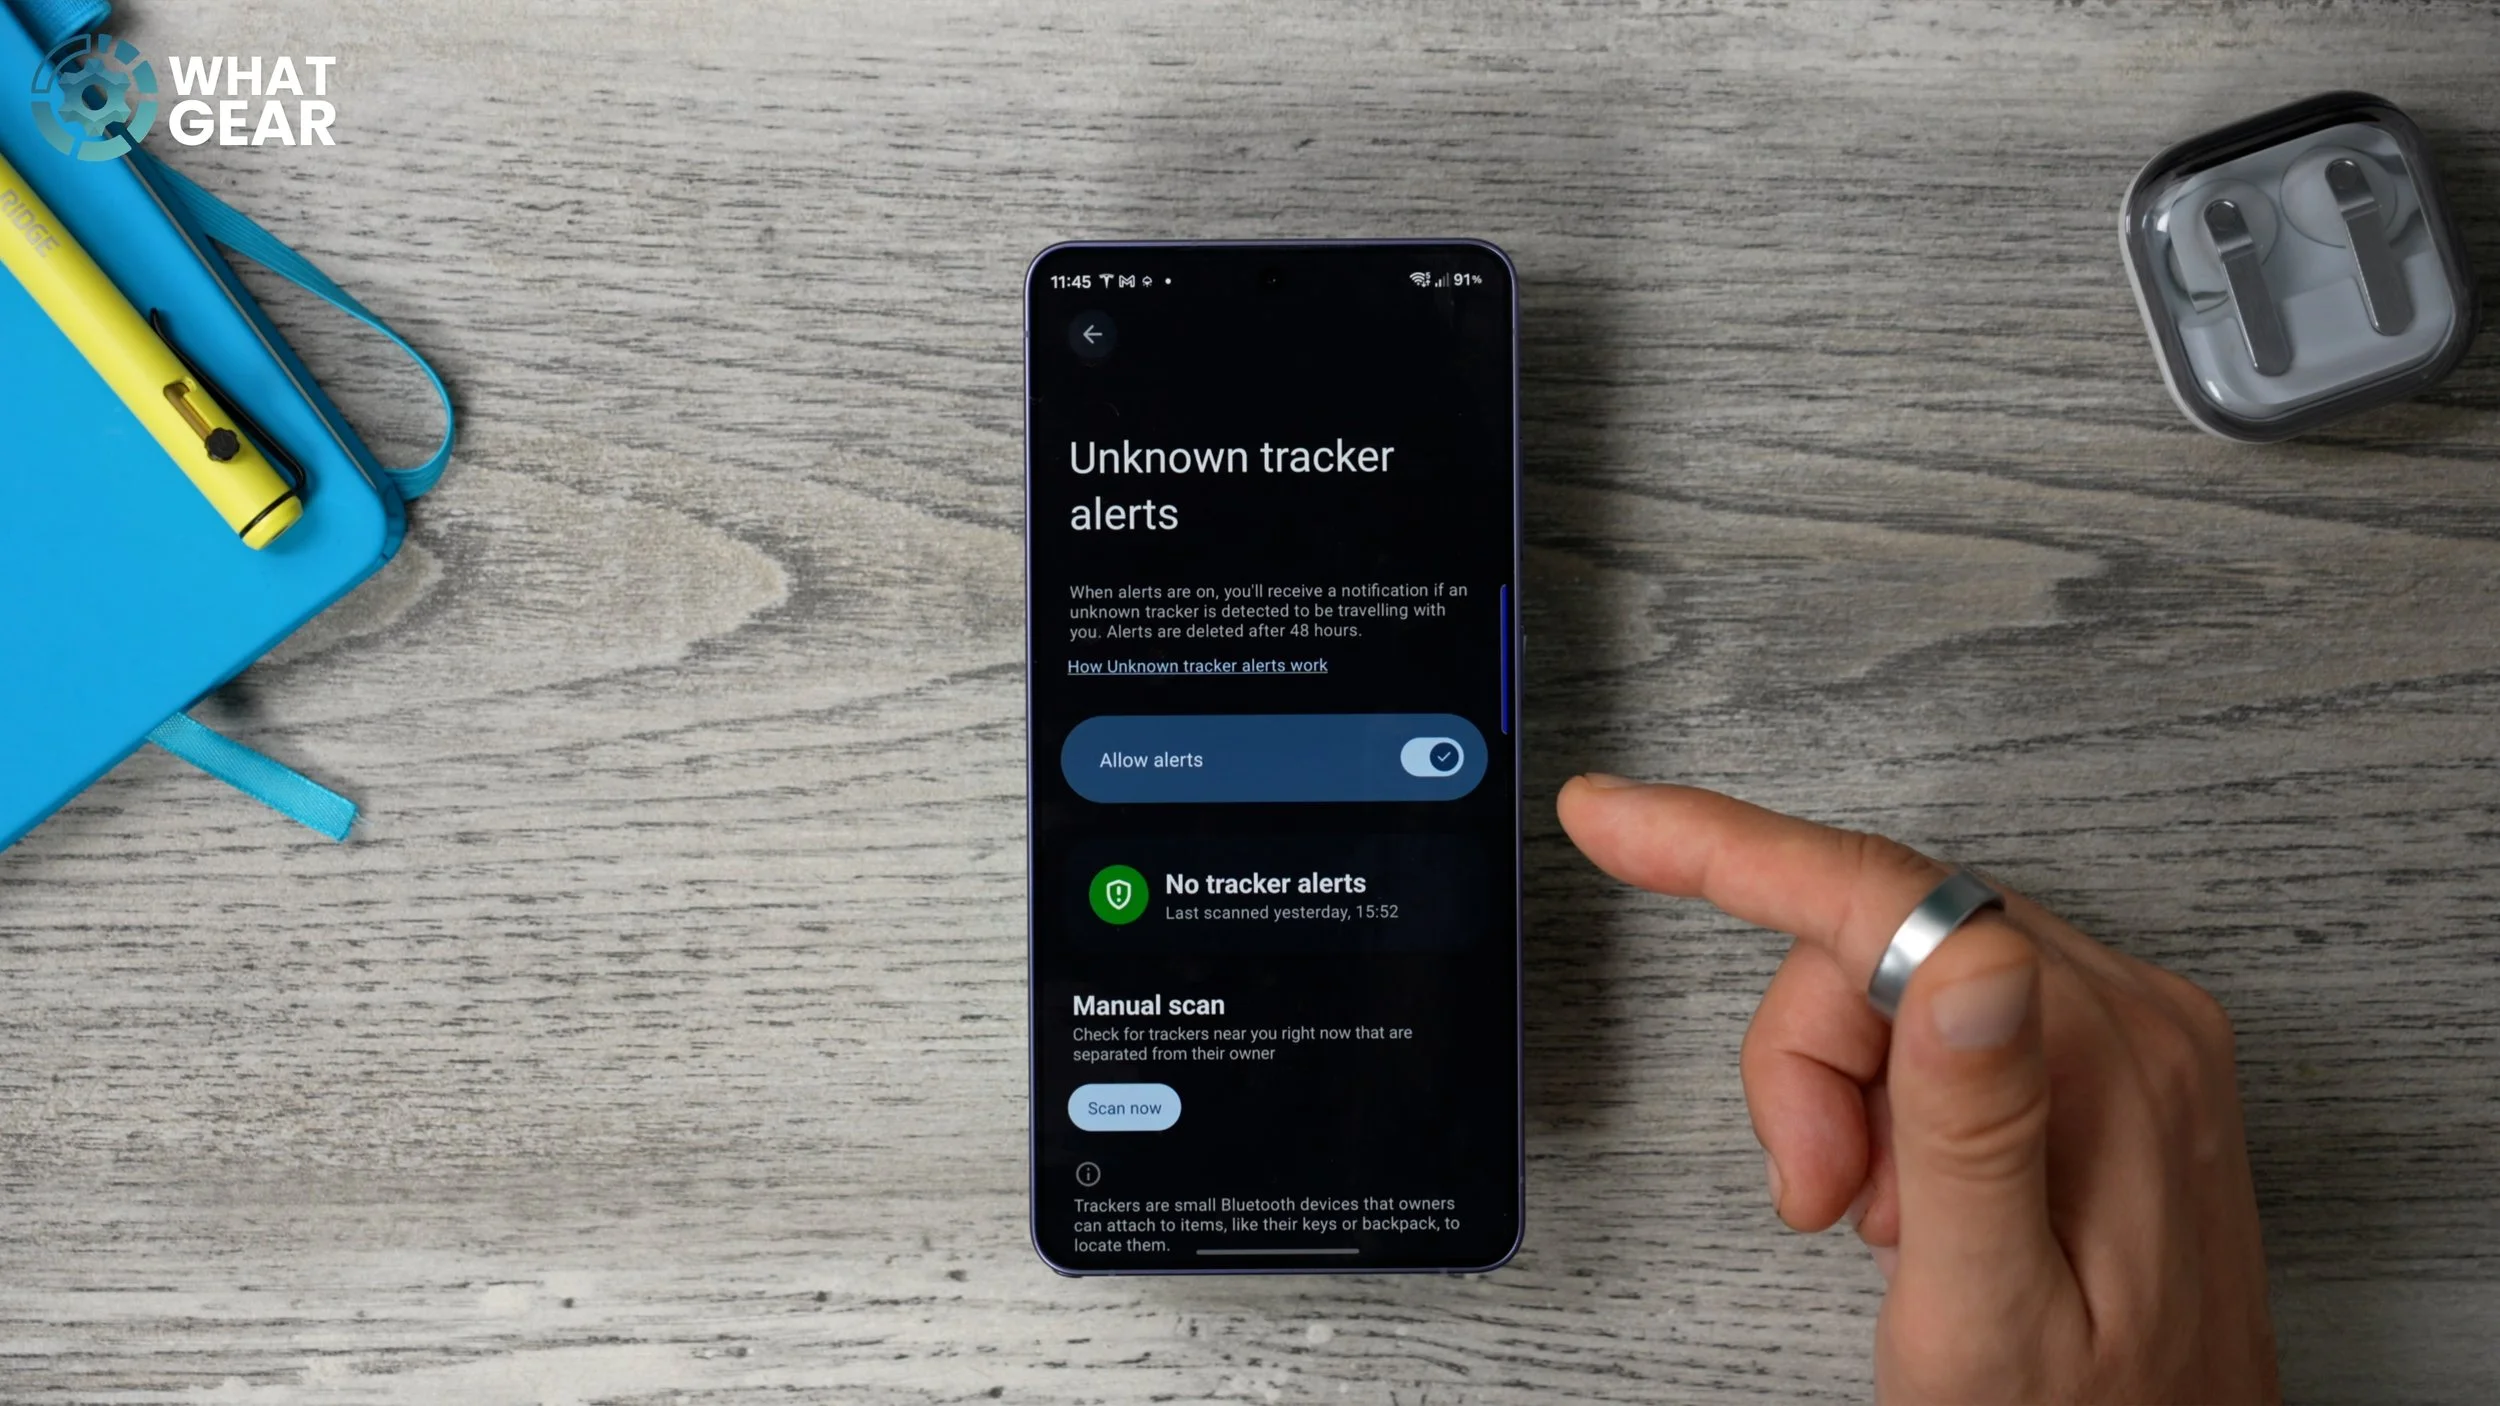
This will reveal a shortcut to the Unknown tracker alerts feature, which you should definitely switch on. Now, the great thing about this feature is you can also scan around you if you're worried and you think someone is trying to track you. You can literally trigger this manual scan to find out if there are any unknown trackers in your vicinity.
ENCRYPT EVERYTHING
Nowadays, data is one of the most valuable commodities on the planet. That's why people are always trying to steal it from you. Here's a way to add an extra layer of encryption to your Galaxy data backups. Within Settings, go back to Security and Privacy, scroll down to More security settings, and then go to Enhanced data protection.
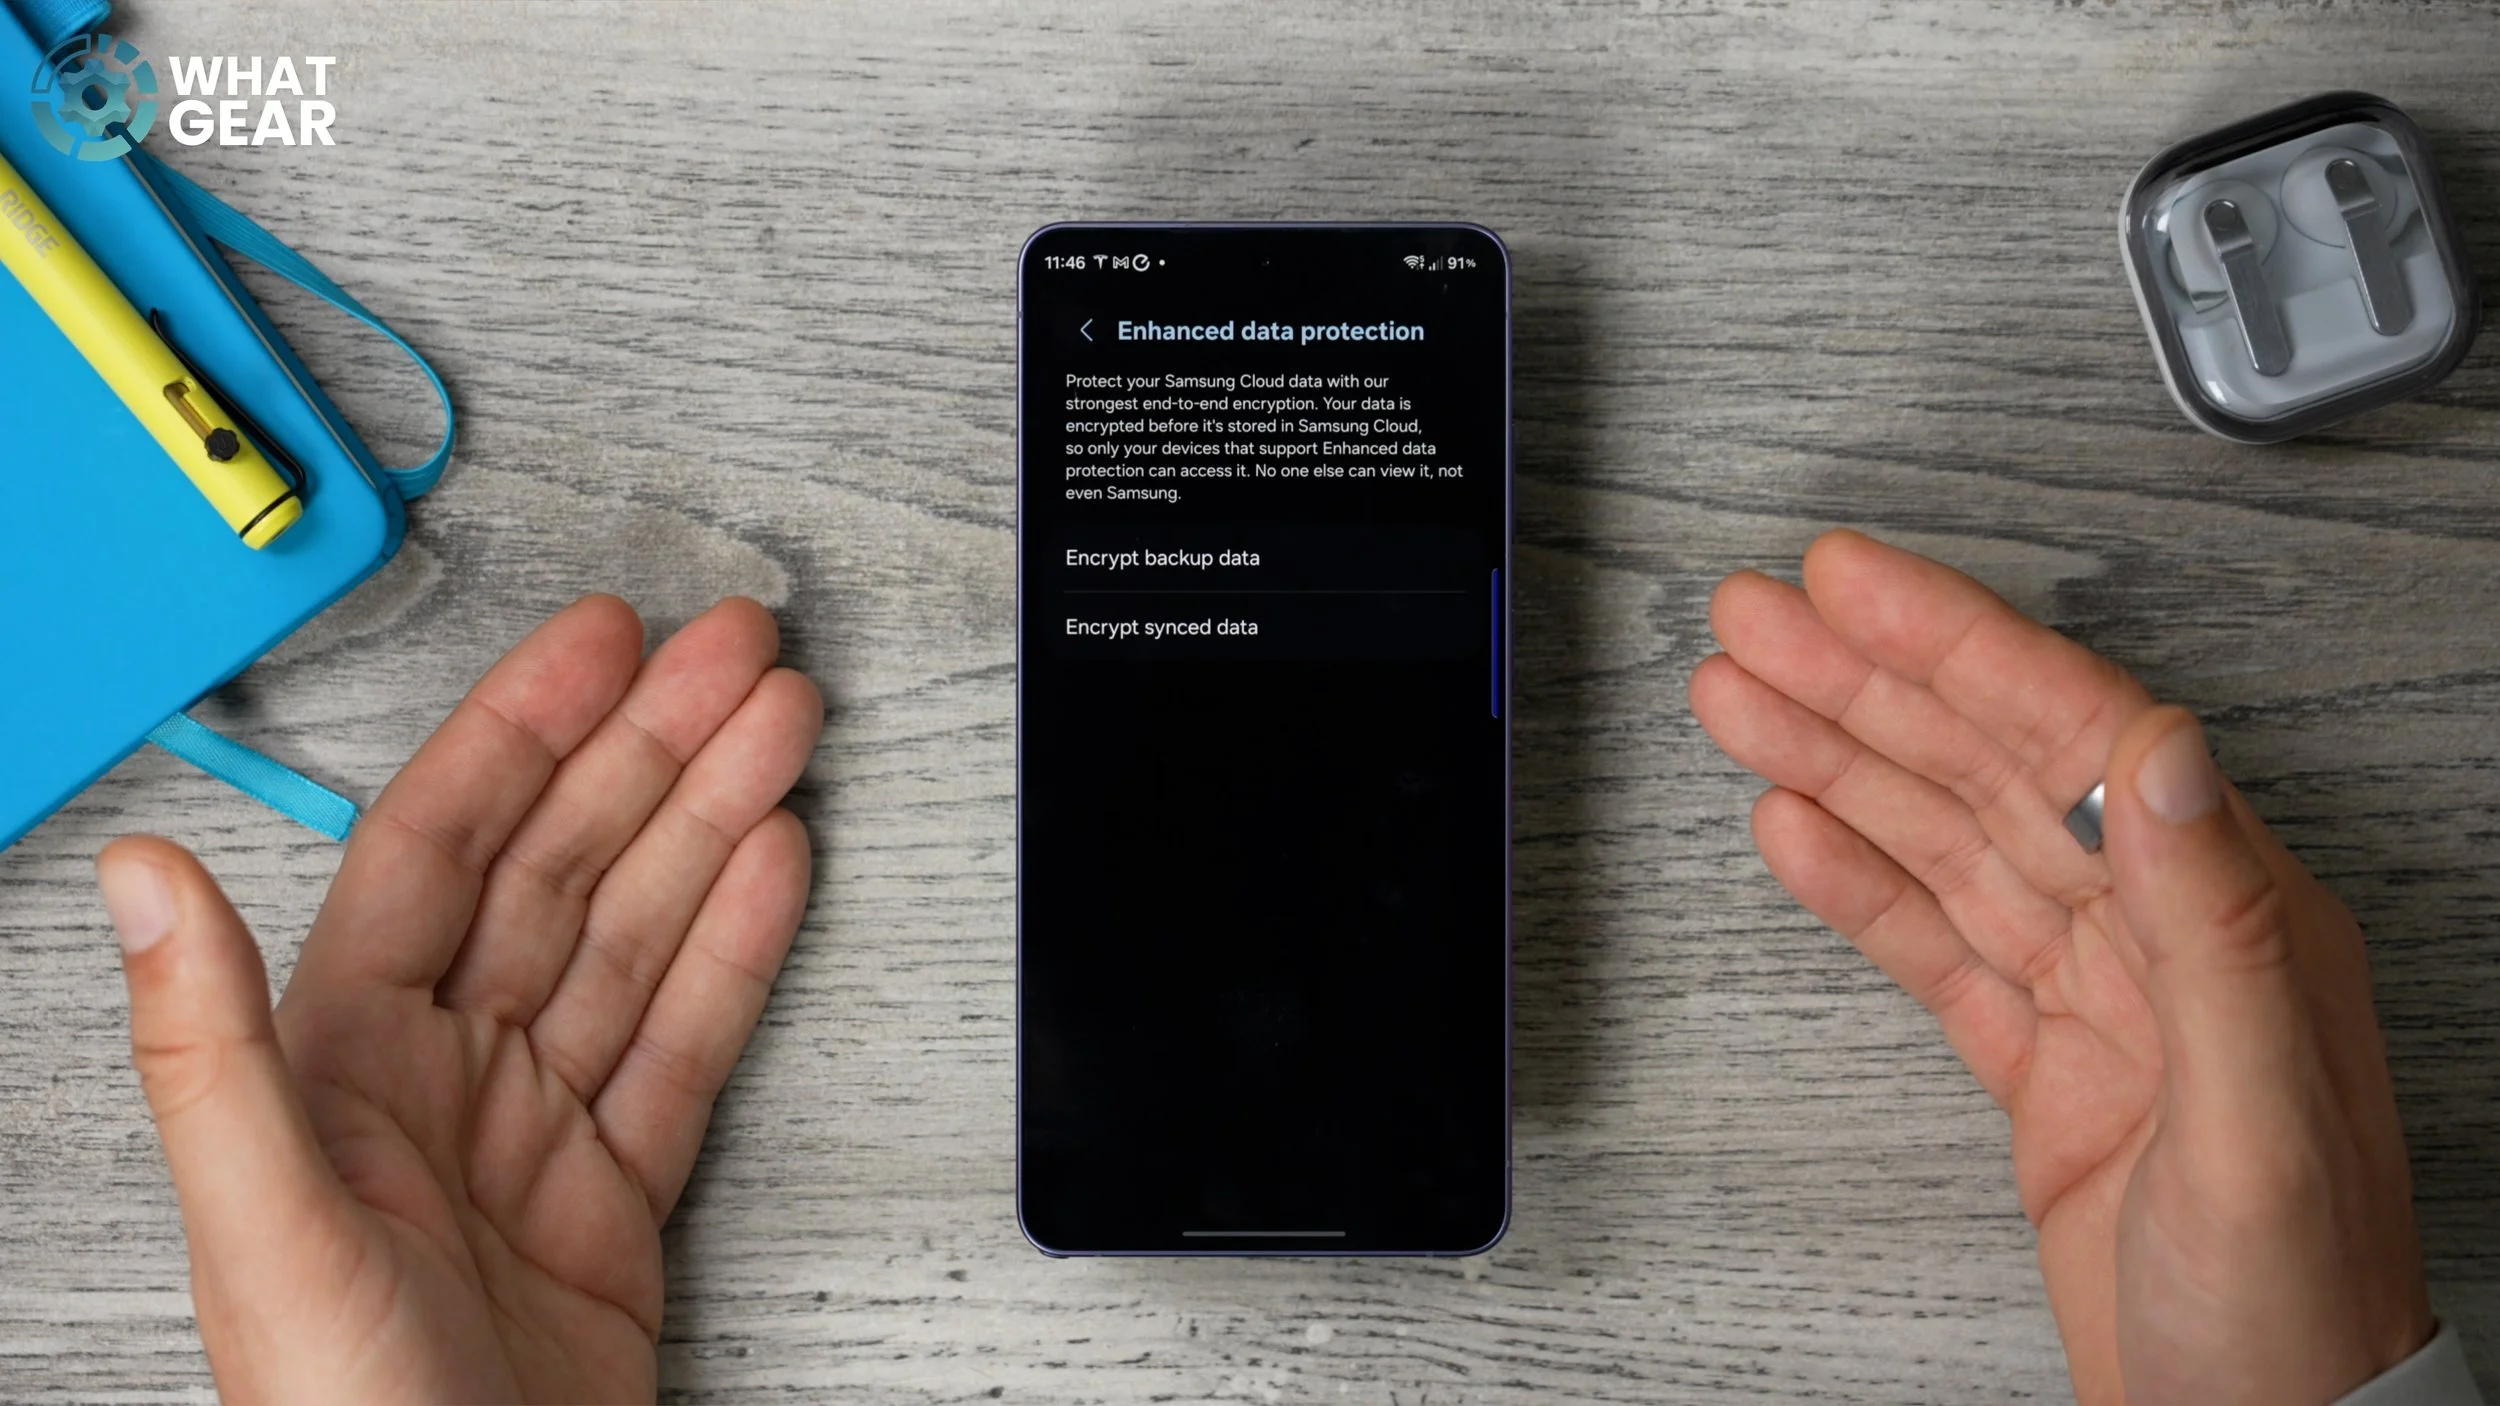
Here you'll see two options: one to encrypt your backup data and one to encrypt your sync data. You might want to switch both of these on if you are very security-conscious. You will need to put in your Samsung ID password to enable it.
PREPARED FOR THE WORST
Here is another way to stay ready so you don't have to get ready. And this is for those scenarios where disaster strikes and somehow you manage to lock yourself out of your device. So at the top of your Settings page, you will see your Samsung account and your little icon. Go and hit that. That jumps into your Samsung account settings. On this page, if you go to Account security, make sure these are all green. If they're not, you need to look at each one of them. But the most important one for when you get locked out of your device is this: the Account recovery methods.
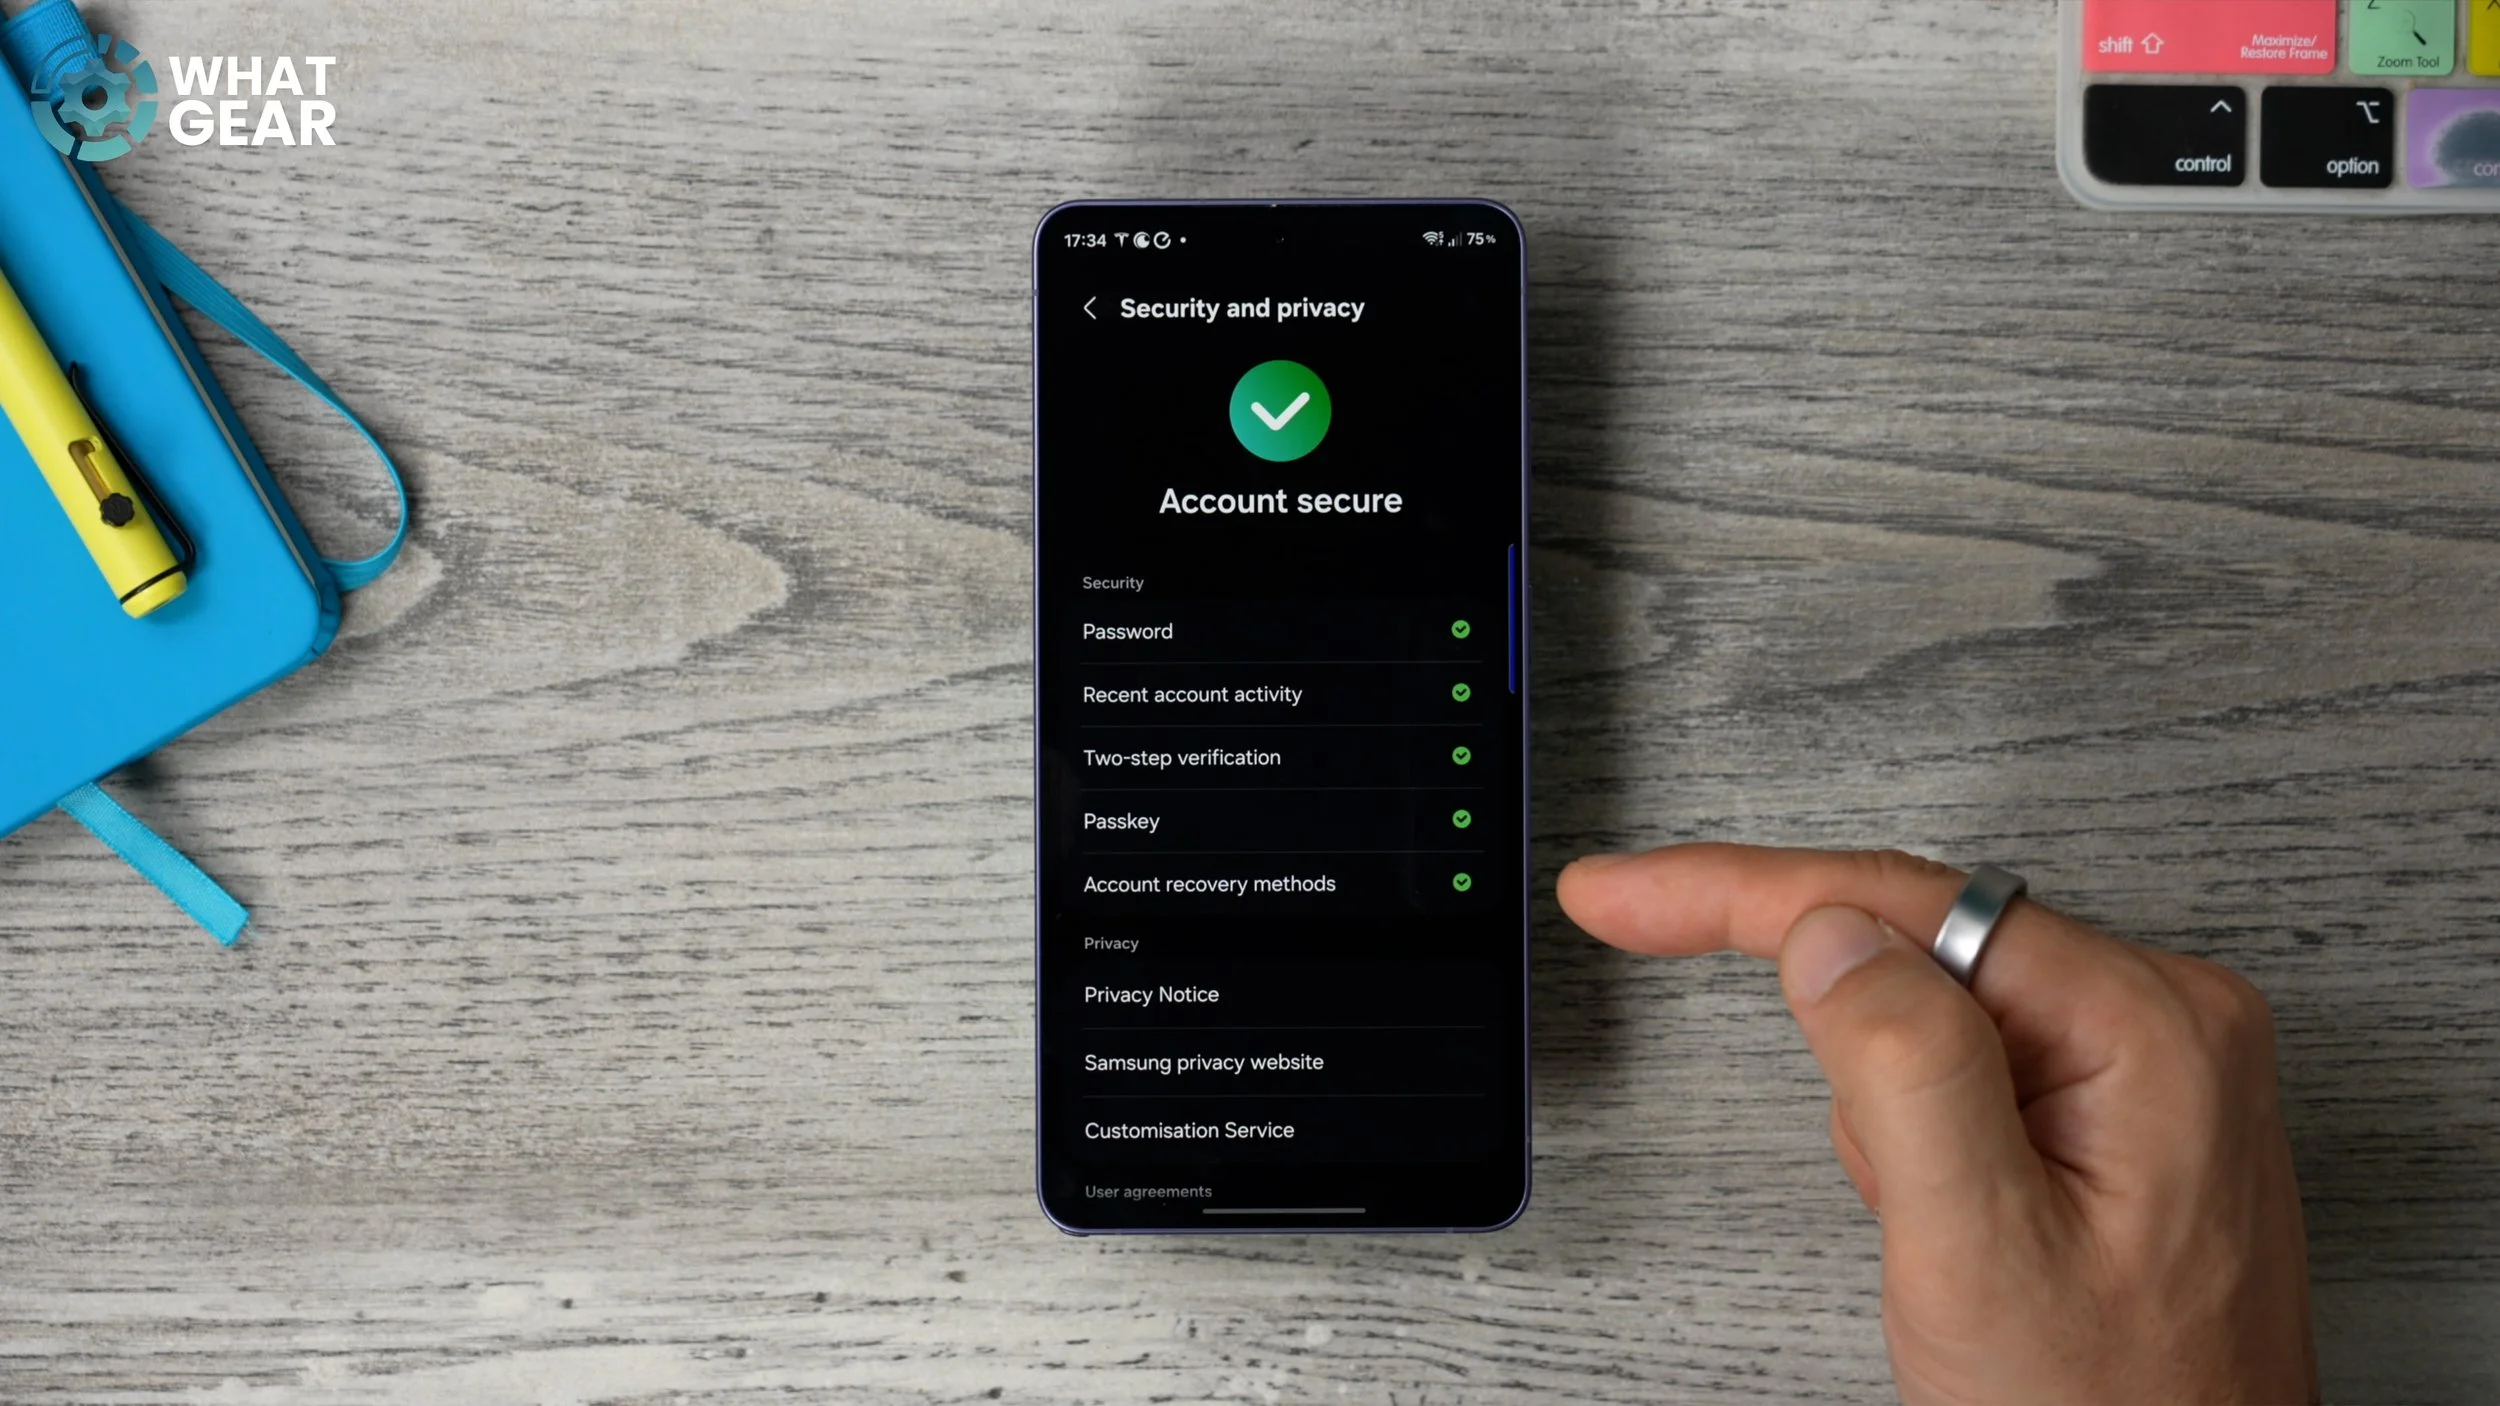
So on the next page, what you can do is enter a backup method, which could be another email address that you will have access to if you do lose your phone. This would allow you to get access again to your Samsung account in the event of an emergency, and you will need this account for tracking down your phone if someone does nick it. There's a pretty high probability, if you are in London, that you may need to.
A PARTICULAR SET OF SKILLS
Okay, here's a bonus tip that you will really appreciate if your phone does get stolen one day. What I do is I add the Samsung Find app to my Edge panel. You can find it just by searching within your app drawer if you need to. But anyway, once you go into the Samsung Find app, make sure you set this up. Hit the three dots on the right-hand side here and go to Settings. And then here you want to go to Allow device to be found. Make sure Offline finding is enabled. And if you want to, you can encrypt the offline location. This just adds a bit more protection to your location data.
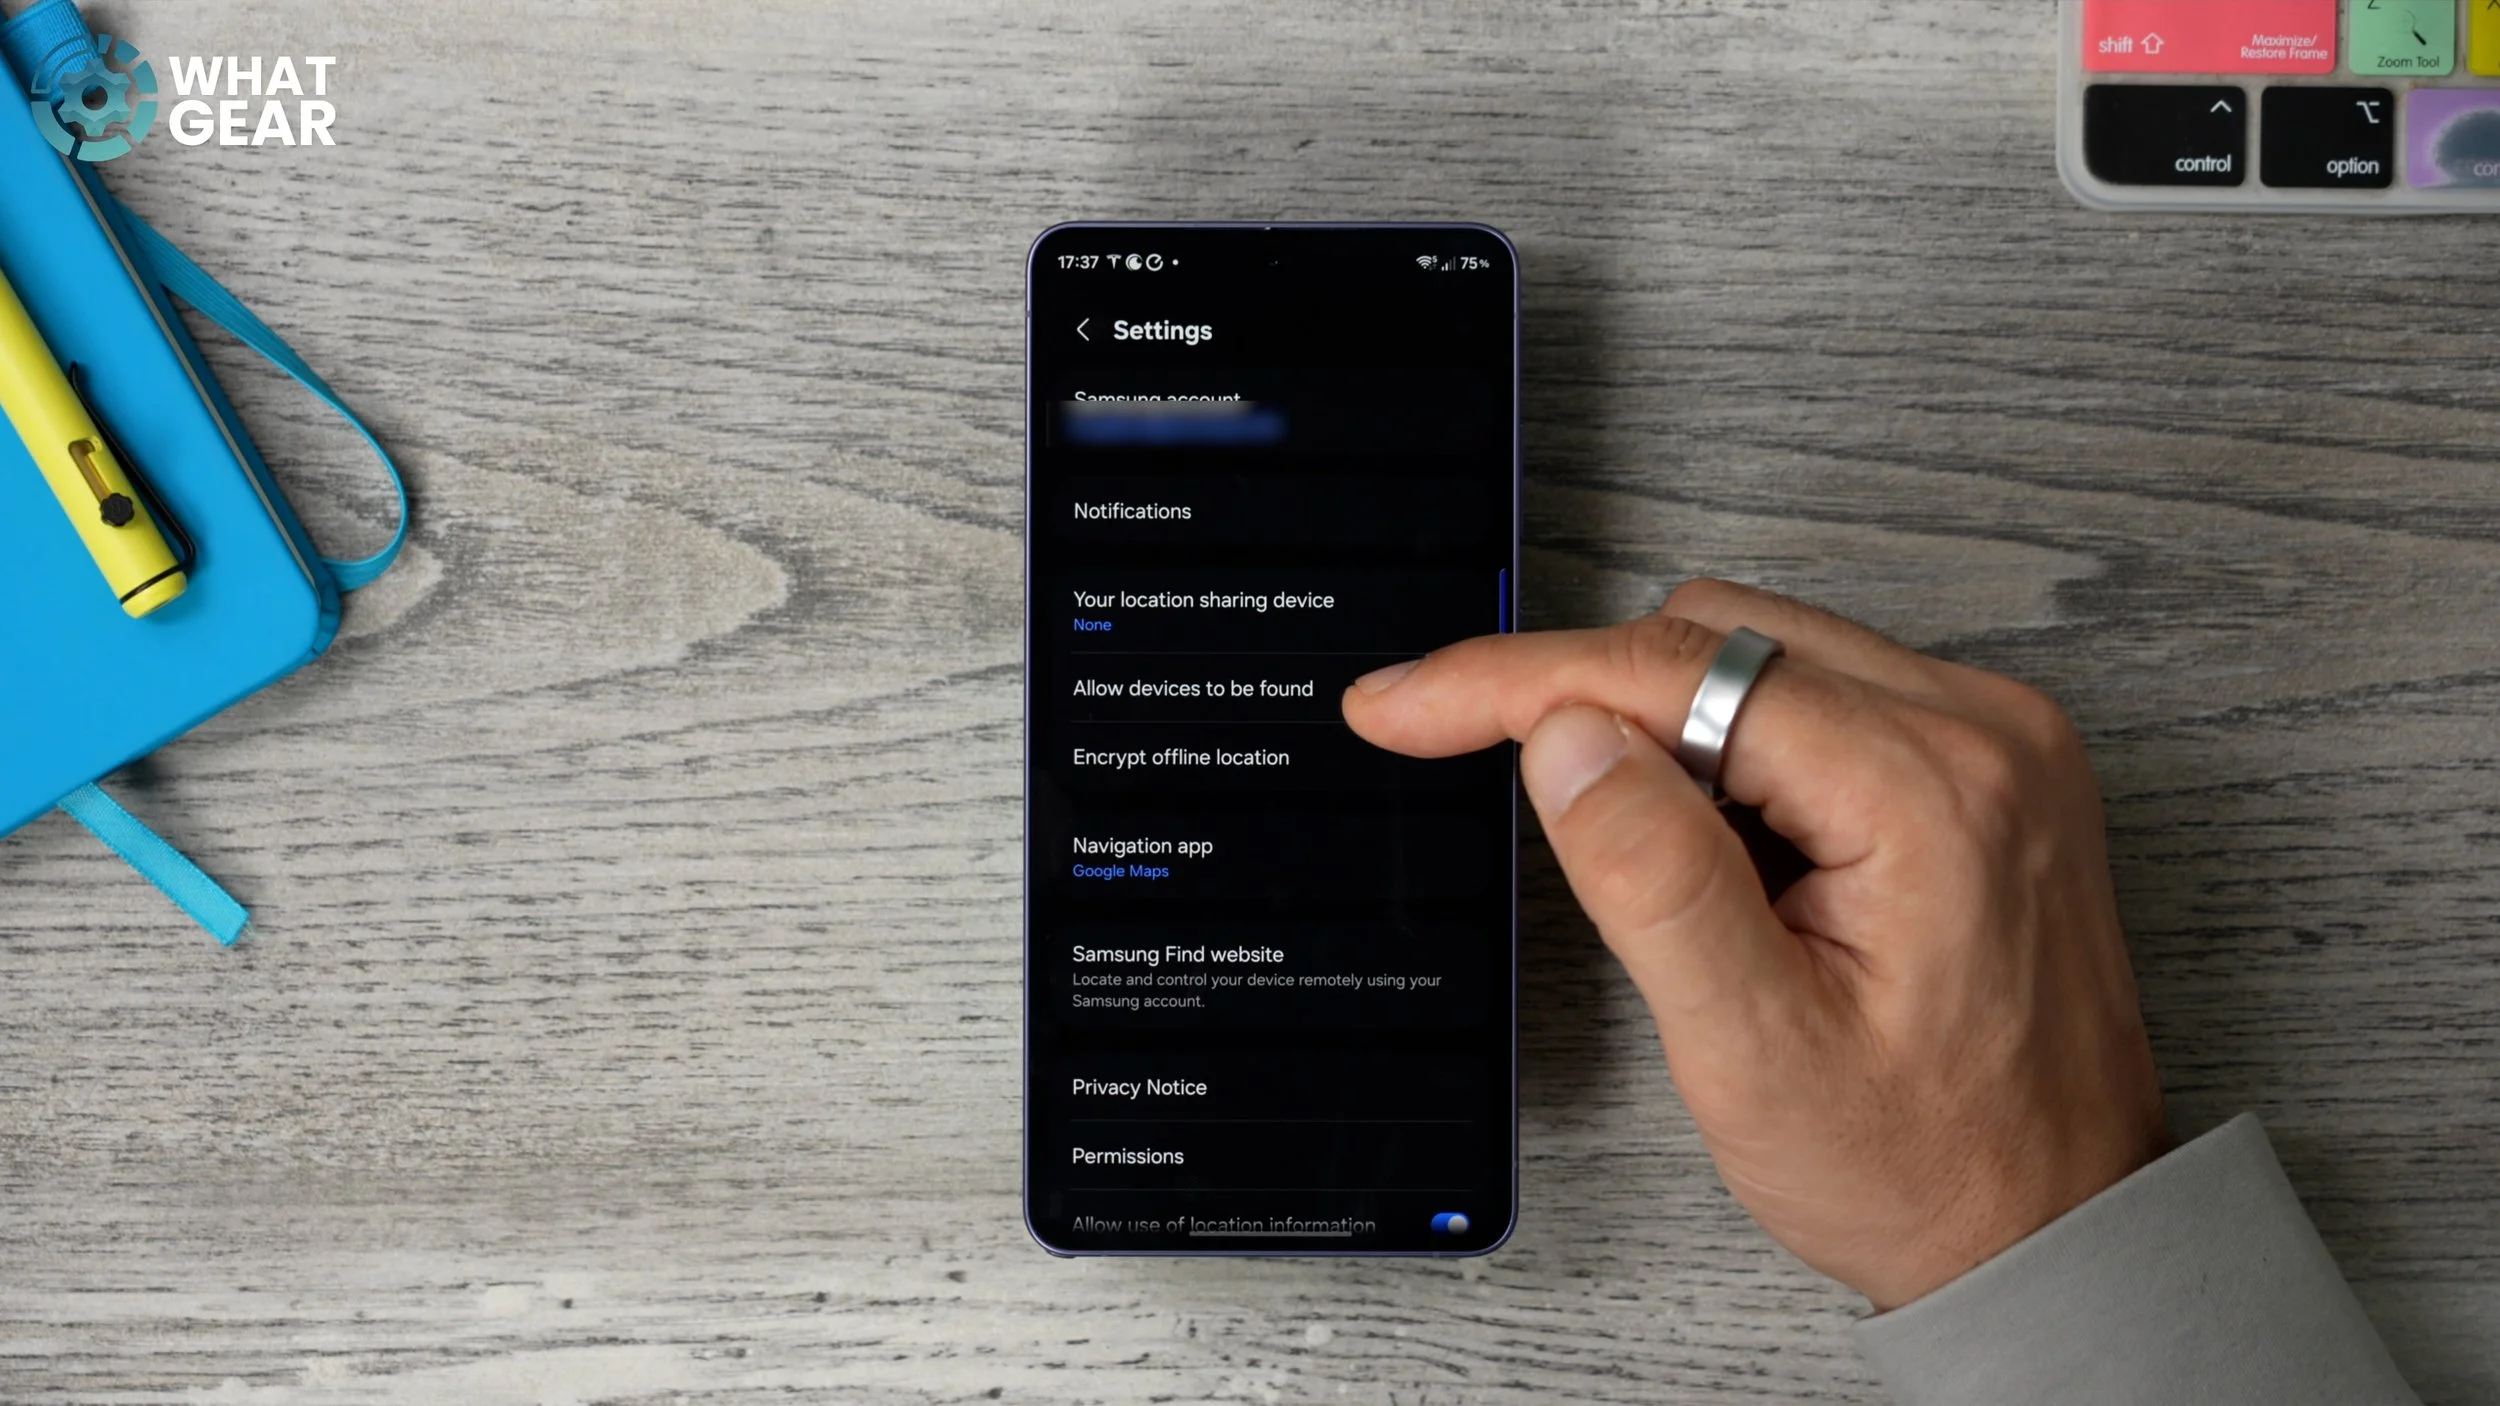
Now, if you go back to the main settings page here, what I recommend you do is go to this Samsung Find website. Copy the web address and email it to yourself, or save it in a note that you would have access to on another computer or device that you have access to. That way, if your phone gets stolen, you can go straight to this web page and locate where your device is, because who knows — maybe you just left it somewhere and someone didn't steal it. And if someone has stolen it, there's an affiliate link to a baseball bat below this video. Okay, I'm only joking. Seriously, though, don't take the law into your own hands because you'll be more likely to get arrested for that than the phone thief is for stealing your phone. At least that's how it works in England.
DIG A MOAT
So if you have followed along with all the security steps so far, your device is fast becoming a fortress. Here's another step that can metaphorically dig a moat around your impenetrable fortress that is your smartphone. And this one is slightly harder to find, so pay attention. Go into your Settings, scroll down to Google services. At the top of this page, you will see all services. Go to that. On this page, you've got to scroll down quite far until you find Advanced protection. So this feature is off straight out of the box. And as you just saw, it's pretty hard to find. Switch this on.
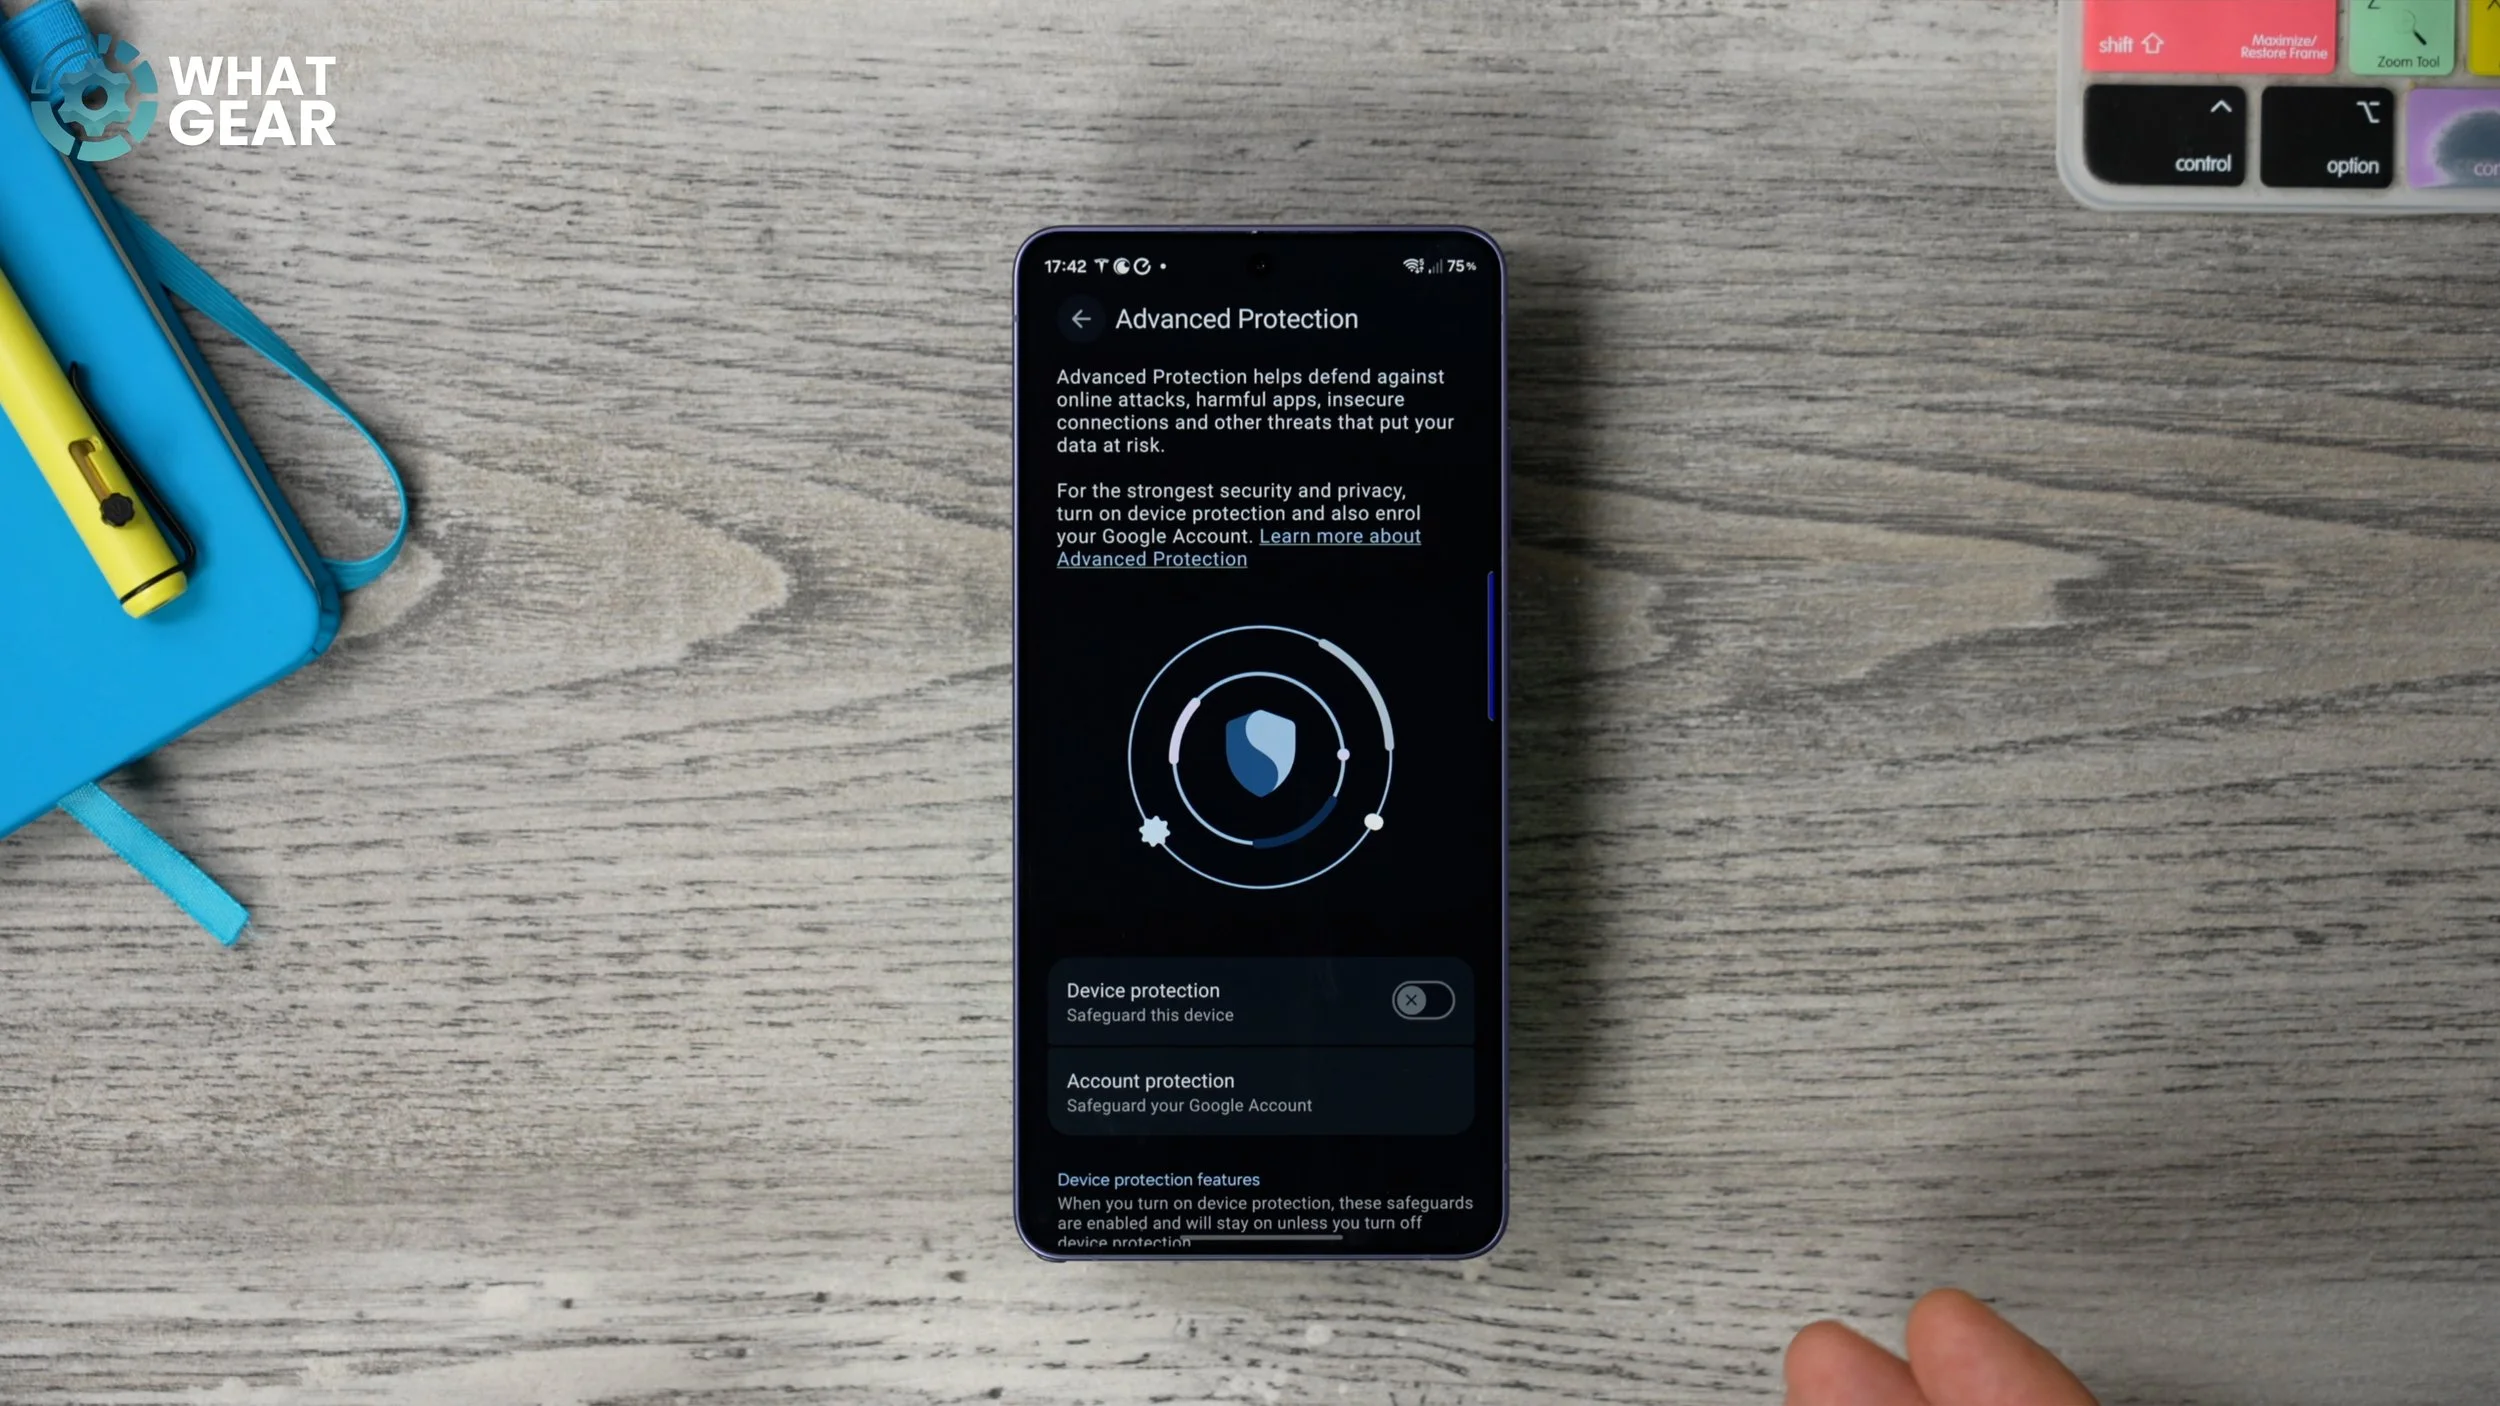
This gives you an extra layer of protection when on more vulnerable data networks, for example, 2G networks and things like that. And if you scroll down, you'll see all of the things that it does. It protects against a whole bunch of risks. And this acts on top of all of the stuff that is already in place on Samsung phones. So yeah, this is a great way to level up your security a little bit more.
ADD SOME BARBED WIRE
Okay, so now let's add some more barbed wire around the edge of the moat we've just created. So once again, within Settings, scroll down to where you see Security and Privacy. On this page, scroll down to Auto Blocker. This should be on. If it isn't on, switch it on and then tap on it. And then if you scroll down, you will see this section called Maximum restrictions. This is really for those of you who are the most security-conscious.
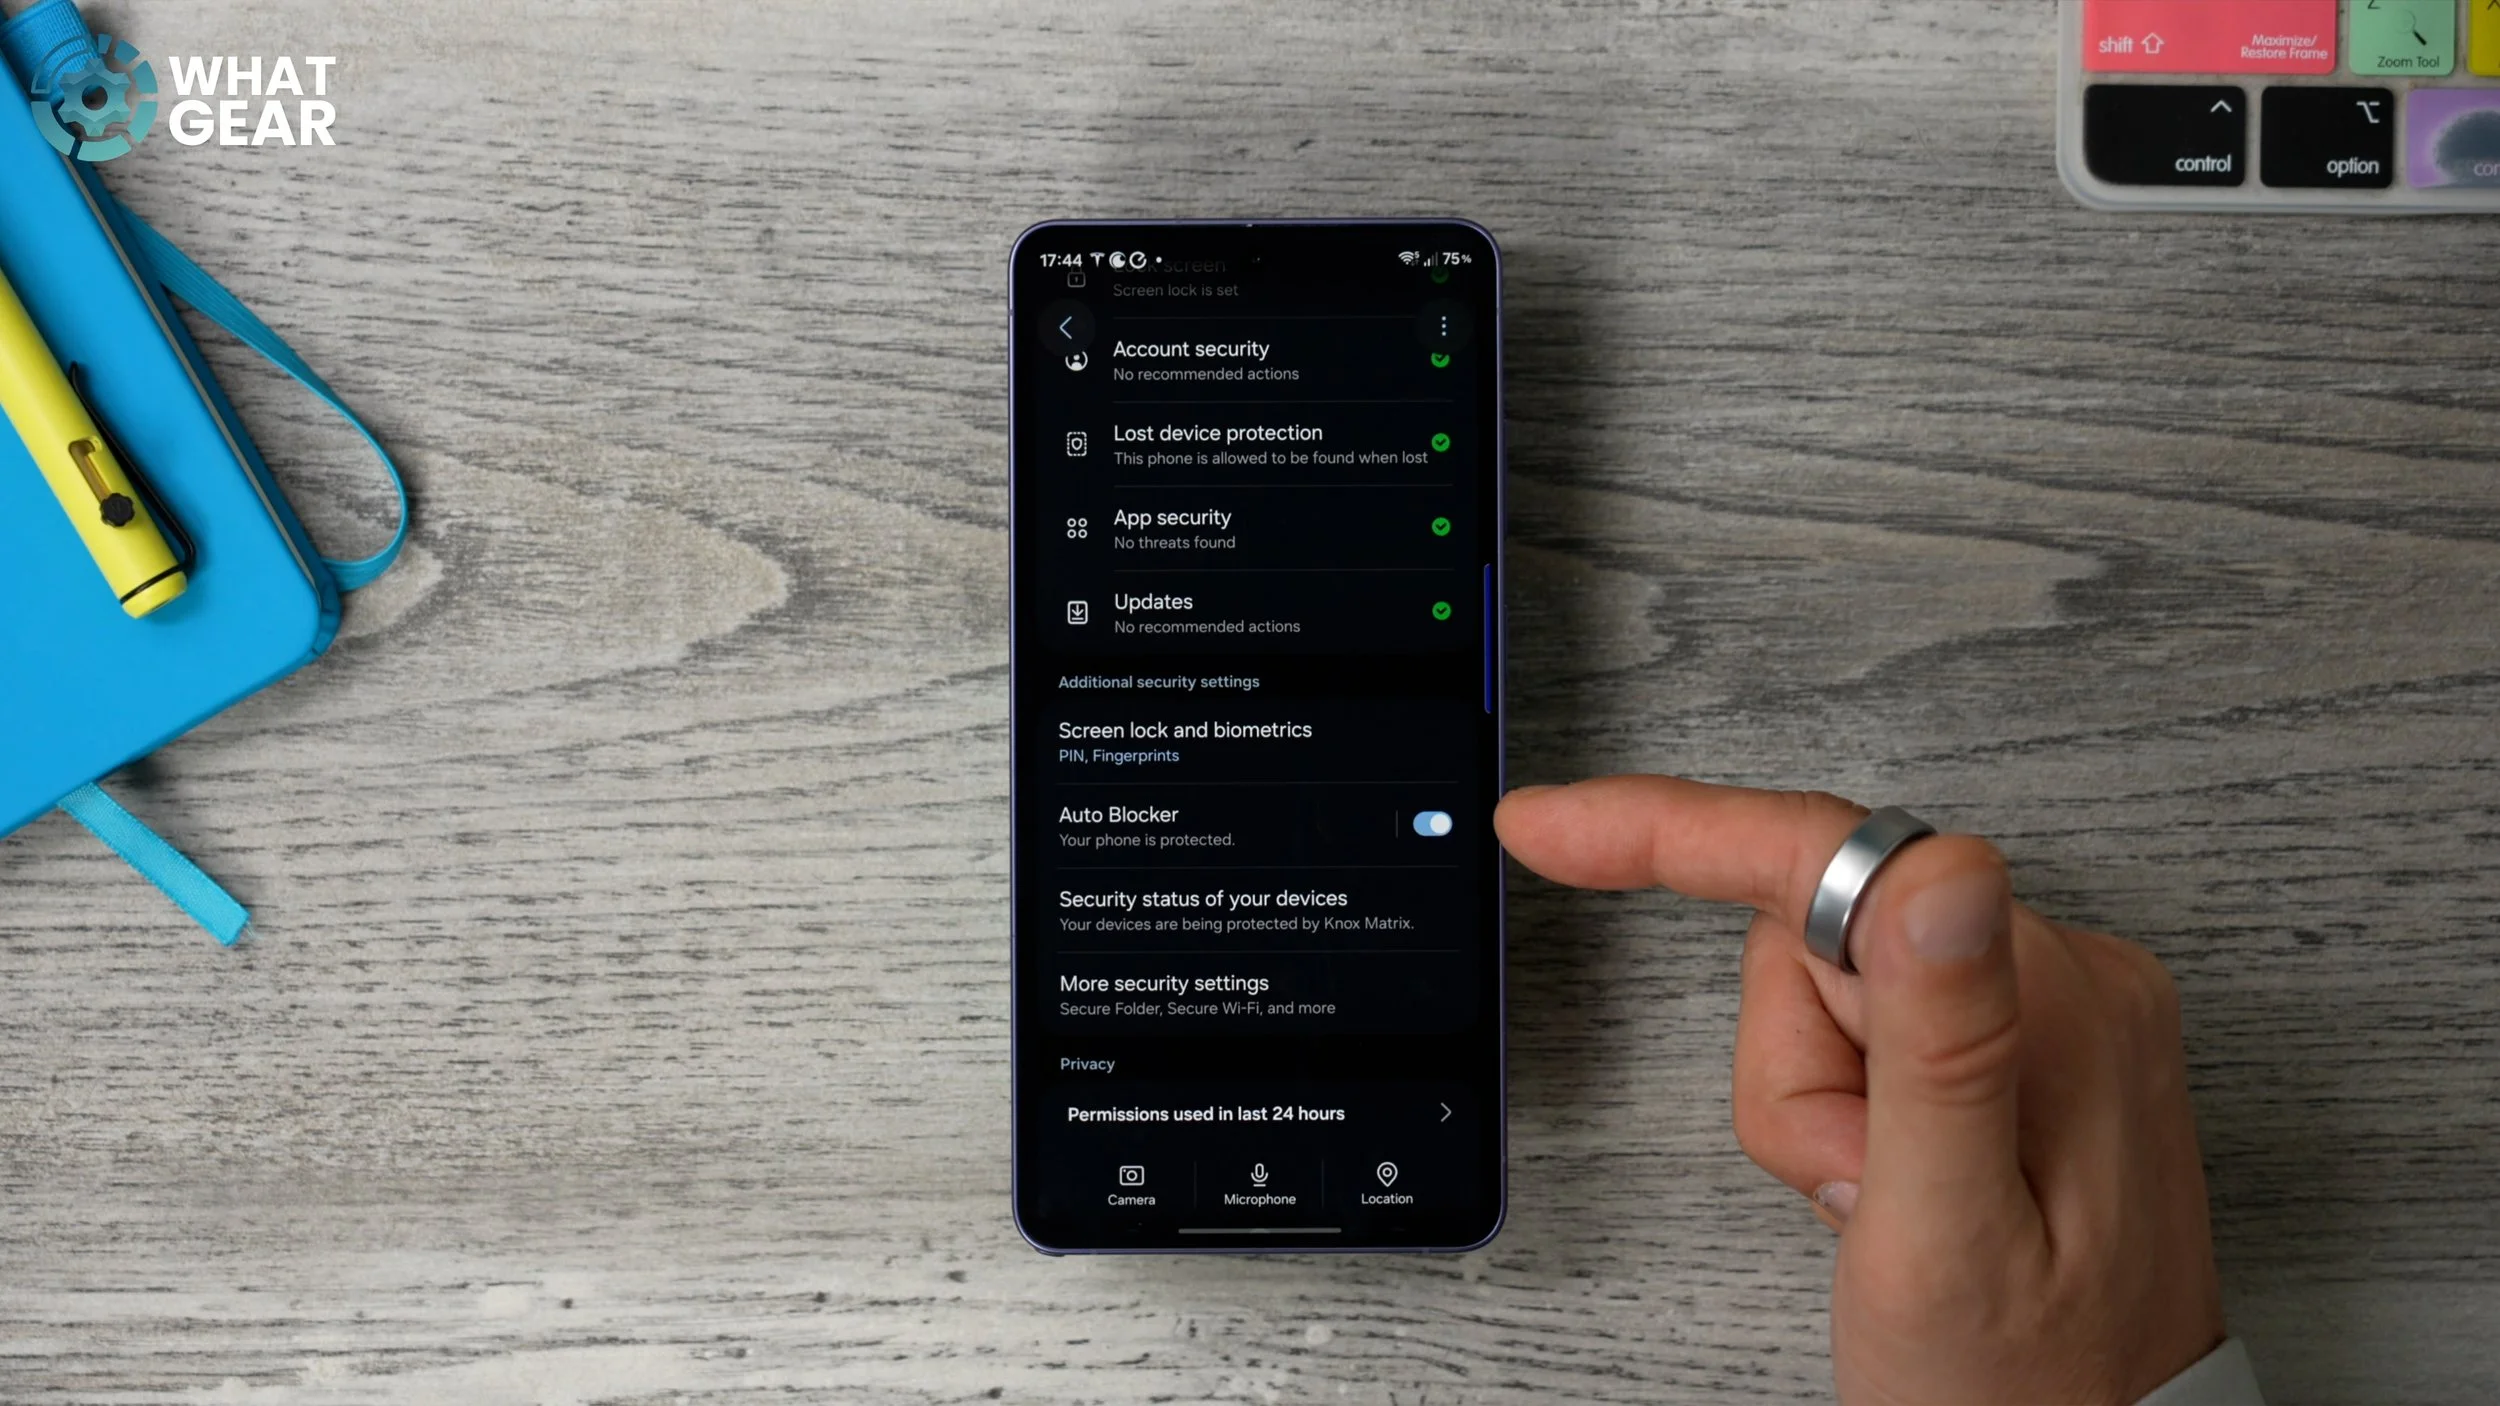
If you tap on this, it adds even more protection to your device. They do suggest that this is ideal for people who have very sensitive information on their phone, so if that is you, switch it on. And if you are, just like I said before, very security-conscious, you might also want to switch it on. Have a little read-through, though, as to what it actually does before you enable this, because it will restrict some of your phone's features.
PING LESS DATA
Did you know that your phone is constantly pinging data right under your nose? And while this is normally quite harmless, it can potentially leave the door open for some bad actors, right? I didn't mean literally bad acting. What I really meant was people with bad intentions. So here's a way you can stop the bleed of your data. So if you go back to Security and Privacy again, on this page, scroll all the way down to More privacy settings. And right here, you see Send diagnostic data.
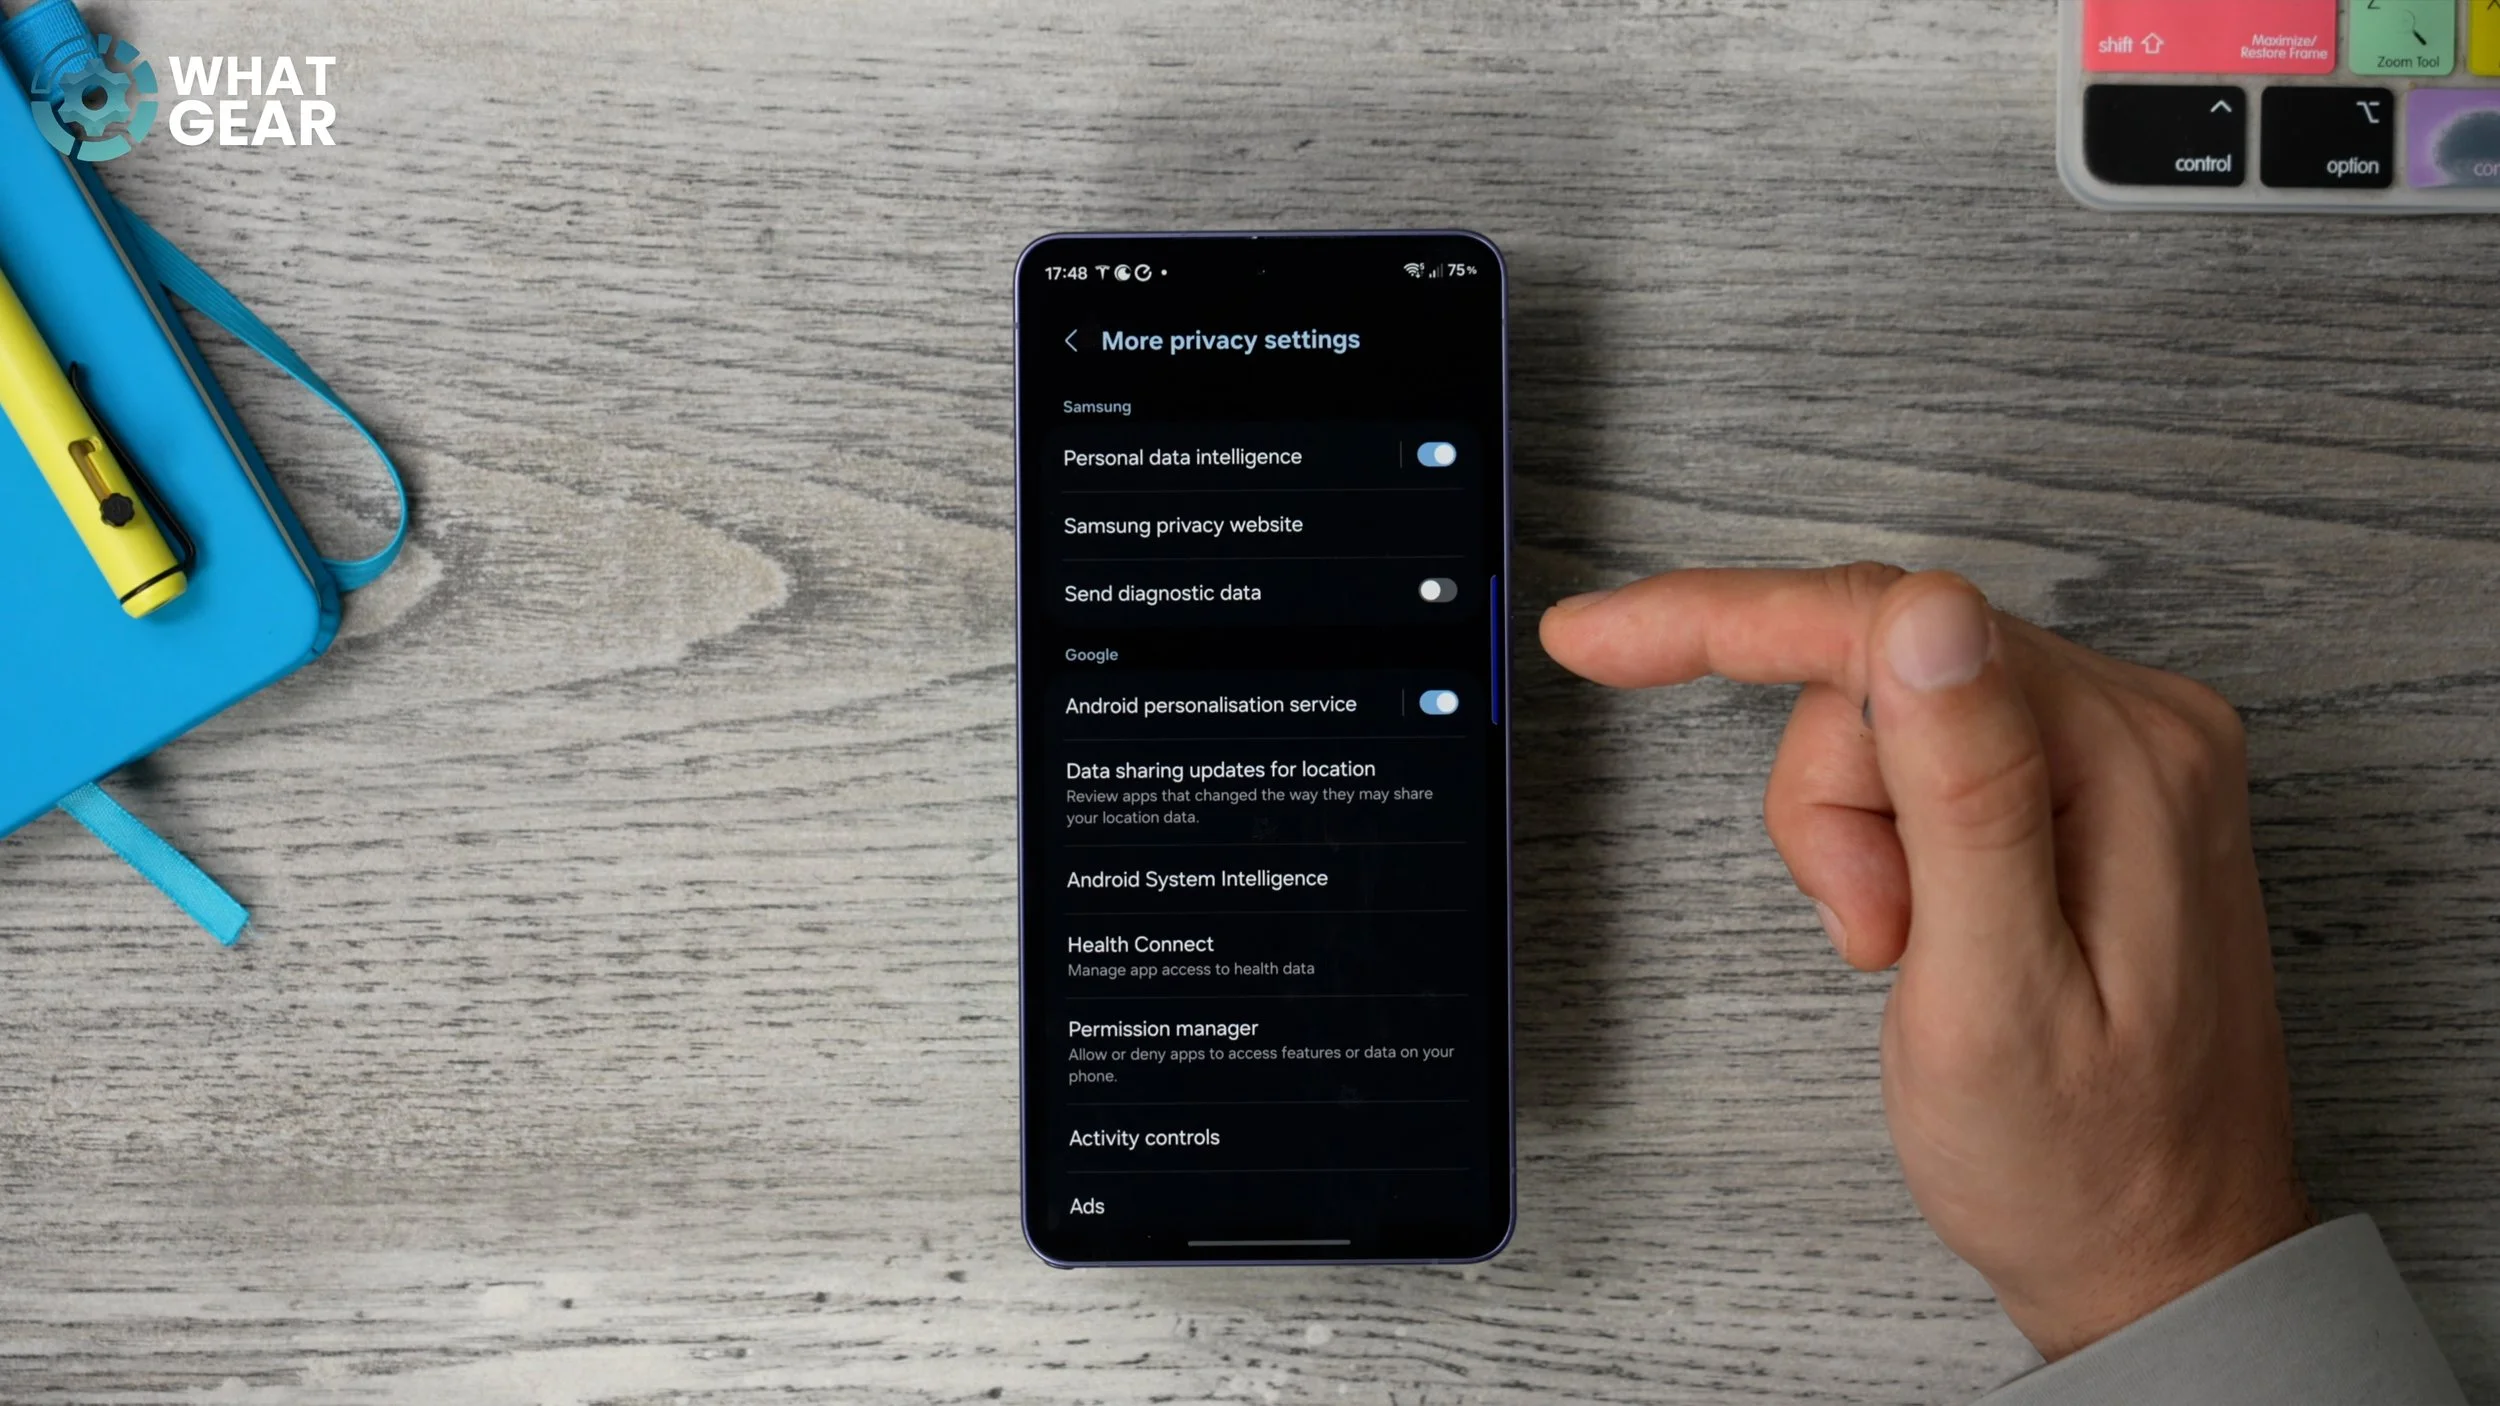
If this is switched on, this probably means you skipped past it when you were setting your phone up for the first time. If you switch this off, your phone will no longer be sending diagnostics about how you're using your phone, what you're using, what features you're using, and all of this kind of stuff — and it won't affect the performance of your device in any way.
ANALYSE THIS
Here's another little hidden layer of protection that prevents data from leaving your device without your permission. And this is kind of harmless, but if it falls into the wrong hands, well, then, you know. So to access this, go into your Settings. Scroll down to the Google services menu. Go to All services. Scroll down to Usage and diagnostics and switch this off.
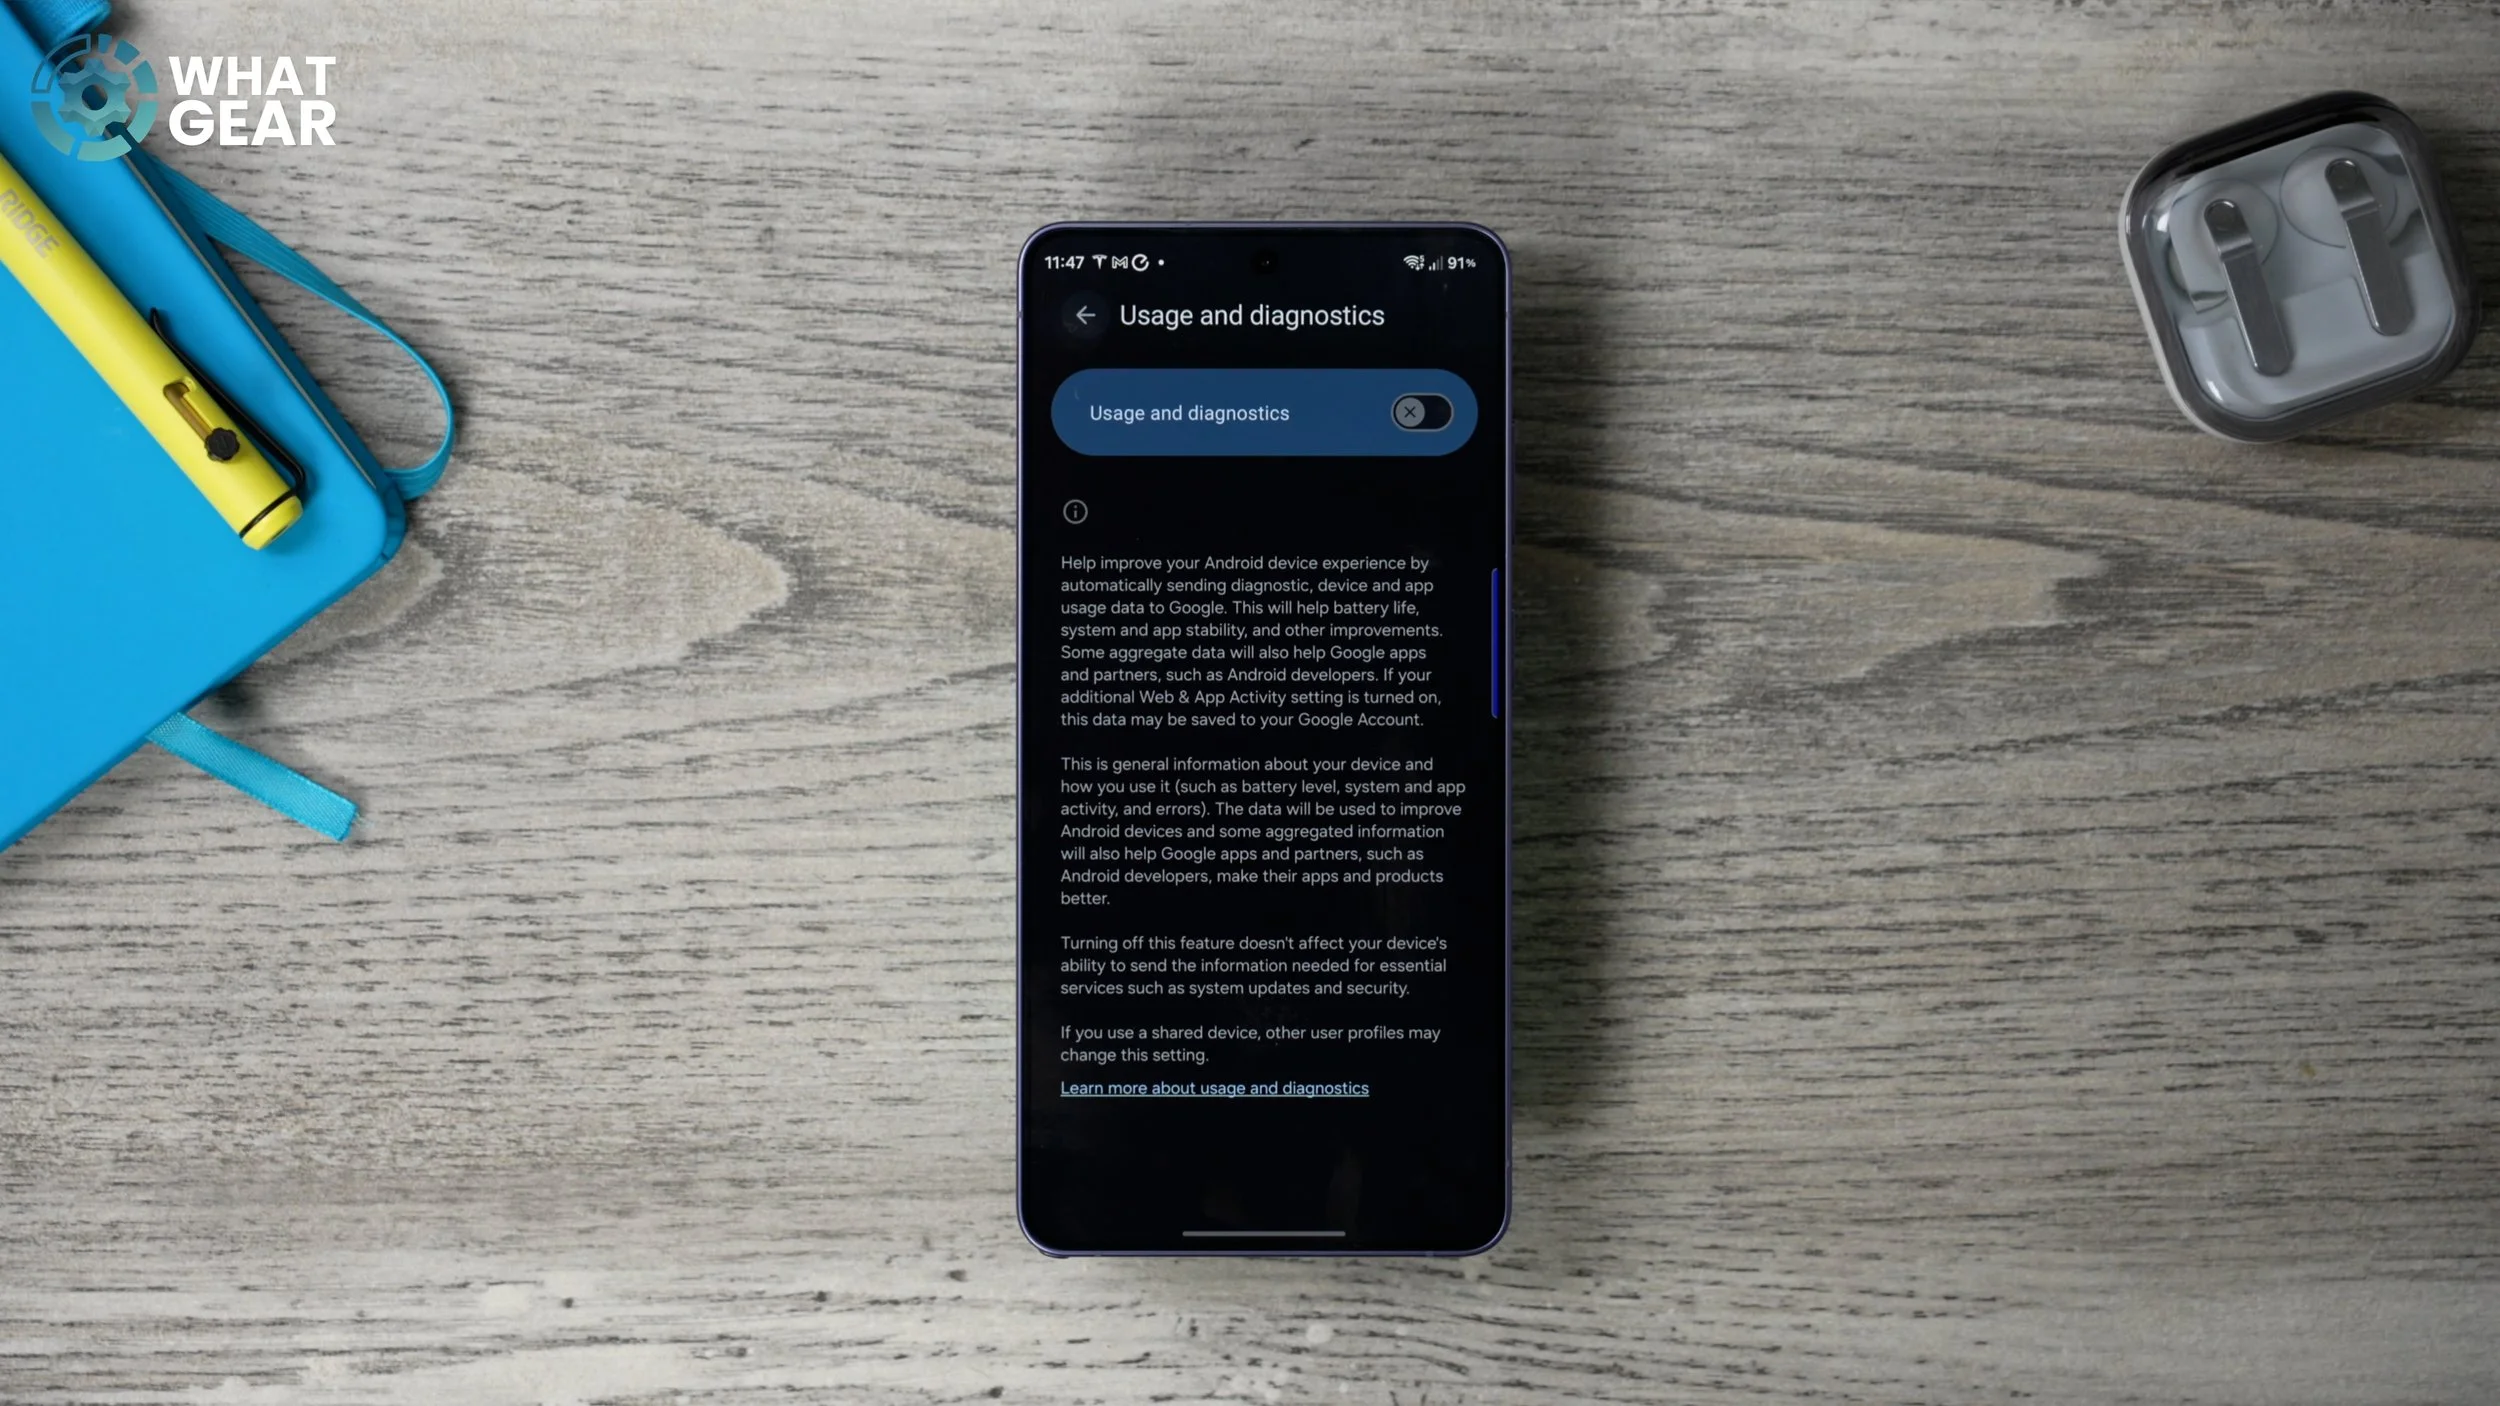
This reduces the amount of data leaving your device for diagnostic purposes. And if you want to read a bit more about what data they're actually capturing, you can tap on this link down here.
ANTI-CAPTURE TOOL
So one of the most likely ways that people can capture your data without your permission is via a web browser. There are so many ad platforms, some of which you might not be that familiar with, that collect data on you in order to sell it to advertisers, in order to encourage you to spend money when you don't necessarily intend to. So if you want to prevent this from happening, there's a really nice tool within Samsung's Security and Privacy menu. If you scroll down, you will find the Internet privacy protection menu.
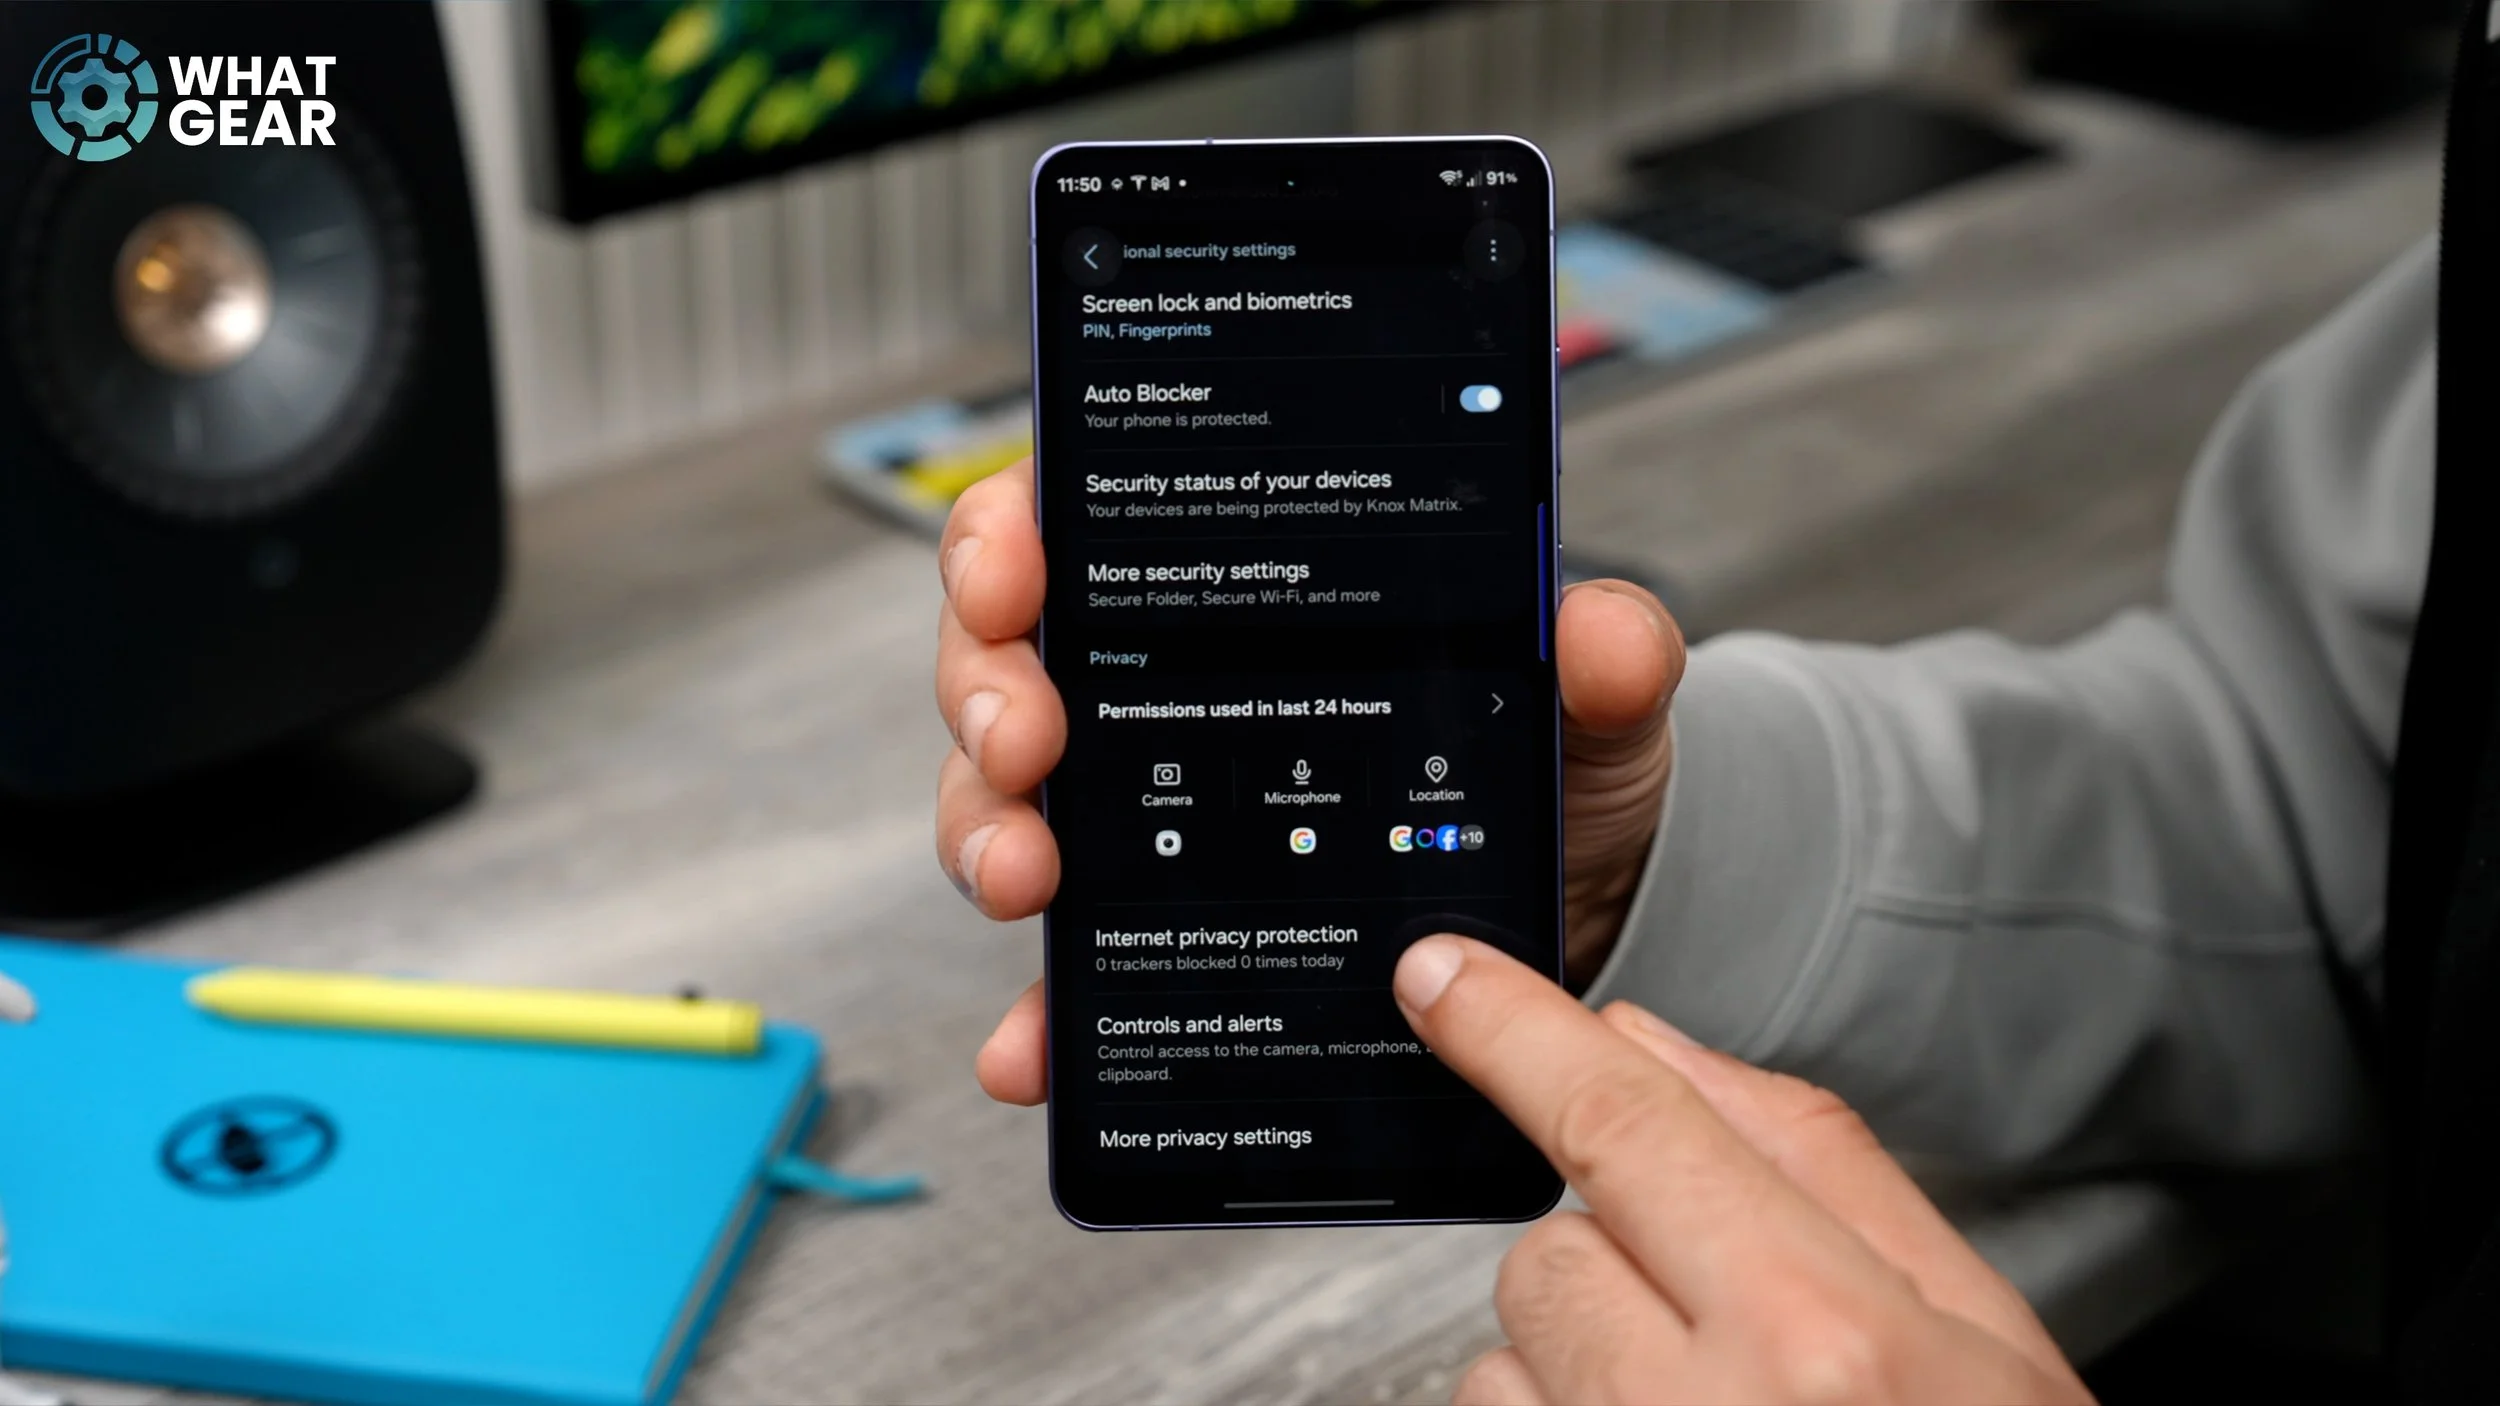
Jump in here, and you'll see right now that the device's privacy and security is moderate. Now, if you really want to maximise this, here's something you can do. Just below this little graph here, you'll see the Smart anti-tracking feature is set to Standard. If you jump into this settings menu, you can set this to Strict. And if you really want to, you can set up automatic verification. Setting this to Strict will reduce the number of tailored ads that you get, but it also reduces the amount of data that websites are allowed to collect from your device.
STREAMLINE YOUR PASSWORDS
Question: When you got your phone for the first time, were you so excited to get up and running that you rushed through the setup process? If the answer was yes, well, then there's a very good chance your passwords will be stored in a number of places, making it harder for you to locate them quickly and easily. So let me show you how to streamline this. Once again, if we jump into Security and Privacy, then More security settings — not the more privacy settings — scroll down to Passwords, passkeys and autofill.
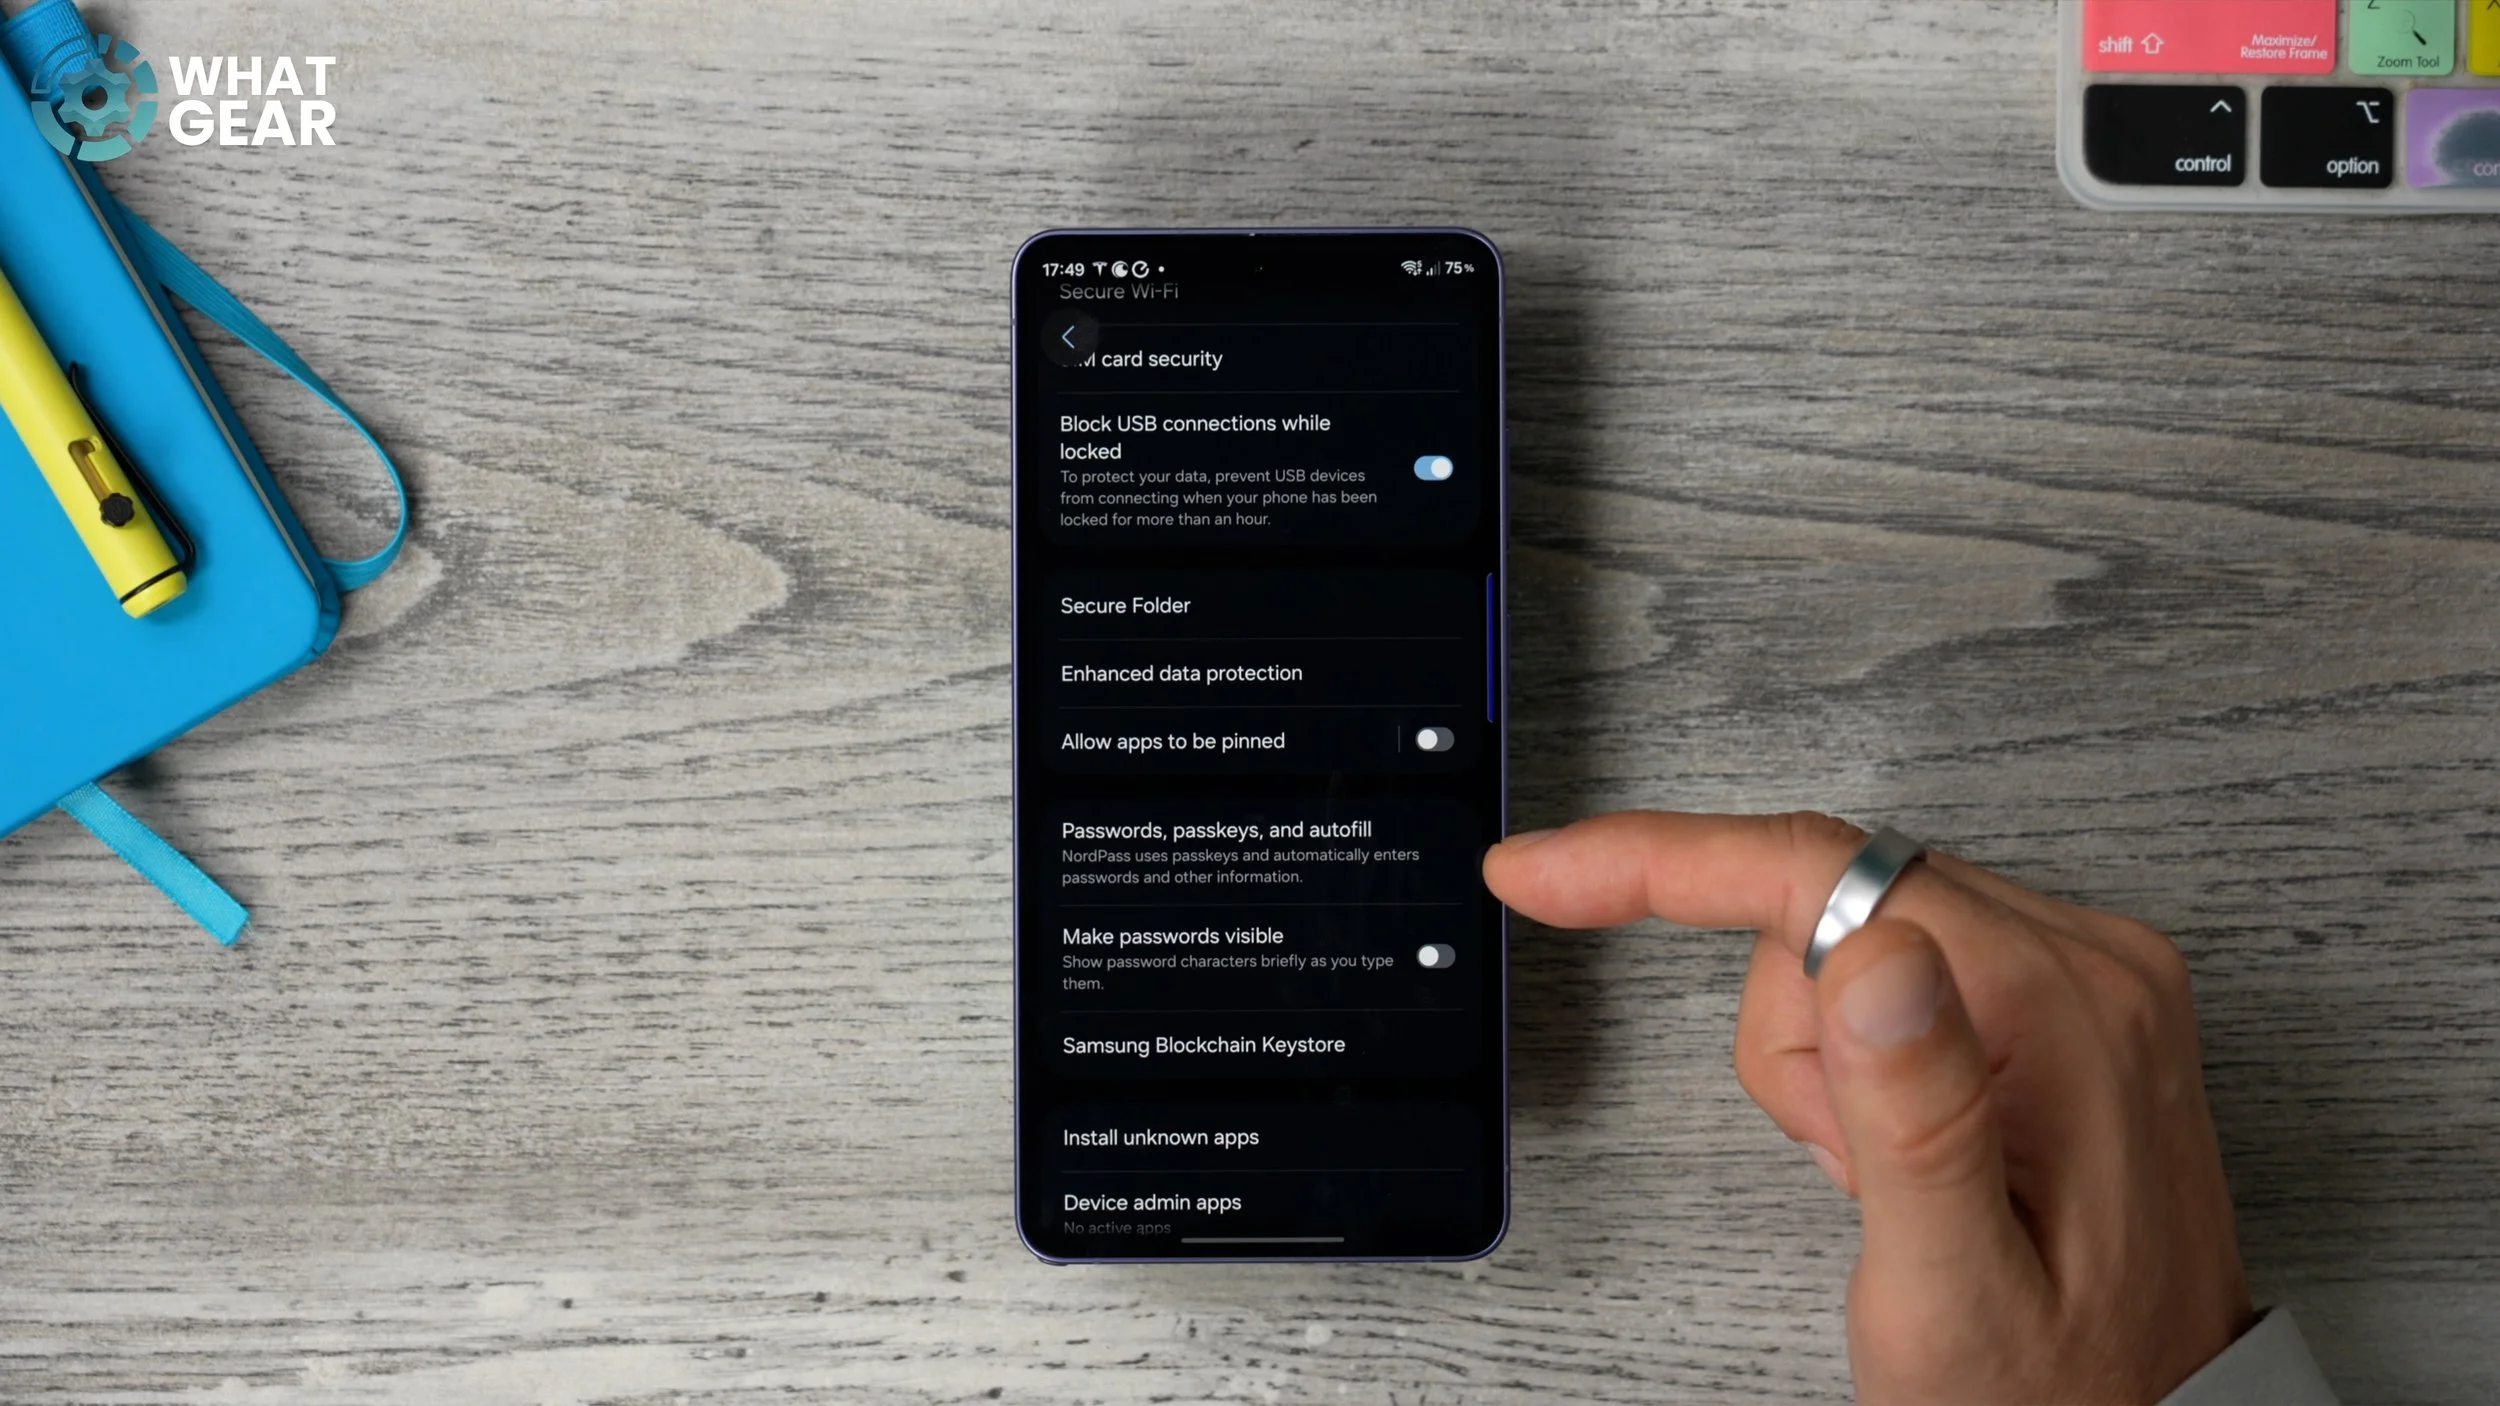
And at the top, you will see your preferred service. If you just rushed through the setup process, you might default to Samsung Pass. But what you might find more useful is the Google Password Manager, because it stores all your passwords from Chrome. So just make sure that it is switched on and then select it here. And that way, this one service will be handling all of the autofill and passwords on your device. And I recommend you switch off all the other ones that you're not using. And if you guys do want to try out NordPass, which is what I'm currently using, I'll have an affiliate link to that below this video where you can get it with a discount and possibly an extended free trial to test it out.
PASSWORD SHORTCUT
Alright. Have you ever been in a situation where an app or website has prompted you to change your password, so you did, and then you almost immediately forgot what you changed it to? This happens to me all the time. But here's how to solve this problem in the future very quickly. Once again, we're going to go to Security and Privacy. And this really applies to those of you using the Google Password Manager, which I think is one of the best free ones out there. So, within your Settings, if you go to Google services right here, go to All services, then Autofill with Google.
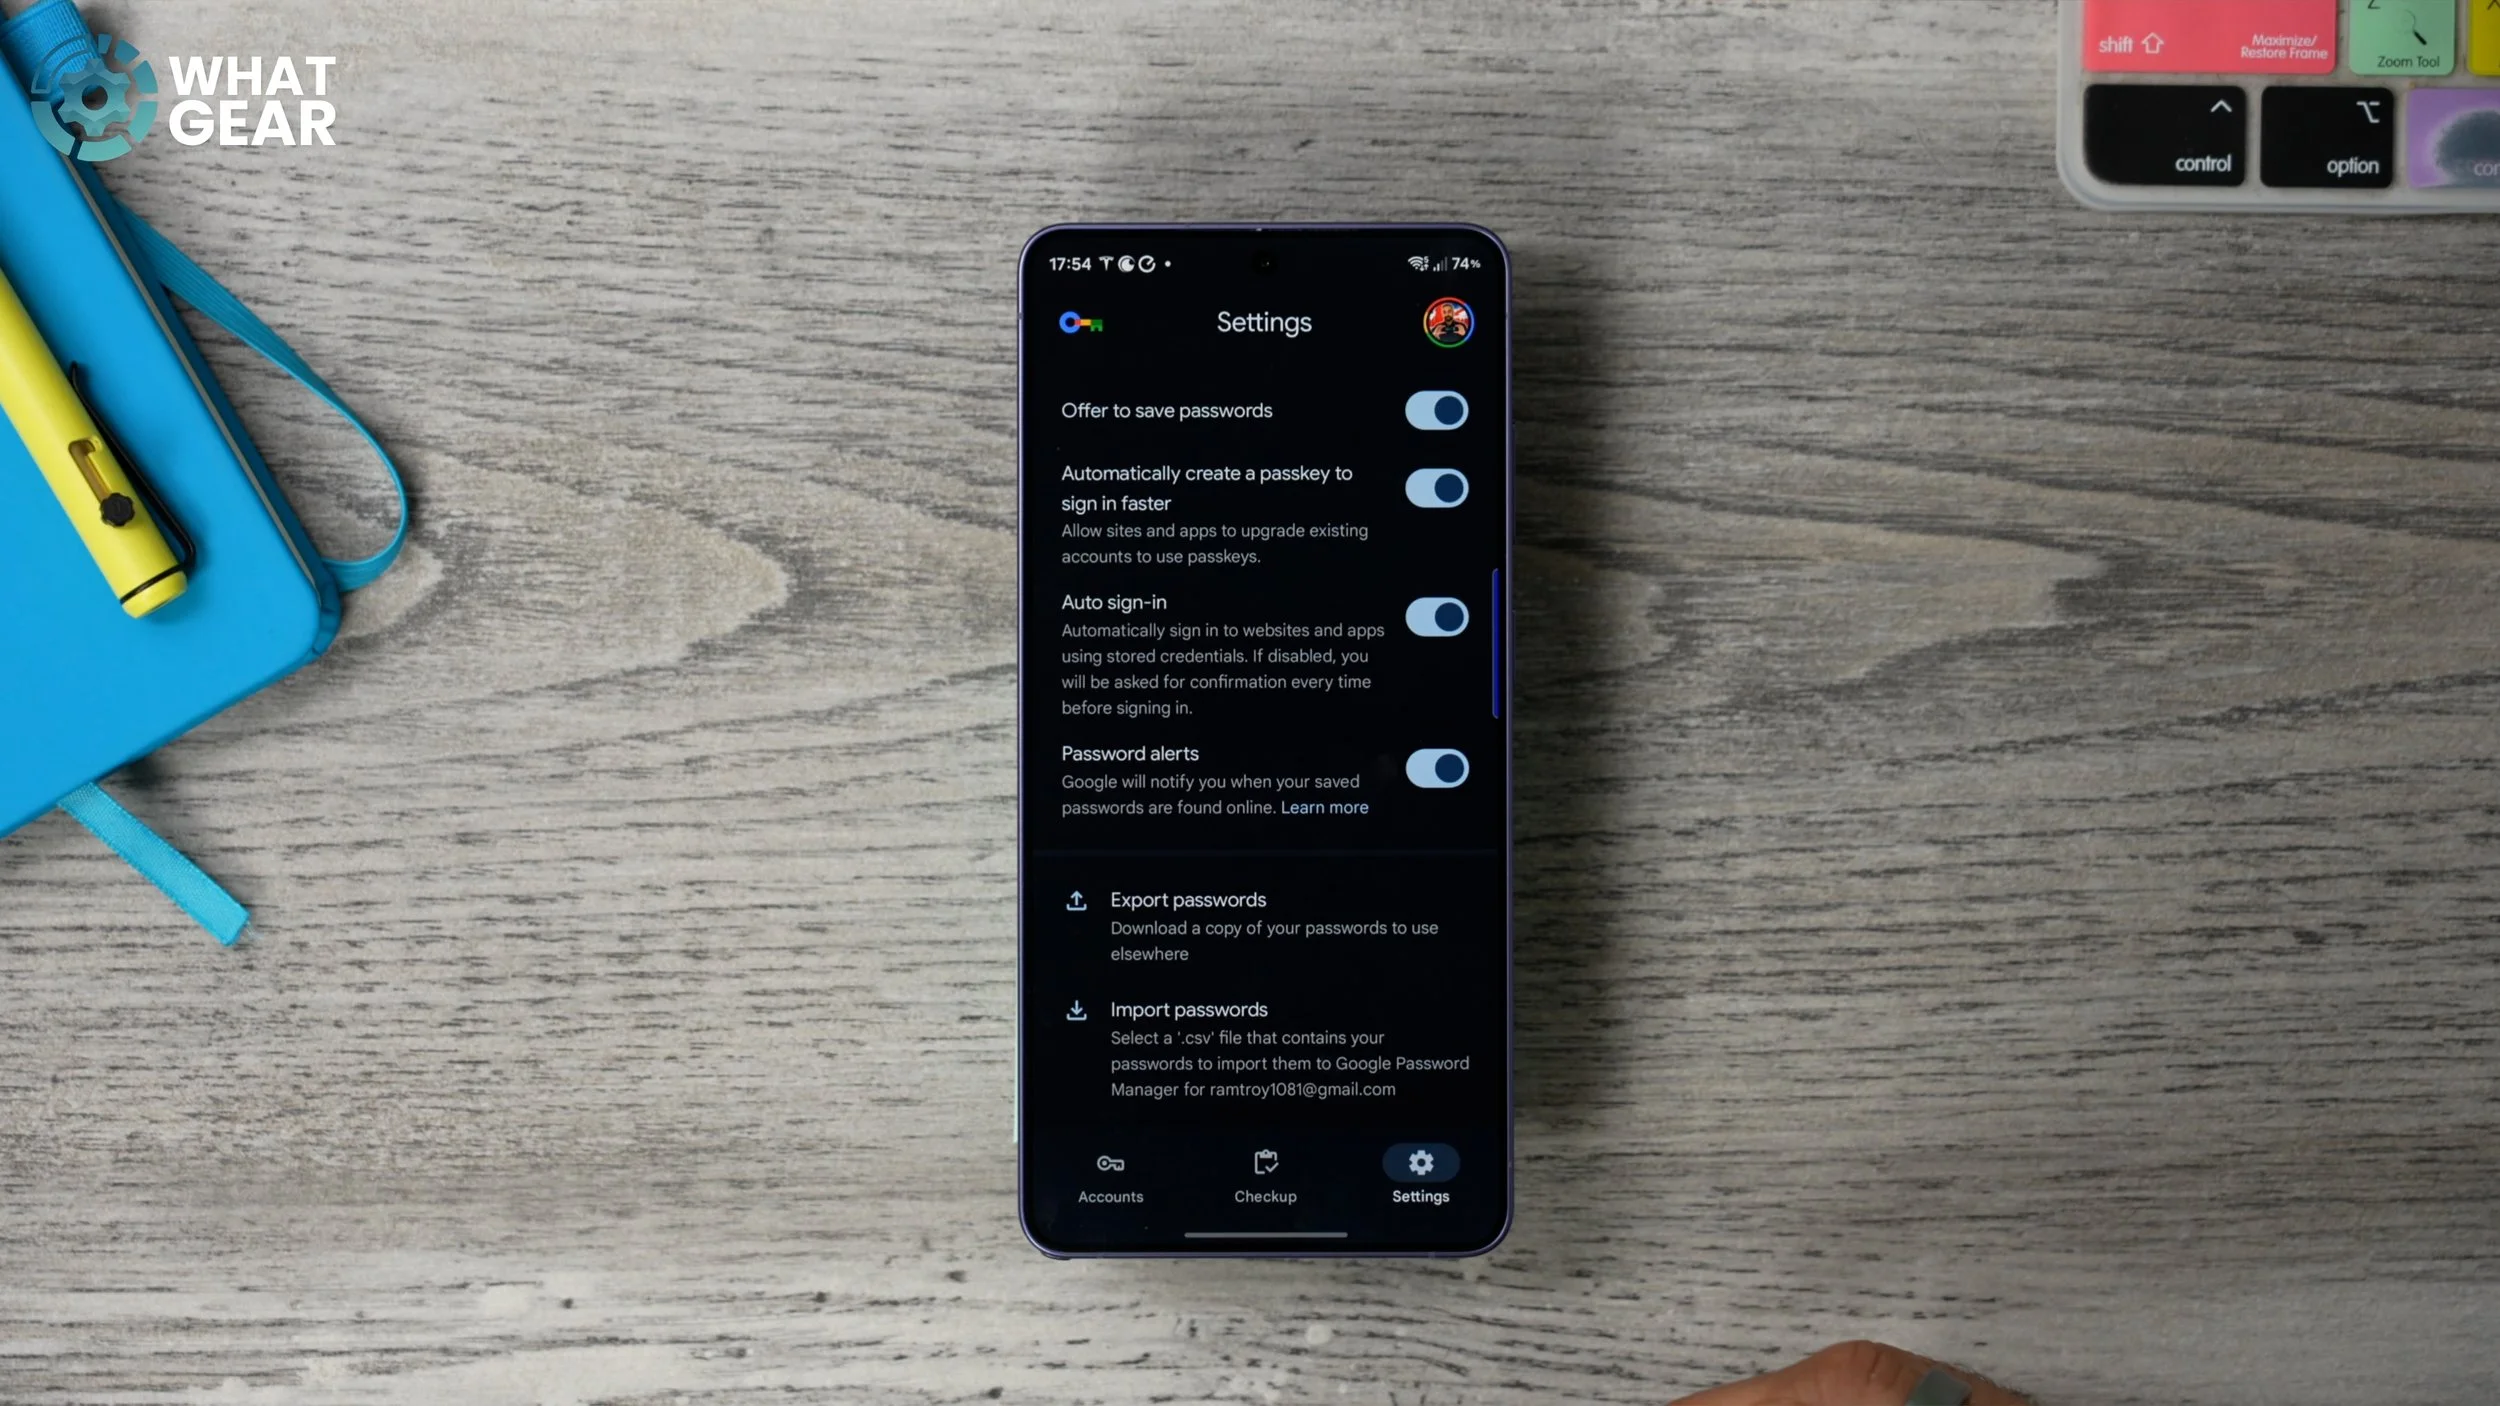
Here you'll find the Google Password Manager. If you open this now, on this page, if you hit the Settings in the bottom right corner, scroll down, and you will see this: Add shortcut to home screen. And this will add this little icon to one of your home screens in the free space. Now this will give you a very quick way to jump into your password manager right from your home screen, without having to go through all the steps that I just showed you to get to the password manager. And this will definitely save you time.
ANTI TEA-LEAF
Okay, here's one more bonus tip for you guys. If you go back into Settings, and again back to the Google services menu, go back to All services. Right near the bottom here, you will find the Theft protection feature. Tap on that. And then right here, you will see Theft Detection Lock.
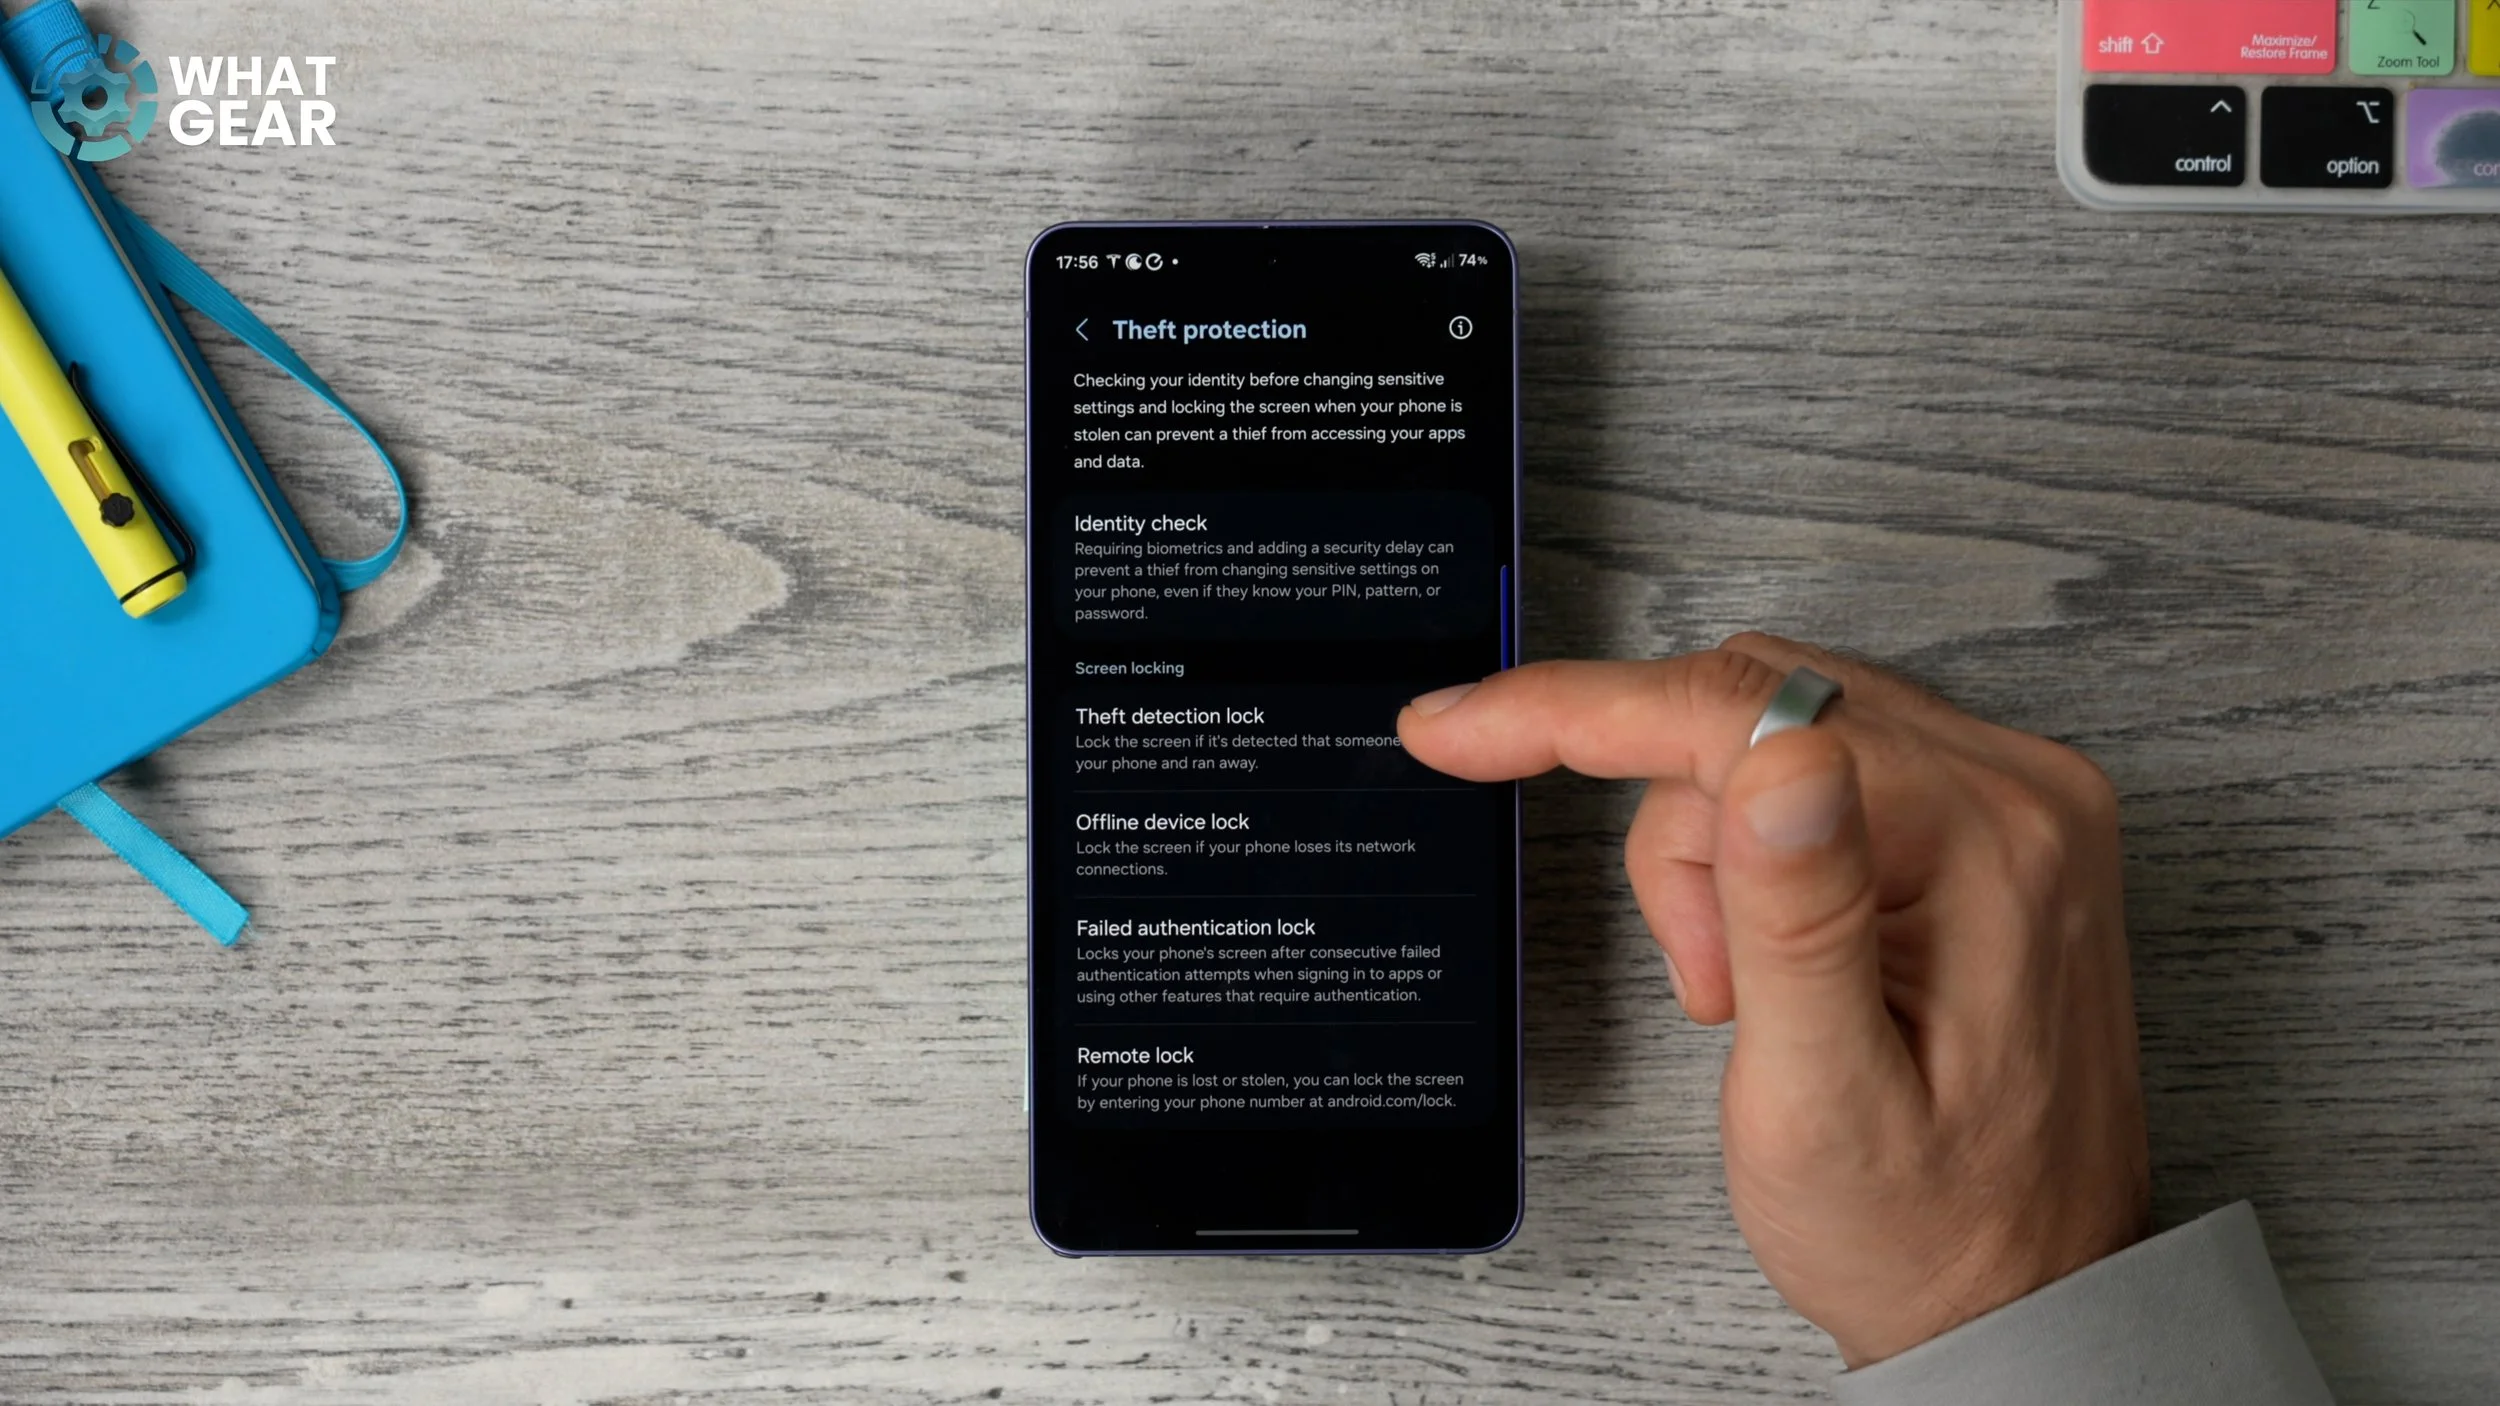
So if someone does grab your phone and rides off with it on a bike or something like that, your phone will be able to detect that this has happened and that it is quickly moving away from you, and it will automatically lock the device. Therefore, they won't be able to get into your apps, Gallery, messages, and all that kind of stuff. So you might want to think about switching this on.