
Samsung Galaxy S26 Ultra Customization - 17 SECRET Settings Pros Never Tell You
If you've just picked up a Samsung Galaxy S26, I think you'd appreciate these 17 easy customisation settings that will instantly make you look like a pro. And be careful about showing your newly customised Galaxy to your iPhone friends, because it may leave your friends with a bad taste. And if you don't consider yourself an amateur, let alone a customisation pro — well, you're here now, so you're on your way. And if you stick around, by the end of this video, you will be getting there very quickly. And I do have so many more advanced customisation guides on the way. So do stick around for that. And if you're still brand new, I have some good news for you.
WALLPAPER REMIX
So the first customisation tweak that most people will do with a new phone is customising the wallpaper. And there are some really cool ways to do this now on Galaxy S26. And this is a fairly new one. So if you swipe up to bring up your app drawer, in the list here, you should see Creative Studio. This is a new and improved Samsung app. And essentially, what you can do here is type in text prompts to create images. But what I want to show you is something a bit different. So in the bottom right corner here, you'll see this little pen. If you tap on this, and then instead of typing something in, if you hit the little image icon right there, you can bring in an image from your gallery. And for this demonstration, I'm going to grab this very popular wallpaper of Darth Vader. And as you can see in that bottom left corner there, the theme selected is 3D cartoon. And we'll leave it as that.
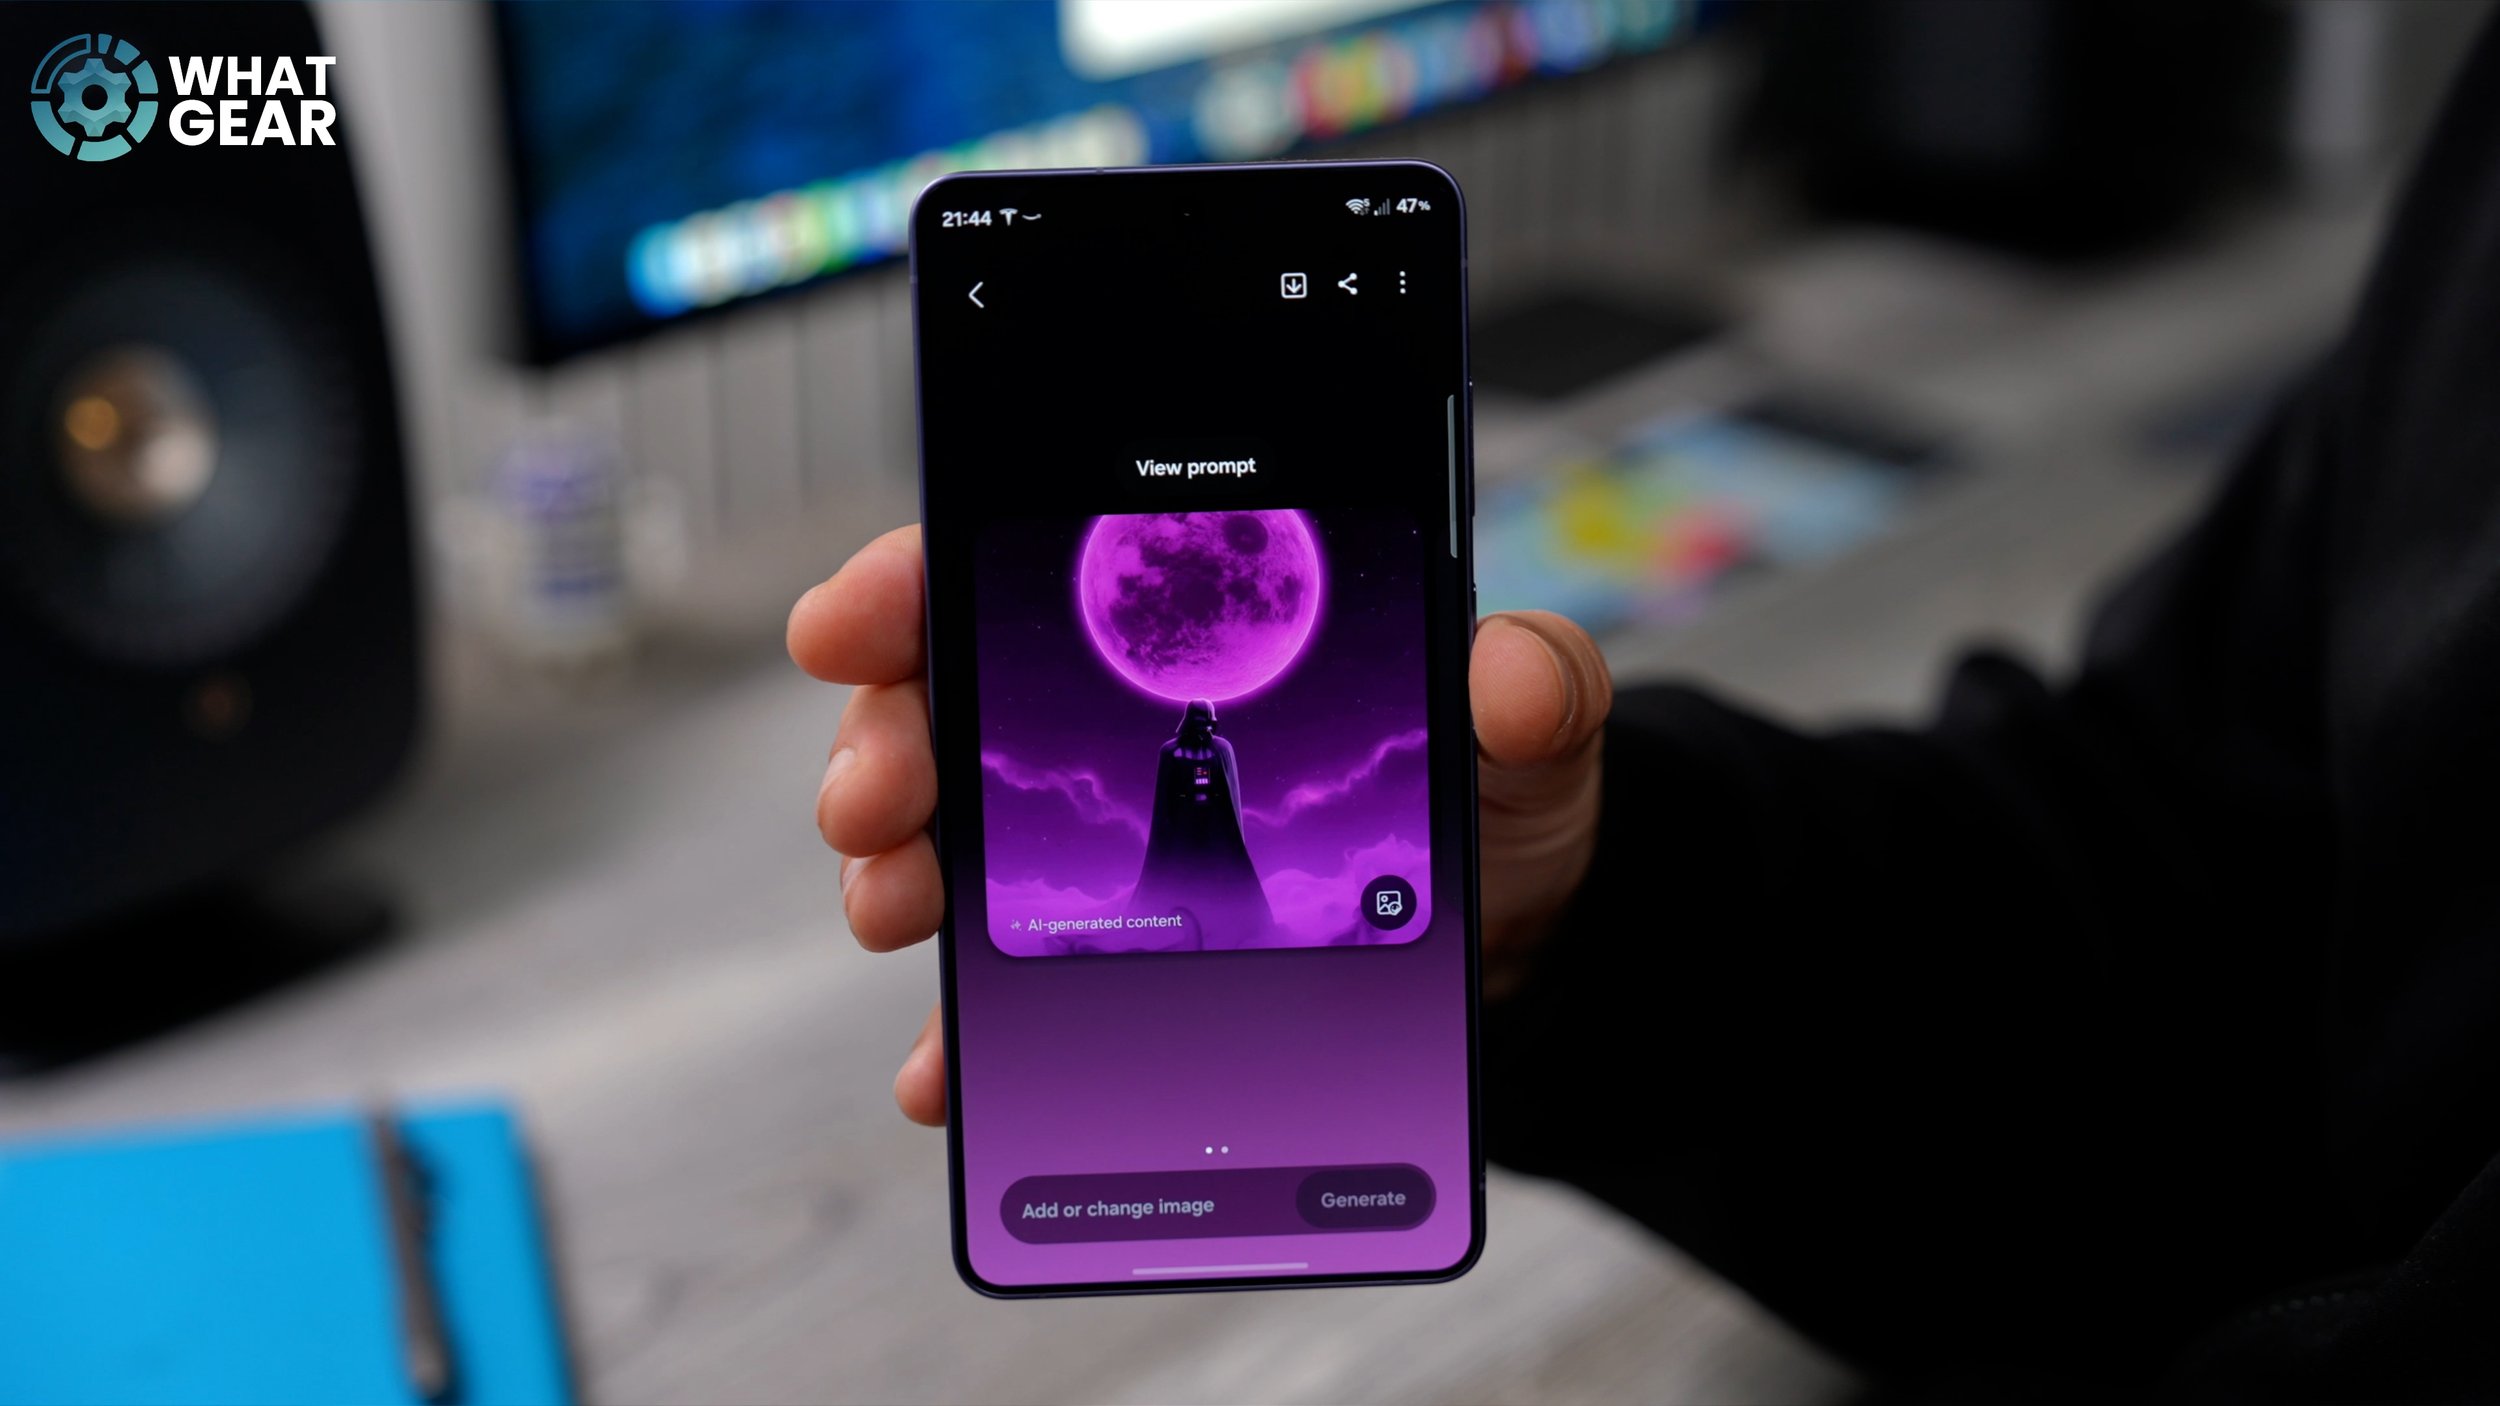
And in this box at the bottom, what I want to do is adjust this image so that it matches my purple Galaxy S26. So I'm just going to type in, “make this more purple,” and then hit generate. And there we go. Instead of just adjusting the image with effects, this has actually recreated and kind of remixed the already very popular wallpaper that I had to match my phone, and it actually creates something different every single time. Here's another version of that same wallpaper remixed using the same app, using pretty much the same prompts as well. And you can see I've got a completely different result, and you can keep modifying the picture just by altering the text at the bottom. Once you have created something that you do want, you can hit the little download icon at the top and save it to your device. You can set it as your wallpaper, or you can even just create a sticker from that image.
PHOTO WALLPAPER TRICK
For the next tip, we're going to use a photo from my gallery because there are going to be some people out there who want to use photos they've taken themselves as wallpapers. And let me show you how you can tweak them and improve them using some Galaxy AI tools. So first thing to do: open up your photo gallery. Choose an image that you might want to use as wallpaper. Once you've done that, you hit the little AI sparkles at the bottom of the phone, and then you get your AI options. If there are photo bombers in the image, you can use the AI eraser to circle them and get rid of them. You can adjust the image and actually straighten it up, and it will use generative fill to fill in the outside of the image.
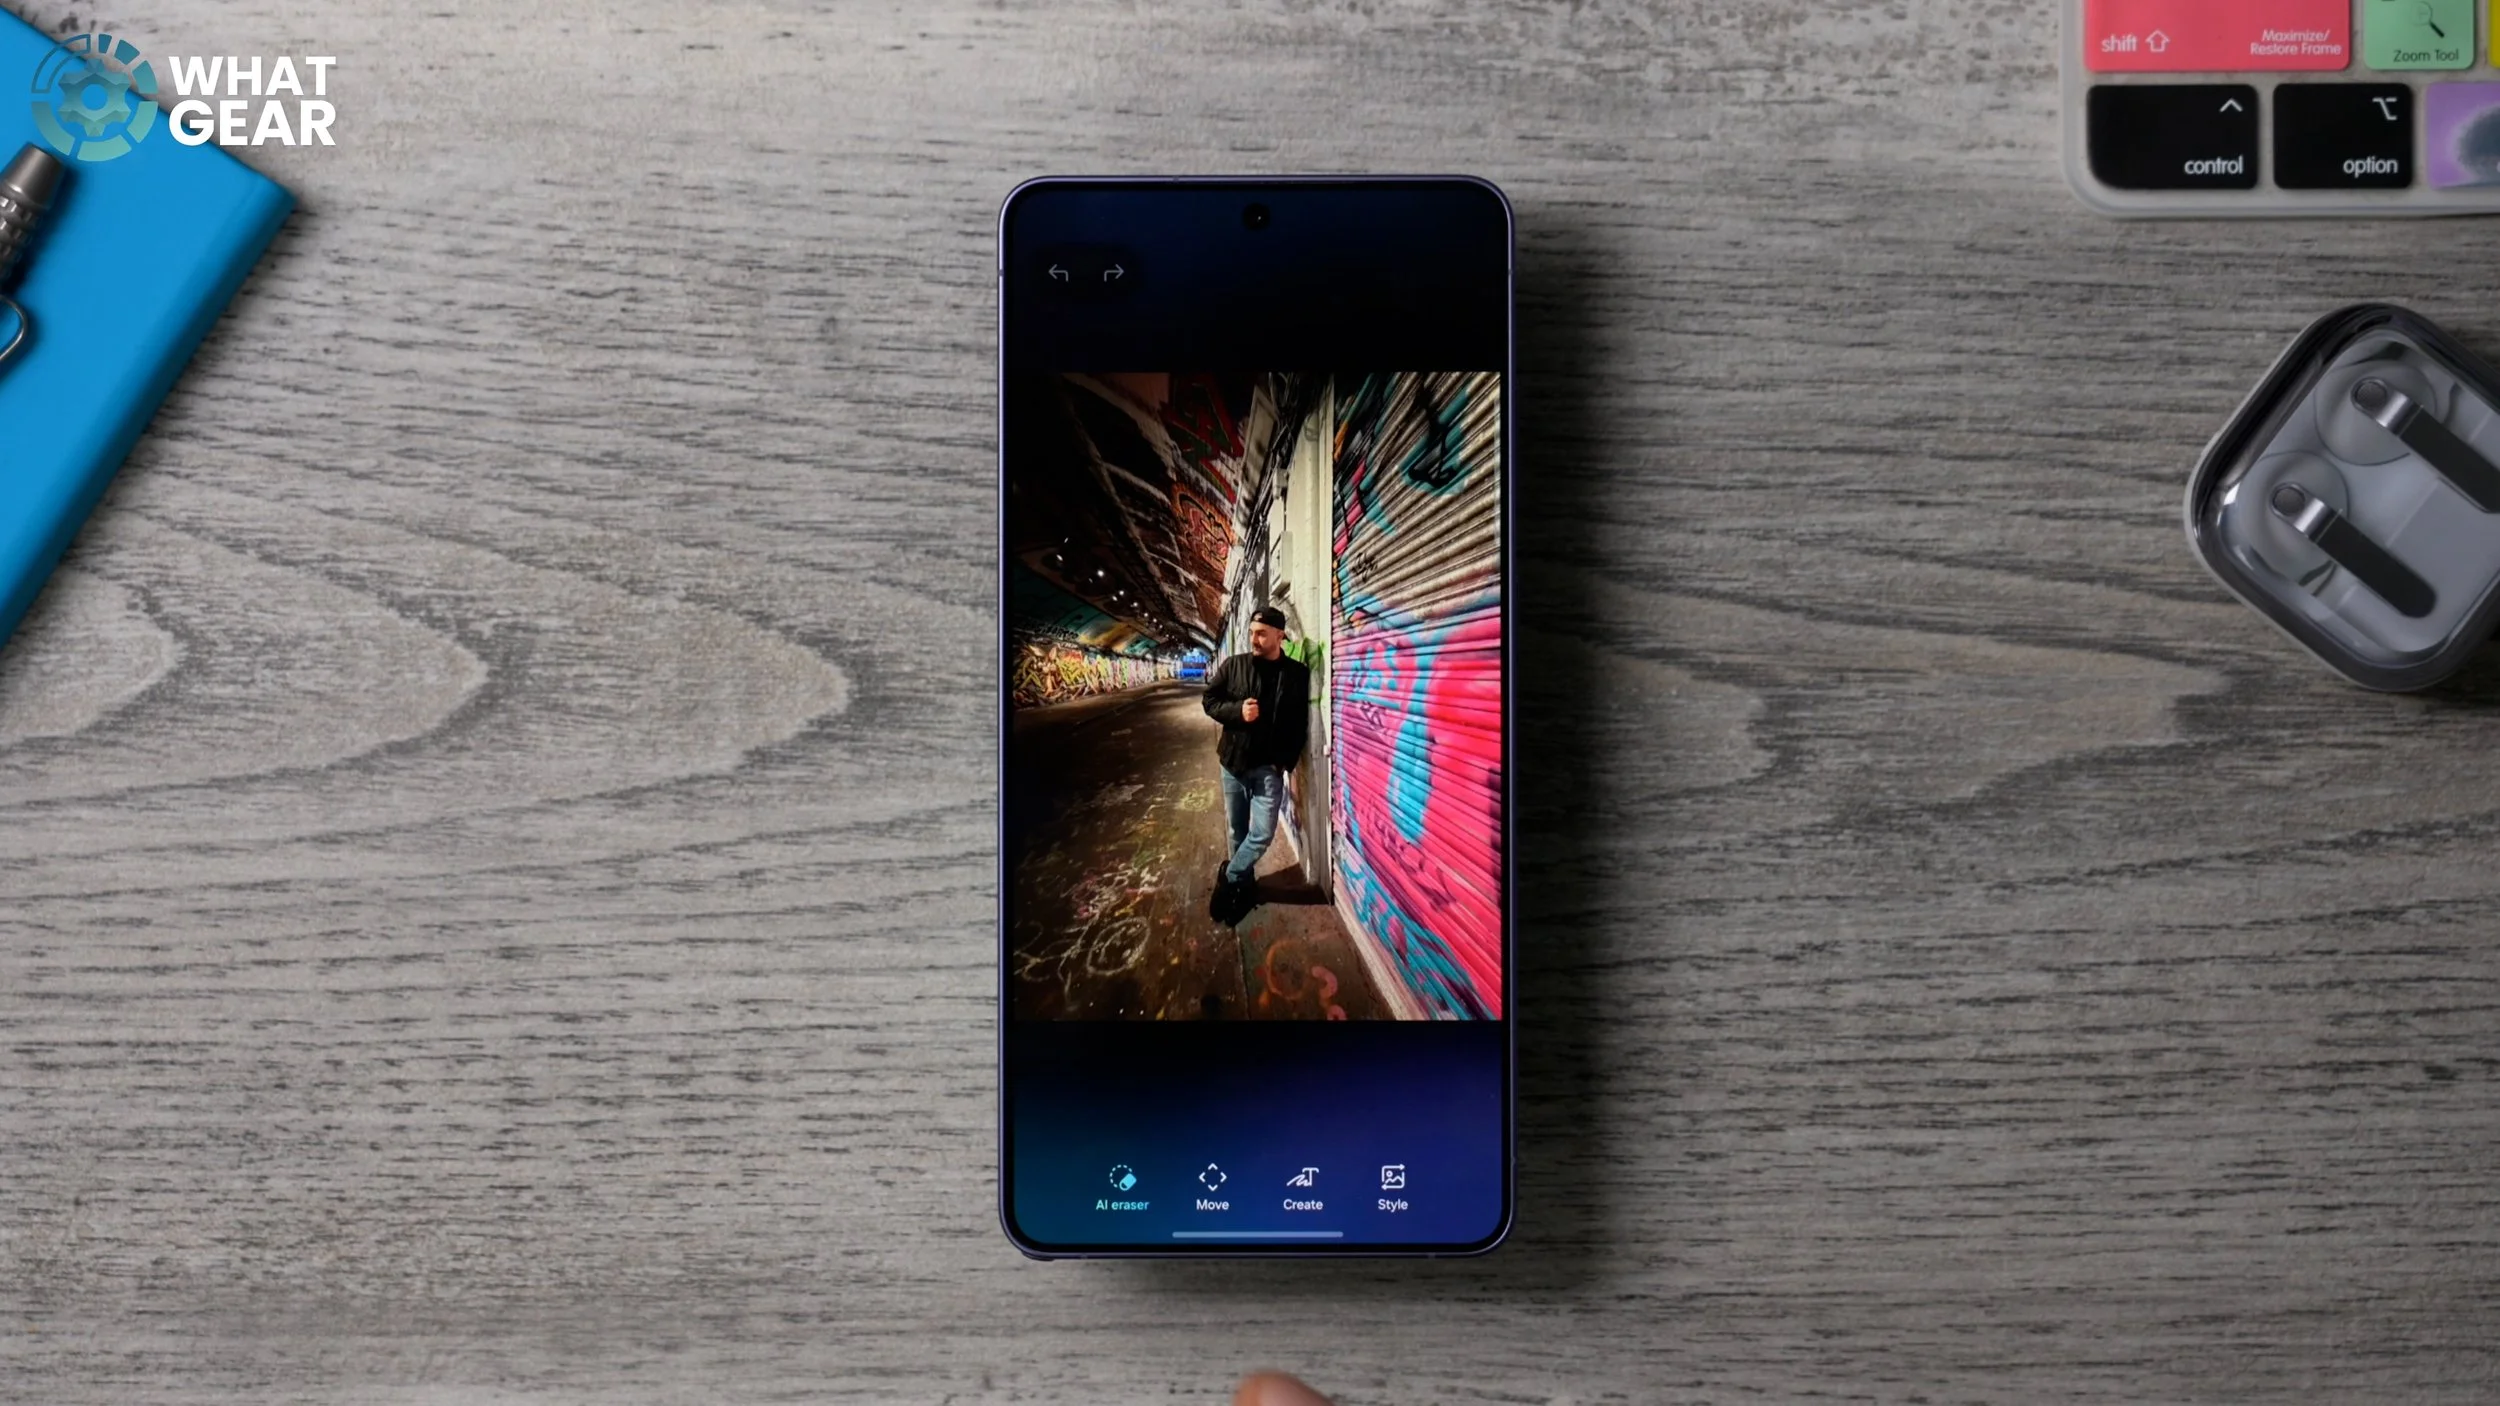
And if you want to, you can hit Style on the side and use one of these image generation tools to completely restyle the image using a preset that you like. Let's go with the sci-fi one and see what it does. So yeah, that's pretty cool. You get the idea of what you can do with that. But what I really want to show you is this. Go back to the original image, and this time I'm going to hit Create. And you'll notice the text field pops up at the bottom of the screen. Here's where things start to get really interesting. You can literally type in stuff here to add to the image. Let me add a DeLorean in the background. And there we go. It's added the car to the back of the shot, and it's actually even moved my arm a little bit, so you can see a bit more of the car.
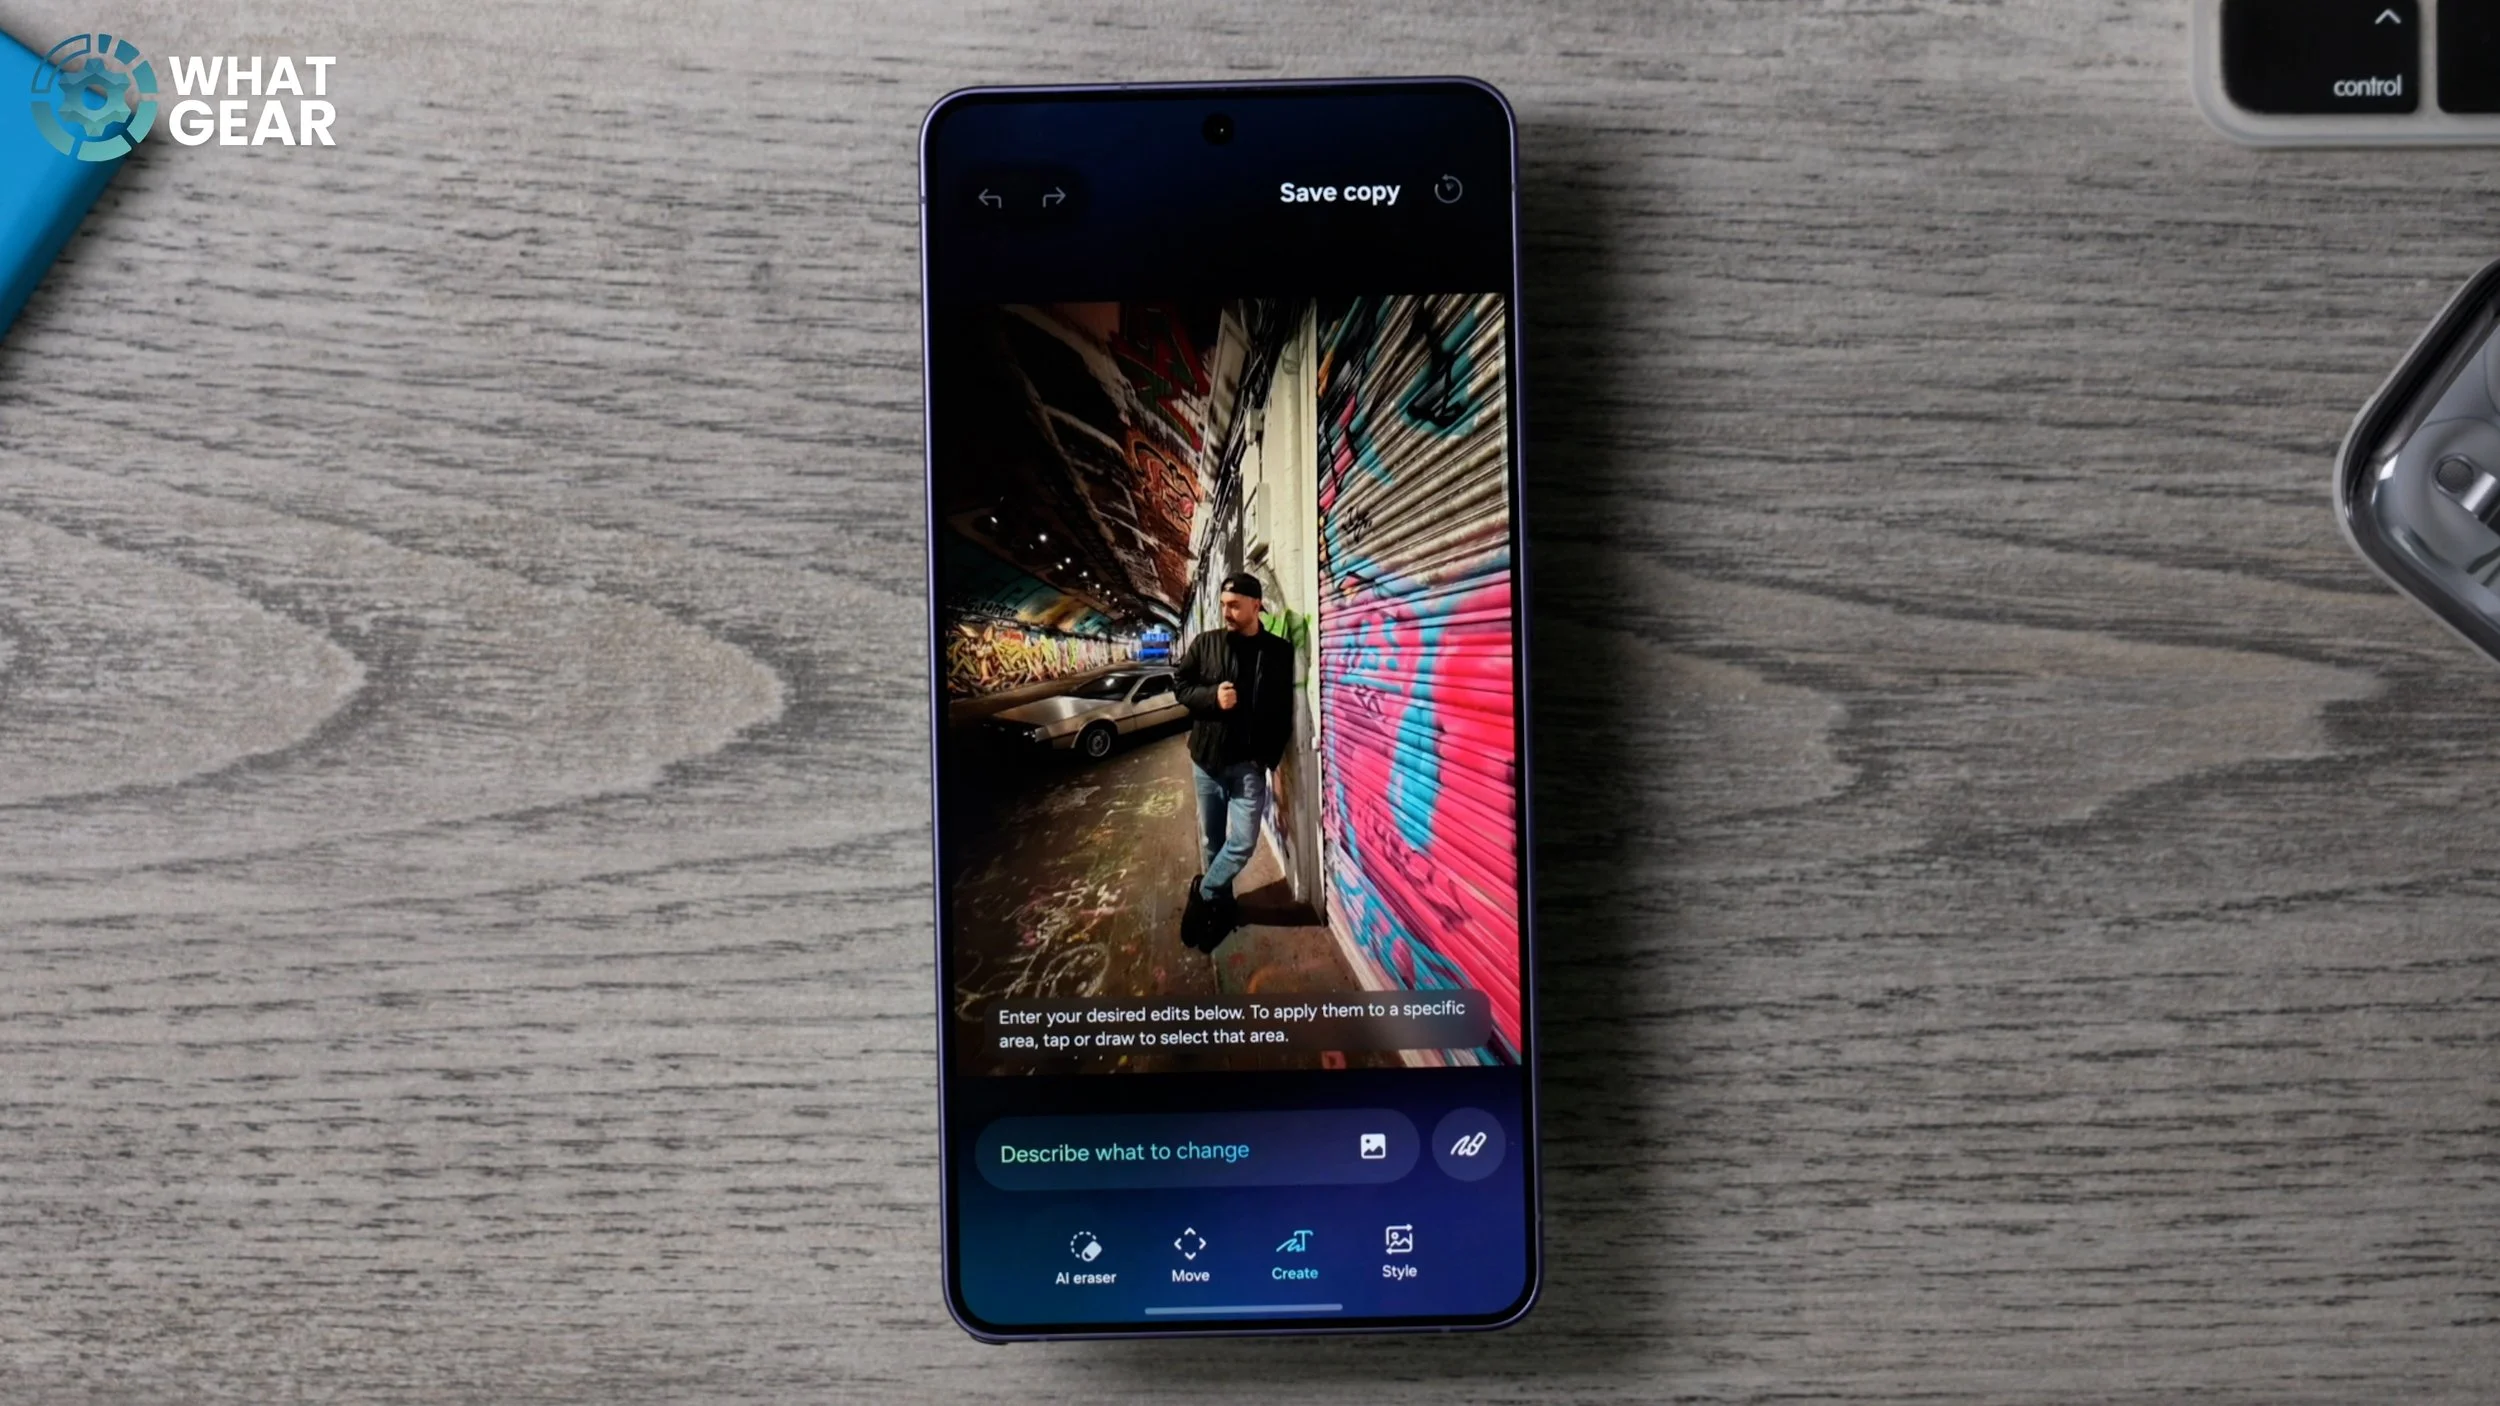
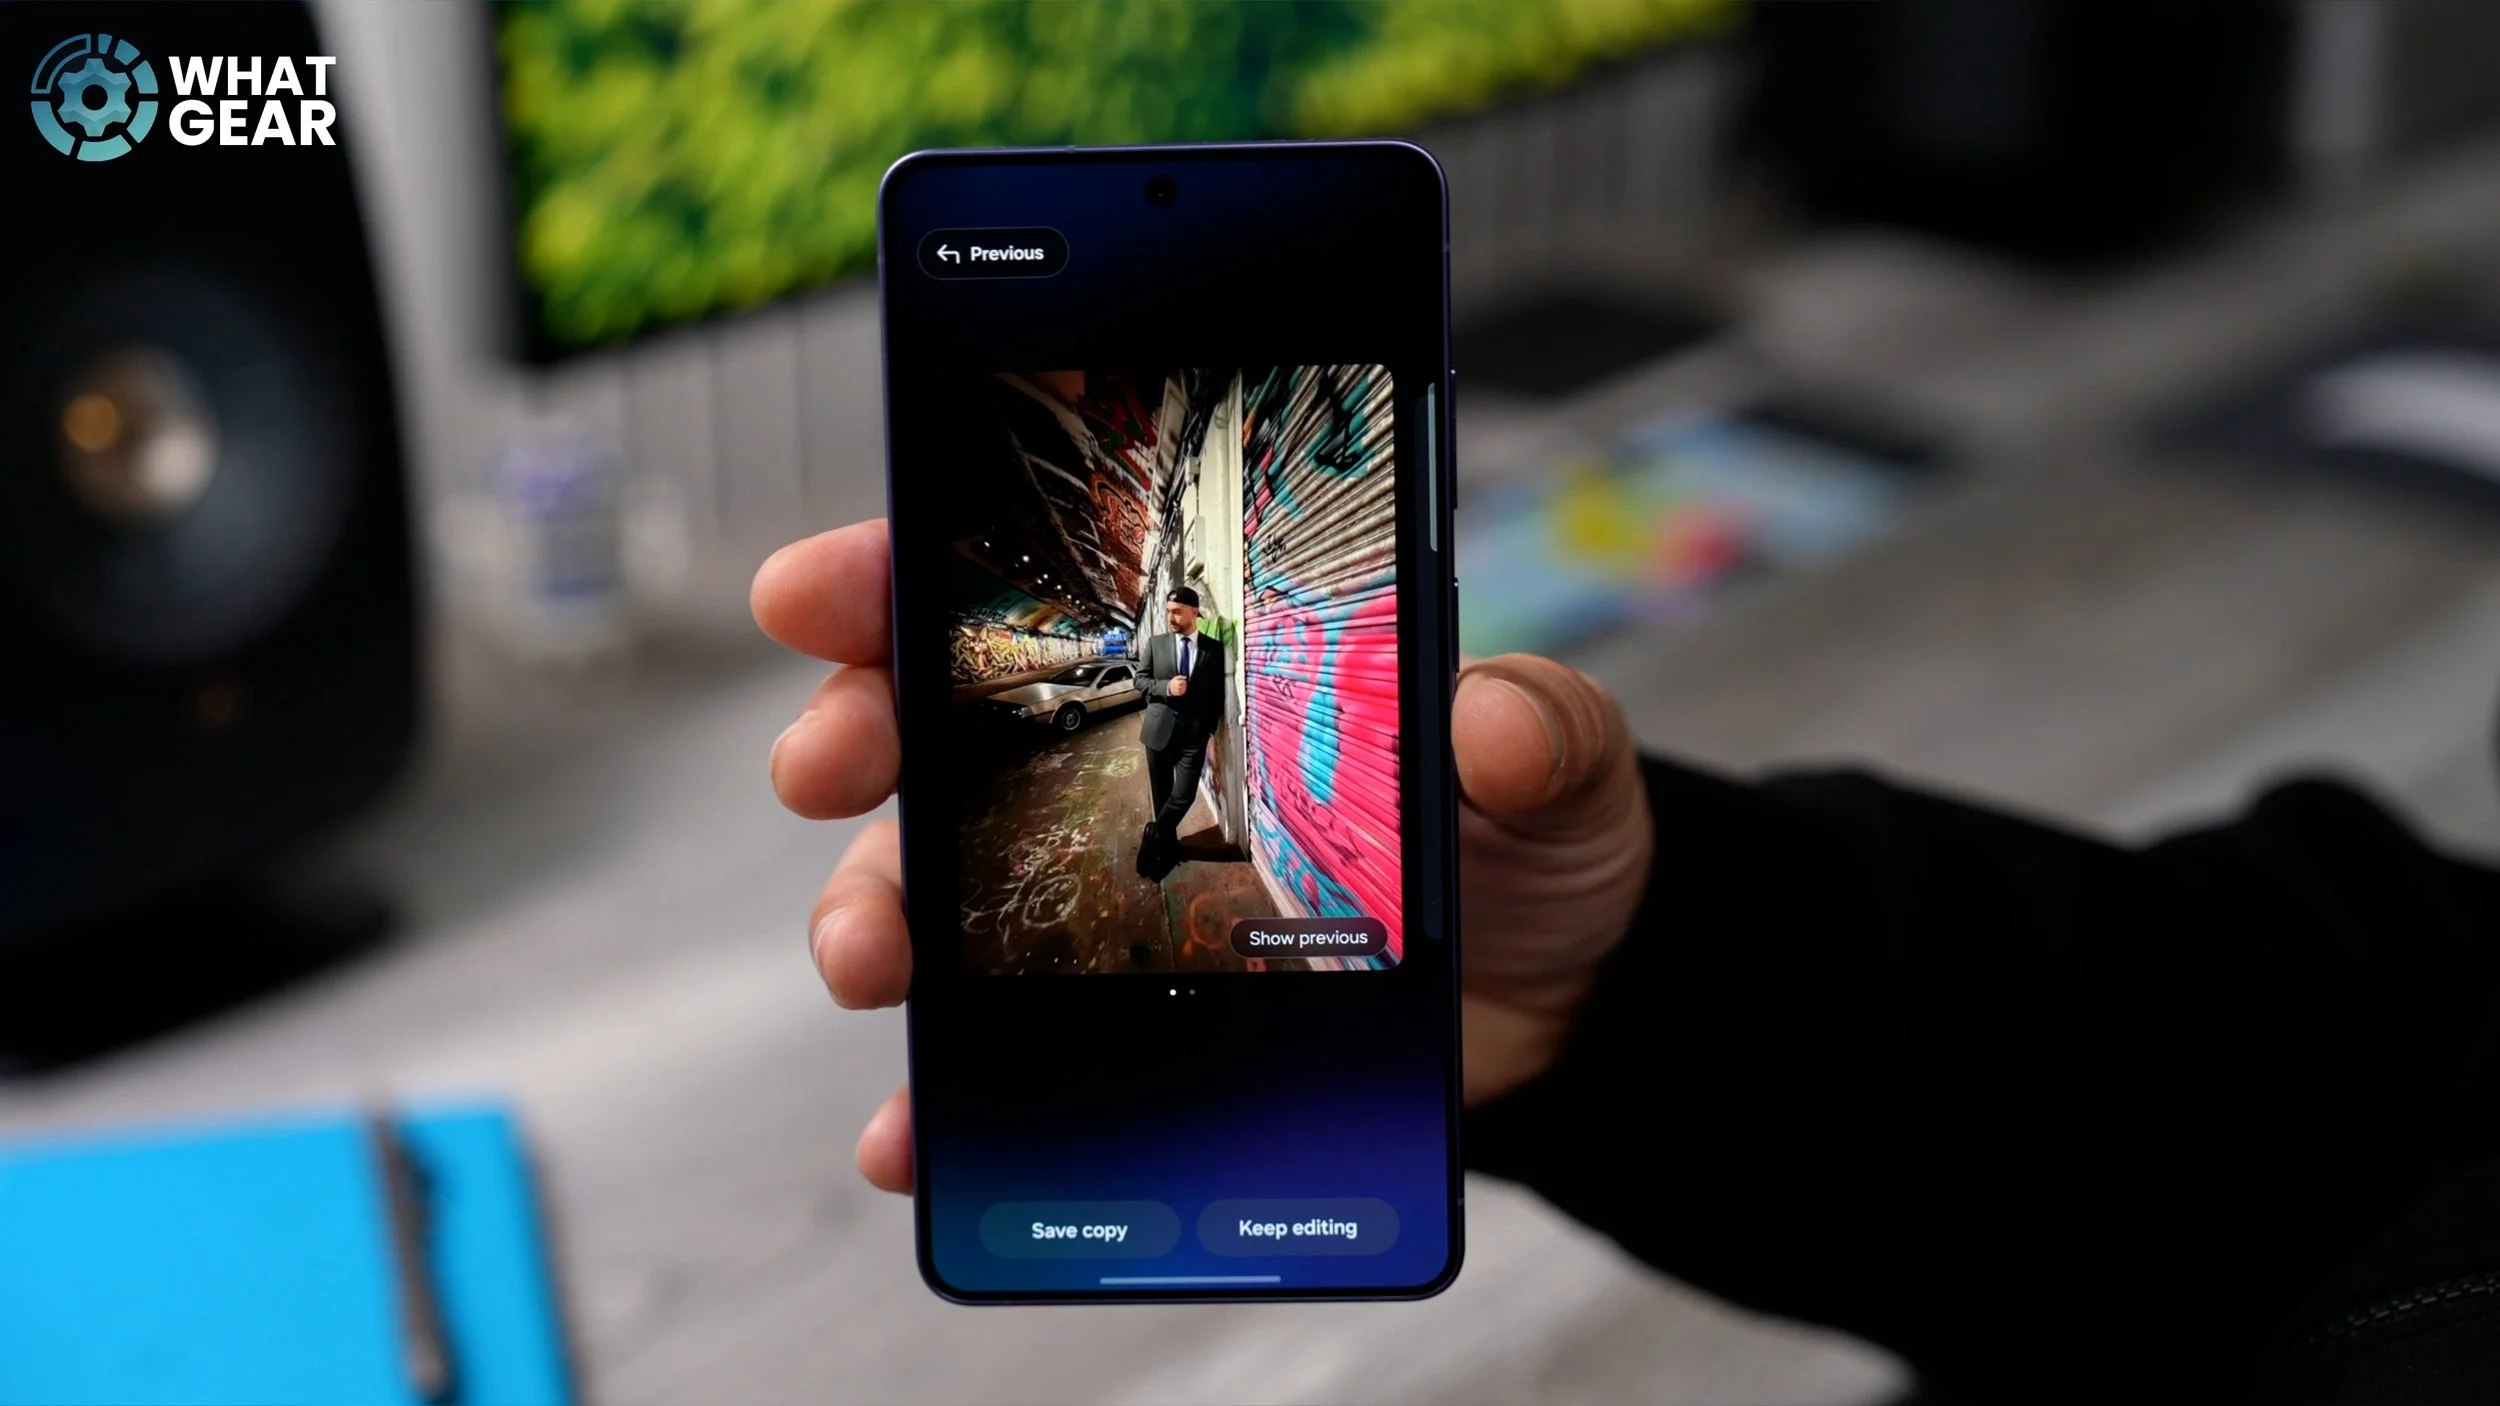
And then if you go to Keep Editing, we can keep stacking more things on top. And check this out. If you hit the little image icon right here, you can even go into your photos and add parts of other images into that image. So this is Yoda, just to see what happens. And once you've extracted that bit of that image, you can ask it to blend it in a specific way. So I'll just put “sitting on the ground” and generate. What you might find is that if the image is copyrighted, which Yoda definitely is, it might not work. So you can extract parts of images and have them blended into the existing image. And you can also change outfits. So let's say I change my outfit to a “business suit.” There we go. It's very convincing. And you can see how it could be extremely creative when it comes to creating a background for your phone. And once you have created something that you like, you just save a copy and then go to the three dots in the top right corner and then set it as a wallpaper.
THE VARIATIONS
I do realise that some of you guys will not be into any of this AI stuff, or Star Wars wallpapers, or anything like that. You probably just want to keep things simple, and if that is you, I think you'll appreciate this little customisation trick. So if you haven't changed anything on your phone, your wallpaper will probably look something like this, with the default Samsung animated wallpaper, which is very nice. But this is also customizable, so let me show you how to do that.

If you hold your finger down on an empty part of the screen and go to Wallpaper and Style, bottom left corner, and you tap on the wallpaper you want to customise — so let's just go to the home screen one — at the bottom of this screen, you should see Variations. If you tap on that, you will see the other versions of that same wallpaper that also animate. So maybe you prefer this one, for example. So have a look at these and see if you prefer any of these. And before we move on to the next tip, I do want to show you one more thing. If we go back to this little icon in the top left corner, this brings us to the wallpaper menu. And when you scroll across here, you'll see some of the other Samsung defaults. And when you scroll down, there are even more. Some of the cool ones worth checking out are these down here — the interactive ones.
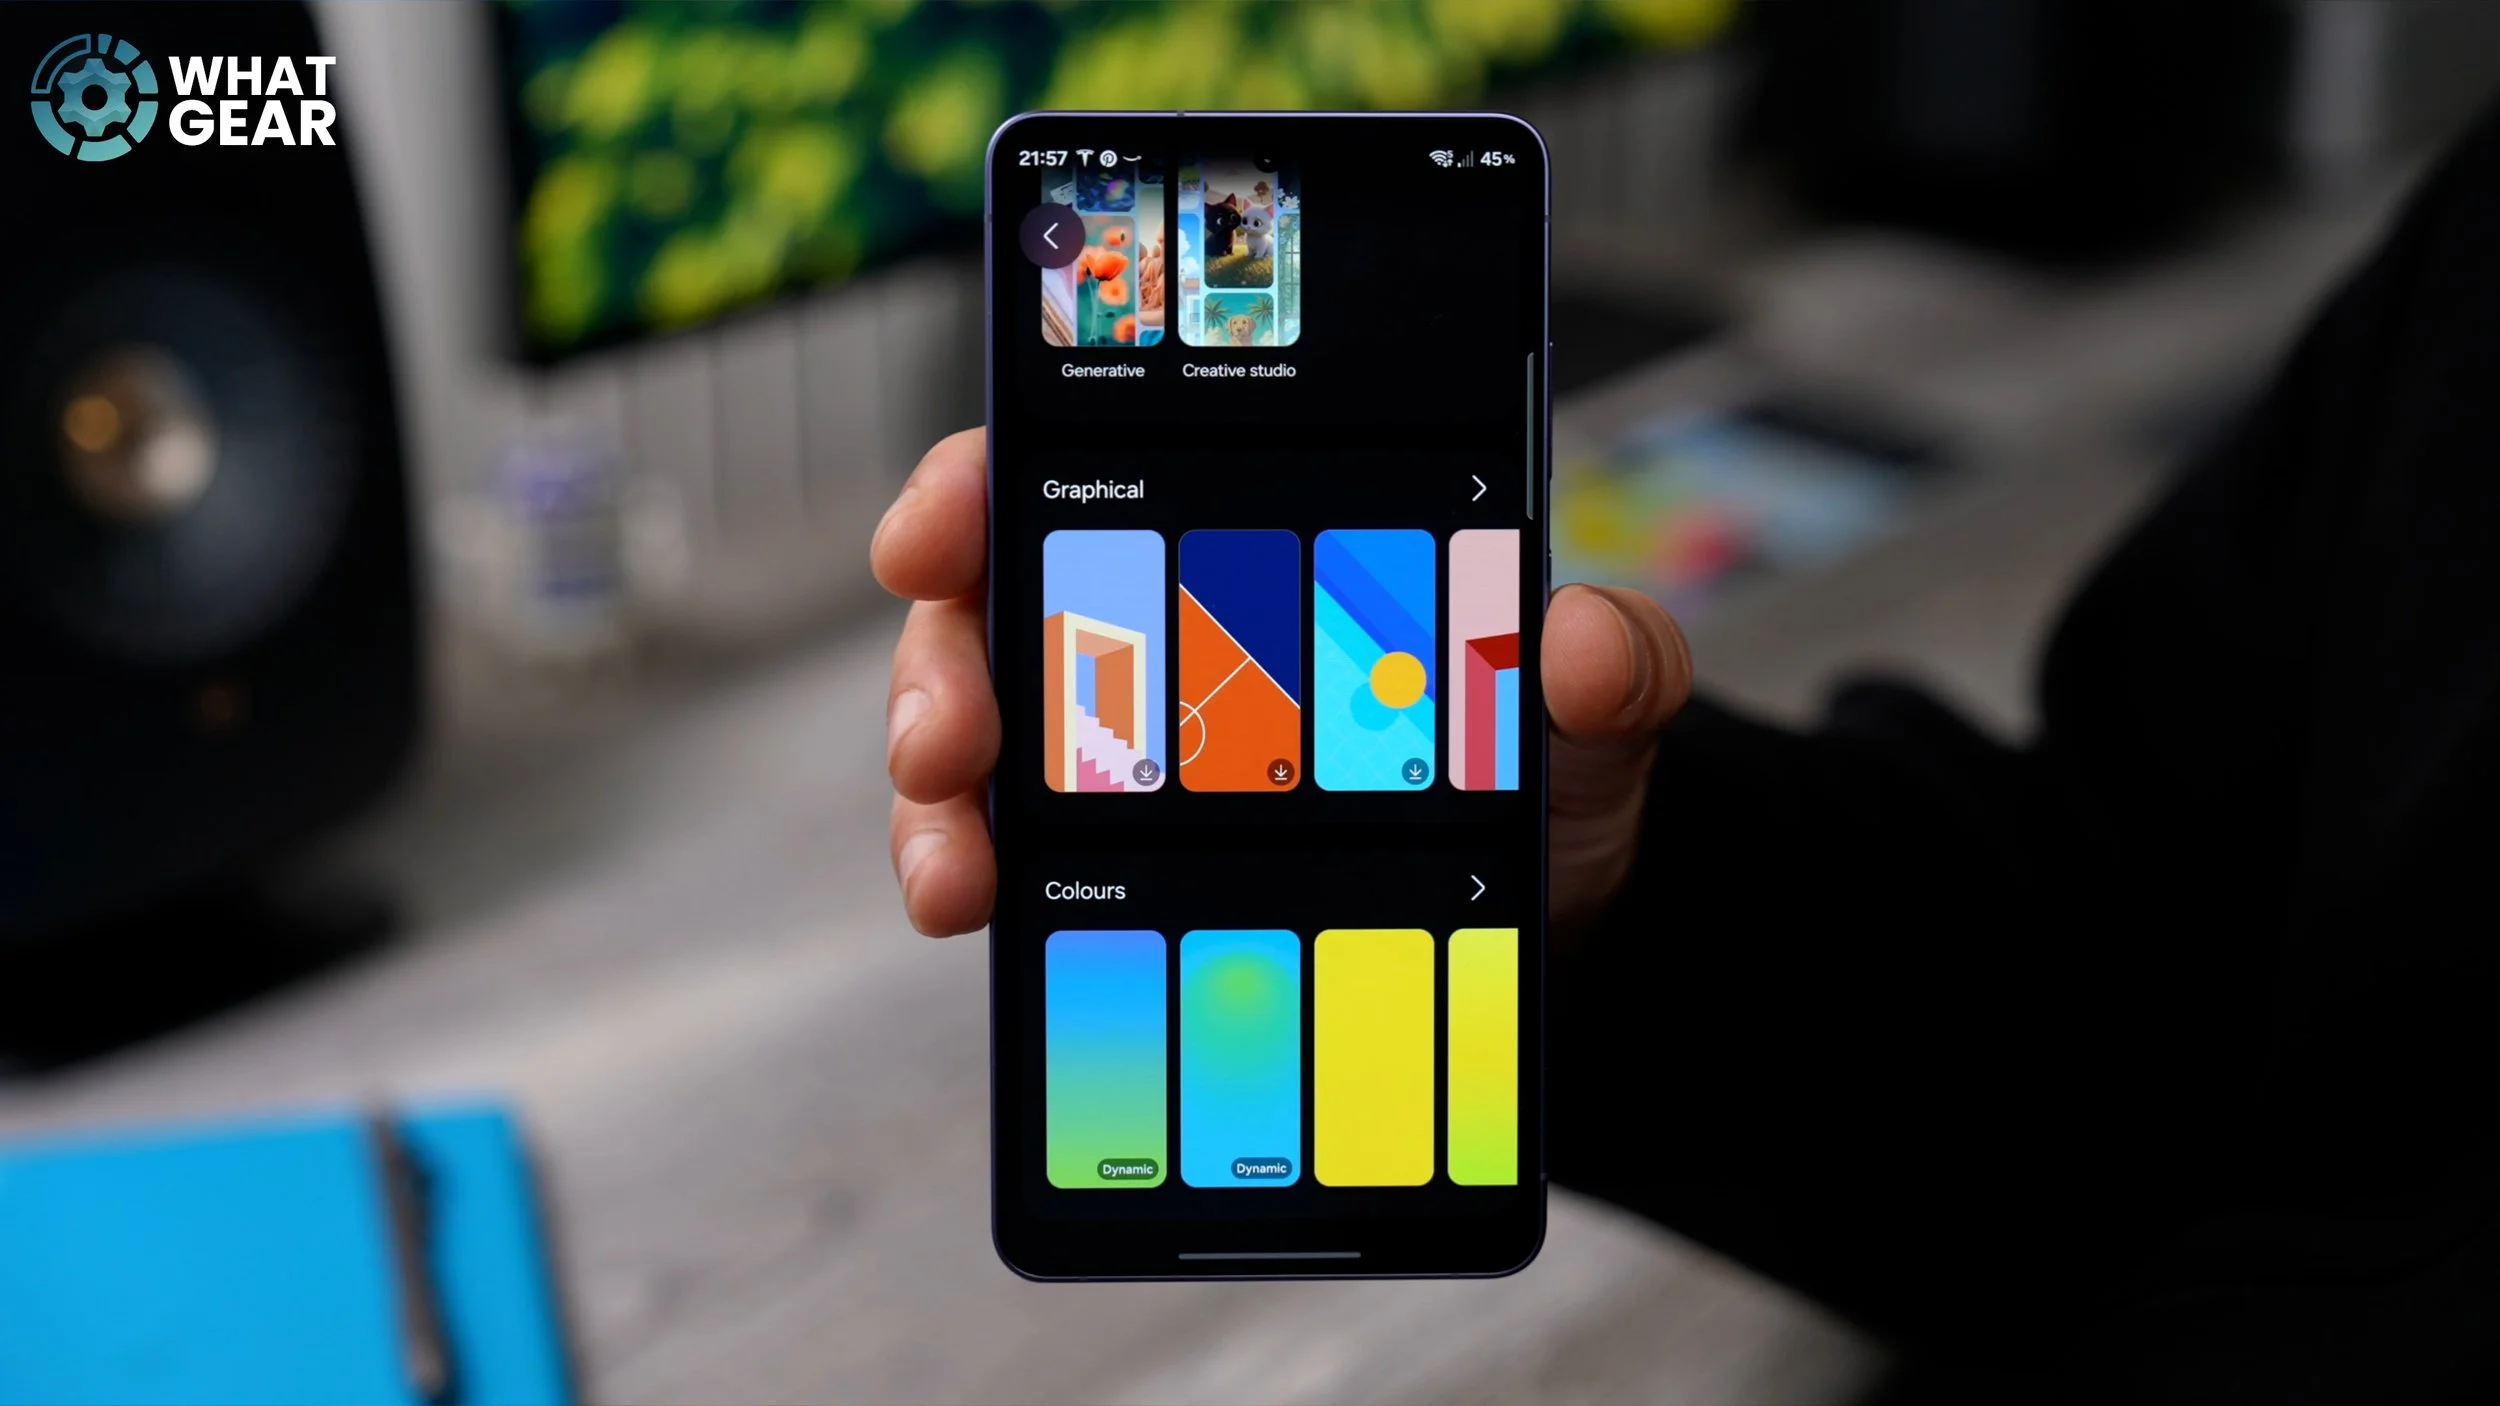
They actually shift colours throughout the day, so they become darker as the day goes on. And by the time you get to the evening, they'll actually turn into a more comfortable hue, so it doesn't strain your eyes. So yeah, these are very nice. And just like before, if you do choose one of these, at the bottom of the page here, you can go to Style and actually even modify the style of these dynamic wallpapers too.
WALLPAPER MODS
Here's one more wallpaper trick, and this one's ready for anyone who has wallpaper downloaded that they want to use. But maybe it doesn't match the colour of the phone or the case that you're using. So I'm going to use this wallpaper right here just for demonstration purposes. This is definitely one of the fan favourites here on this channel, but this kind of pinky grey doesn't really match the purple of the phone. So here's what we can do about that. First of all, we need to set it as the wallpaper. So if we go to the top right corner, hit the dots, and go to Set as wallpaper, I'm going to set this just as my home screen wallpaper. Now, once you've done that, you'll notice some extra options pop up across the bottom of the screen. If you go to Suggest, the phone will try to predict what you might want to do. I don't suggest you do that. If you go to the Gallery, you can change the image entirely, and if you want to put a frame around it, you can do that.
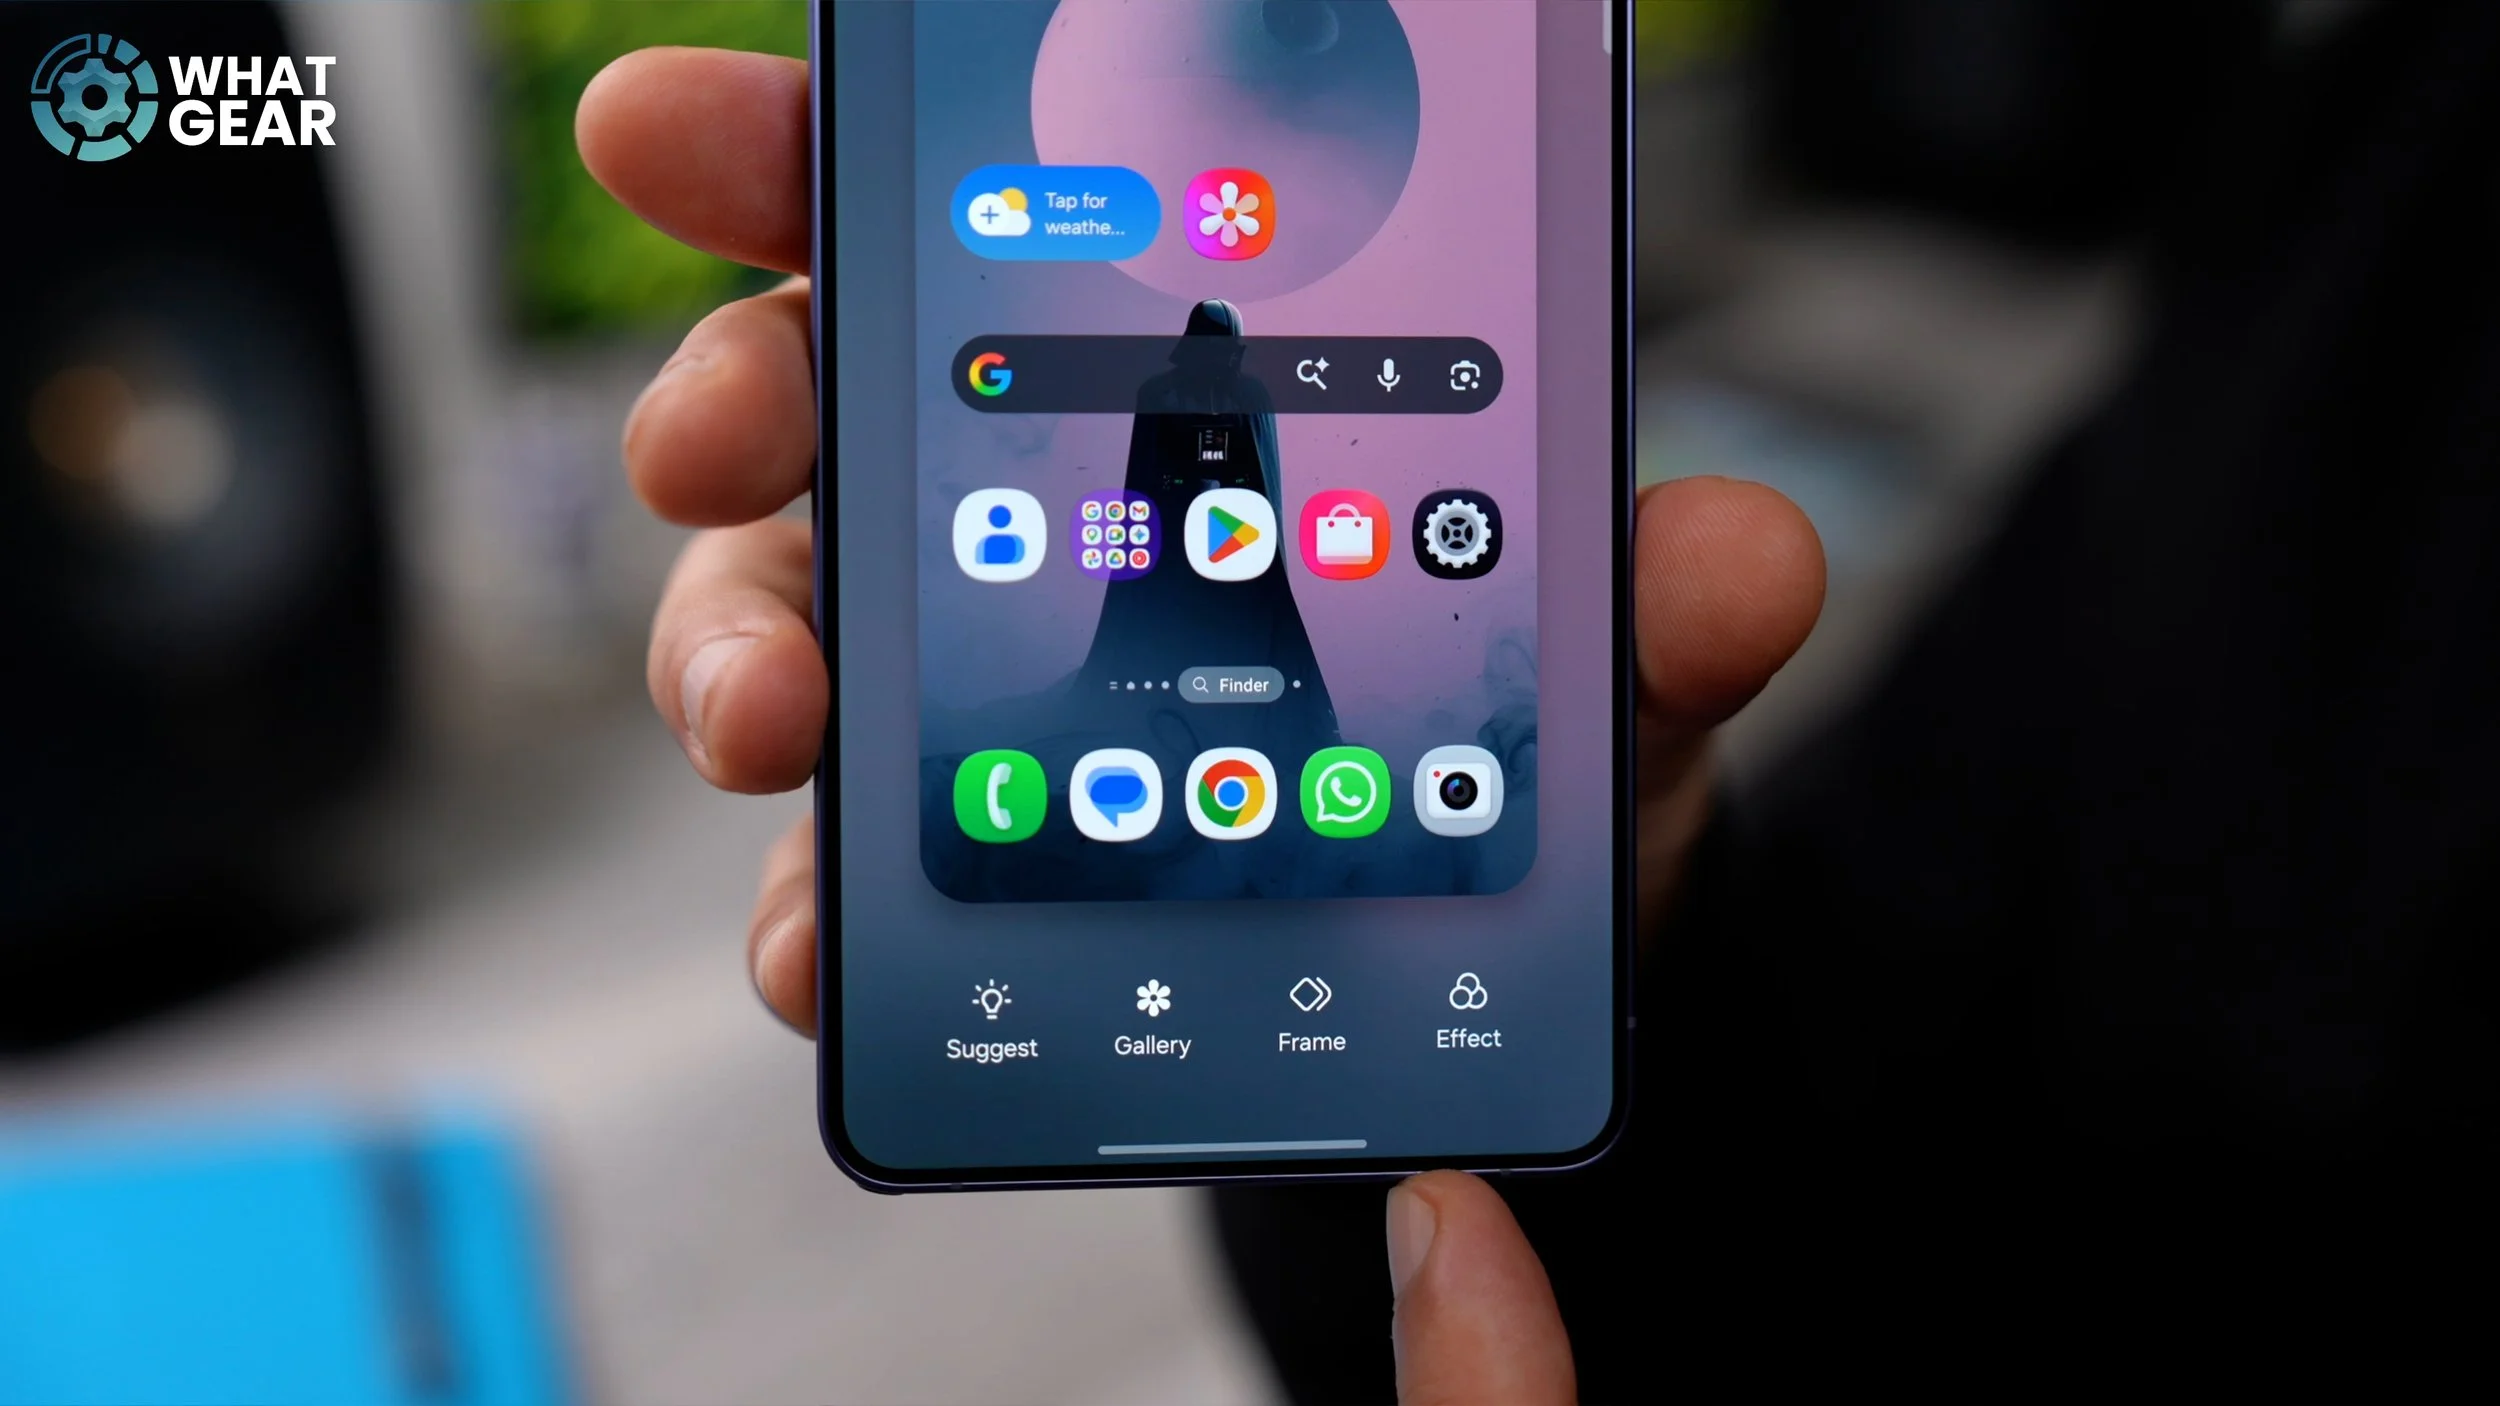
But what I want to focus on here is the Effect. So this is completely different from remixing the photos as I showed you at the beginning. This one takes the existing image and kind of modifies it. So for home screens, I do like to add the blur effect sometimes if there are lots of sharp edges on the image behind. This allows you to focus on the app icons. But for this particular image, I want to show you something different. There is the blurred background option, so if you have a photo of a person, it will blur the background, which can be quite nice. There's a grayscale background, which does look pretty cool, but it's still not what I had in mind. And then there's this one: custom colour background. Now this is where it starts to get a bit more interesting. See the little colour icon in the bottom right corner? If you tap on that, this brings up your colour options. And if you really want to be pro, you can go to the colour wheel and dial in the exact colour, and even use the spectrum if you prefer.

Once you've done that, it applies the colour to the background, and you can even use the opacity slider to change how much of that colour is overlaid. So you can bring back some of the details that exist underneath. So this is kind of nice, but it's still not my favourite. So let's go back and go across to the next one, which is this one: dark background. So essentially, this just modifies the back of the image. And again, you have the little colour icon. So if you tap on this again, you can adjust the intensity of that overlaying colour, but it just applies it to the background. And I think that looks pretty cool. You've kind of got a little bit of purple tones in there, and you've got a darker colour that allows the icons to stand out from the background. So I'm going to apply that. There are a couple more effects that you might want to check out here as well. So if you scroll across, there is the ink drawing background, the pastel background, and there's also an oil painting, which looks very cool, actually, but I'm sticking with this dark background.
CUSTOM COLOURS
So here's another tip that would differentiate your phone from your friends, even if they have the same phone. So if you hold your finger down on the home screen, go to Wallpaper and Style. This time we're going to go to Colour Palette. It's kind of important that you do your wallpaper before you do this, so hopefully you've done that. When you tap on the palettes here, you can enable it. Essentially, what this will do is grab colour schemes based on the wallpaper that you're using, and it will present them down here. And up top, you have a little demo of how this will affect the user interface. So have a look at the options that are presented to you and pick your favourite one.
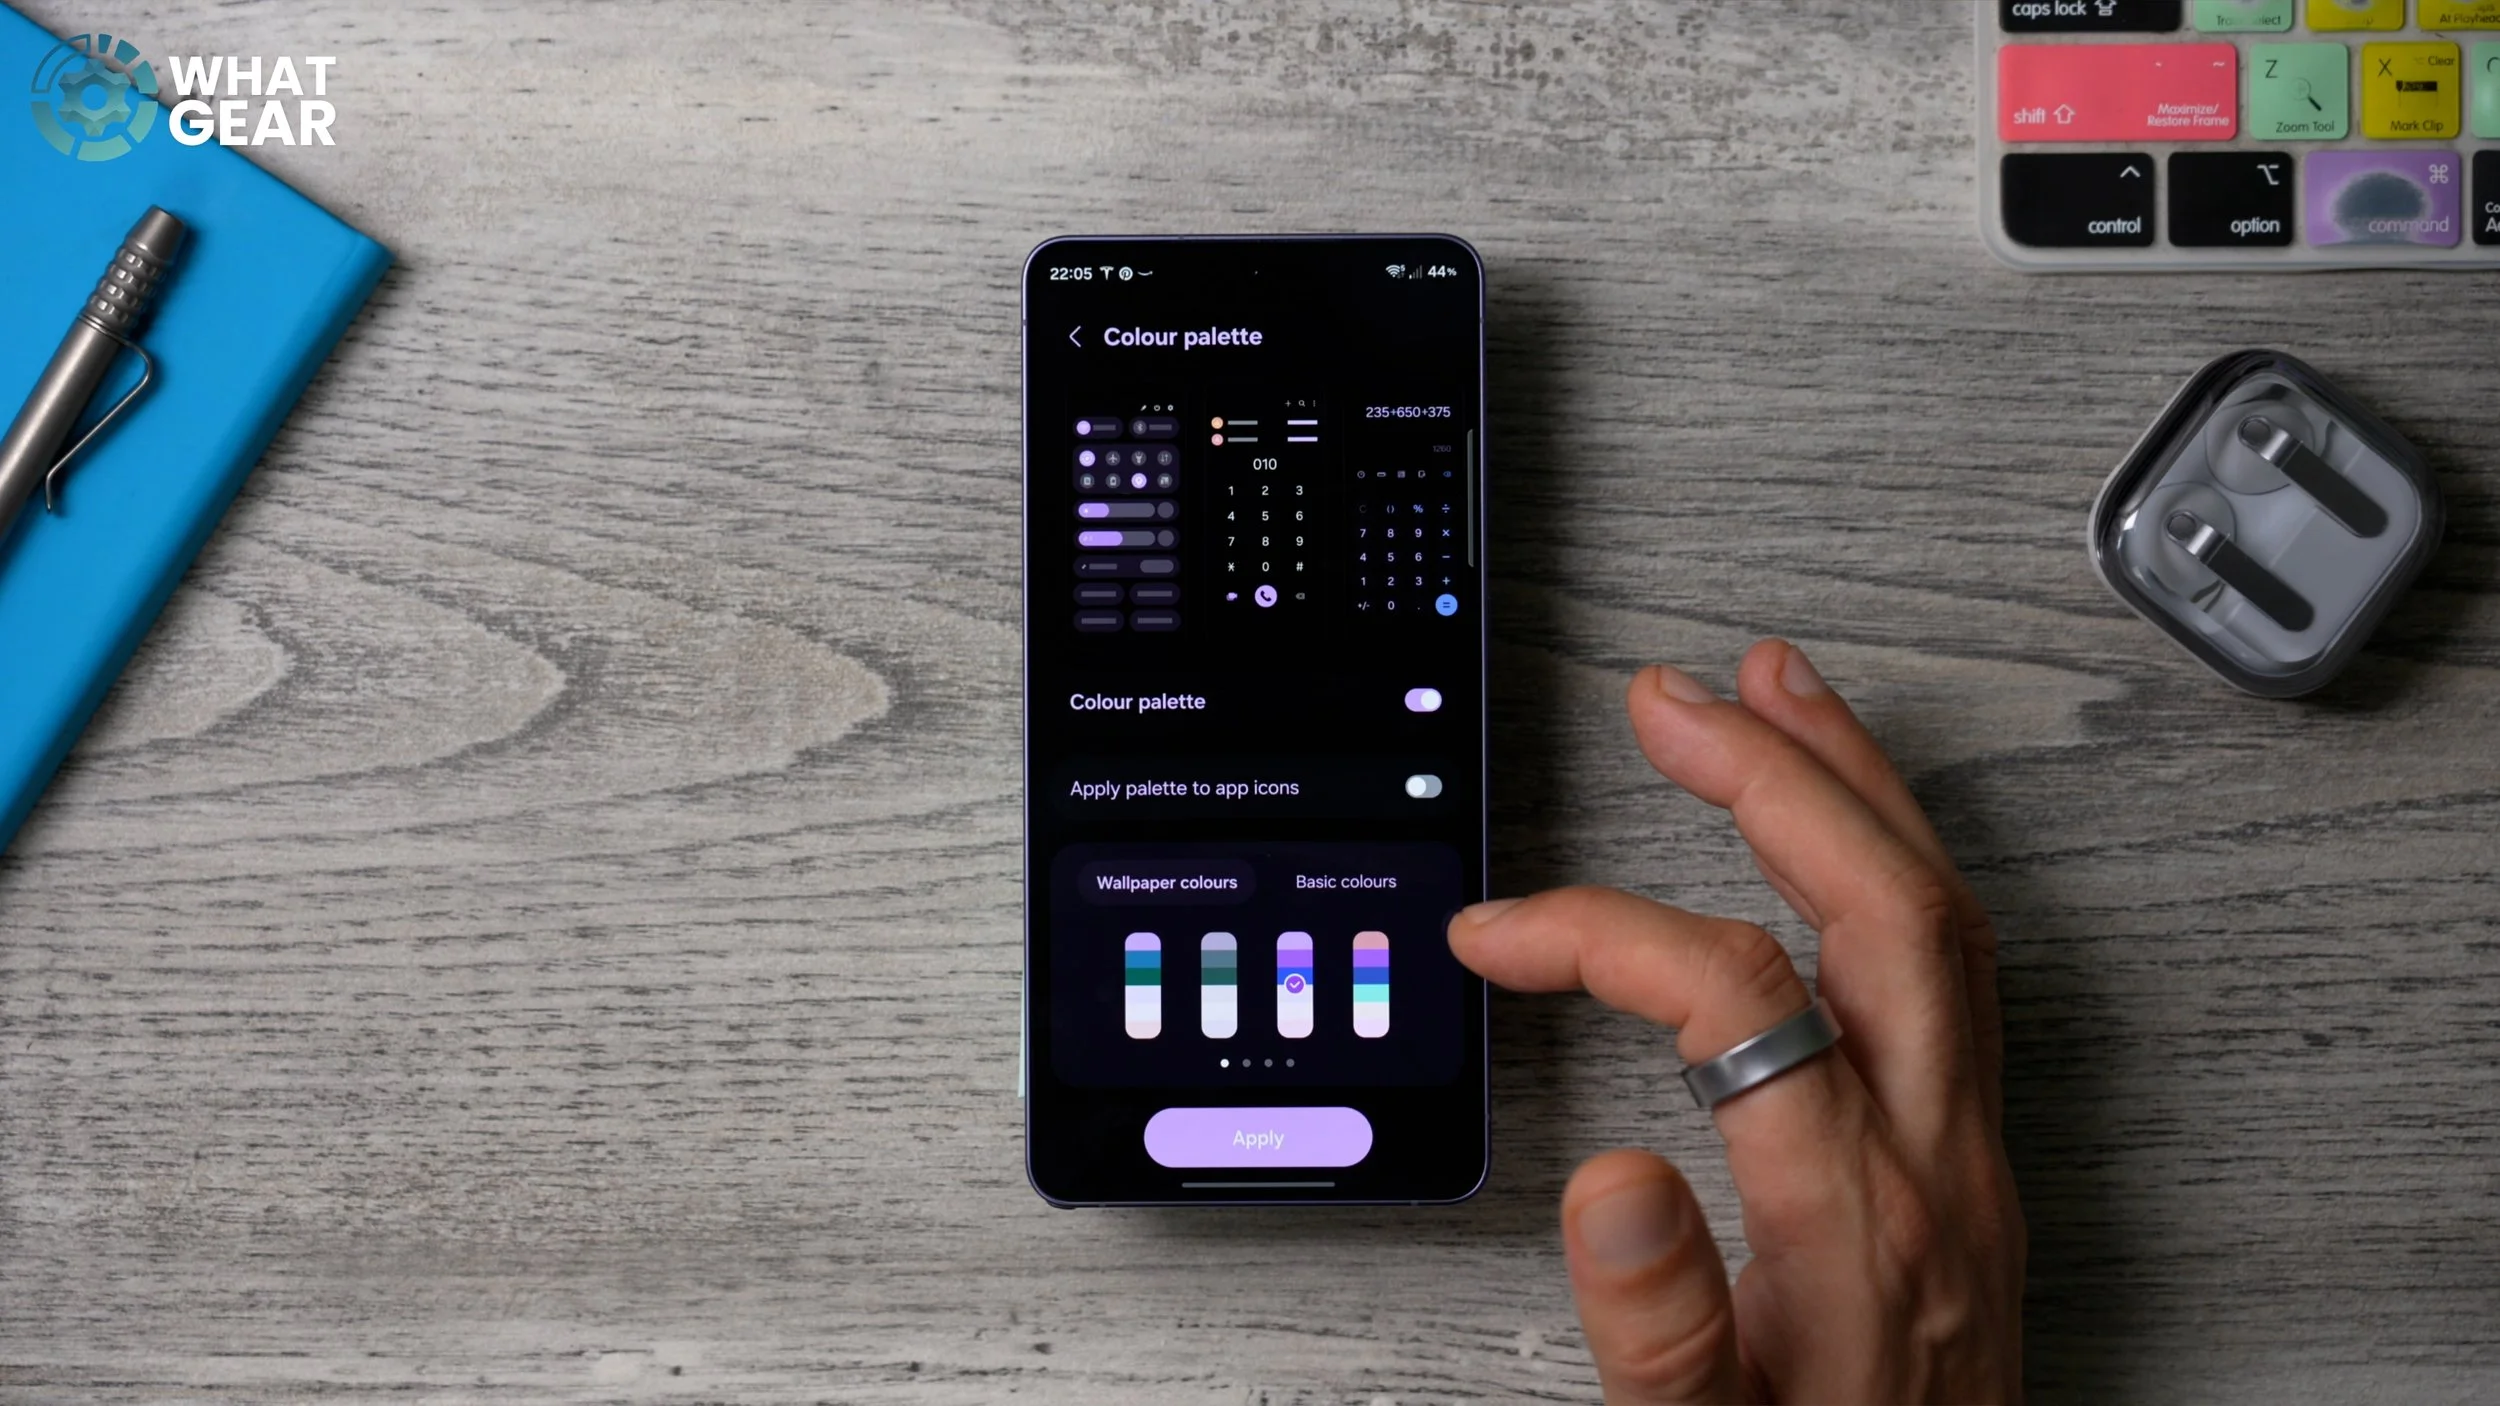
If none of them is what you like, you can swipe across, and there will be more options, so you can spend as long as you like finding the colour scheme that you like. But if you want to keep it basic, just go to Basic Colours. Here, you could choose a solid if you want, and if you go across, there are two-tone options as well. And once you are happy with the colour configuration, you can just hit Apply, and that will apply it to all of your system settings and menus. And just to show you how that's affected the UI, when I bring down the quick settings, it's all colourful now. Before, it was all kind of grey and black and white.
COLOUR ICONS
And there is one more step to this, which you may or may not want to do. And you may have to change your entire colour palette setup just to make this work. But let me show you what it is. If you go back into the Colour Palette right here, you can apply the palette to app icons as well. Now, when you do this, it changes all of your app icons to a colour from that palette. And up here, you'll see what colour they will be.
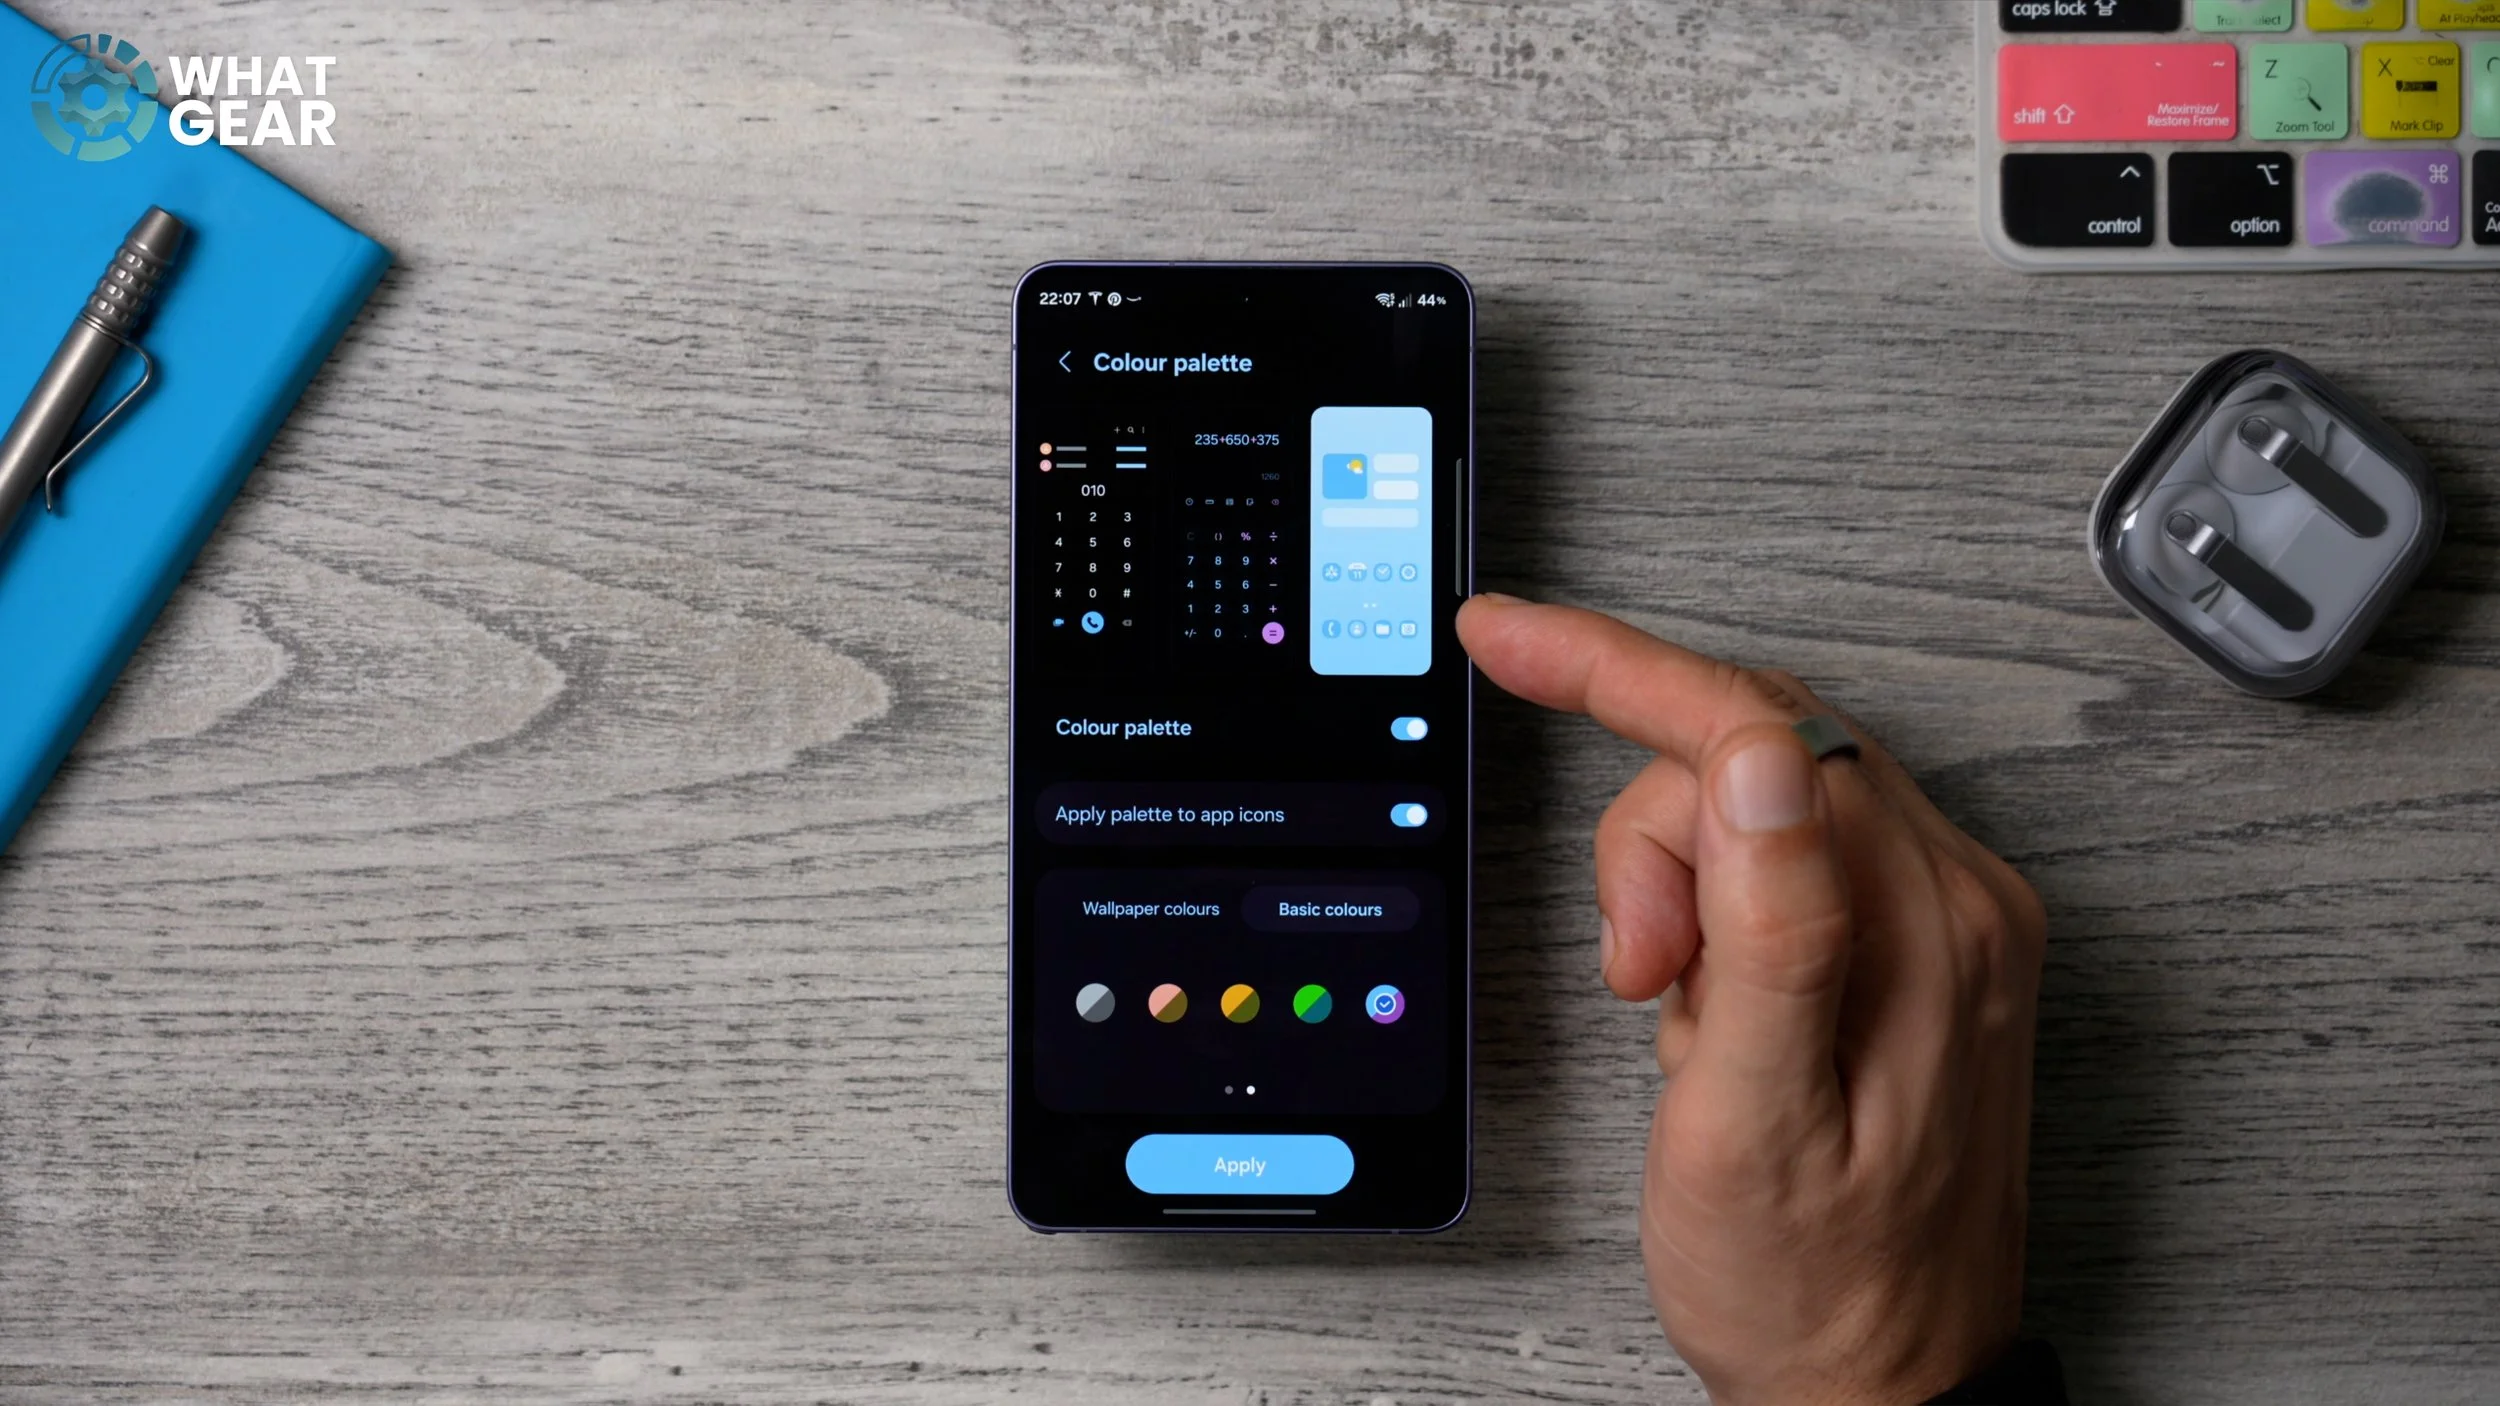
So right now they appear blue, which is not really ideal for the wallpaper that I've chosen. Now I've got dark blue app icons, and to be honest, I'm not a big fan of how this looks, so you do have to spend a bit of time to get it right. So I switched it to grey, and this looks way better now.
LOCKSCREEN TIME
Now let's set up a custom lock screen. So an easy way to get there is to hold your finger down on an empty part of the screen, go to Wallpaper and Style, and then tap on the lock screen. Now, to make this demo a bit more interesting, I'm going to add an image to my lock screen. So I'm going to change this to my Yoda wallpaper and hit Done. And now that I’ve got that set up, I can customise the clock to work with this image. So when you tap the clock, you can change the different styles, the different fonts, and even the size of the numbers. There will be different options depending on the fonts that you choose. So, for example, this one here, you'll notice there are a bunch more options. And some of the other ones I showed you already. And you can even have full-on calendars here on your lock screen if you want to.
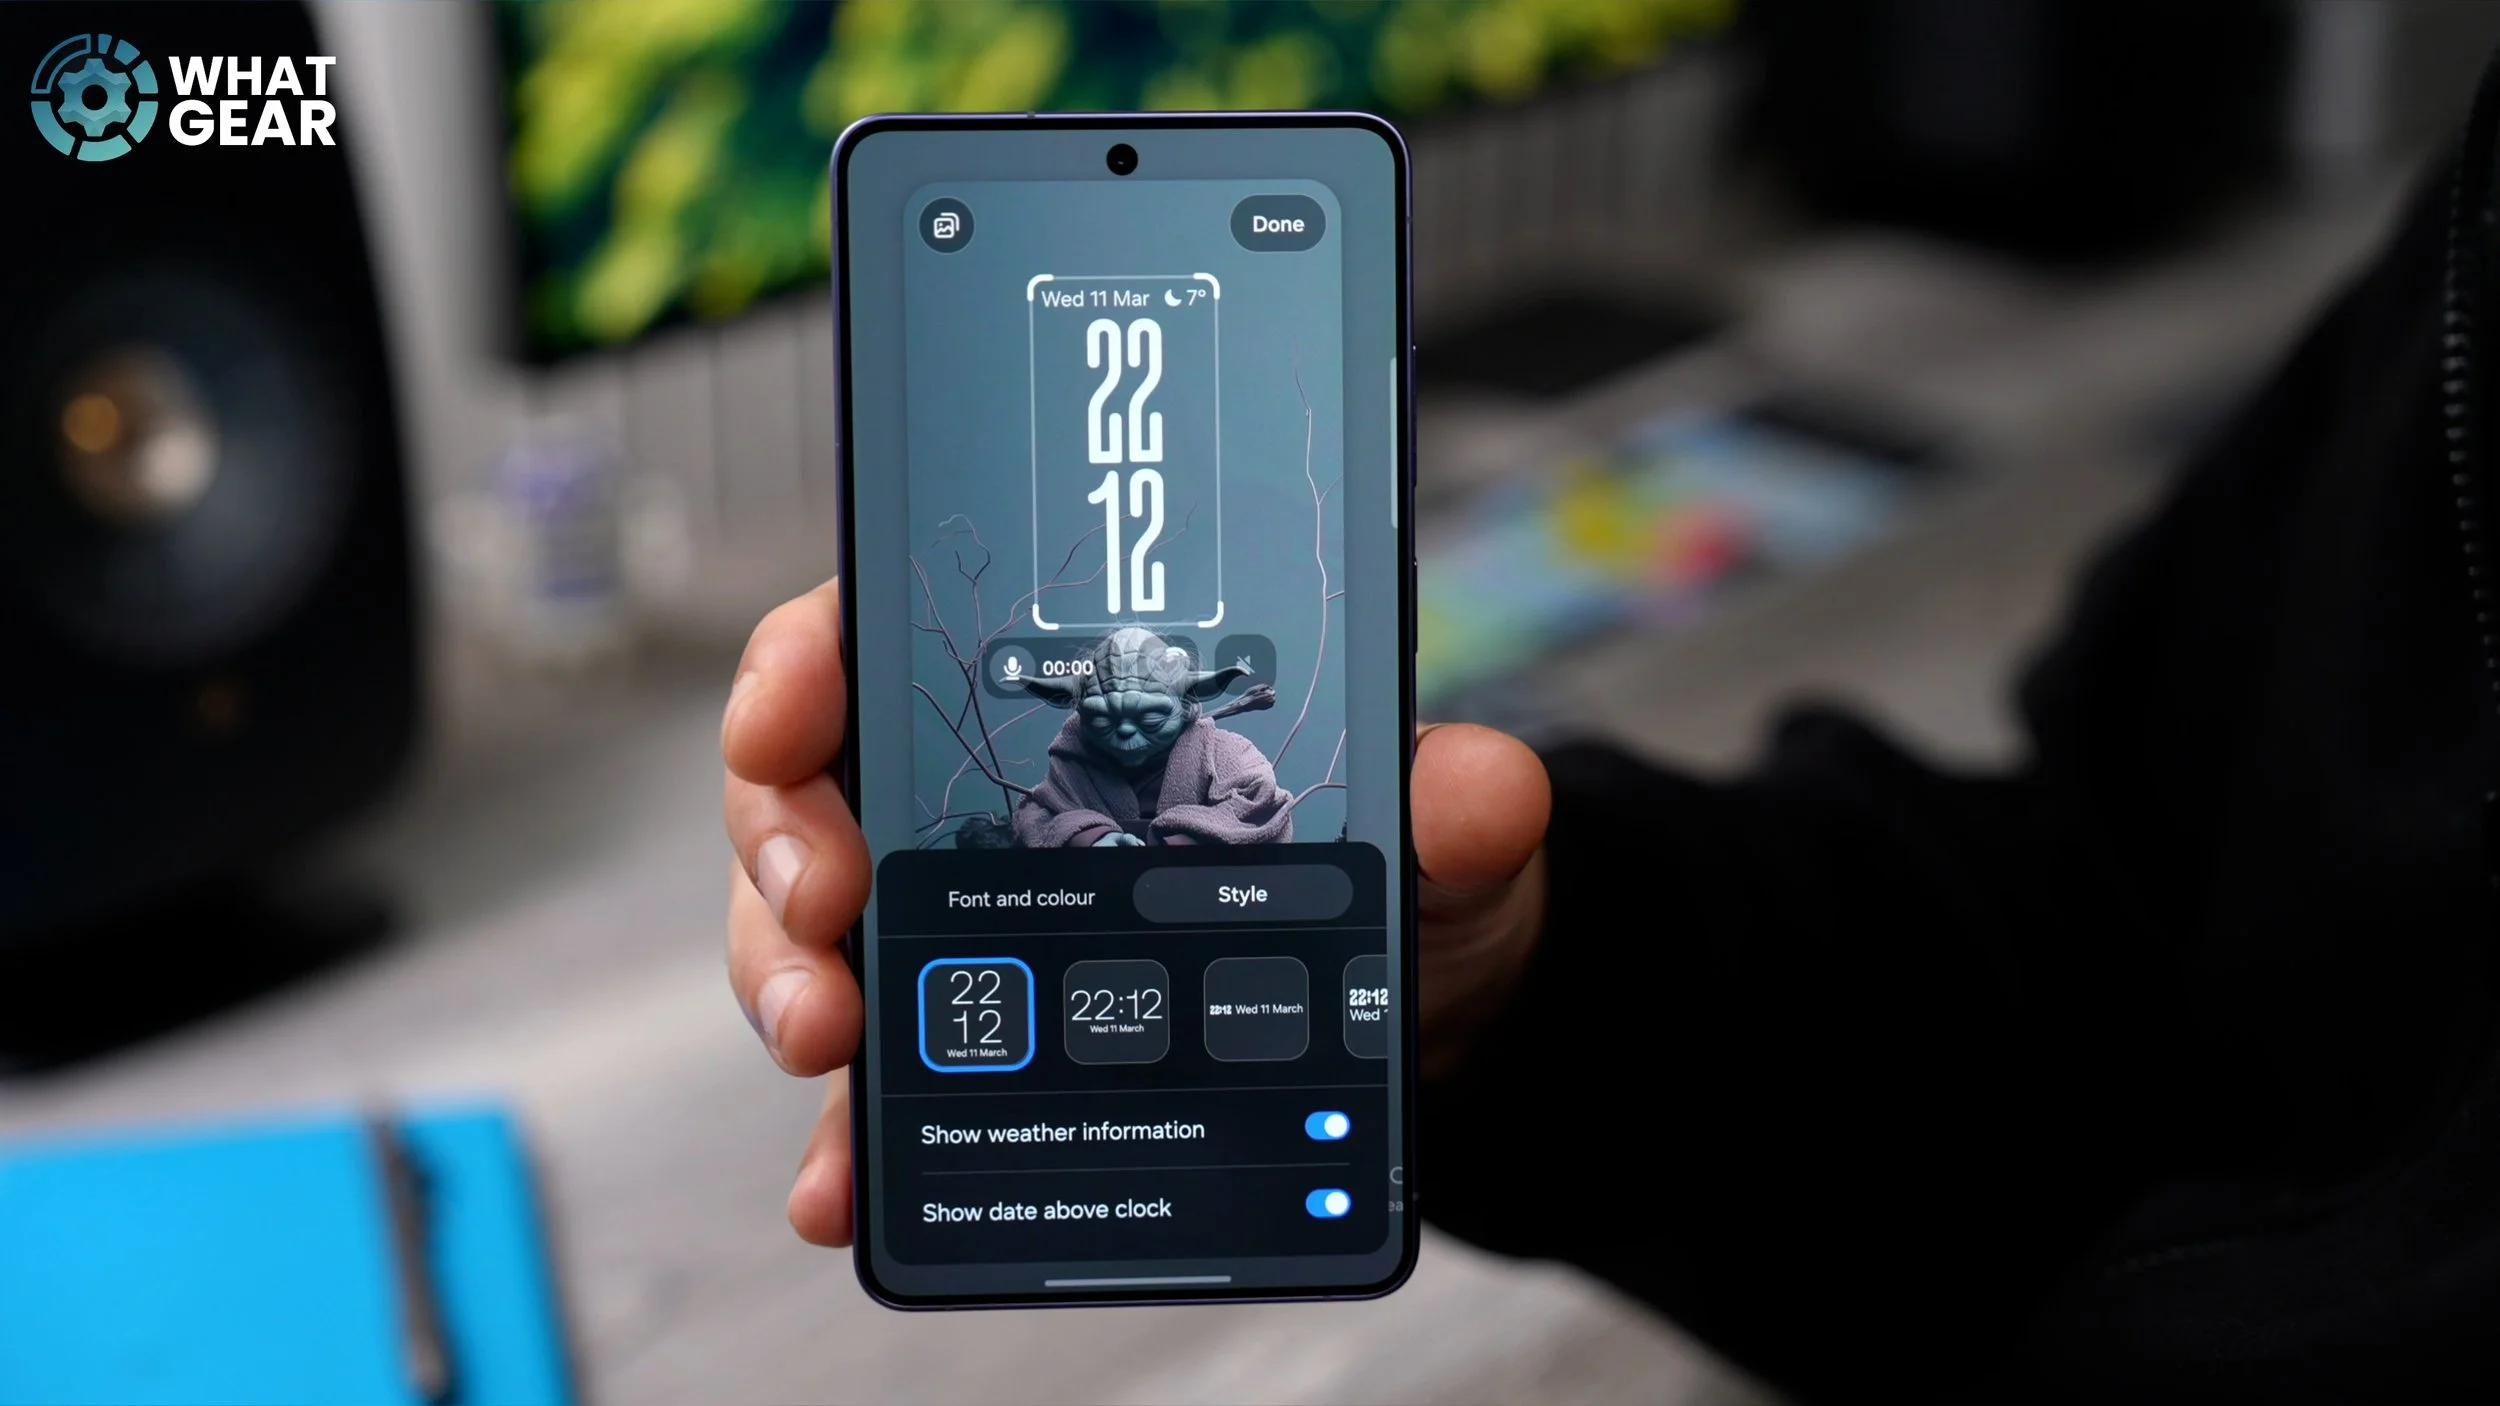
And when you are choosing the style of your clock, do have a look at this as well. You've got the option to enable the weather information, which will sit either above or next to the clock that you've chosen. Once you've done that, you can adjust the size of the clock as well. And the cool thing about this particular clock is that it actually adjusts to the image that you're using. So you can see how it kind of changes shape based on where it is in the image. If I move it across to the side, for example, the numbers adjust around his head. So definitely play around with your lock screen clock and the overall style.
LOCKSCREEN CUSTOMIZATION
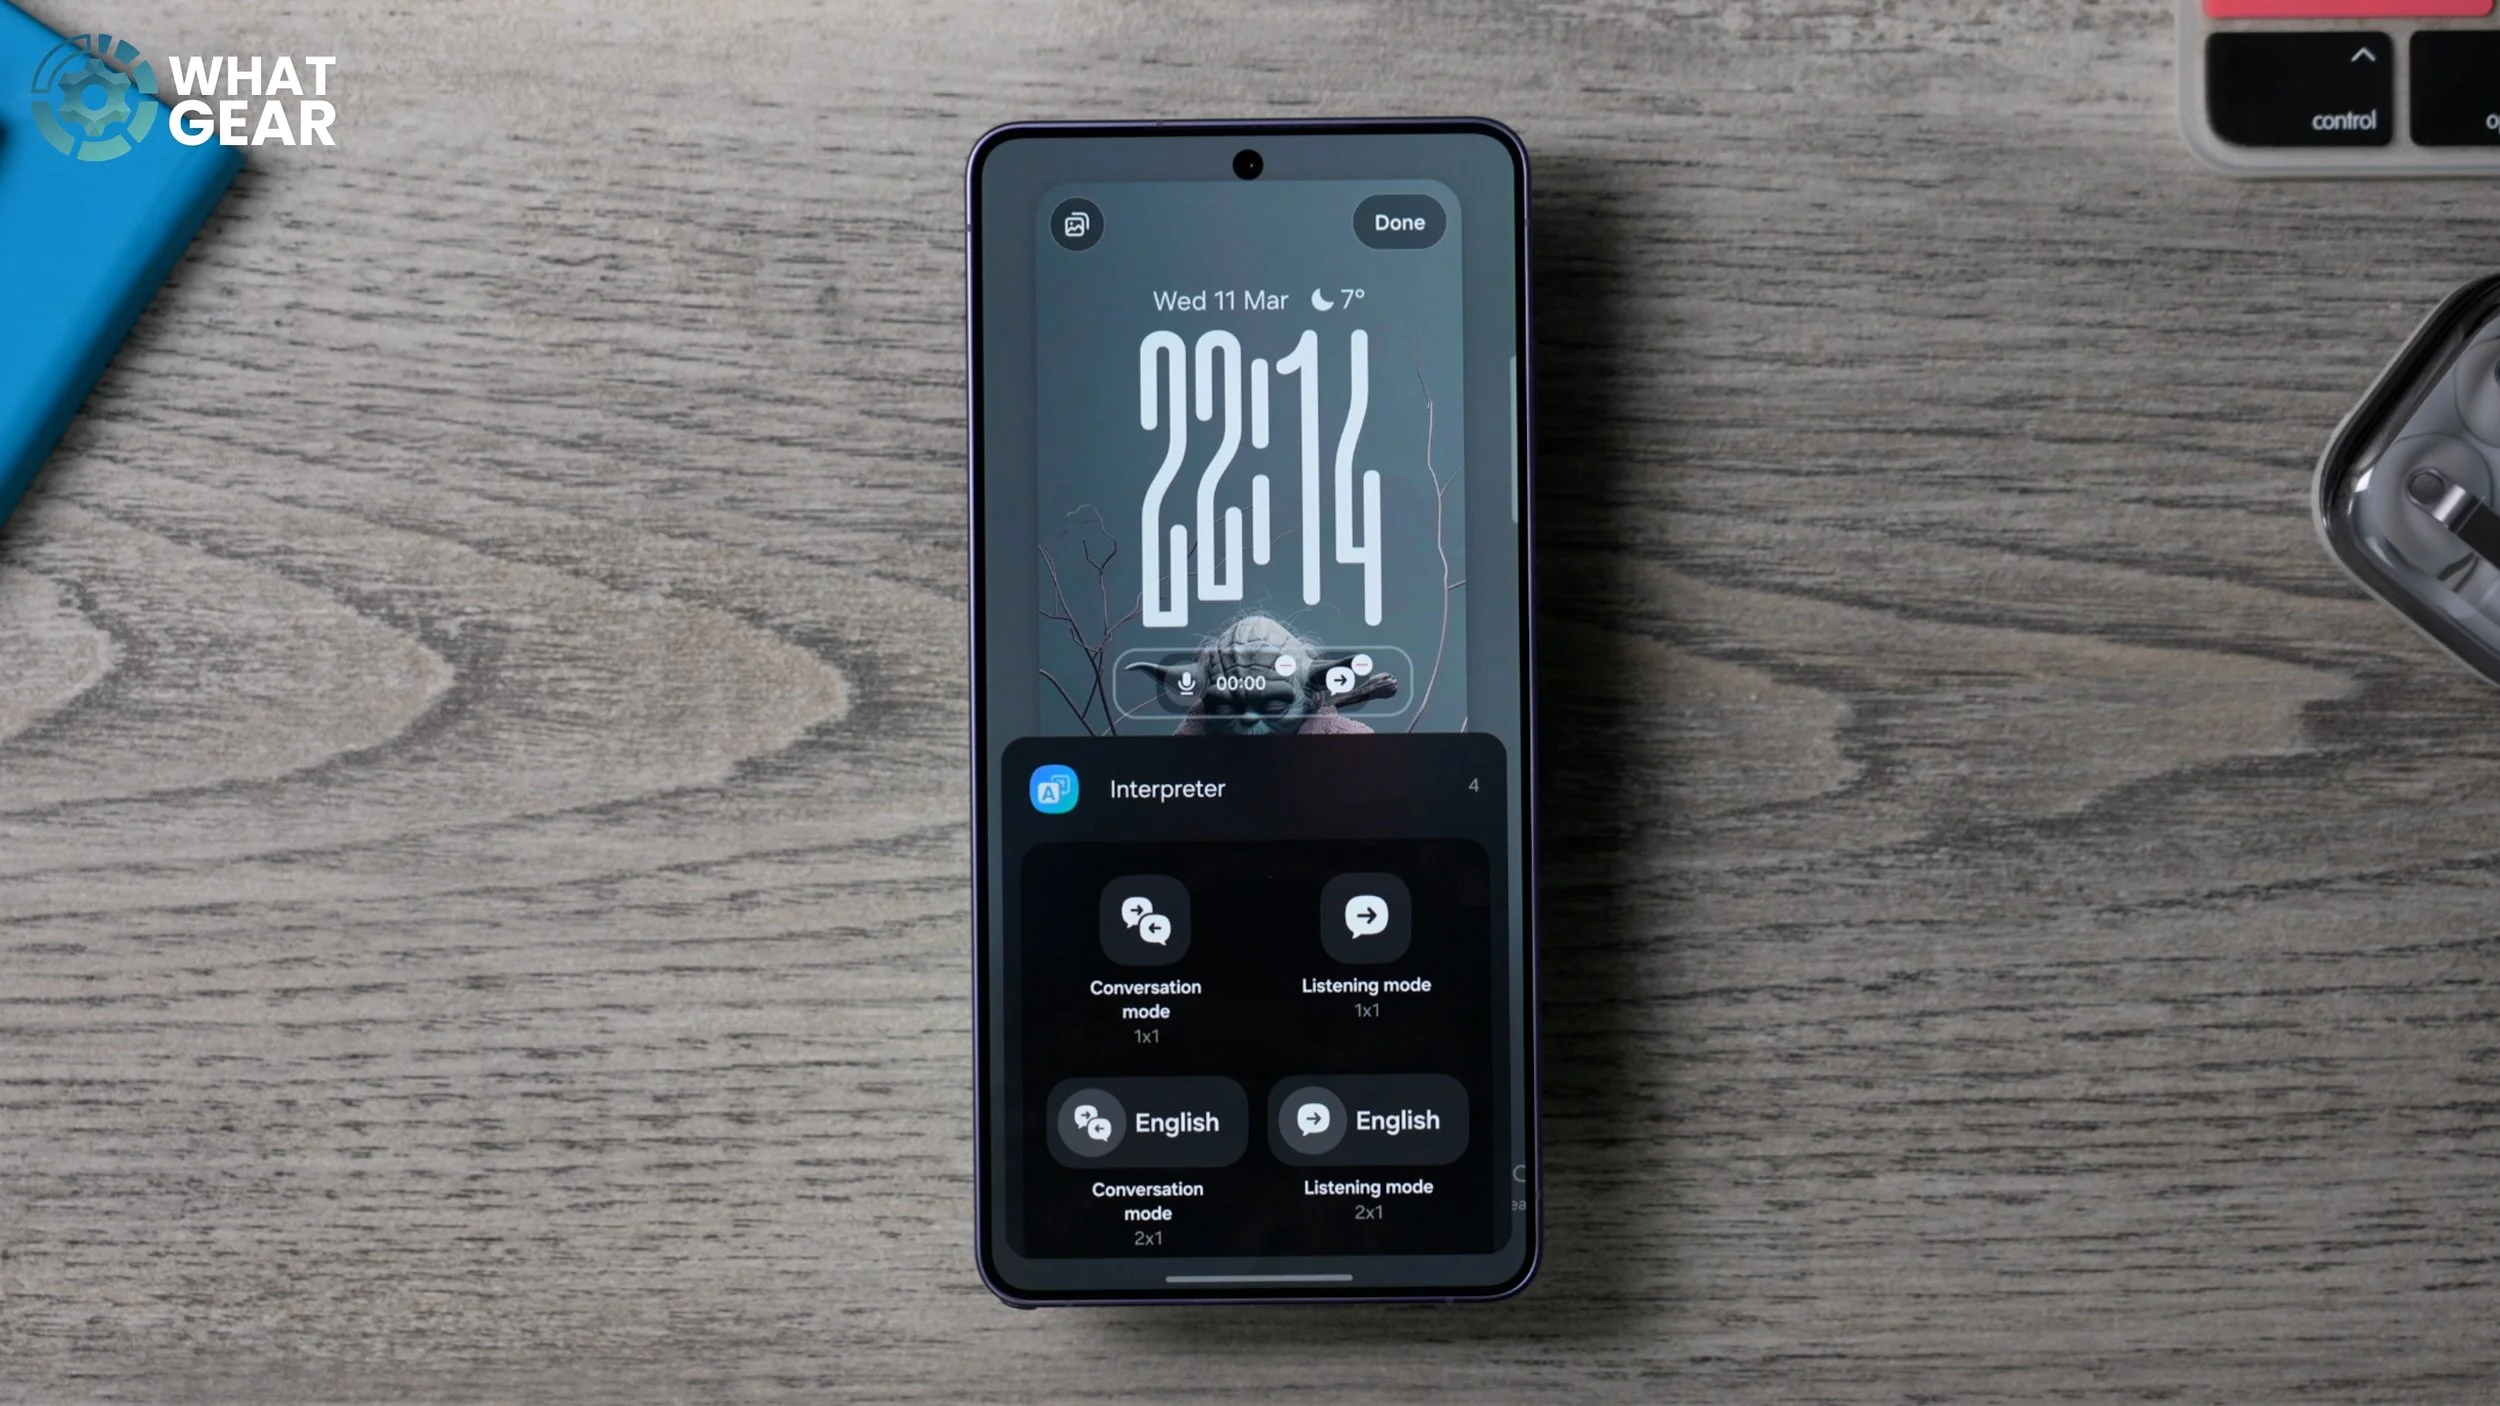
Here's another tip for your lock screen. Again, if we jump in using the shortcut here, tap on the lock screen here, and just underneath the clock that you've just set up is a space for up to four widgets. I'm just going to delete the ones that I have. You can choose from any of the widgets available here. One of the ones that I think is probably most useful is the Voice Recorder, because you can actually activate this from the lock screen without opening your phone. So that's one that you might want to add. Another one that you can activate as well is the Interpreter listening mode. If you are in another country and you think some people might be talking about you in their language, well, you can activate the listening mode and find out what they're saying. So make use of the space, but be aware that you only get four spaces. You could just use individual one-by-one icons if you prefer, but I do like using this one so I can see how long it's been recording if I need to record.
And before we leave this page, there are actually three more things I want to show you, and one of them is very useful. So the two icons down here, the phone and the camera — those are the default shortcuts on your lock screen. If you find you're never going to use those, you can customise those two just by tapping on them. You'll see the options that you have available, and you can remap them to do whatever you want them to do. And the last thing is this: across the bottom of the screen, if you go all the way to the end, you will see the weather option. If you tap on this, it adds a dynamic weather effect based on your location on top of your lock screen, so you can figure out what the weather is like outside without even looking out the window. And there's really only one downside to adding this effect, and it's this: you get the little AI-generated thing at the bottom because it's adding this weather effect over the top and altering the image. So yeah, because it's modifying the image, it has to show that badge. I think it's a legal thing.
GRID SIZE
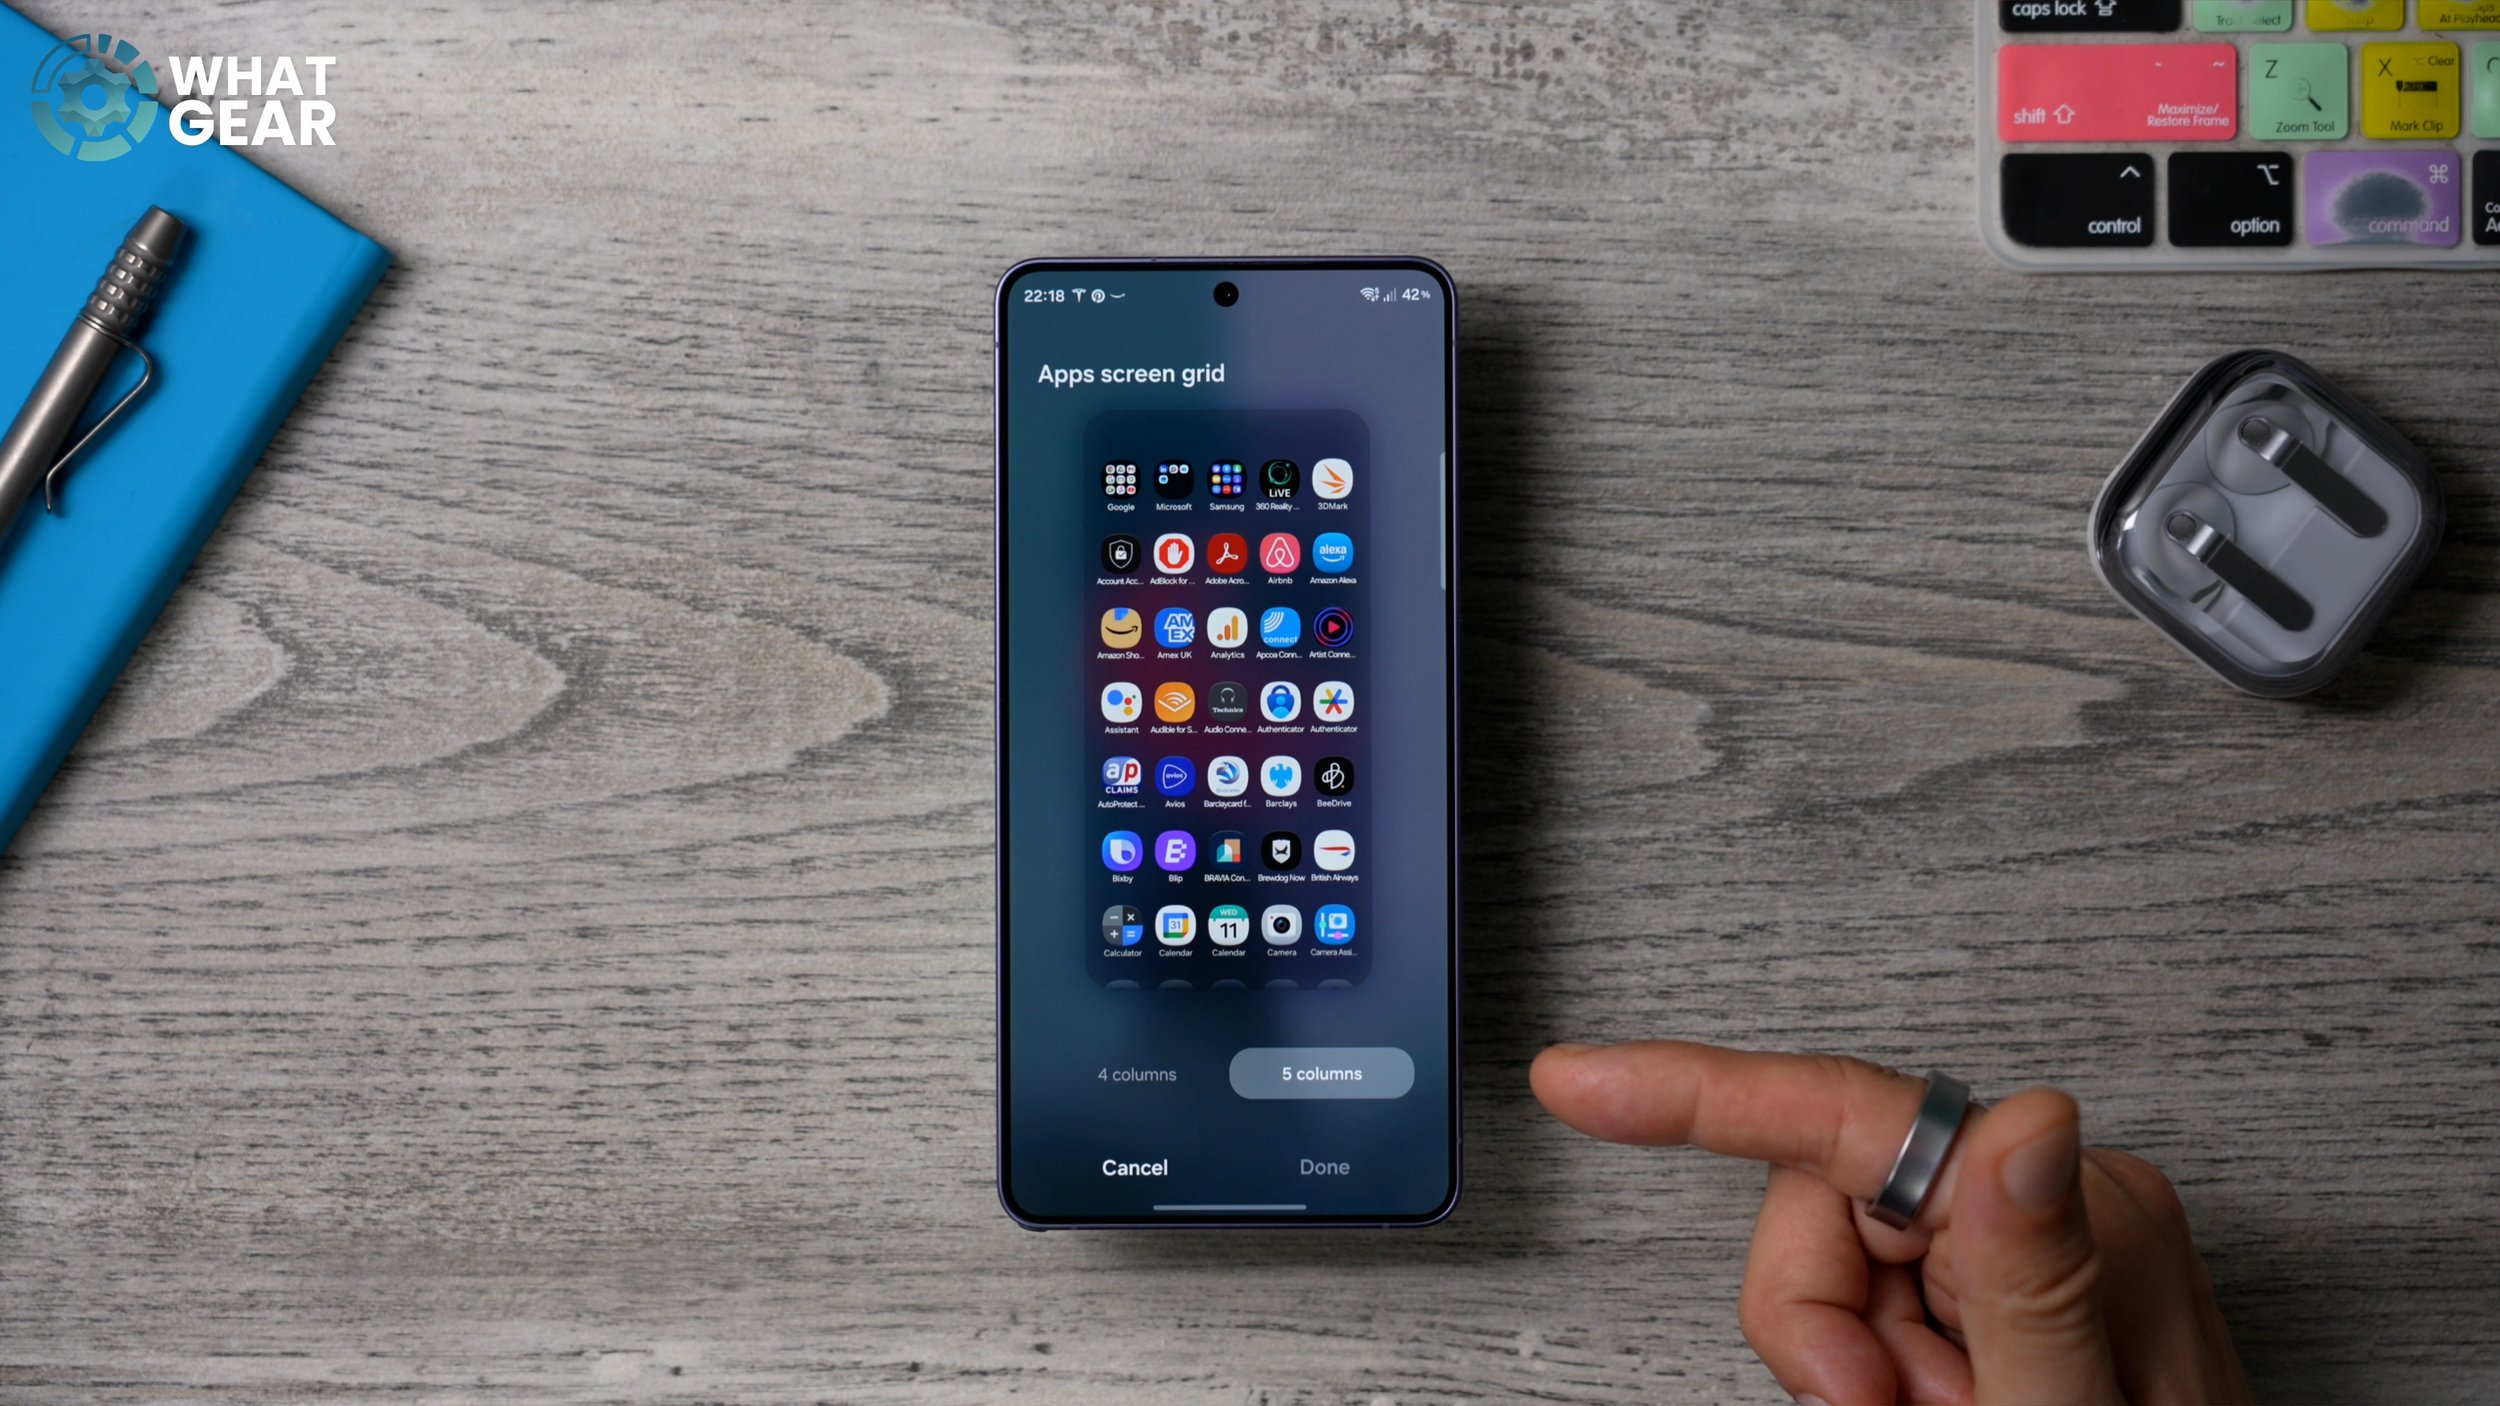
So if you've just got a brand new Galaxy S26, your home screen layout is going to look like this: four icons across, possibly five app icons at the bottom. And if you did get one of the bigger phones like this one, the Galaxy S26 Ultra, I'd recommend you make the most of the screen real estate, and you'll see why when we get onto the next tip. But first, let me show you how to do that. So if you hold your finger down on the home screen and go to Settings, this brings you to your home screen settings. And here is where you will find the option to adjust the grid size for your home screen. I do recommend you set it to 5x6. This allows you to have five columns and six rows. And also, if you go back in, you might want to adjust the app screen to five columns as well, and your folder size to 4x4.
Since you do have so much screen to play with — if you do have the smaller S26, you might want to skip this one anyway. Now you've done that, you've got a lot more screen space to play with, and you can also increase the size of the app icons if you want to. So now you can see how much space that's freed up. And if you do want to declutter your home screen even more, what you can do is go back into the home screen settings and switch off Show app labels on the home screen. This is something that I do all the time now, because I'm very familiar with what the app icons look like. I don't need the text underneath to tell me. So if you want a more minimal look on your home screens, then yeah, you might want to do that too.
MAXIMUM SPACE
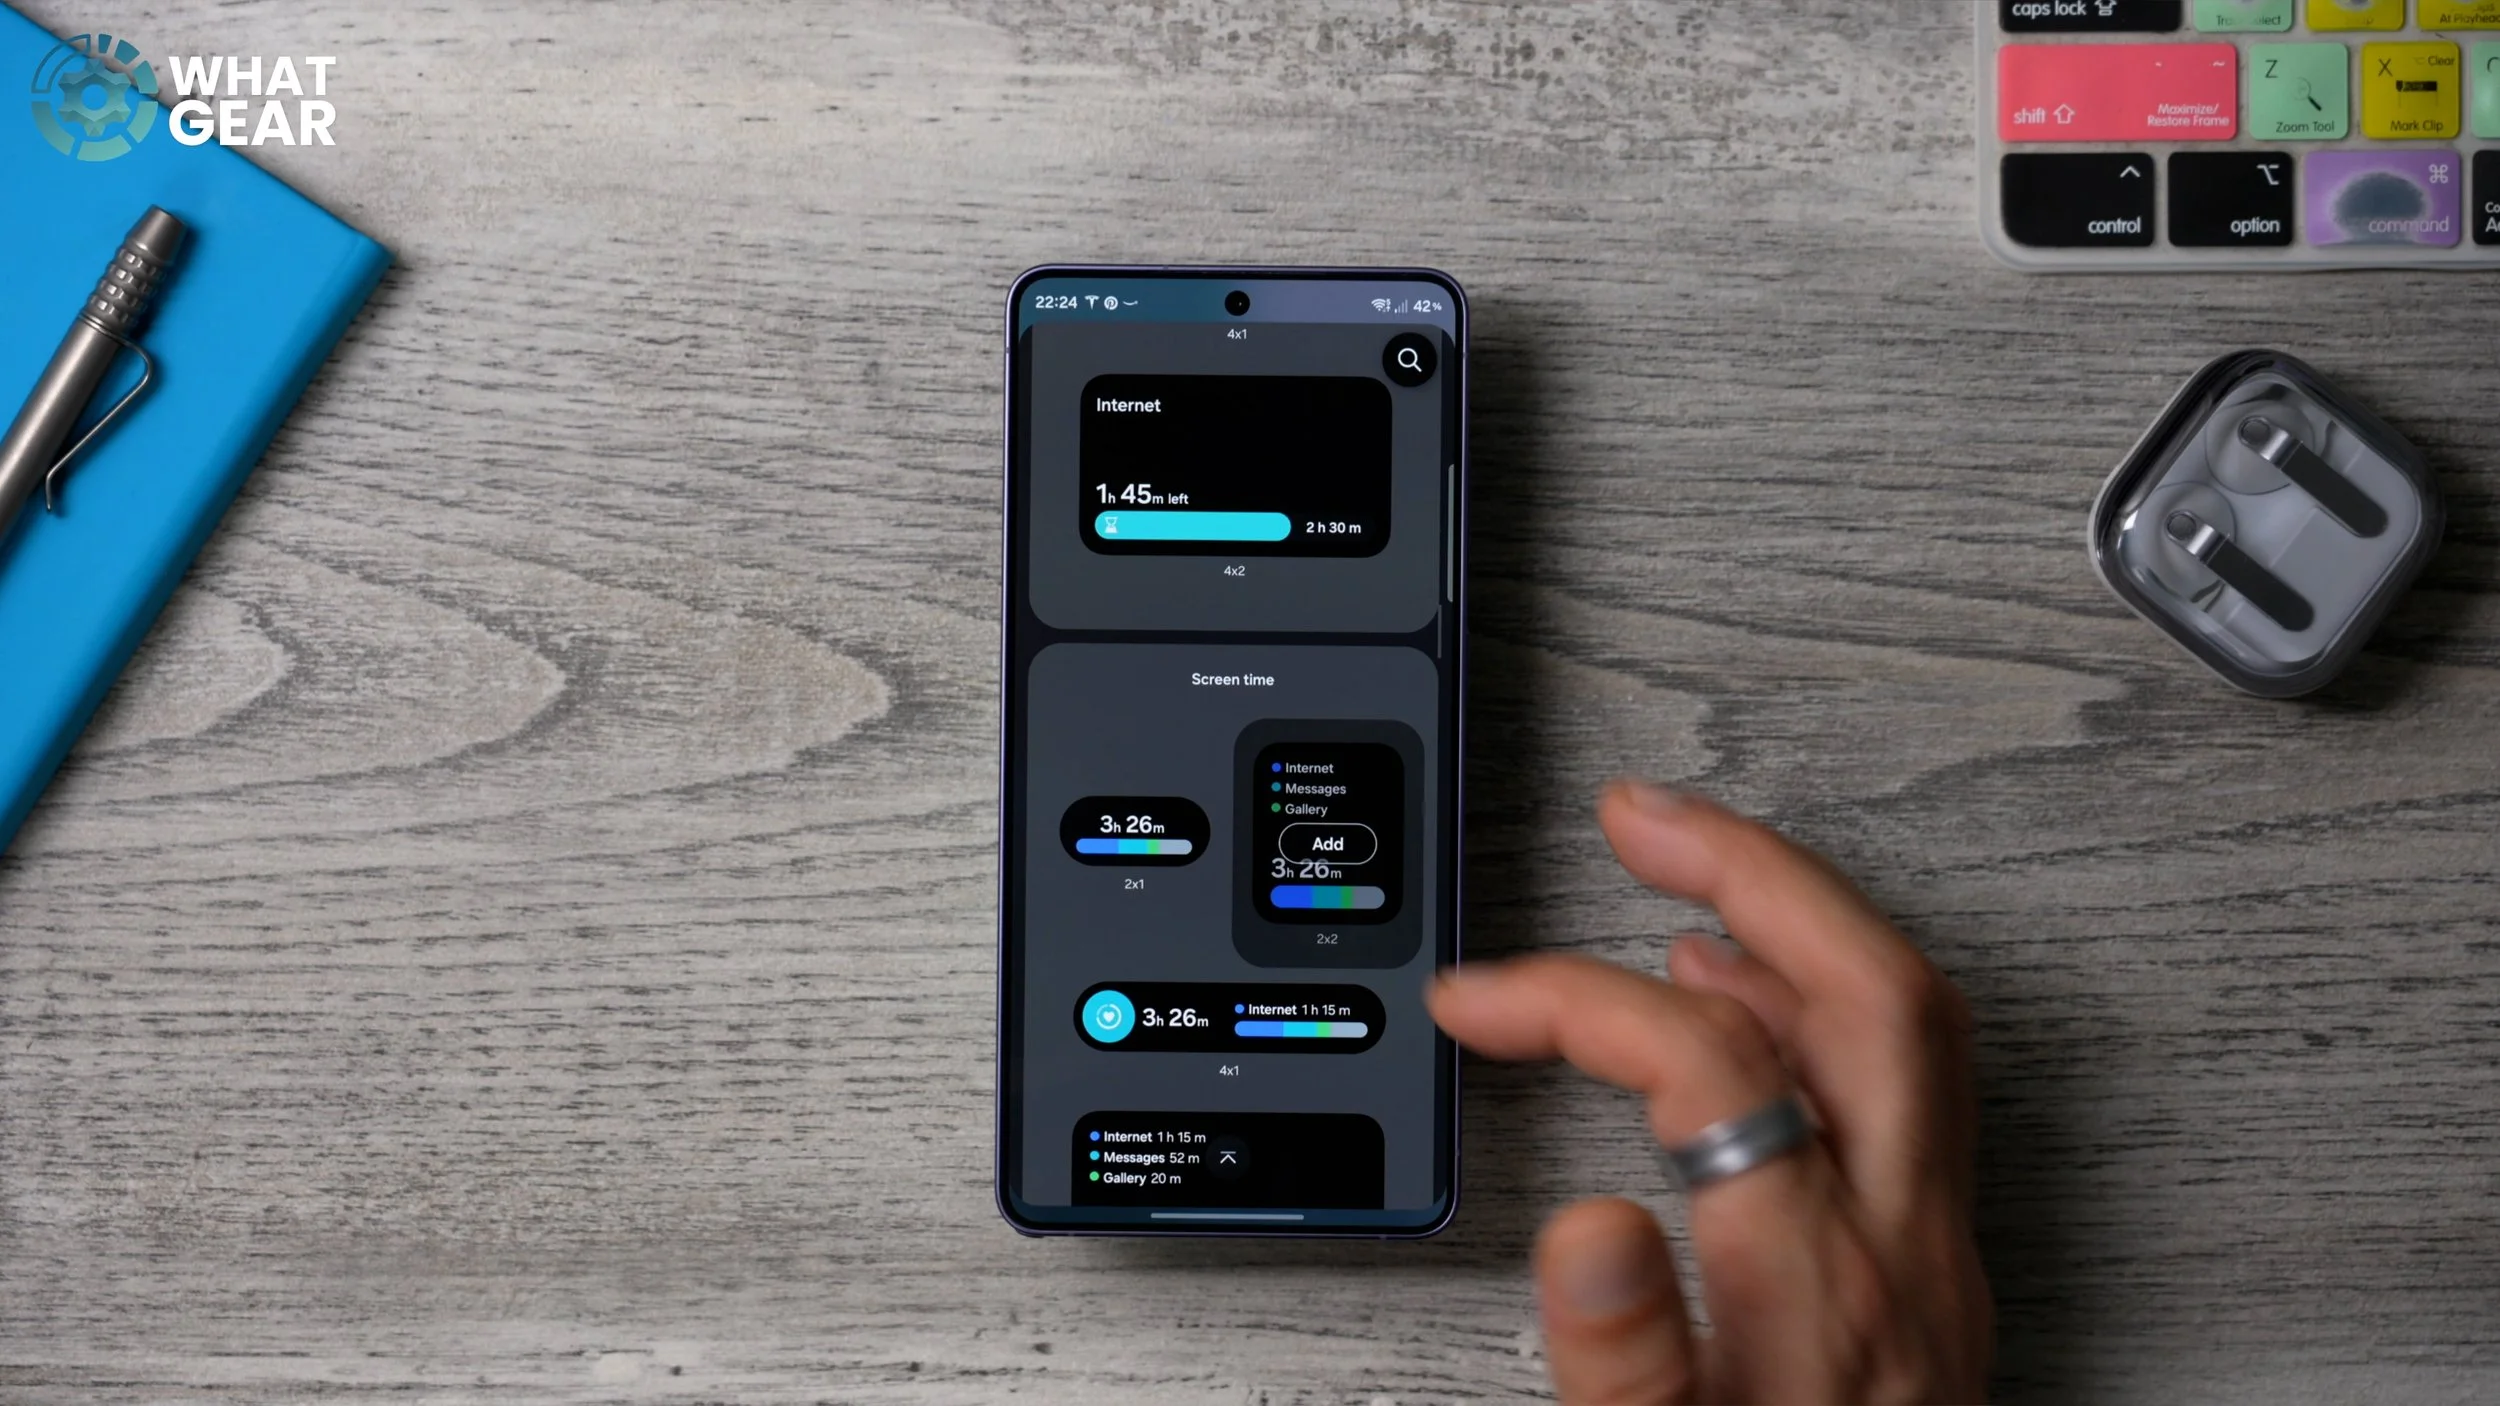
Now, let me show you something that you should definitely be using to maximise all of the spaces on all of your home screens. This is really quite fundamental, but it is also extremely useful. That's why I'm showing it to you. So when you've got a lot of space to play with, you can start to populate your home screens with widgets. So all of these bigger icons here, these are all widgets. And here's the basics of how to add them and how to add even more behind them so that you can maximise the amount of shortcuts that you can have in one space. So here's the first step. If you hold your finger down on an empty screen, at the bottom of the screen, you will see Widgets. Tap on that. Up top, you'll see some of the suggested ones. And when you scroll down, you'll see all of the other options that you have. One of the ones that I really like to have is the Digital Wellbeing and Screen Time widget. So this just lets me know how much I'm using the phone and what I'm actually using it for. So this is just kind of a visual cue.
But you can add functional widgets as well, and you can add them to the same spot. To do that, just hold your finger down on the existing widget and then go to Create stack right here. So if you want a functional widget that can actually help improve the speed of your device when it starts to slow down, the Device Care one is a good example of that. So if we add this to the stack, we've now created a stack for the first time. And this widget right here allows you to clear RAM usage very, very quickly. And now that we've created this stack, you can add more to it even more easily. So just hold your finger down on it and go to Edit stack. And this brings up a slightly different user interface where you can hit the plus at the end and add more stuff to it. For example, maybe you have lots of Samsung gear, and you want to add the battery widget. So definitely play around with your home screen layout. Create widget stacks to make the most of the space on each one of your home screens.
WIDGET TRICK
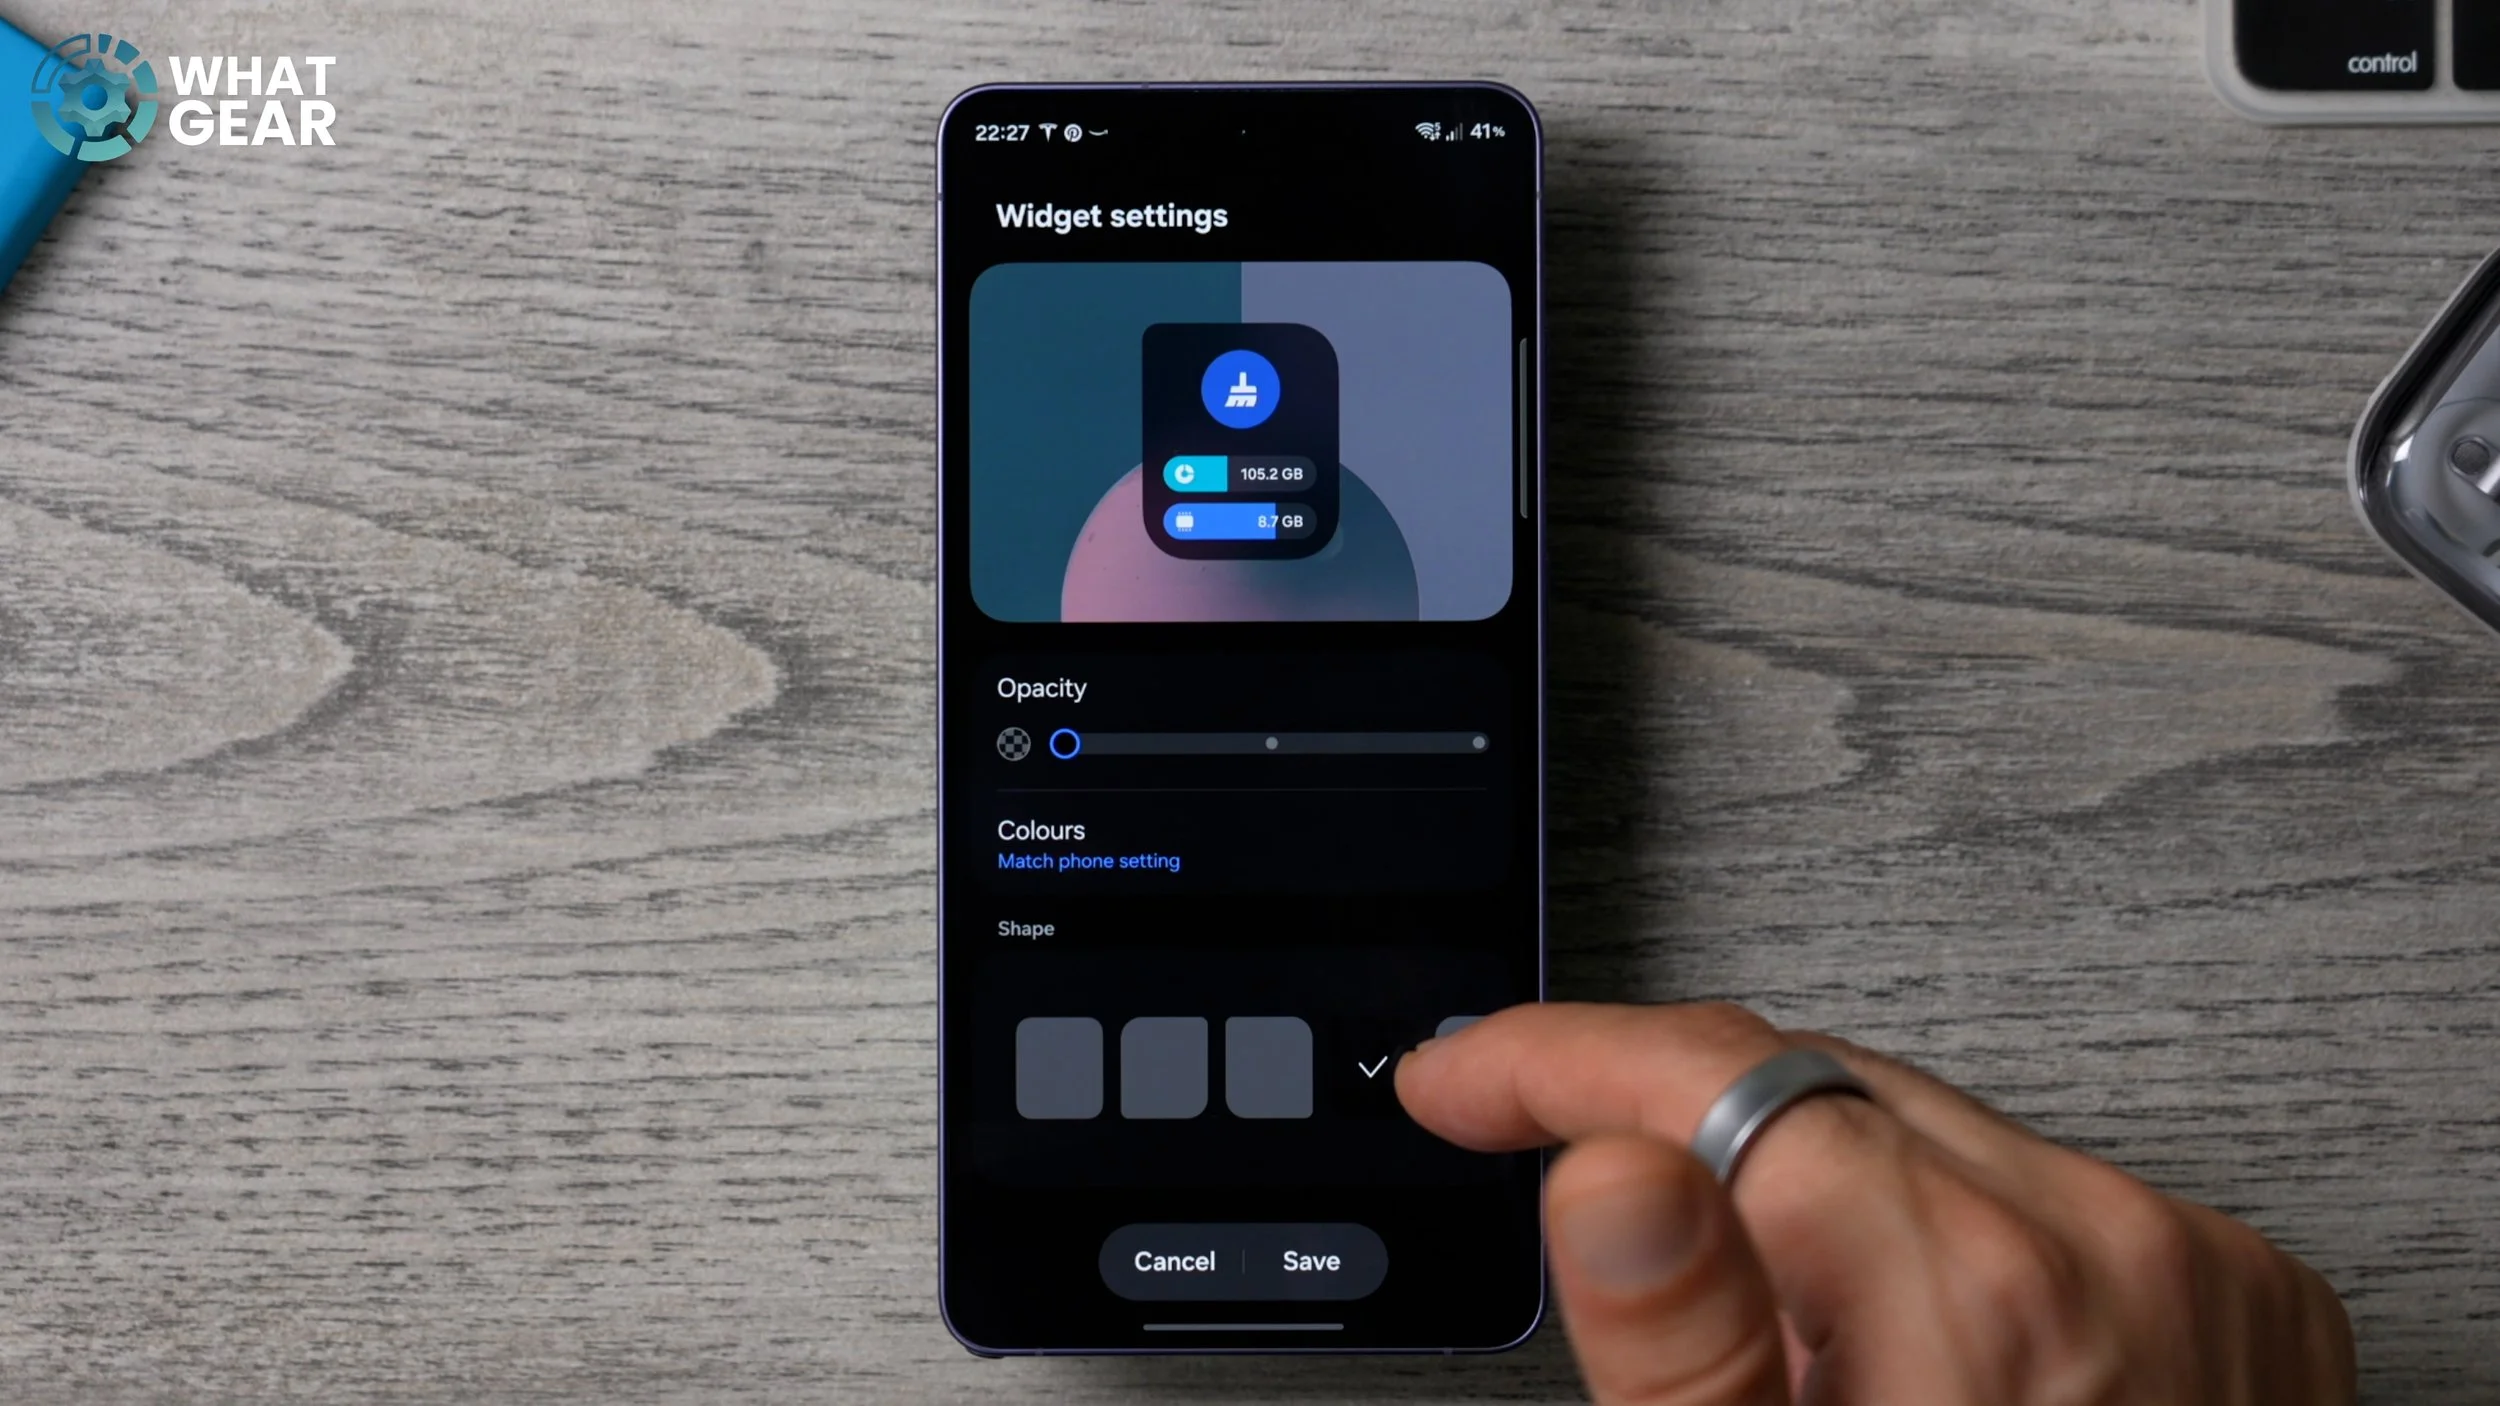
Now here's a little customisation tip for widgets. See this one that I've added up here? The Device Care one is a bit ugly, and I feel like it's ruining the entire look of the home screen, but you can actually do something about that. So if you hold your finger down on that widget and then go to Settings, you can customise the opacity of the background, so we can reduce it right down. Some widgets will let you remove the background entirely. And when you scroll down, you'll see you can customise the shape of the background too, to make it less ugly.
Now there is one widget that I do want to show you guys, because it's very cool and I use it on my work and business page. So once again, I'm just going to go to the widgets, and then in the list, I can go all the way to the bottom to Samsung's own weather app. Now, if you scroll down, there's a pretty big one that looks like this. If you add that, it's all bright and colourful, and it will match whatever time of day it is. But if you want to keep it more minimal, hold your finger down on it, go to Settings, and then right here you can switch off the background.
CUSTOM FOLDER
Here is an organisational tip that can help you get to where you want to be on your phone more quickly. And this is going to be extremely useful for you if you like to keep things in folders. So this is kind of my practice screen, just to show you guys. So your home screen will probably look like this on day one. And you'll probably have a Google folder that looks just like this. Here's how you can customise it to make it more useful. If you hold your finger down on the folder, you will see the option to Enlarge folder. So if you go to that, it does exactly what you think it does. It enlarges it, but it also makes all of the apps inside the folder that you can see openable without having to open the folder first.
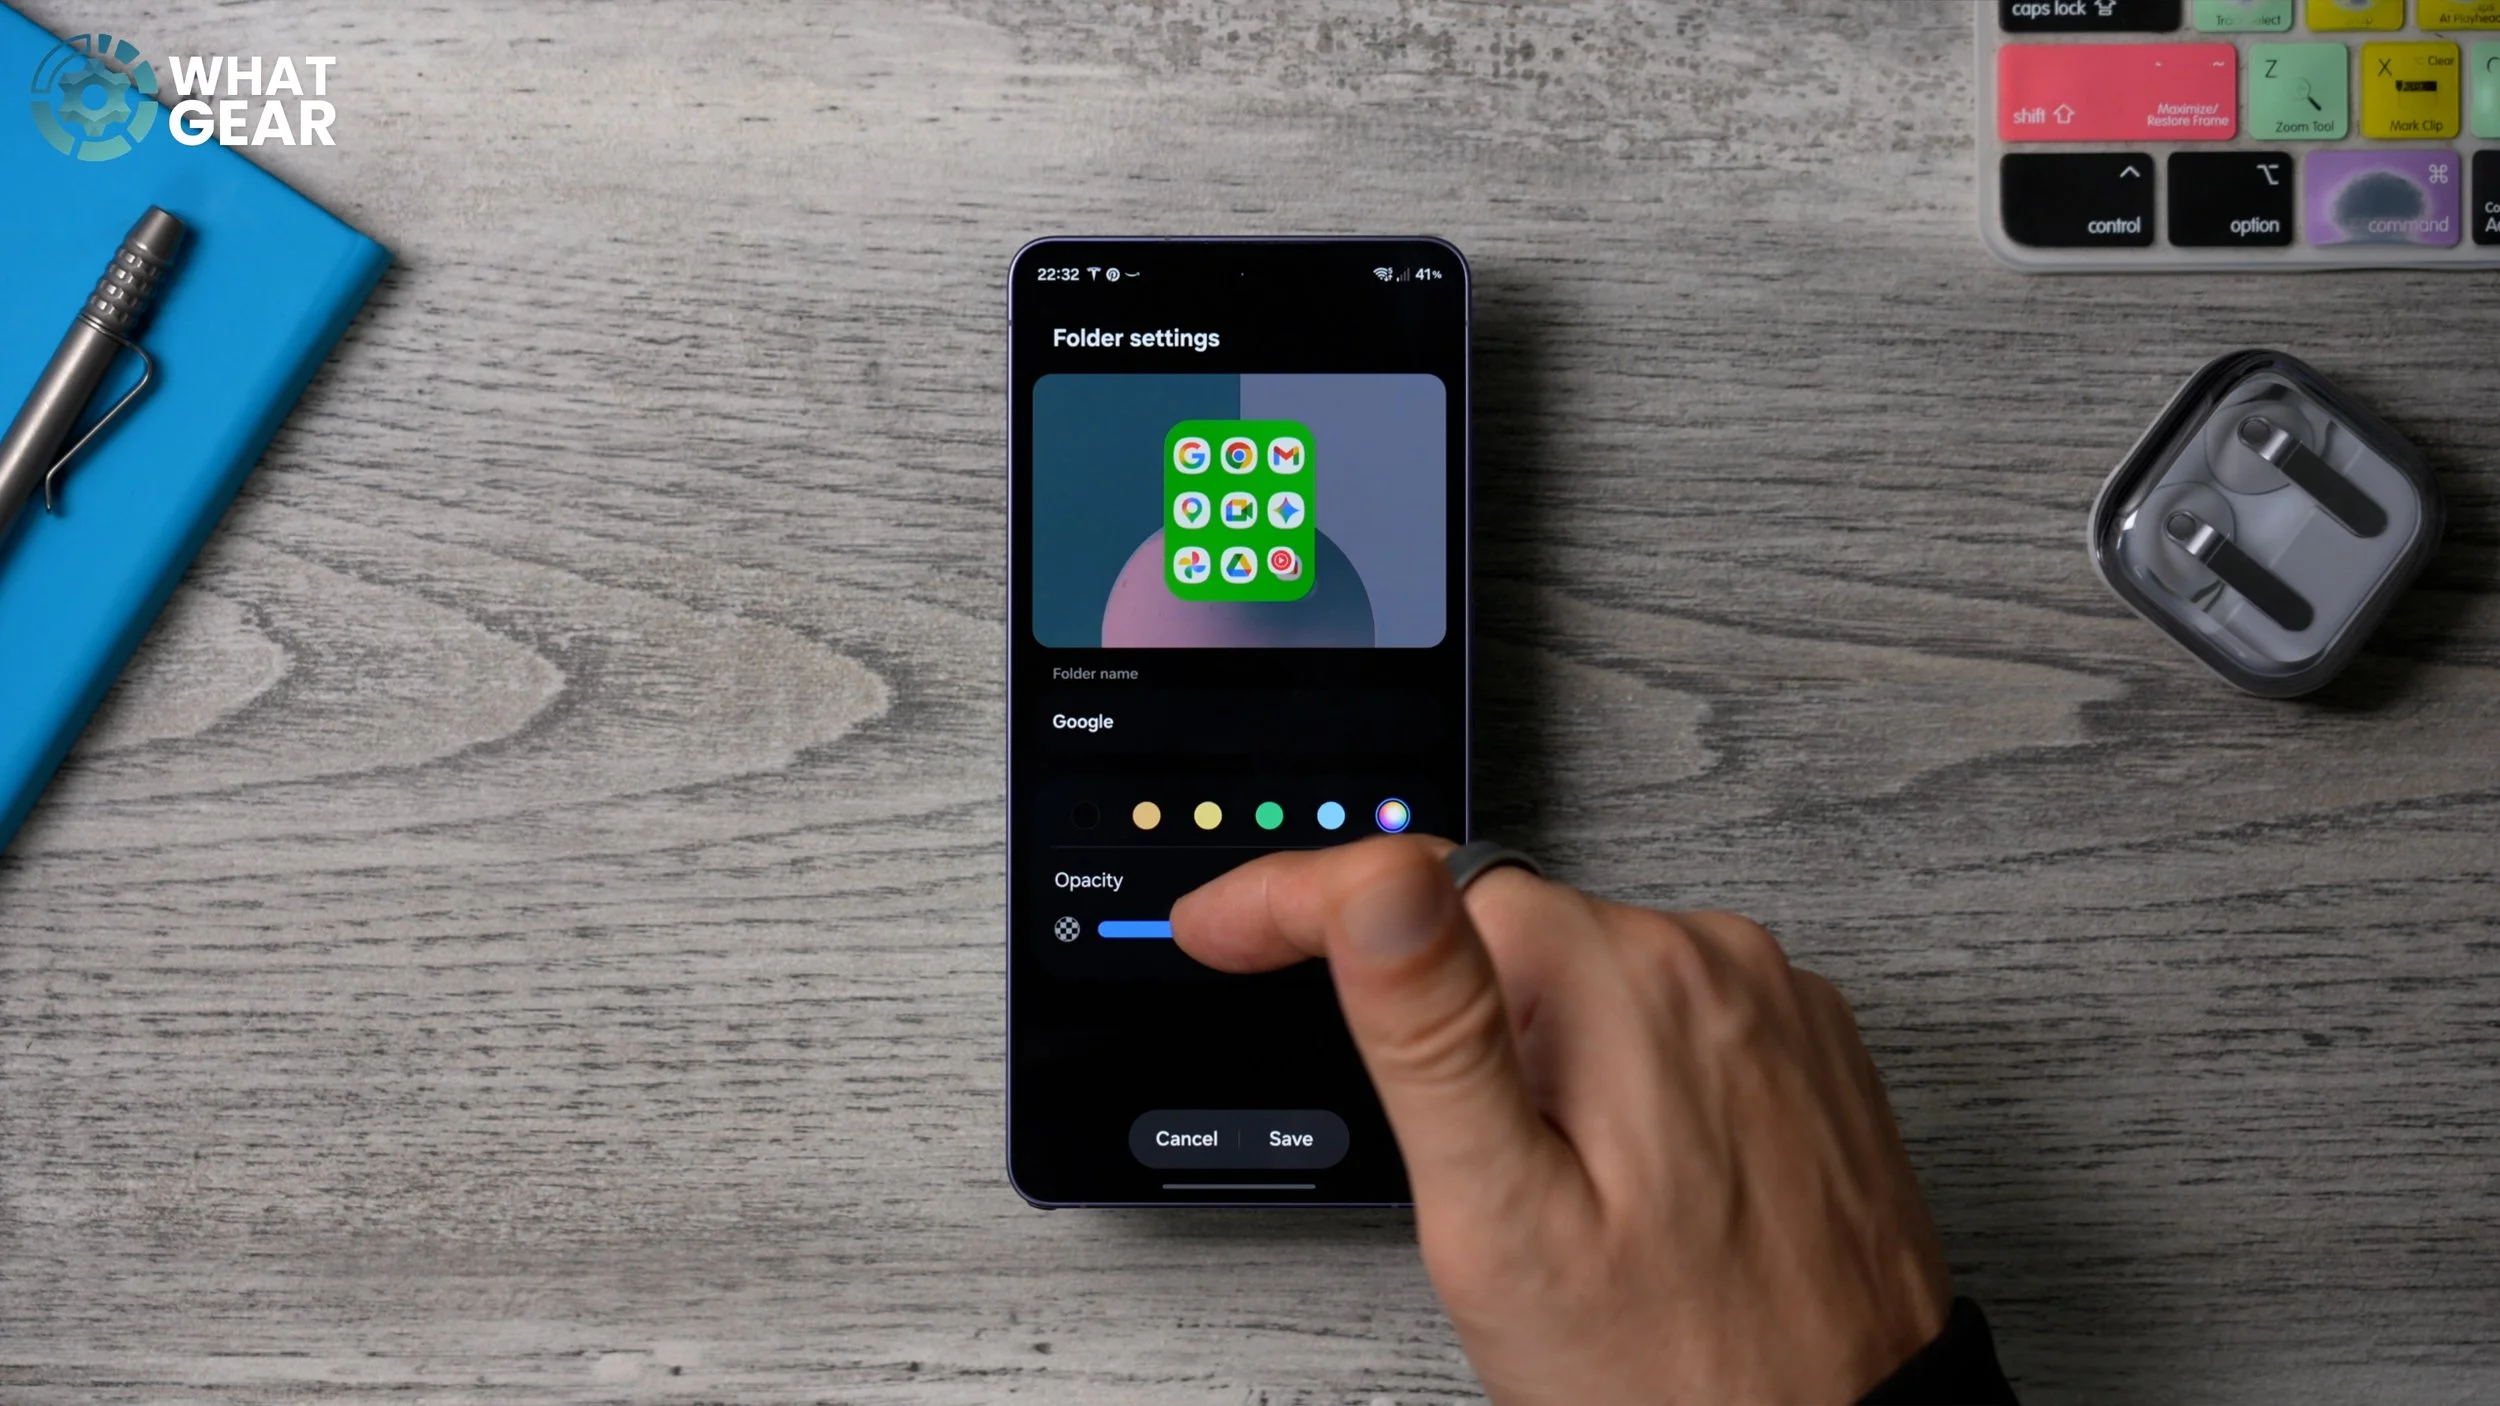
So that's pretty cool. But this is what I really want to show you. If you hold your finger down on the folder and go to Settings, here you can rename the folder to be whatever you want it to be, and you can also colour-code that folder. For example, I have all of my money apps in one folder, and I make that folder green. If you don't like the shade of green that it is giving you, you can go to the colour wheel on the side here and choose the exact colour. And you can even use a spectrum if you want to. Once you find the colour you want, you can adjust the opacity. And again, you want to choose colours that work well with your background. So this one's quite nice there, I think. Definitely customise those and colour-code your folders so that you can find things faster.
NO NOTIFICATIONS…FOR NOW
So here's a question for you. Do you have an app on your phone that is constantly blowing up and distracting you when you're trying to be focused and productive? If the answer to that is yes, then you definitely want to change this little setting to take control and customise when you will receive these notifications. So to find this setting, we need to jump into the actual Settings menu on the phone and scroll down to Notifications. And on this page here, if you scroll down again, at the bottom of this page, you'll see Advanced settings. Go to this, and here you'll discover a feature that's switched off, and I highly recommend you switch it on. It is the Show Snooze button.
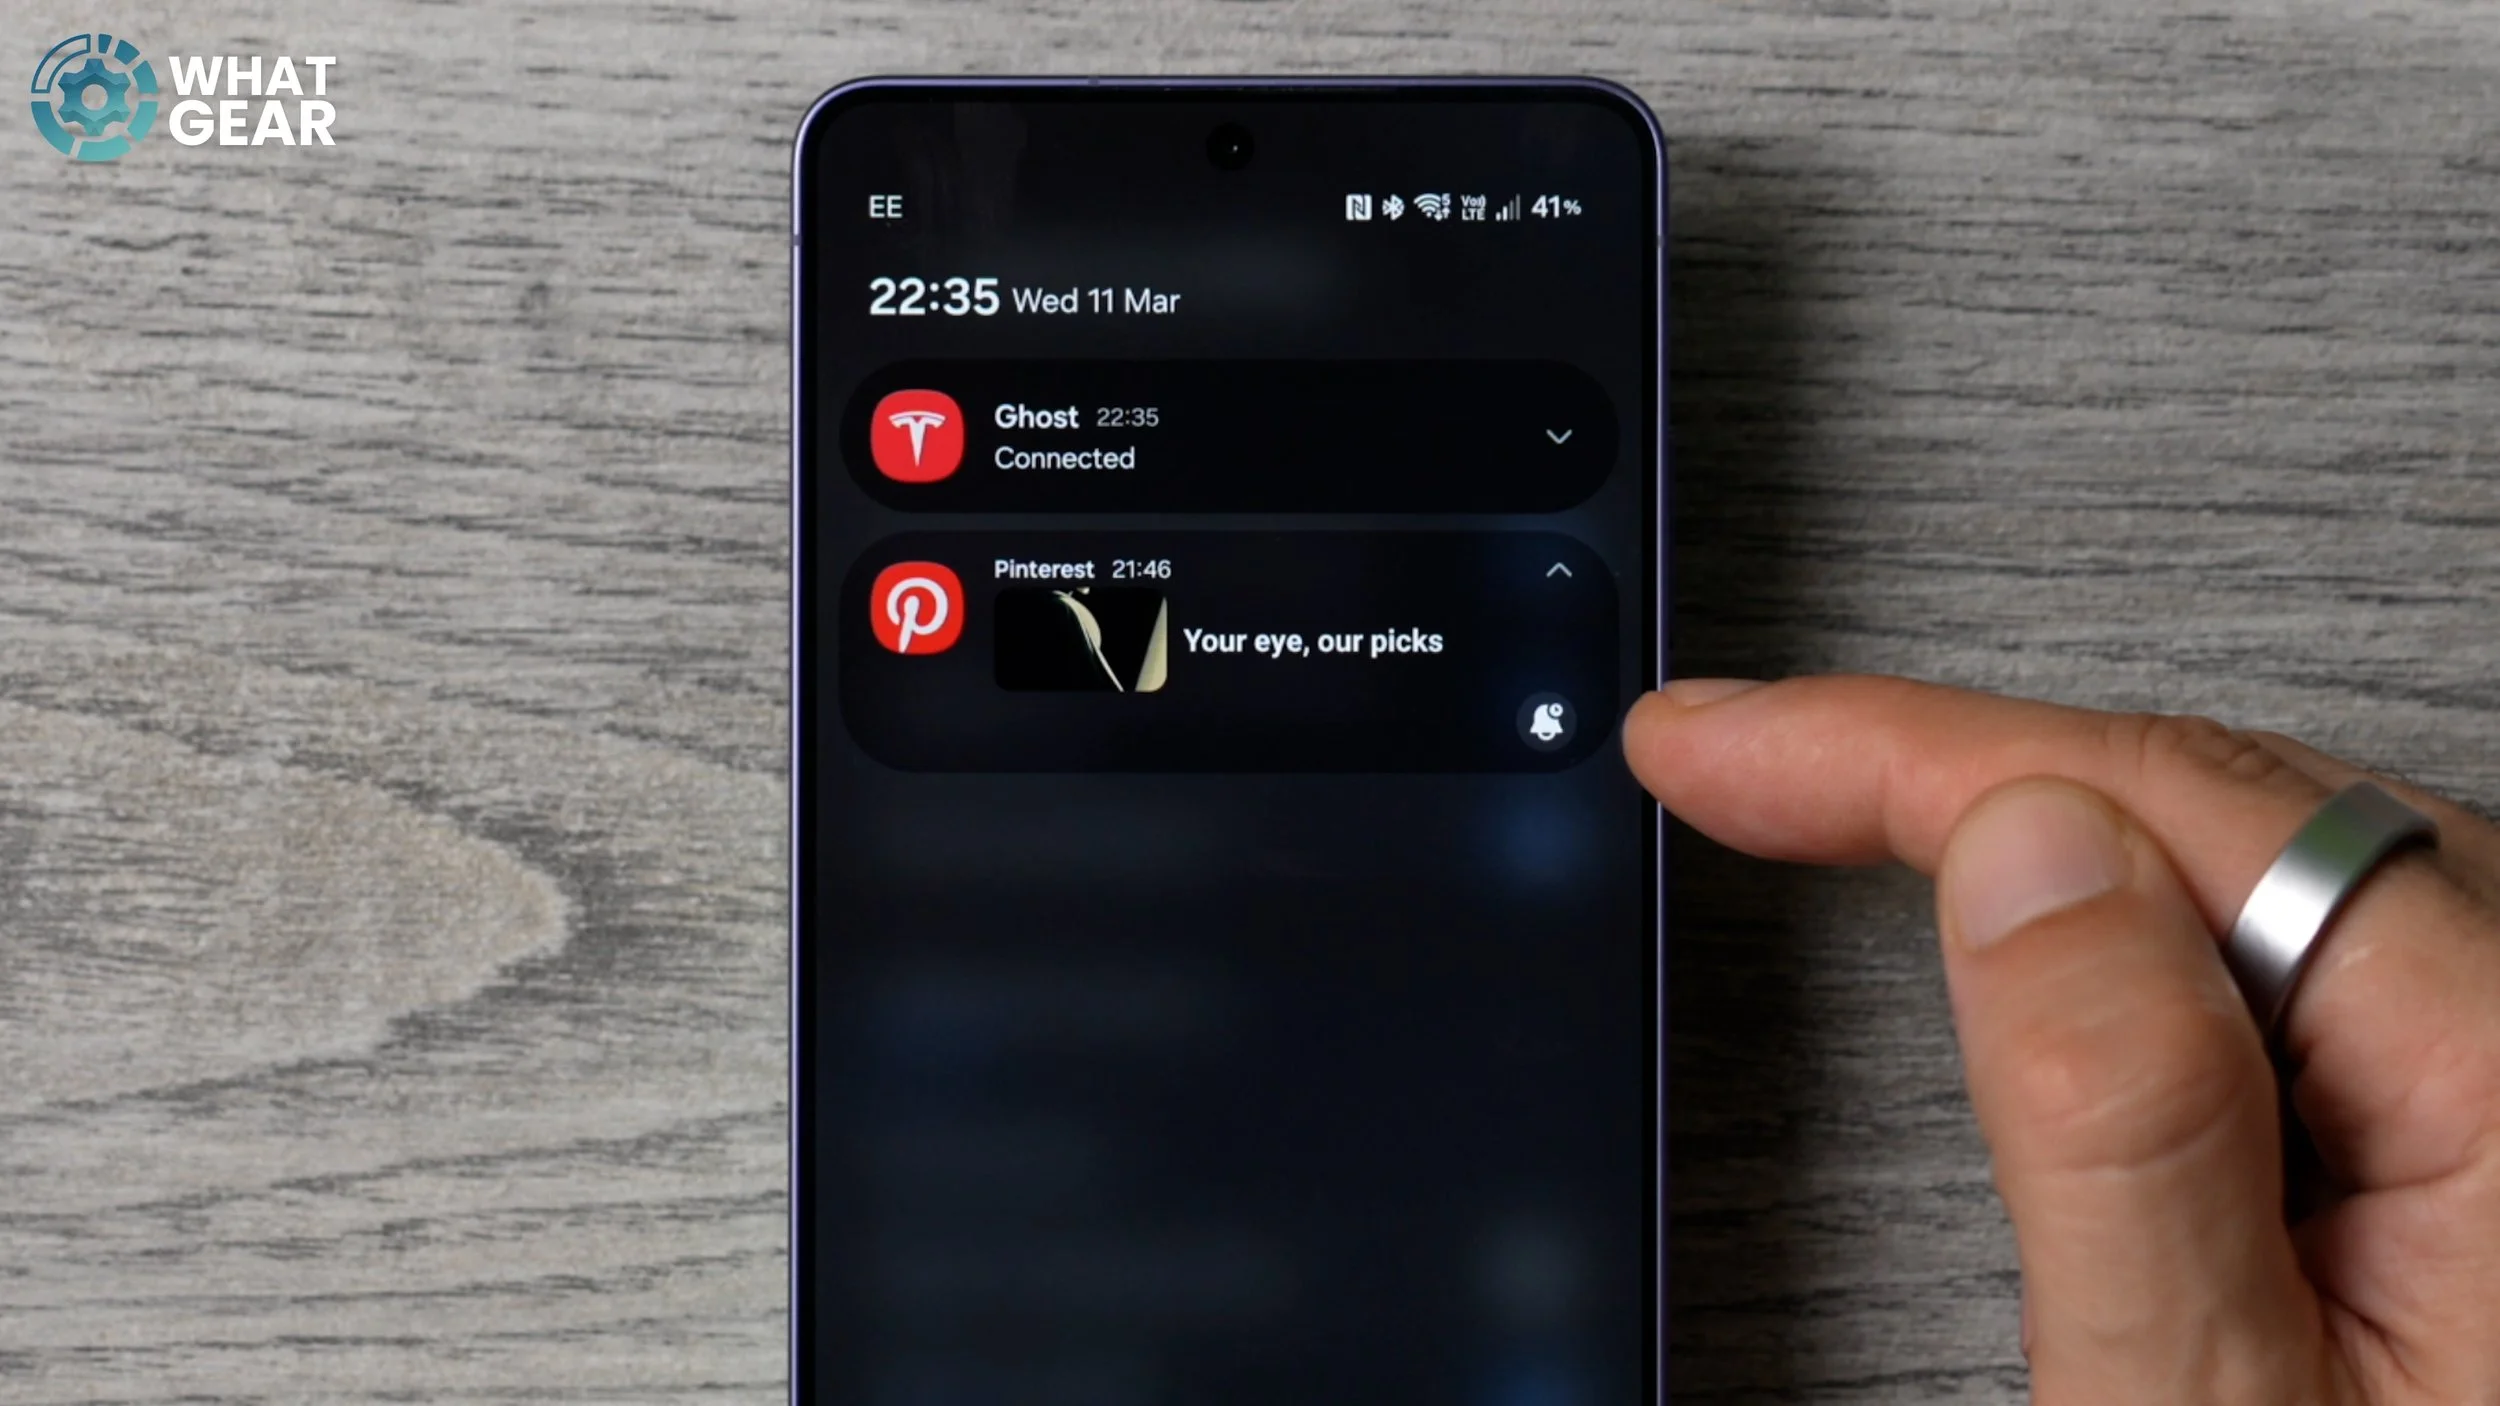
So when you are getting bombarded by notifications for whatever reason, and you don't want to read them, or you're not interested, what you can do is swipe down your notification pane, expand the notification that is annoying you, and then you should see this little alarm icon right here. If you tap on that, here you can choose how long you want to snooze those particular notifications for. The maximum is up to two hours. If it needs to be longer than that, well, then you need to go into your notifications and manually turn off all of them. But this is a nice, quick way to mute them for a limited amount of time. So let's just say two hours.
HANDLE IT
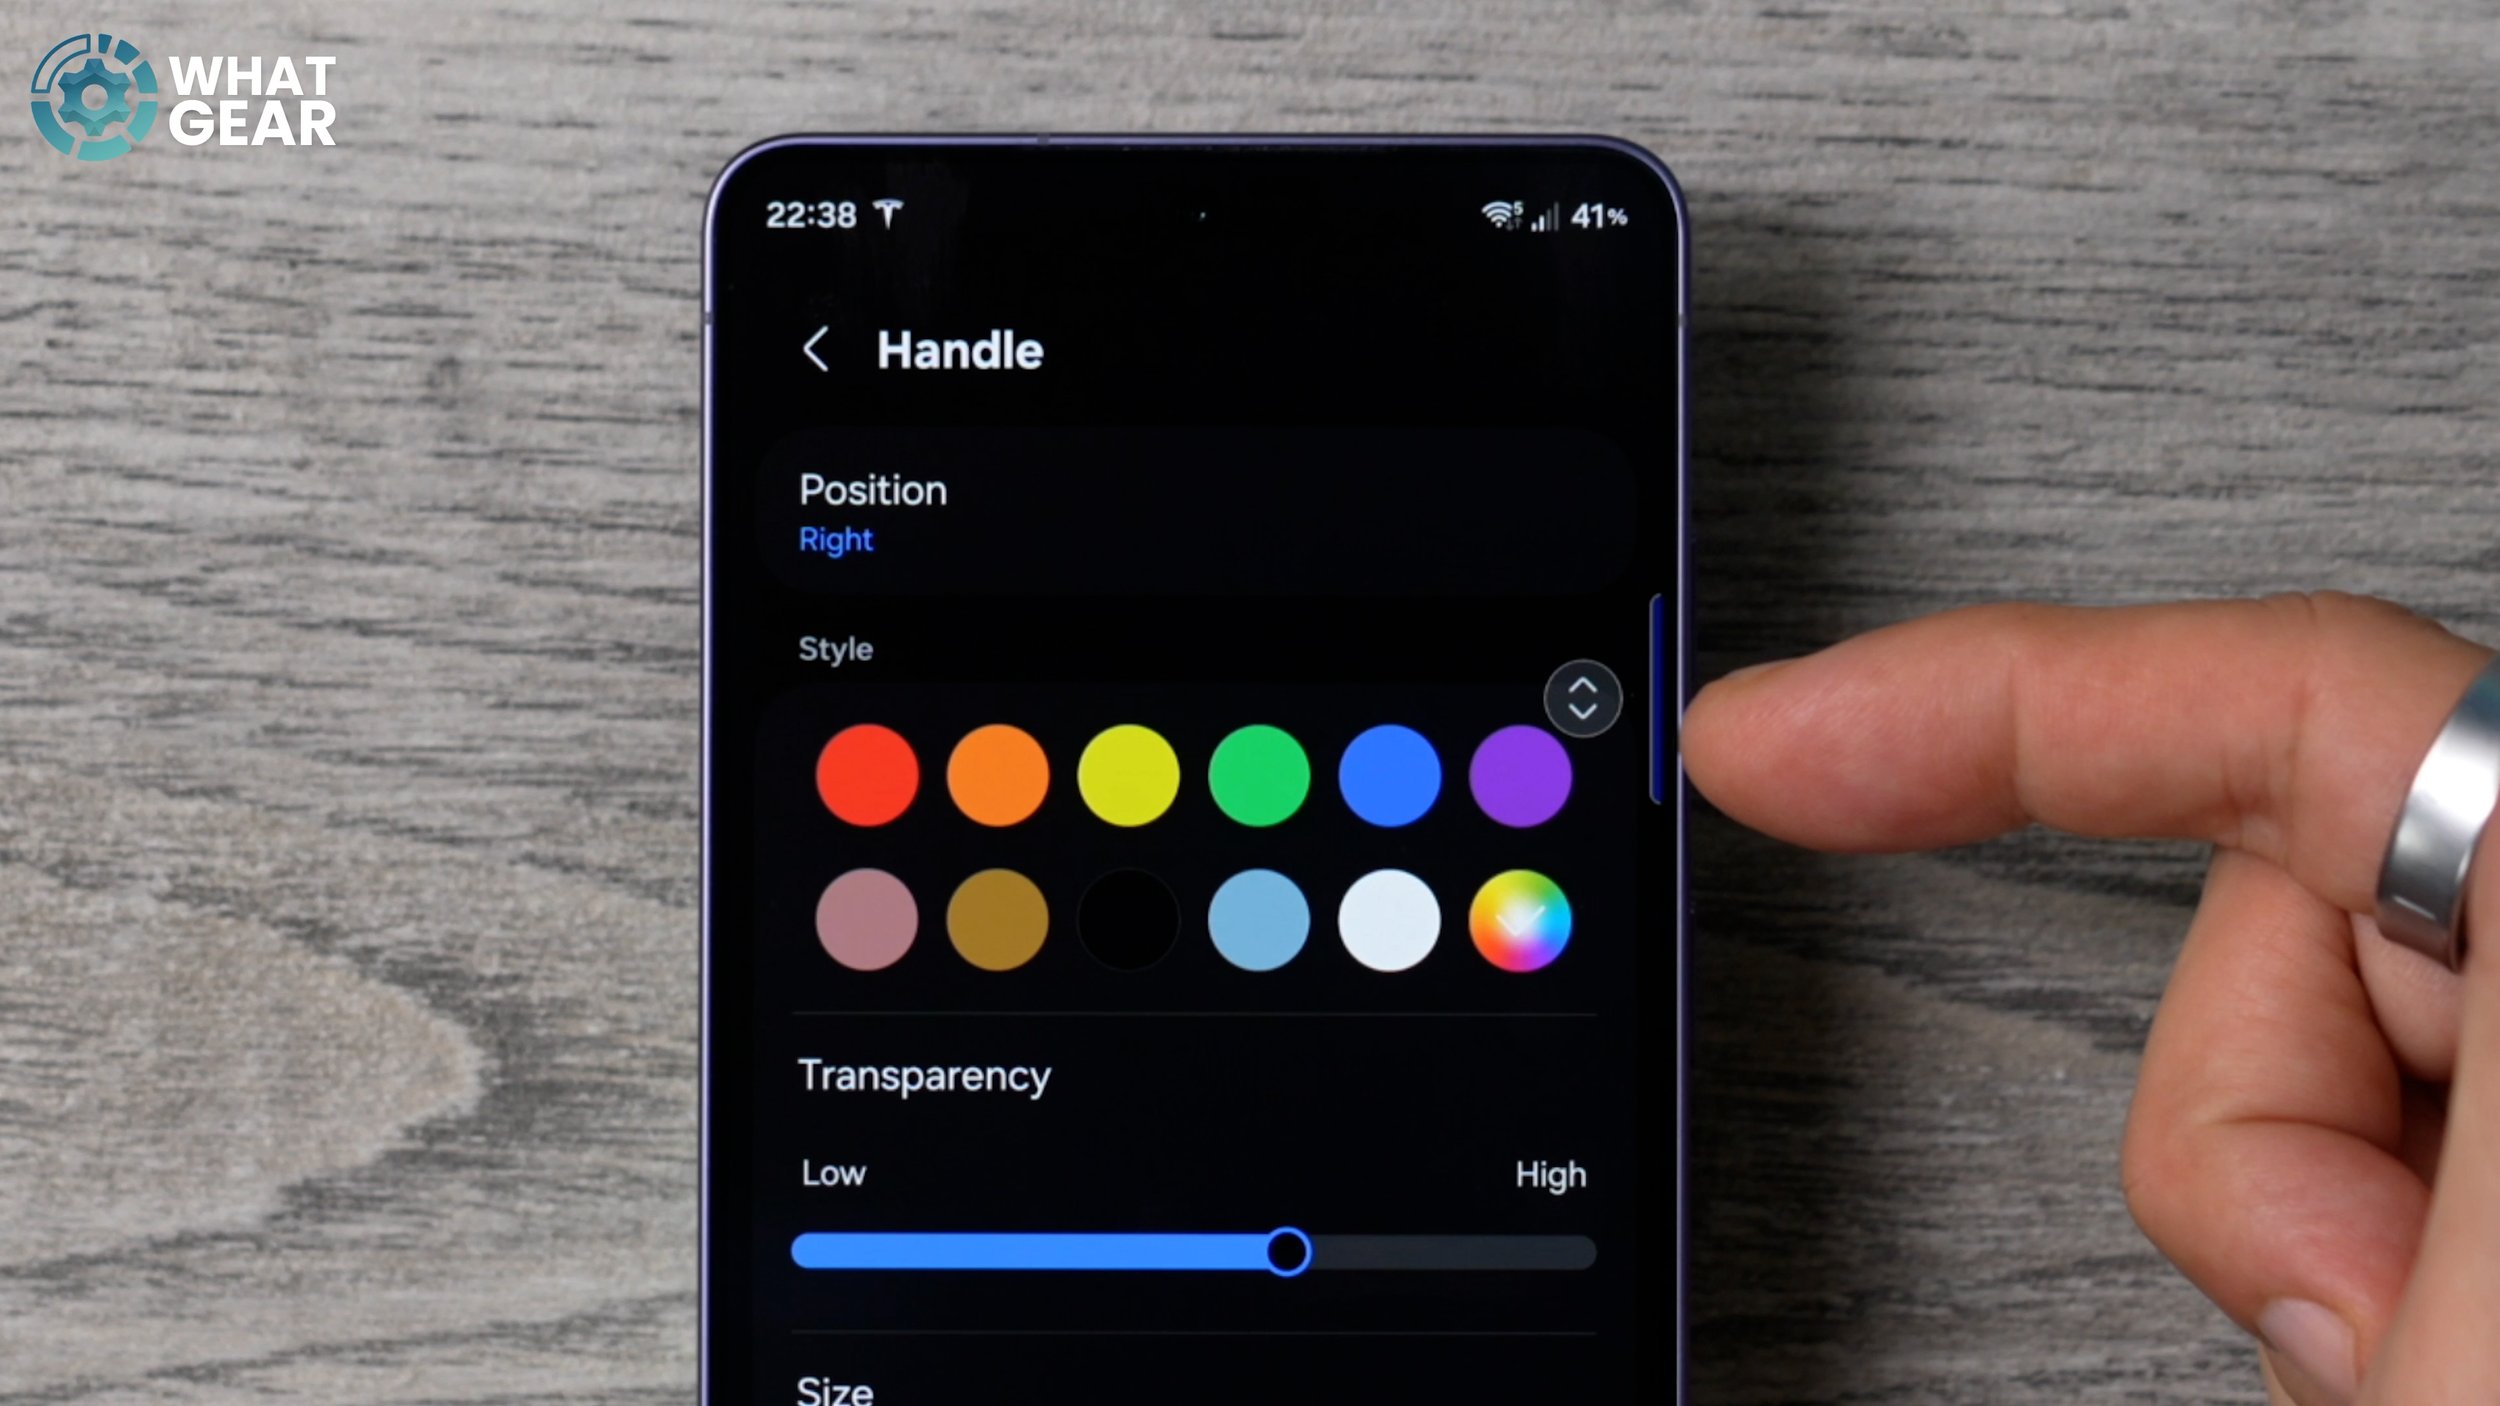
This next customisation tweak is to a feature that I think more people should utilise, and I'll explain how you can maximise its potential. But first, let me show you what I'm talking about. So if you go into your Settings and go to Display and scroll down, you should see this little switch for Edge panels. If it isn't switched on, switch it on. Now, once you've done that, tap on where it says Edge panels, and this brings you to all of the settings for the Edge panels. Now the first thing to do is tap on Handle. And this is the little line here at the edge of your screen. You can customise the colour of the handle, as well as its transparency. So if you want it to be very, very minimal, you could reduce the transparency all the way down. You can make it smaller so it's less distracting, and you can even change the width so it sticks out a bit further. Since my wallpaper is kind of purple, I think maybe a blue or something like that might work quite well. So let's go with that. And you'll notice the little lines here as well. You can drag this up and drag it down. And I recommend you keep this further up on the screen because you don't want to swipe it by mistake when you're trying to swipe across screens.
And if you're left-handed, you can of course switch it over to the left side if you prefer. Now that you've customised the handlebars, let me show you what you can use the Edge panels for. So when you bring out the Edge panel, you will see a little pen at the bottom. Here you can customise the apps that exist on the Edge panel. Now, what I recommend you do is populate this with apps that are important to you, but that you don't necessarily need all of the time. For me, I found that having my authenticator apps here is the very best use case for the Edge panel. Also, sometimes I need access to all the files on my device. If I've downloaded something and I can't find it, I can use the file manager to find it, and the Samsung Find app lives here on my phone as well. I'm always losing my keys and my earbuds, and this helps me find them. And I've also got my security apps here as well, which again, I don't use all the time, but it's nice to have quick access to them. So now whenever I'm logging into something, and I need an authentication code, I don't have to look around — it's right there at the top.
MORE PANEL
So when you swipe out the Edge panel, you'll see the little settings icon pop up down here in the bottom left corner. If you tap on that before it disappears, this shortcuts you to the Handlebar and Edge panel section. So right here is where you can add more panels. If you tap on Panels, here are some recommendations. The clipboard is very useful. Let's say you've copied a very important address or something like that, and then the next thing you know, you've had to copy a one-time passcode. You might feel like you've lost that address which you had previously copied, but if you have the Clipboard panel, it actually keeps a log of the last few things that you've copied, so you can still recover that information, and it's not lost.
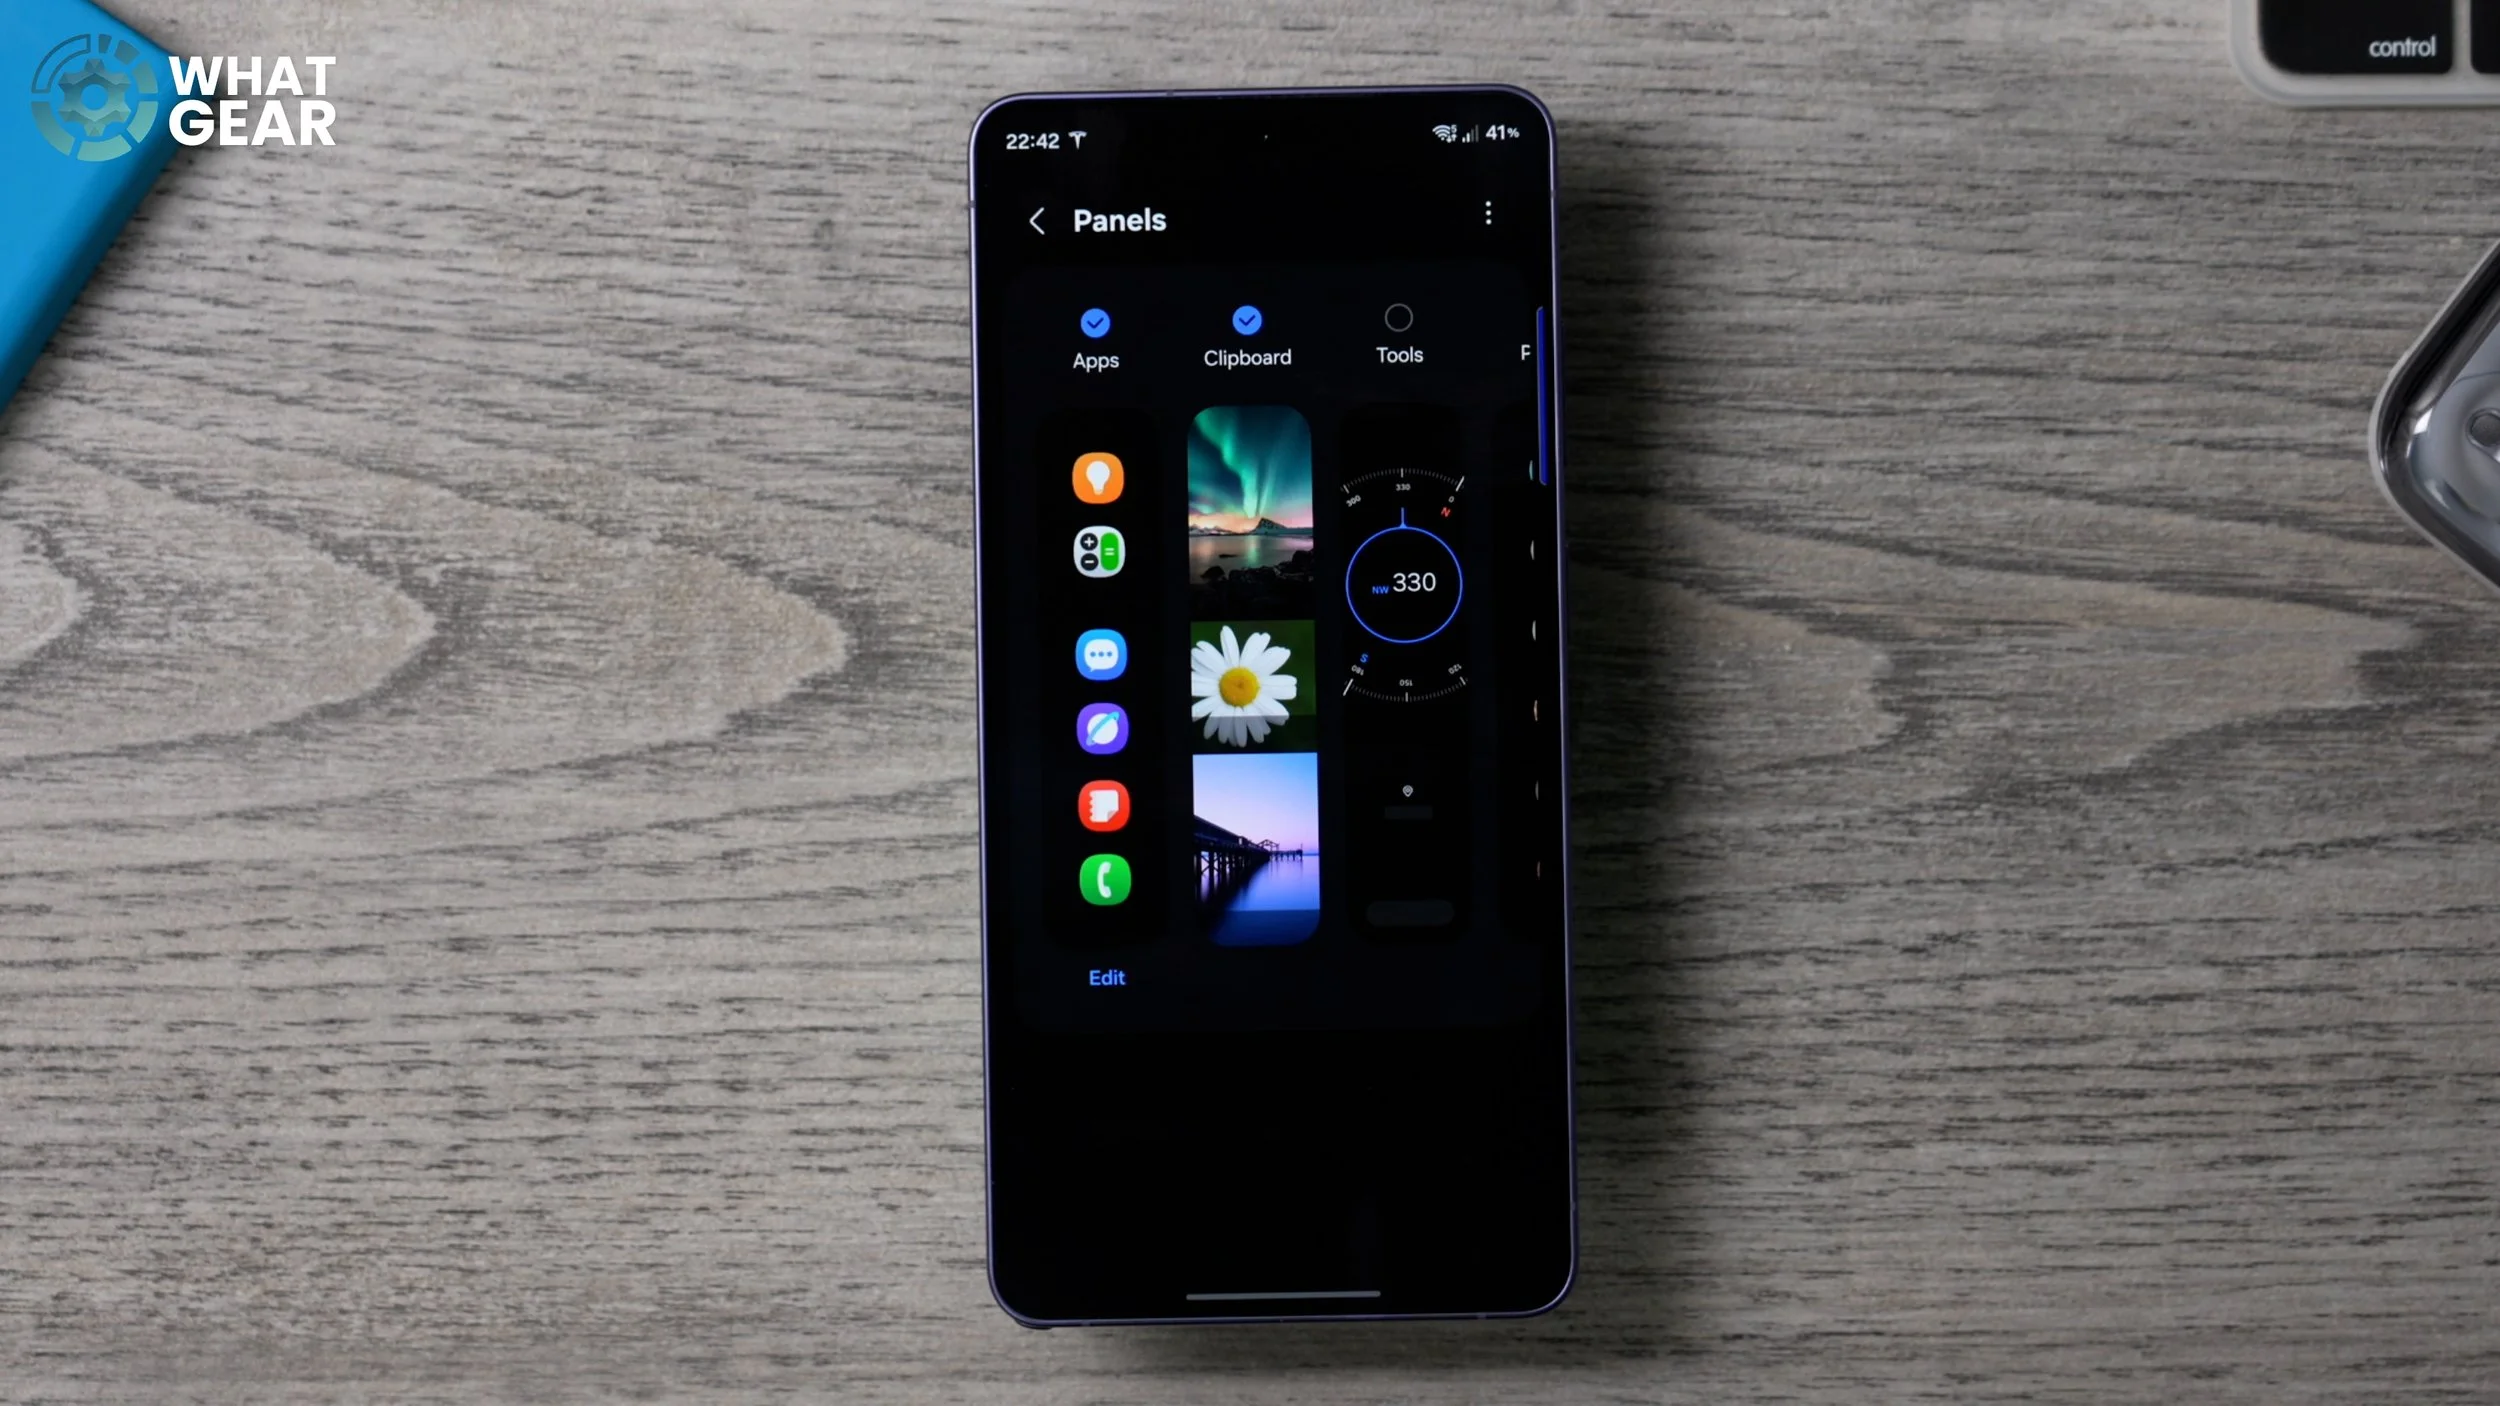
Another very useful Edge panel is Tools. So when you enable this, let me show you what you can do. When you bring out the Edge panel and swipe across again and again, you get a compass by default. But that's not it. There is more to this. If you hit the three dots at the top, there are even more tools, including a surface level, which is very handy. As you can see, my desk is almost perfectly flat. There is also an emergency tool here, which could be a lifesaver, quite literally. If you go to the torch tool, you can switch the torch on and adjust the brightness, but also baked into this tool is this S.O.S. feature. So this will actually use the torch to emit Morse code patterns to let somebody know that you're in trouble. So just be aware of these tools because, as I said, they could save your life one day.
WHERE TO GET THIS CLOCK
Now, I know at some point someone's going to ask, “Where did I get this clock from?” I get this question all the time. So I'm going to show you guys how you can get it for yourself. So if you go to the Google Play Store, type in Google Clock, and you should find the official clock app from Google. Install this, and that widget comes with it. And there's more than just the one that I have set up. If you hold your finger down on it and go to Settings, there are some other styles to choose from as well.
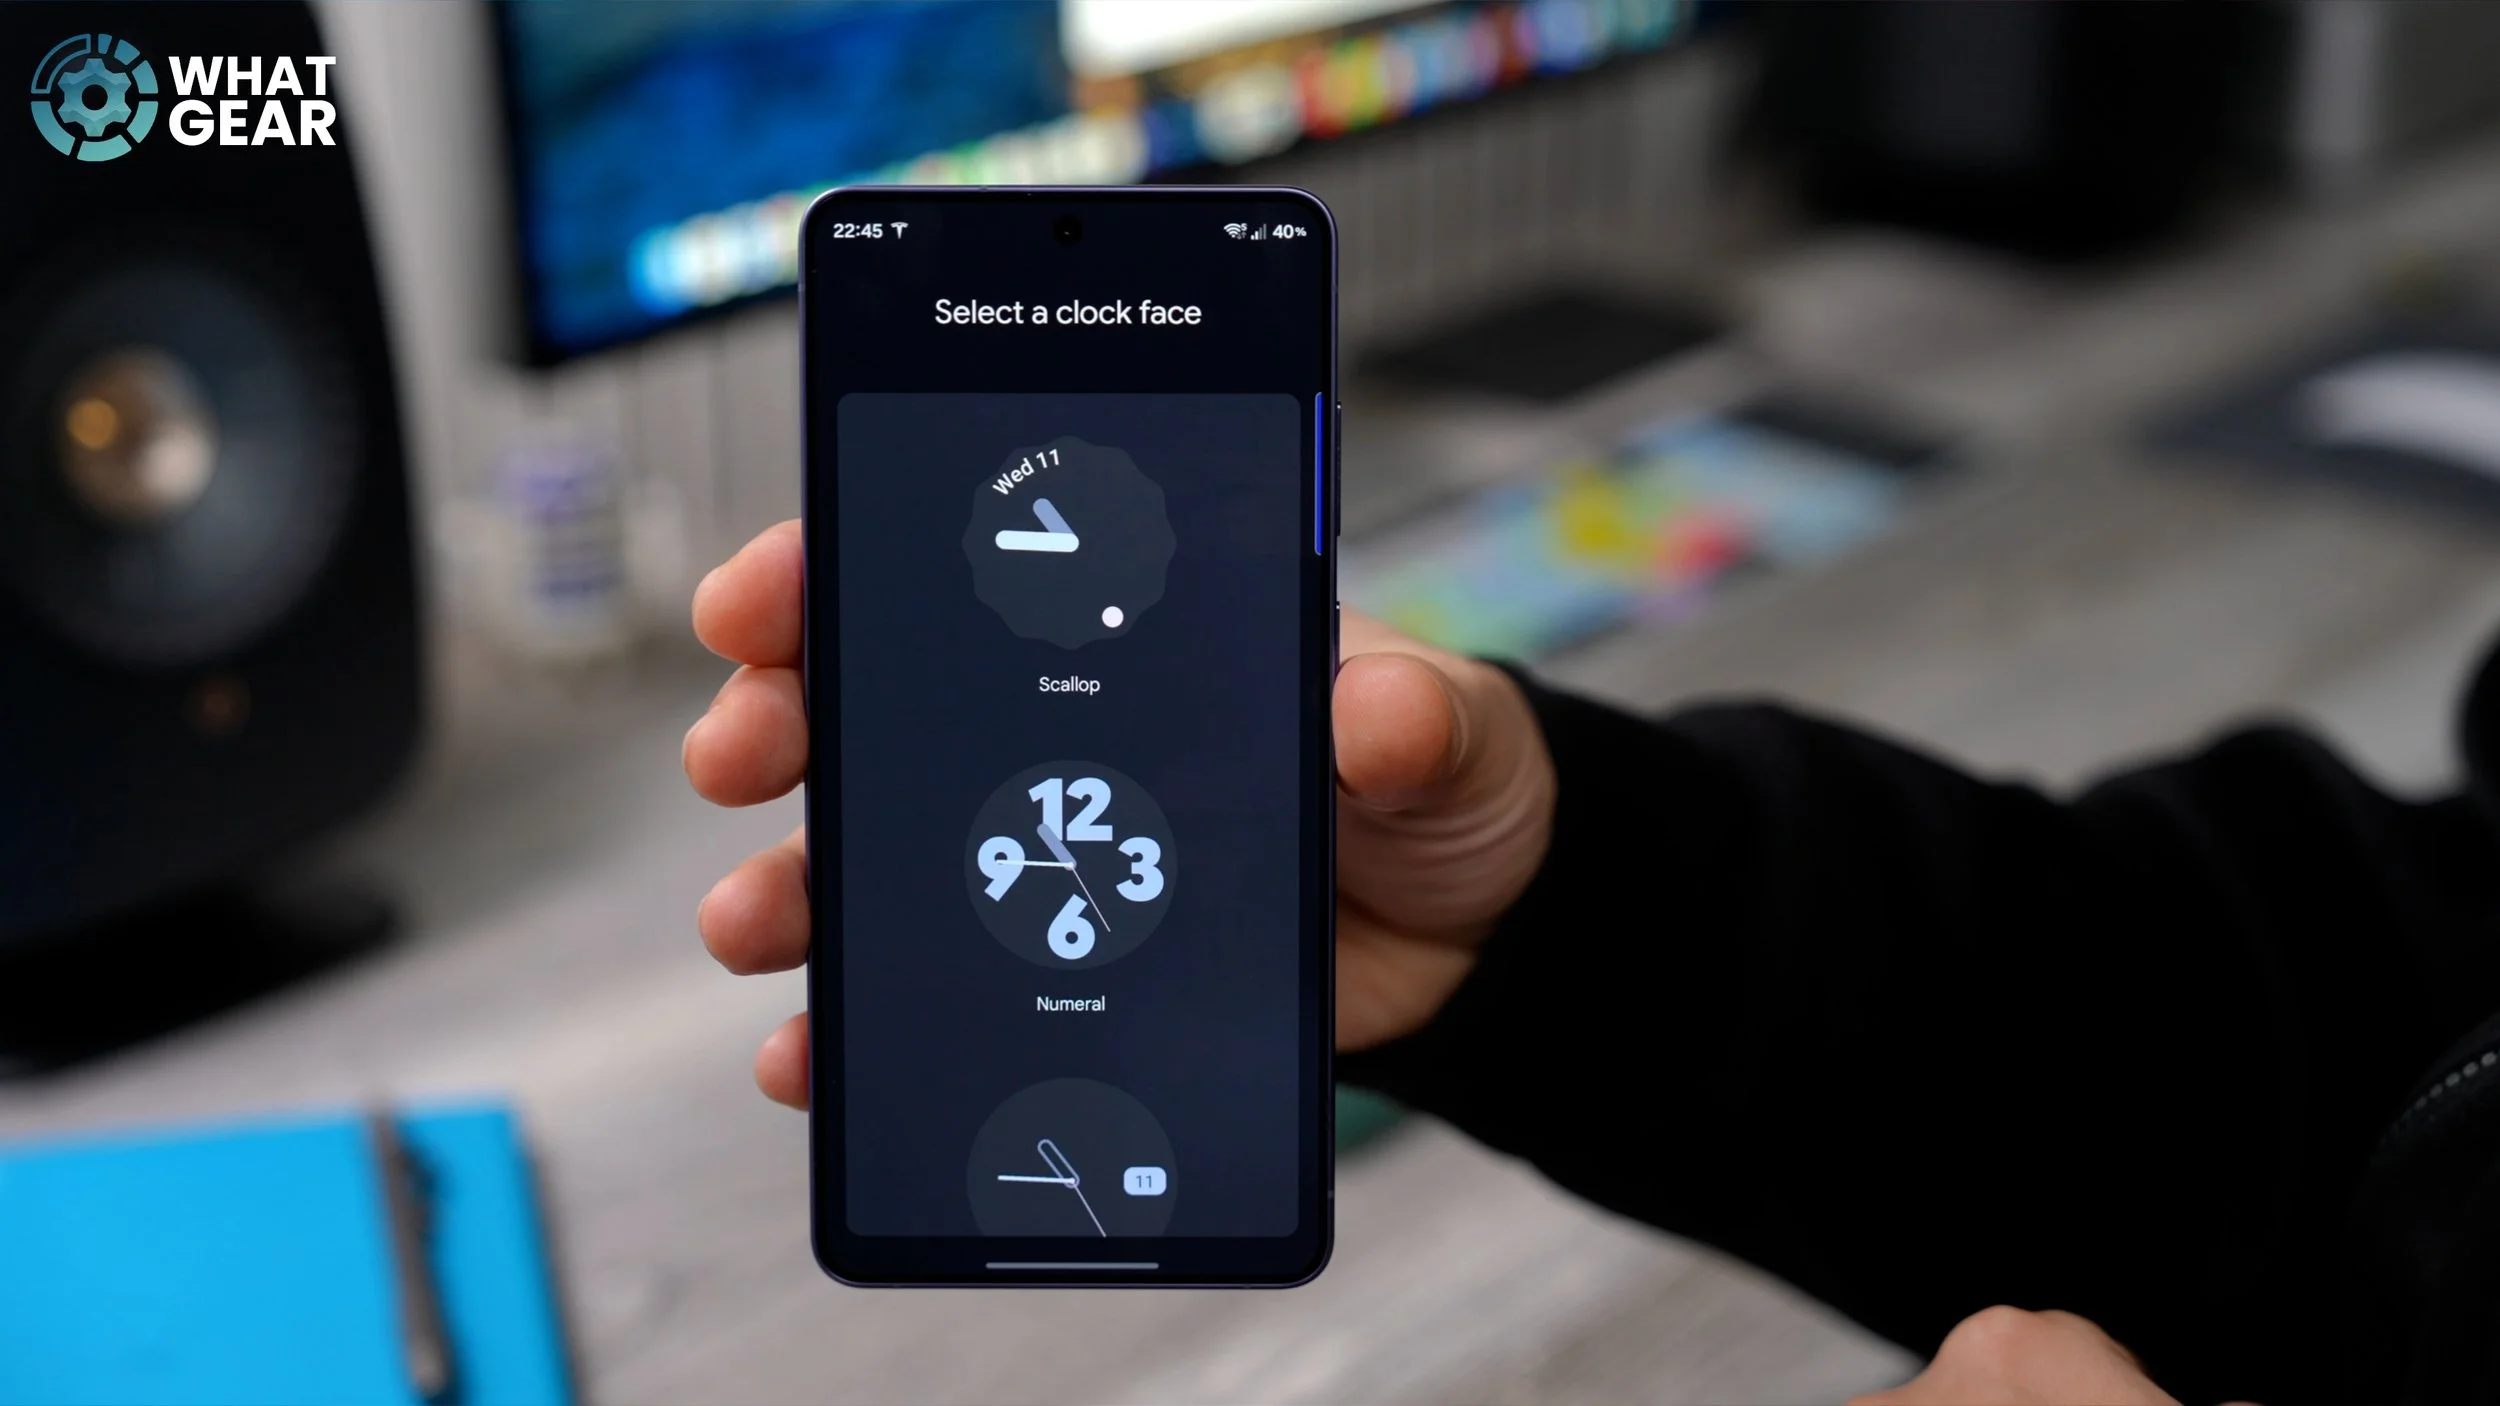
But the scallop one, in my opinion, is by far the best. And you should be aware of the fact that the colour of the clock will be affected by the colour palettes that you choose, and also by Light and Dark Mode. So this is how it looks in Dark Mode. And if you don't know what I'm talking about when I'm talking about Dark Mode and Light Mode, definitely check out my absolute beginner's guide to this phone. I'll link it at the end of this video.
CUSTOM SEARCH BAR
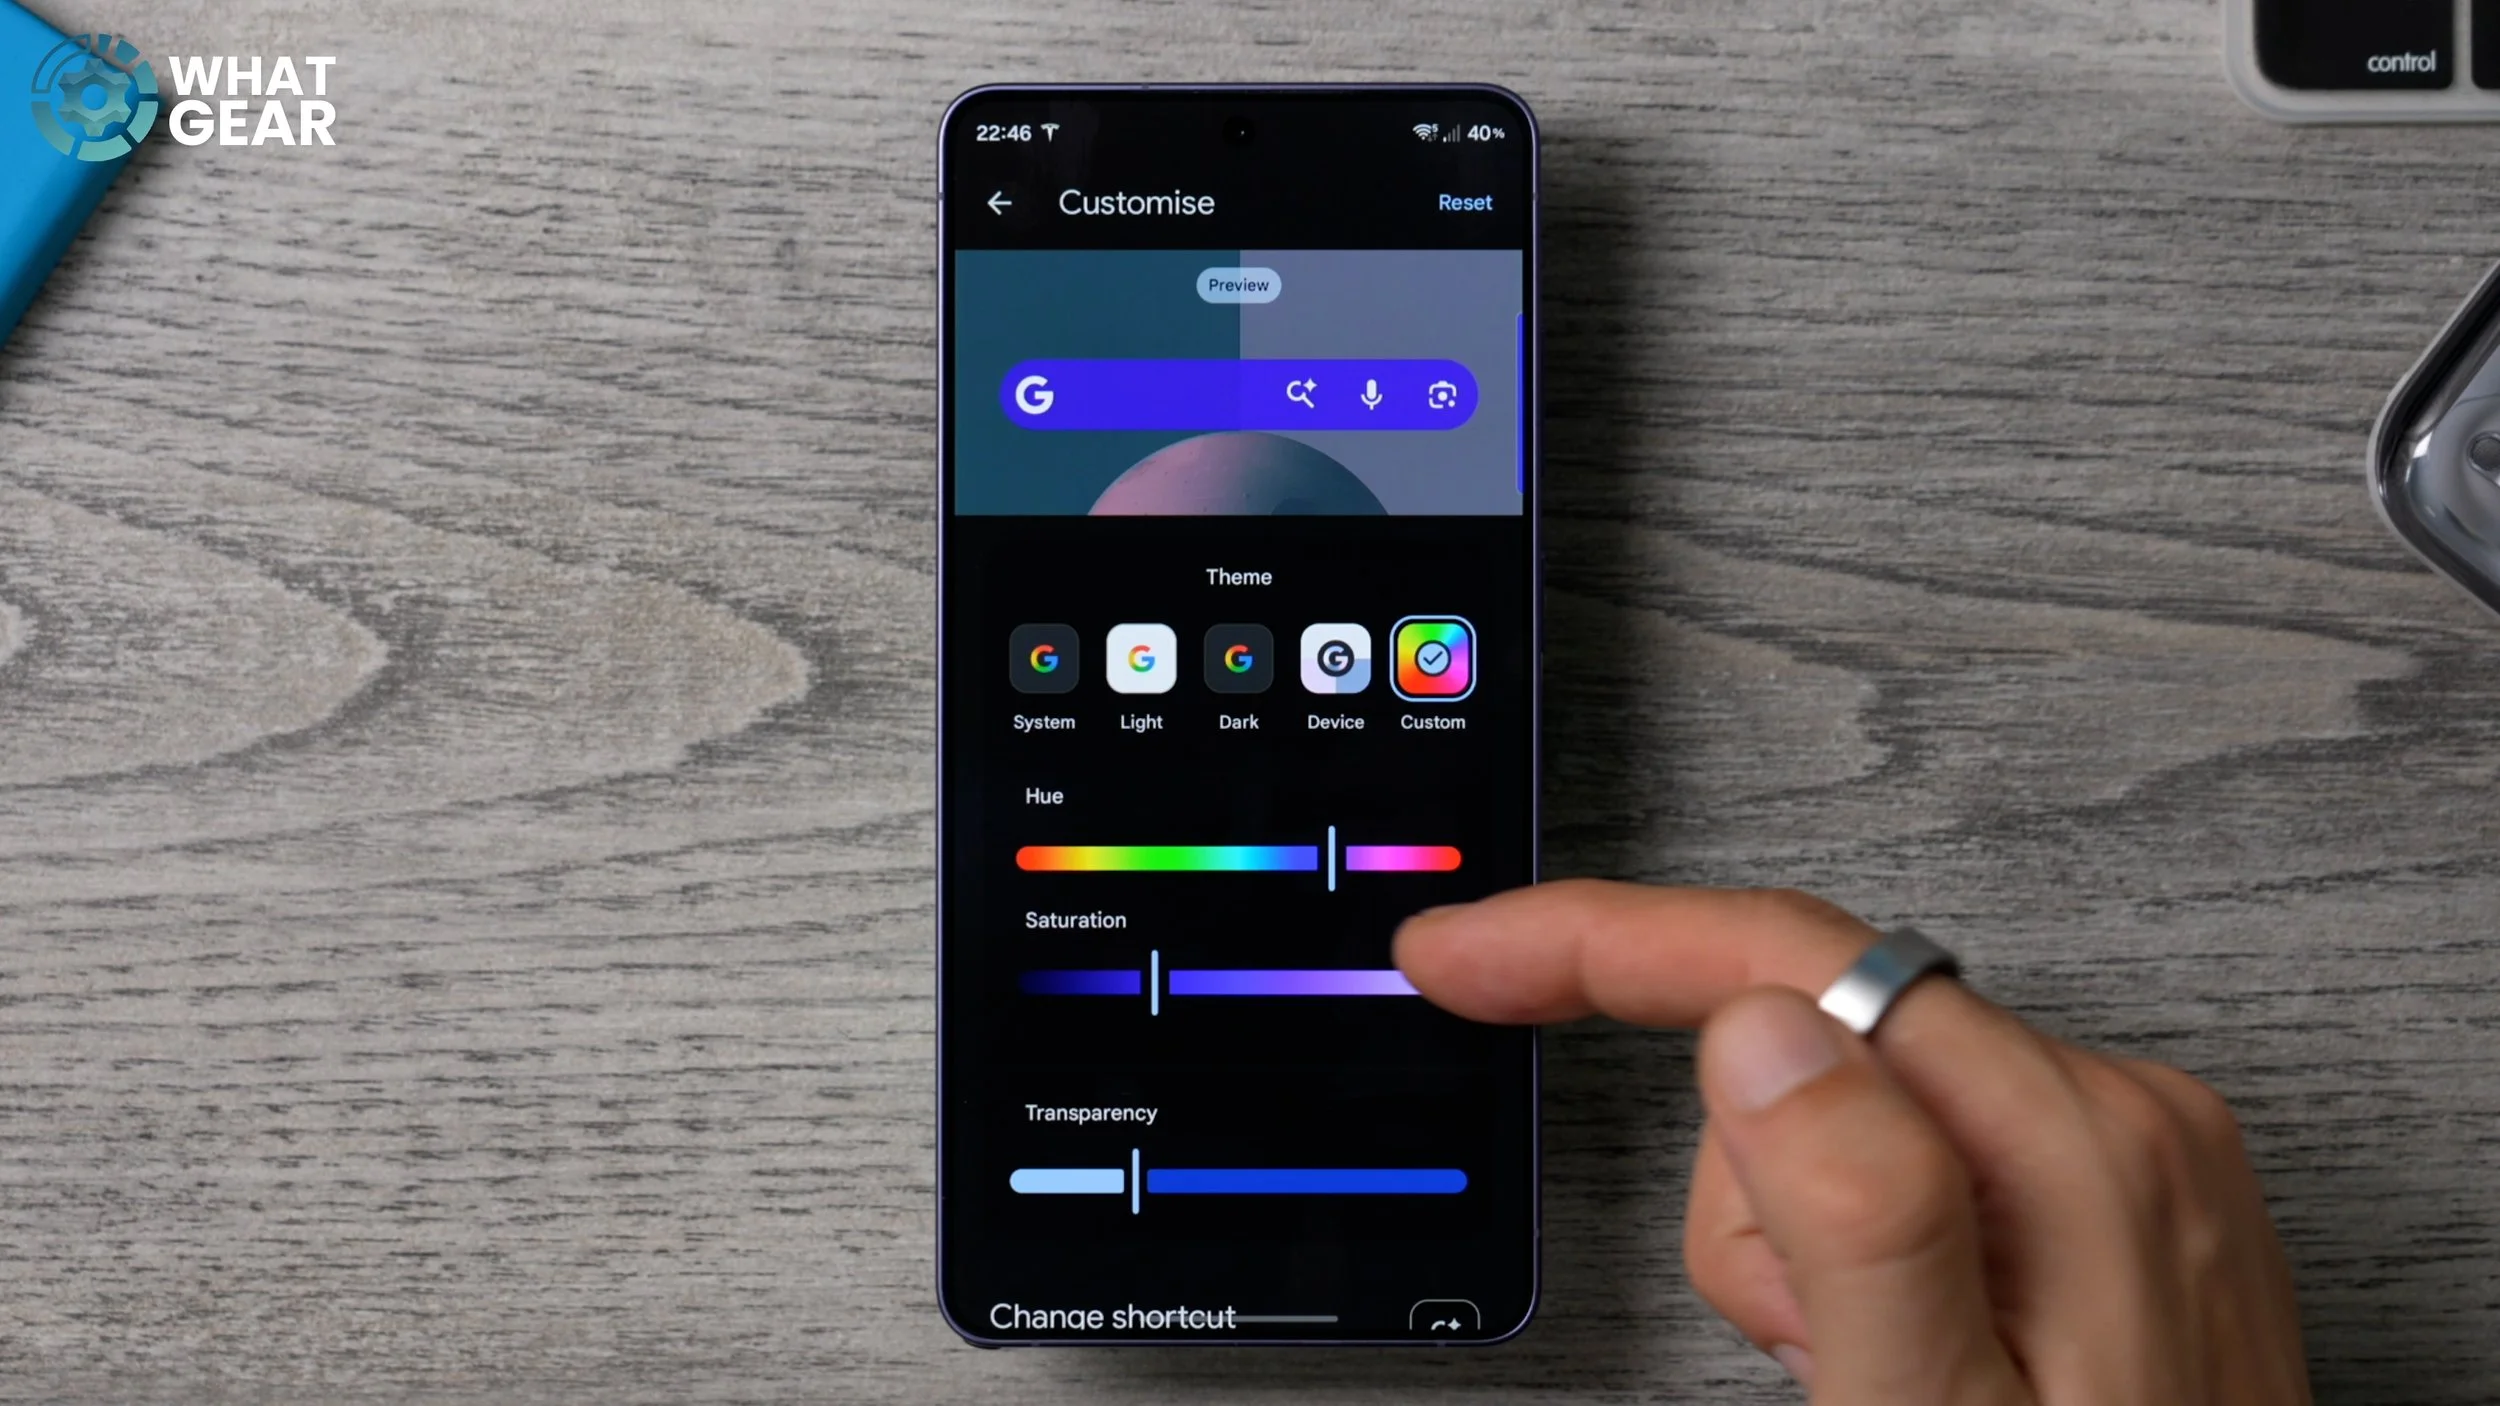
Okay, here's another Google-related customisation tip, and it is in regard to this. So this is the Google search bar. Pretty much every single Android phone has one. On the Samsung phone, you can delete it entirely, but I do find it is quite useful, and you can really tailor it now, which is really cool. If you hold your finger down on that search bar, go to Settings. Now it jumps straight into the customisation options. It was so well hidden before. So if you want to, you can go to the device theme. You can set a custom colour theme for it and change the hue to whatever you want it to be, the saturation, and even the transparency.
And if you scroll down, you can add shortcuts. One of the cool ones to add is the AI mode. So if you are researching something on Google with the AI mode, as opposed to just searching the entire internet, it can pull information from lots of different places and bring it all into one area. There are some really useful things, including song search, but just be mindful of the fact that you can only have one. So for me, it is the AI mode. So there we go. We've customised the home screen, we've customised the colours, the wallpaper, the widgets, all of that good stuff. And I just want to take this opportunity to say thank you for making it this far into the video. It's much appreciated. I do have four other parts, so this is a 26 Tips and Tricks series. And as a reward for you guys making it this far into the video, I have saved a couple of bonus tips and tricks.
CUSTOM CALL DISPLAY
So let's start with a customisation tip for your Phone app, which is this one down here. If you open it, go to the three dots in the top right corner, go to your settings, scroll down, and you will see this option right here: Call display while using apps. If you tap on this, the default setting is a small pop-up. This will appear as an overlay on top of whatever it is you're doing on your phone now. If you want it to be less distracting, you can set it to mini pop-up, and it will still appear; it will just be much smaller.
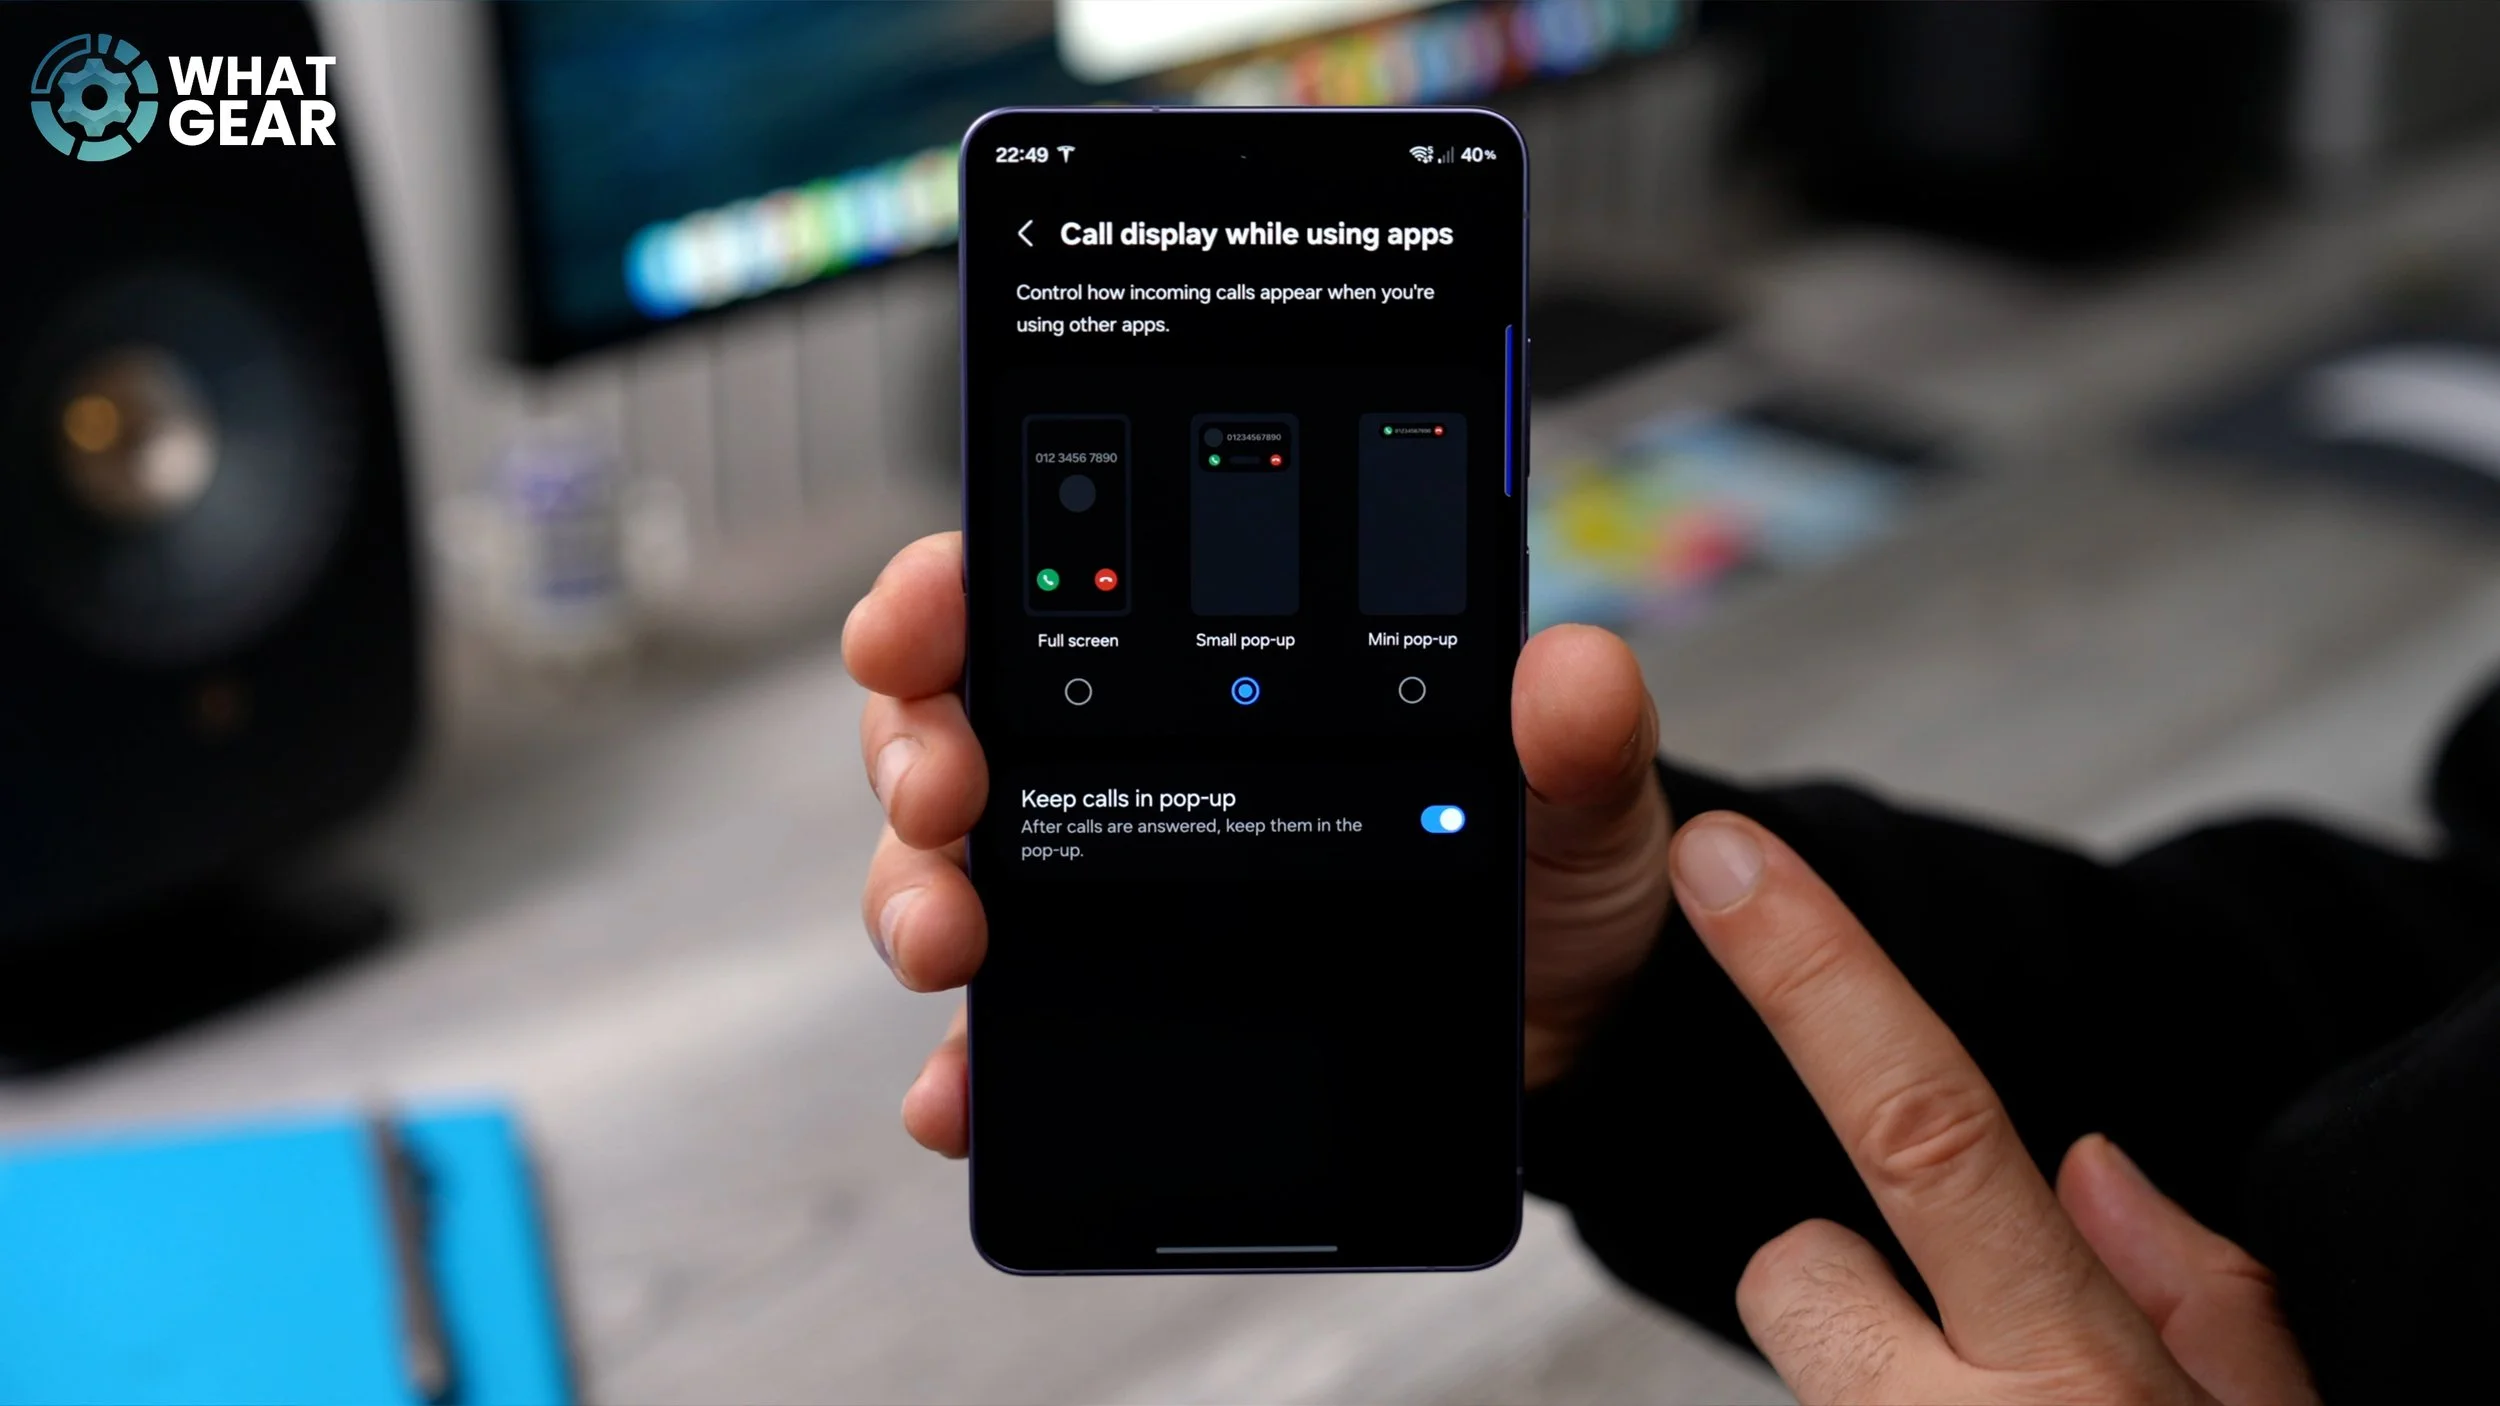
And if you really want to focus on the phone call fully and allow it to block out everything that you were doing before the phone call came in, you can set it to full screen. And there is a fourth option, which is actually on by default, and that is Keep calls in the pop-up window. So if you don't want to be distracted from what was going on on your phone before the phone call came in, you could tick this box here, and a little pop-up call window will disappear once you've answered the call. It is kind of a feeling-out process with this one, so test out the different options and see which one you like.
CUSTOM CALL BG
Here's another phone customisation tip. Let's go back into the Phone app again. Hit the three dots, top right corner. Go to Settings again. This time, we're going to scroll halfway down, and you should see the Call background option. The default one is what you see right here at the bottom of this page. You'll see the background. If you tap on that, you can choose from any of the featured backgrounds, which are quite nice.
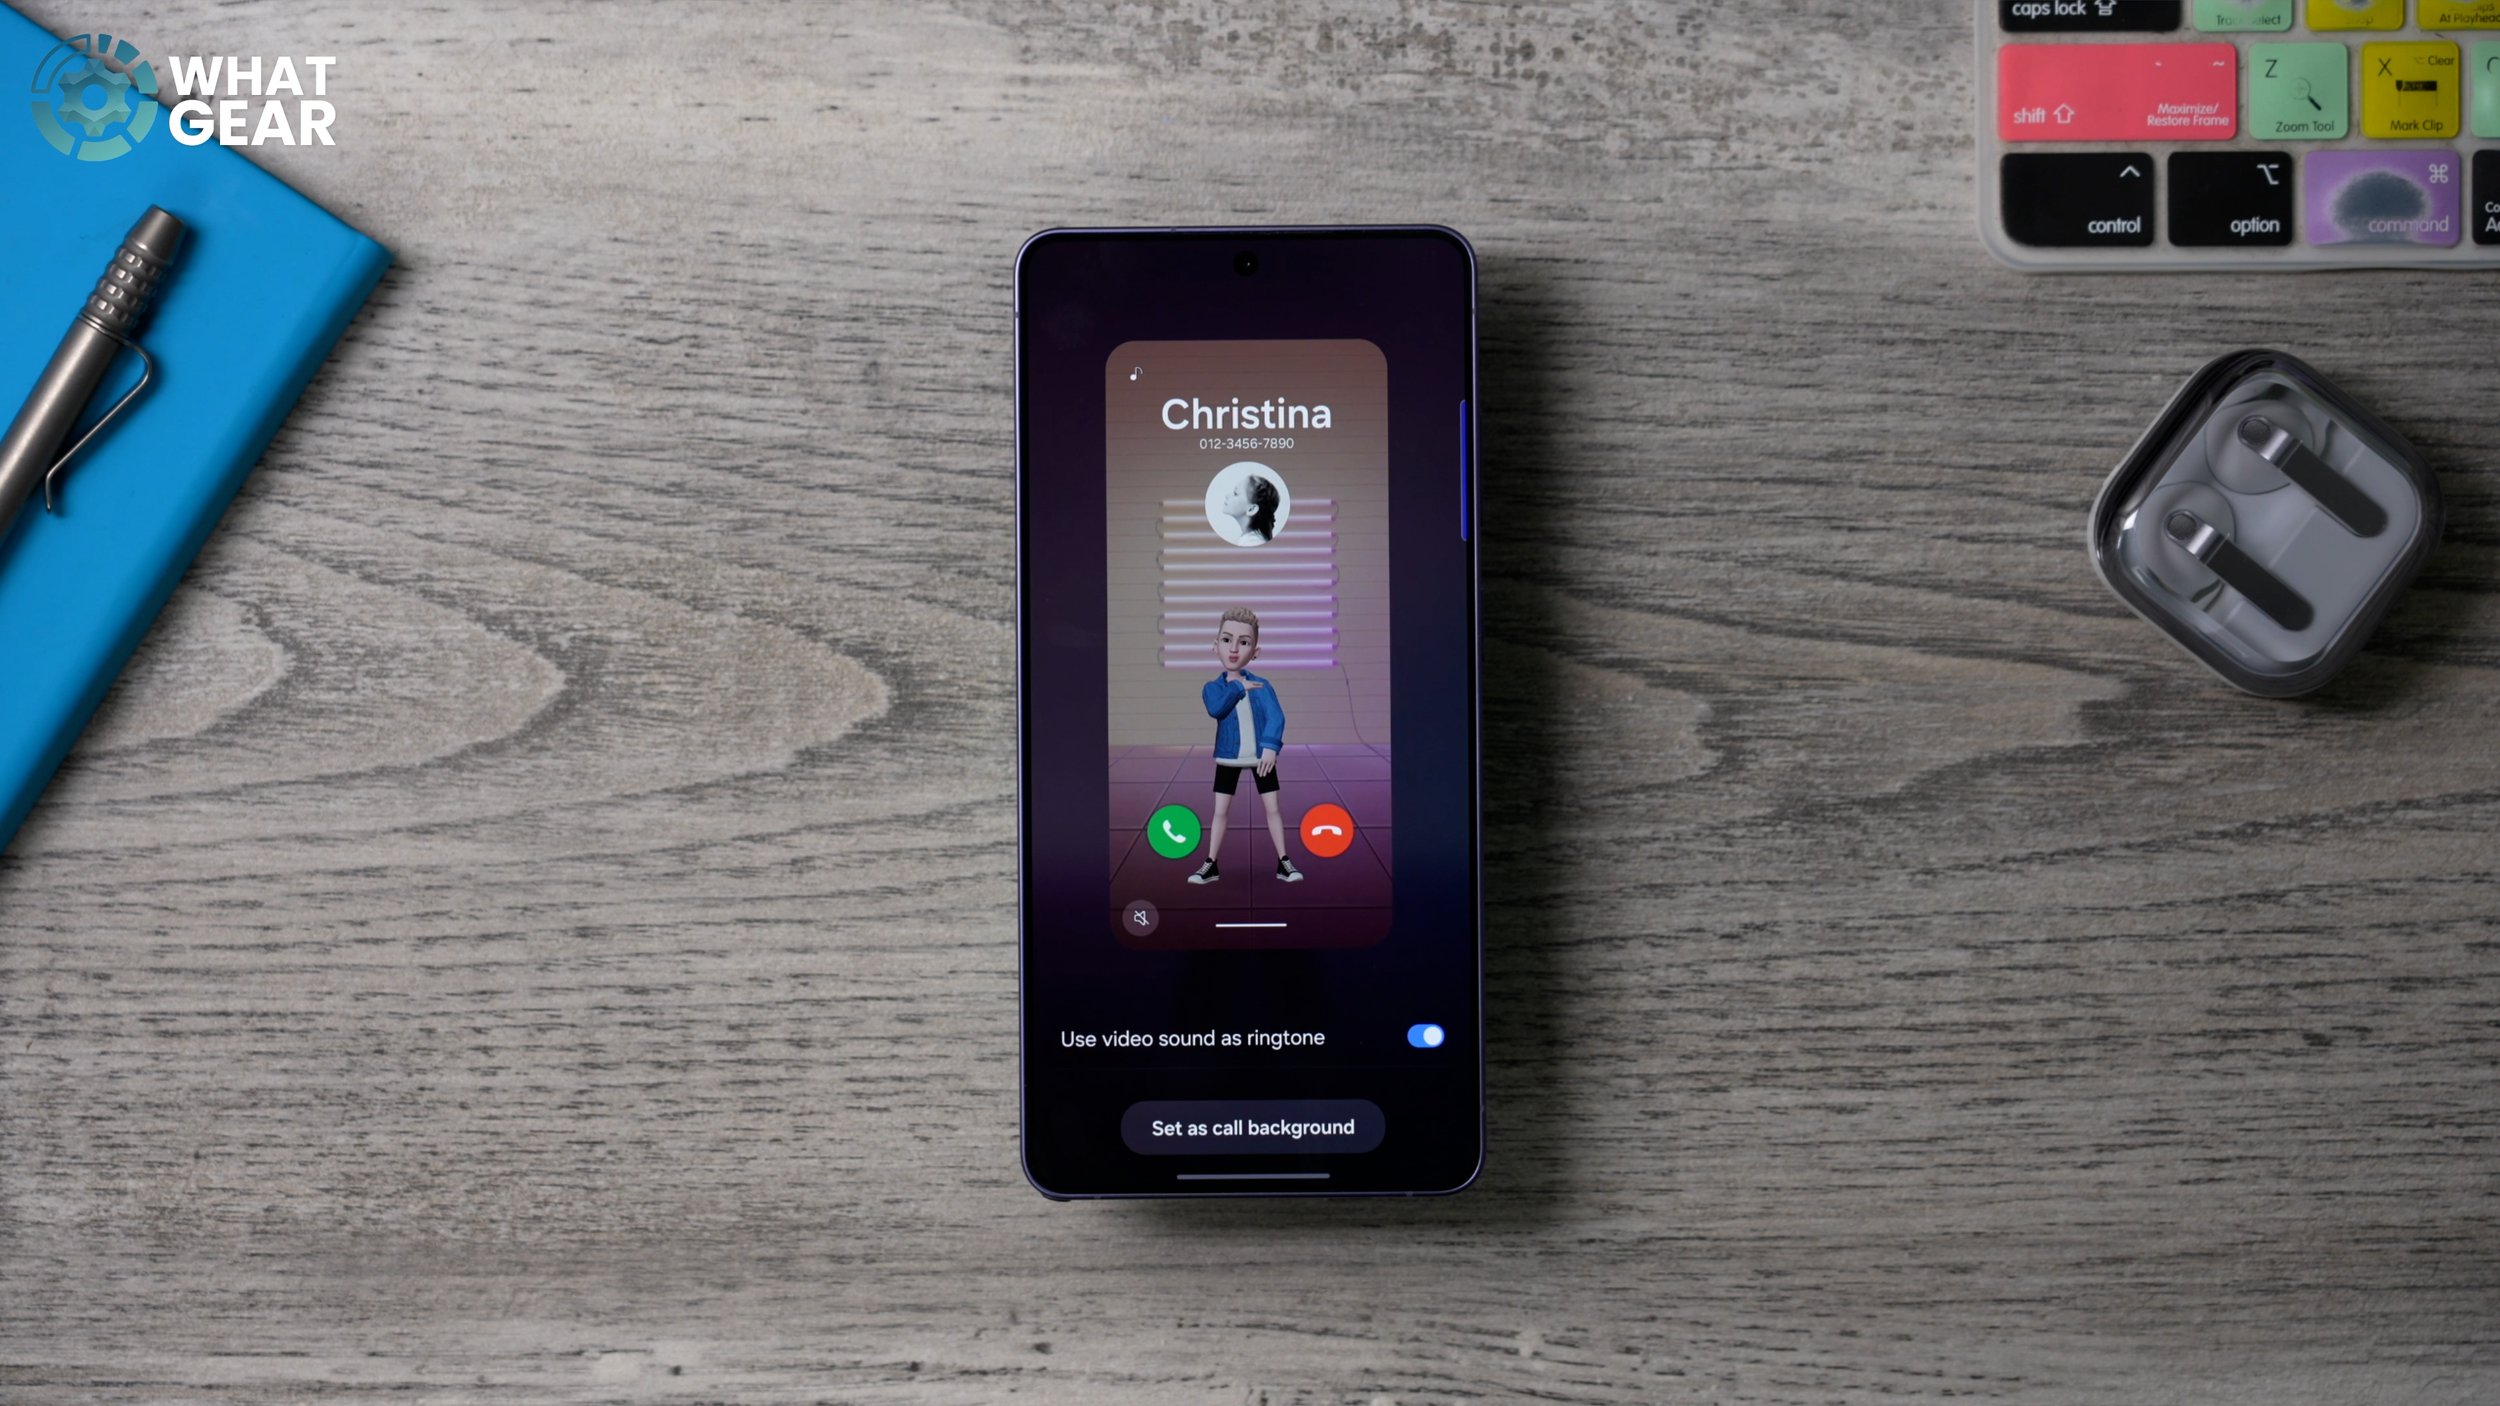
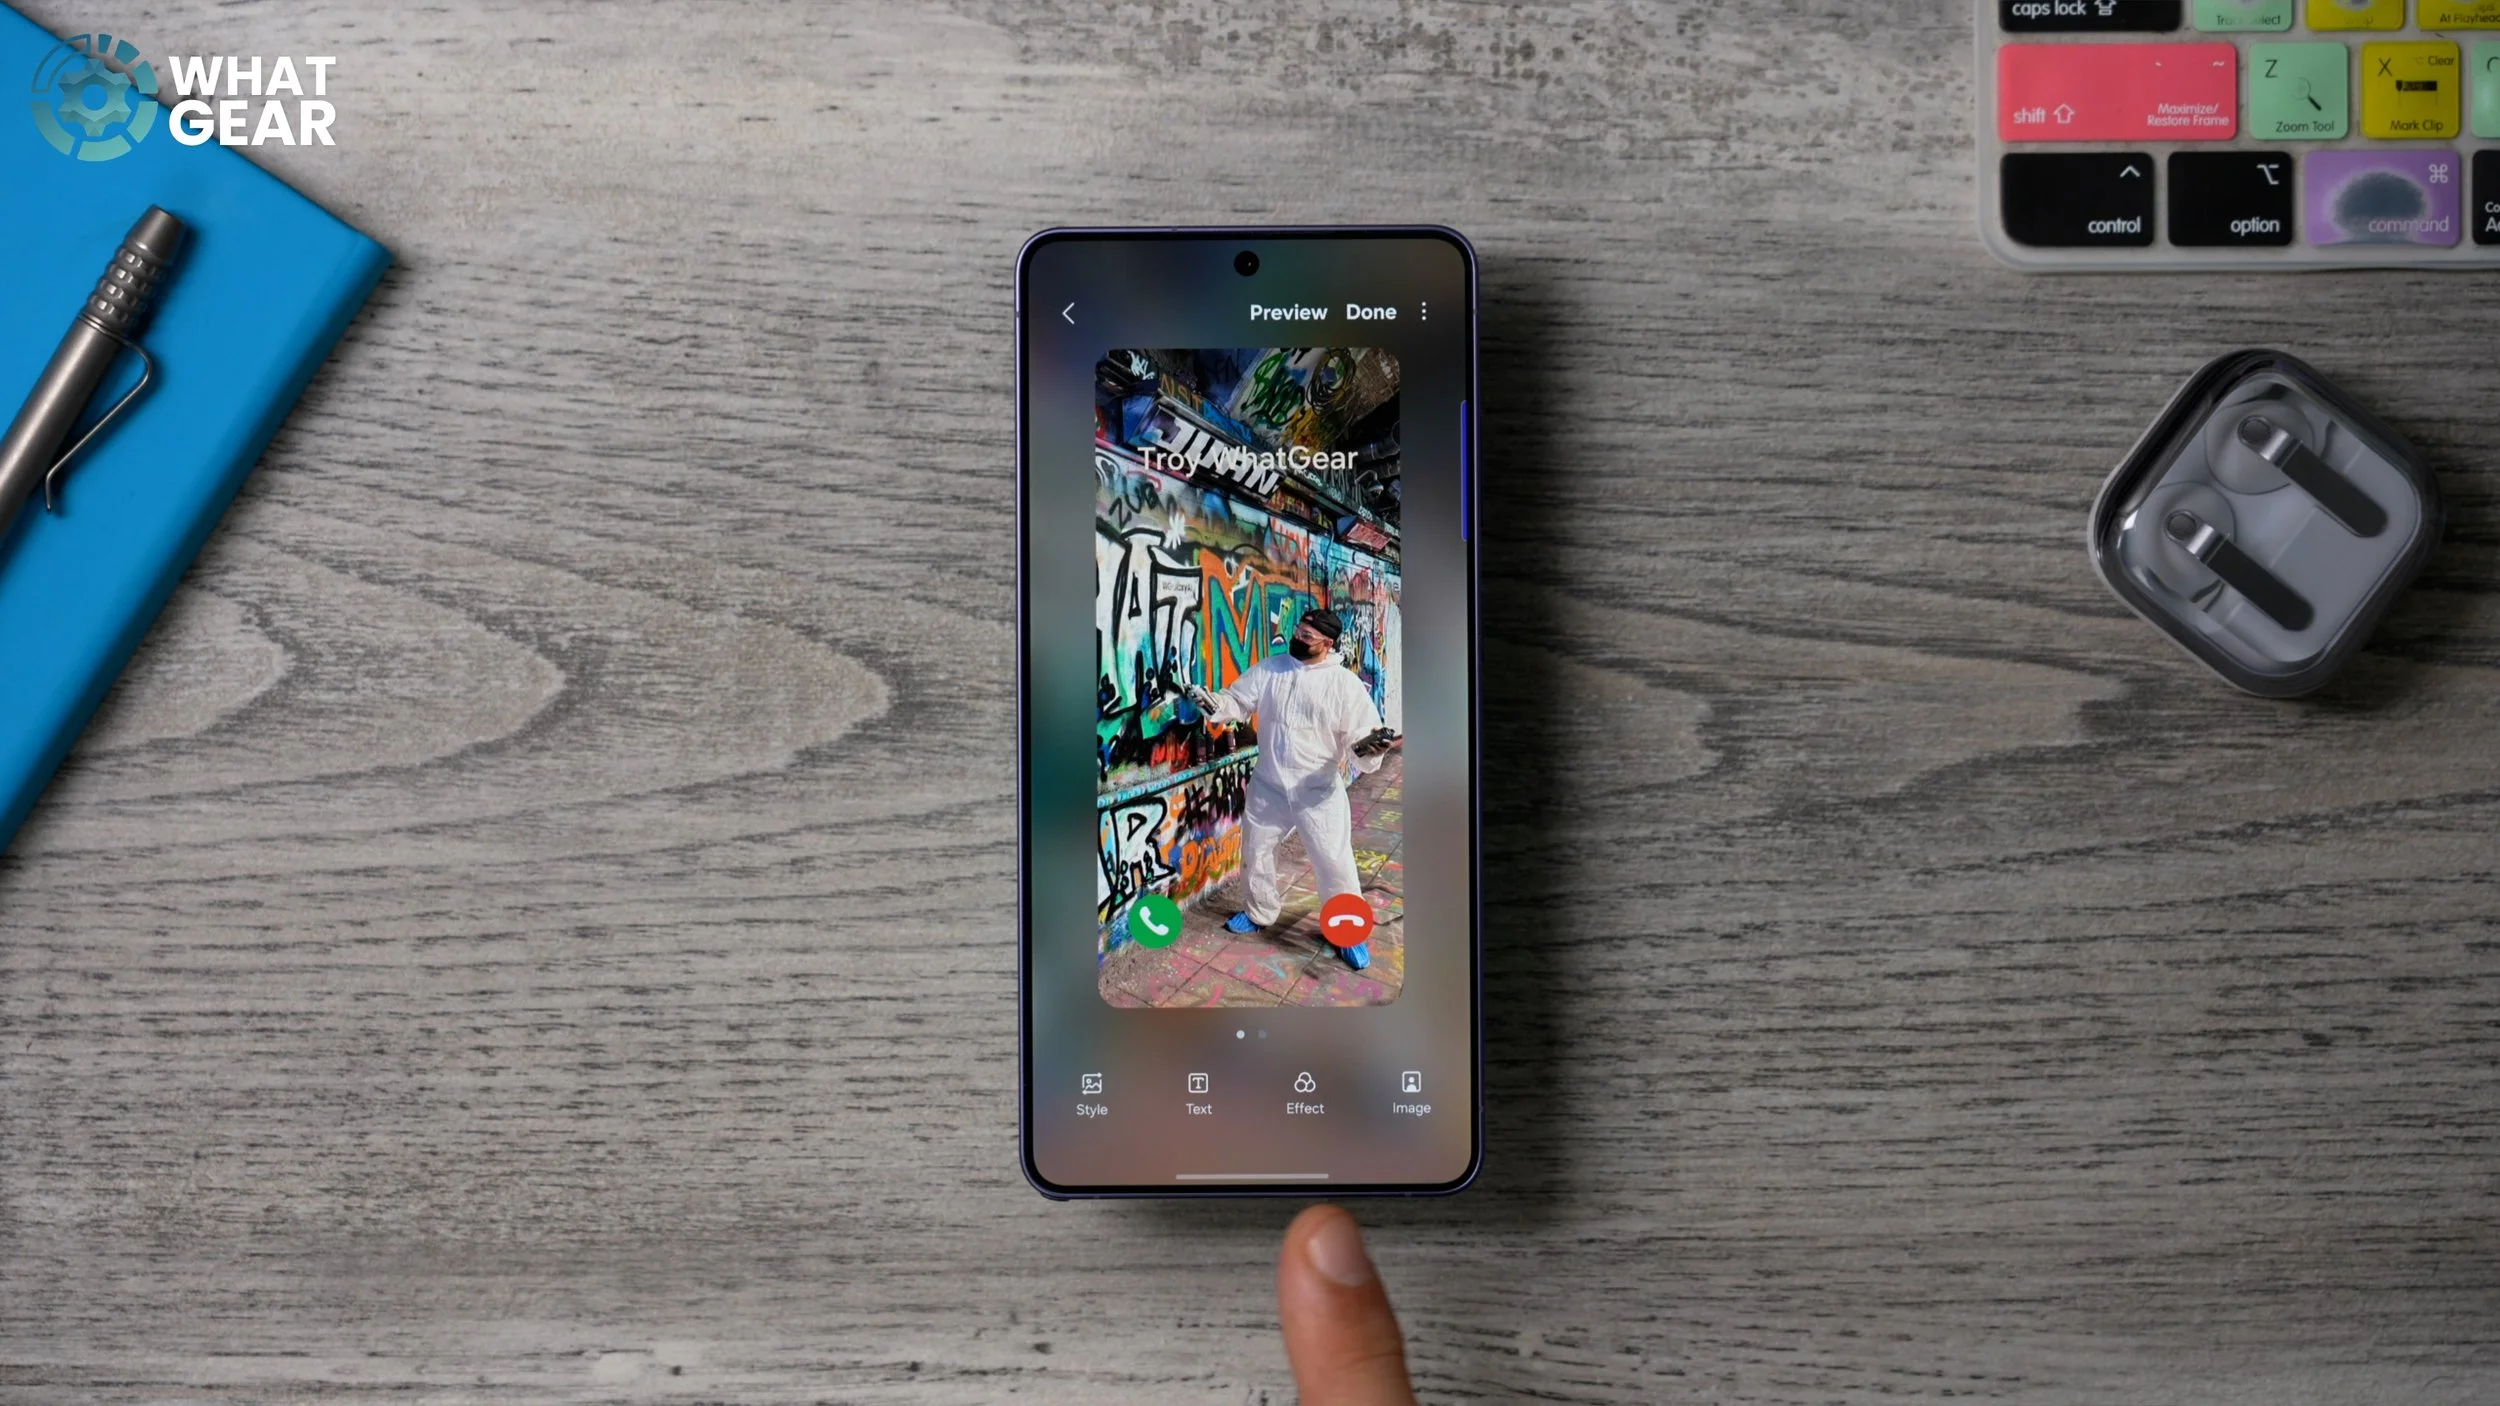
And there's even this one here, which is a video background, which can be customised with your own Galaxy avatar. And if you go back, you can even choose a custom image from your library. And it could even be one that you've created yourself, like this.
CUSTOM CALL CARD
And here's another customisation tip for your phone. If you go into the Phone app again, this time you're going to go to your Contacts. At the top, you should see My profile with your name. If you go to that, you should see your phone number, your name, and if you go to Edit at the bottom, you can customise the profile card. You can add a style, you can add text, and you can choose the image that you want it to be. And you can also customise your own little picture icon.
And once you have created that, you can actually share a QR code, which will give that person all of your details, essentially your calling card, just by scanning your phone with their camera.
THE DOUBLE TAP
Here's another very quick customisation tip that can save you time in the future. If you go into your Settings, go all the way down to Advanced features, and in here go to the Side button. This is the power key on the side of the phone. If you go to Double-press, you can remap this to do anything. If you have the Galaxy S26 Ultra, you could even set it up to activate the privacy display. What I like to do, though, is I like to set it as an app.
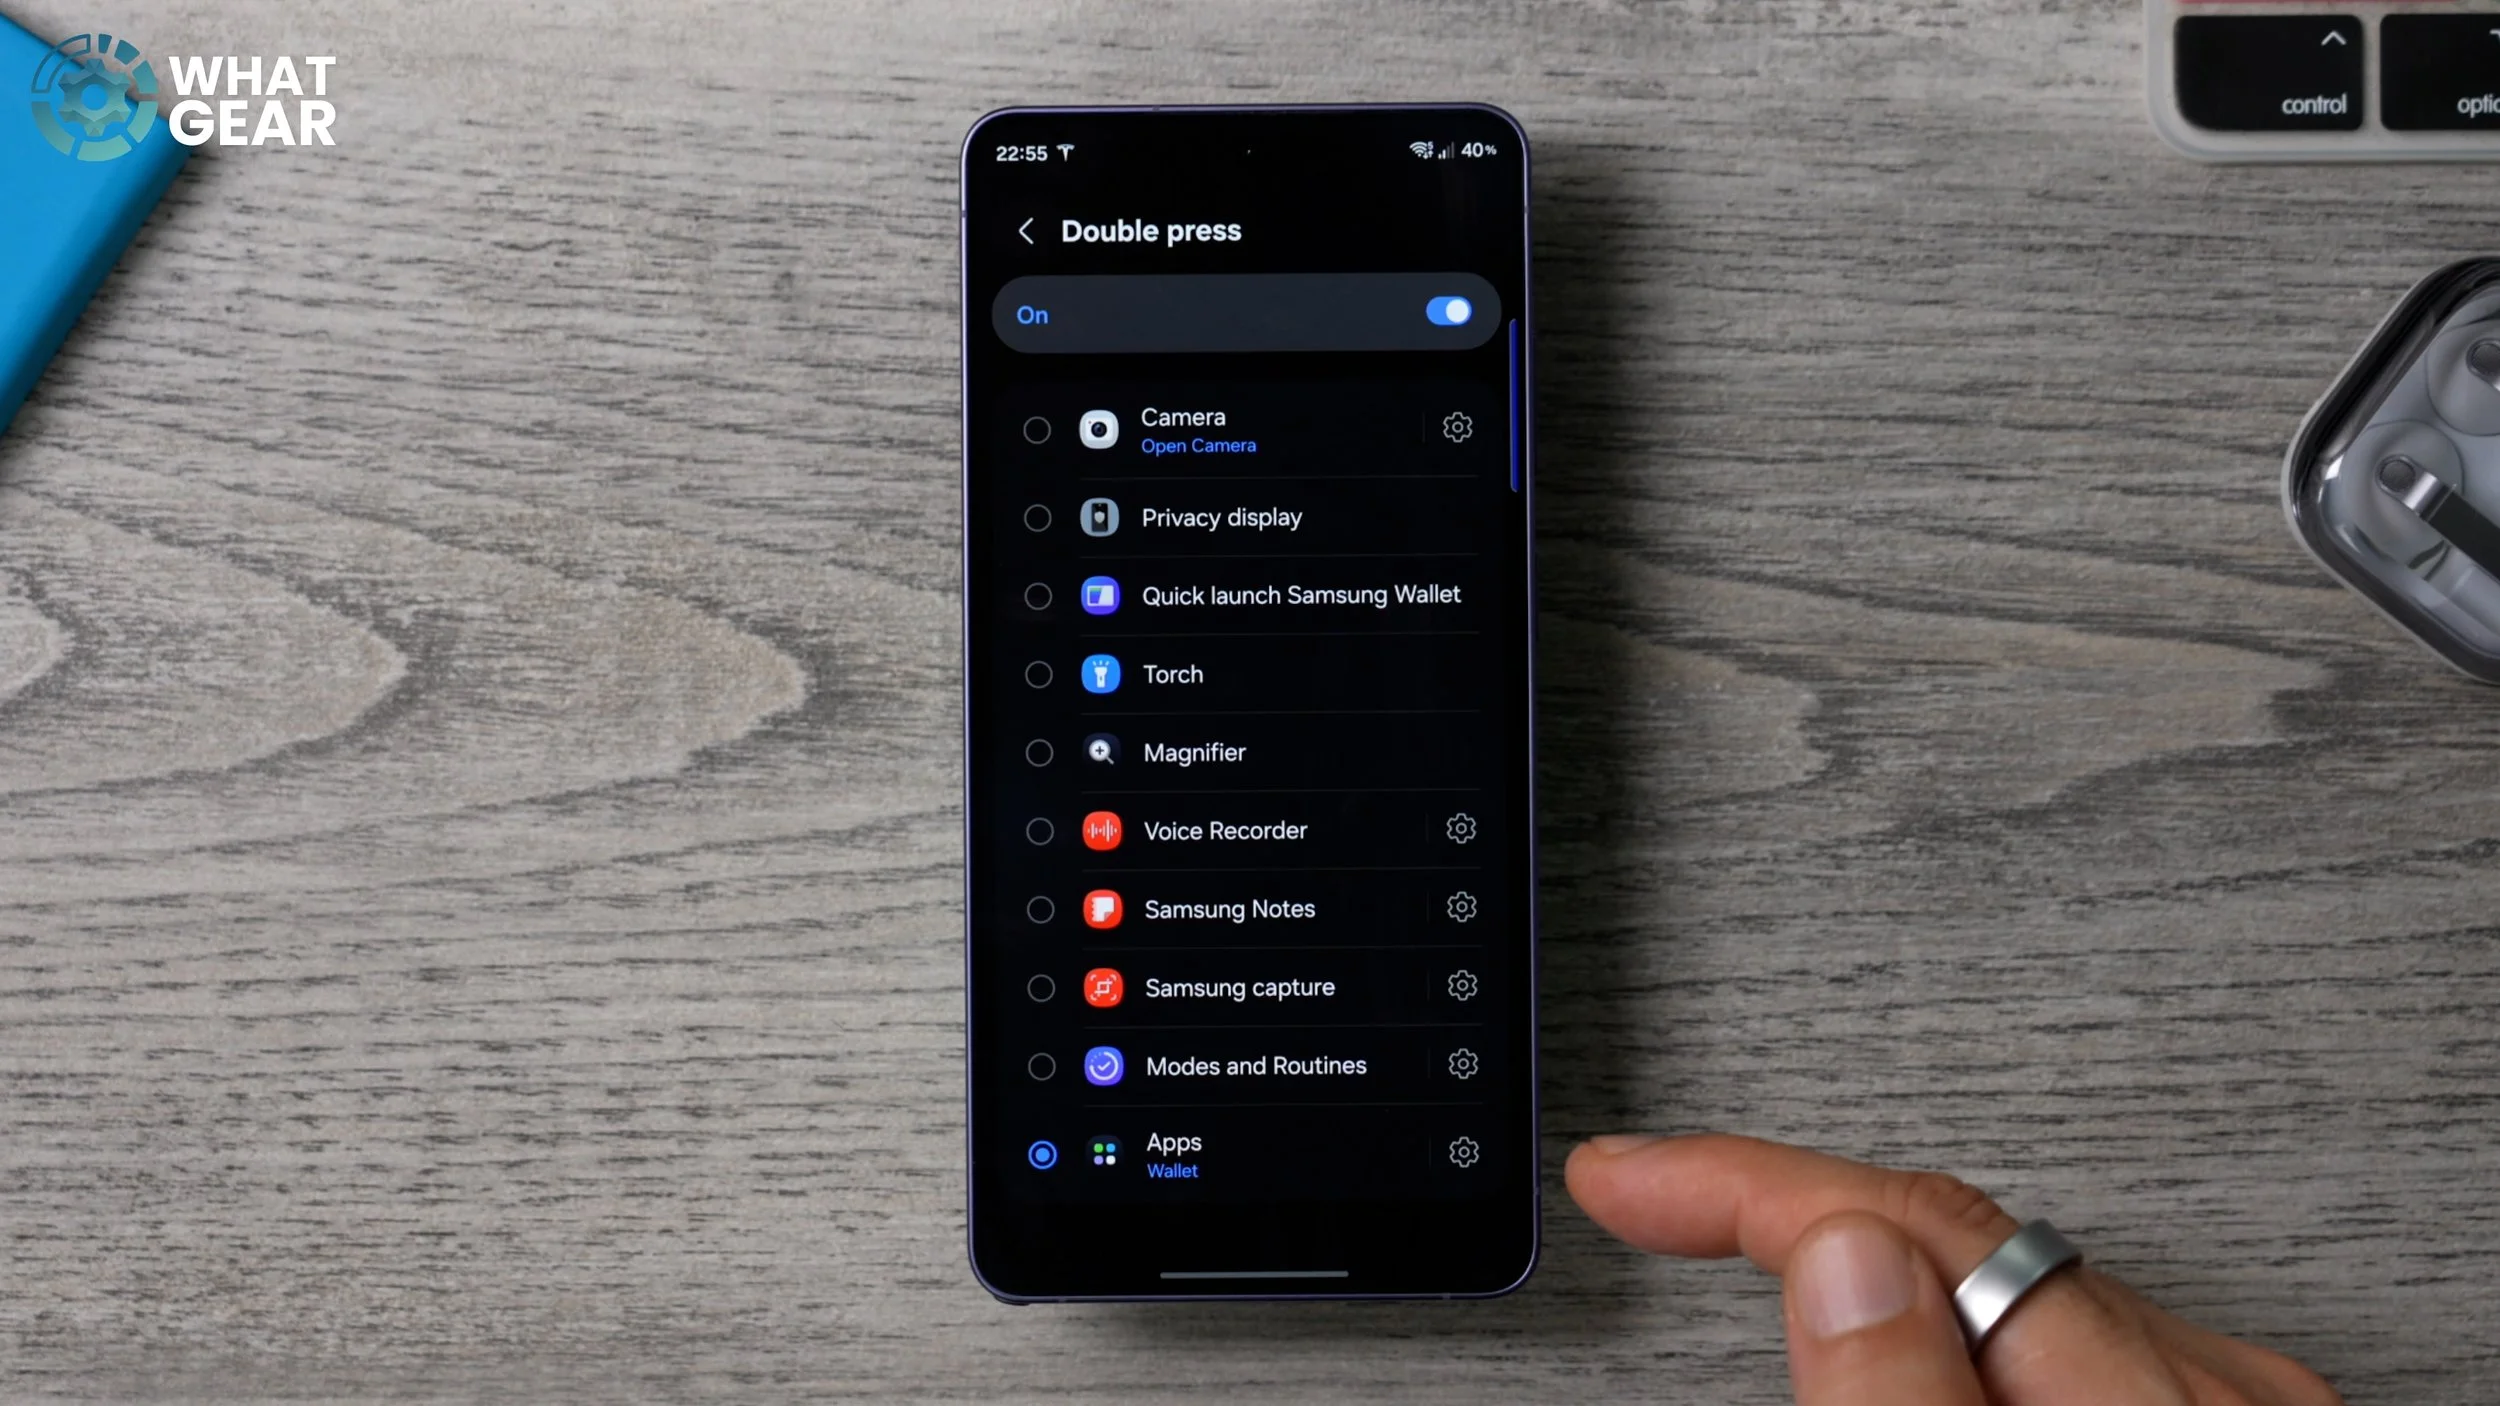
And if you hit the little settings next to the app here, you can choose which app it is. For me, I always set this to Wallet, so whenever I'm in the shop, and I need to pay for something quickly, I double-press the power key, and it jumps straight into my wallet, and I can pay. I can find all my loyalty cards and all that good stuff.
FOR SPORTS FANS
And here's the last tip. And if you are a fan of any sports at all, you will really appreciate this one. So if you go into your Settings, scroll down until you see the Lock screen and AOD, tap away. You'll see Always On Display, and make sure you've got the Now Bar switched on here. Also, you might want to set this to Auto as well, just so that this works a little bit better. Now, if we go back to Lock screen and AOD settings, and go to Now Bar. And on this page, go to See all. And this is where you'll find all of the things that can be shown on the Now Bar, on your lock screen, and on your Always On Display, and in your notifications.
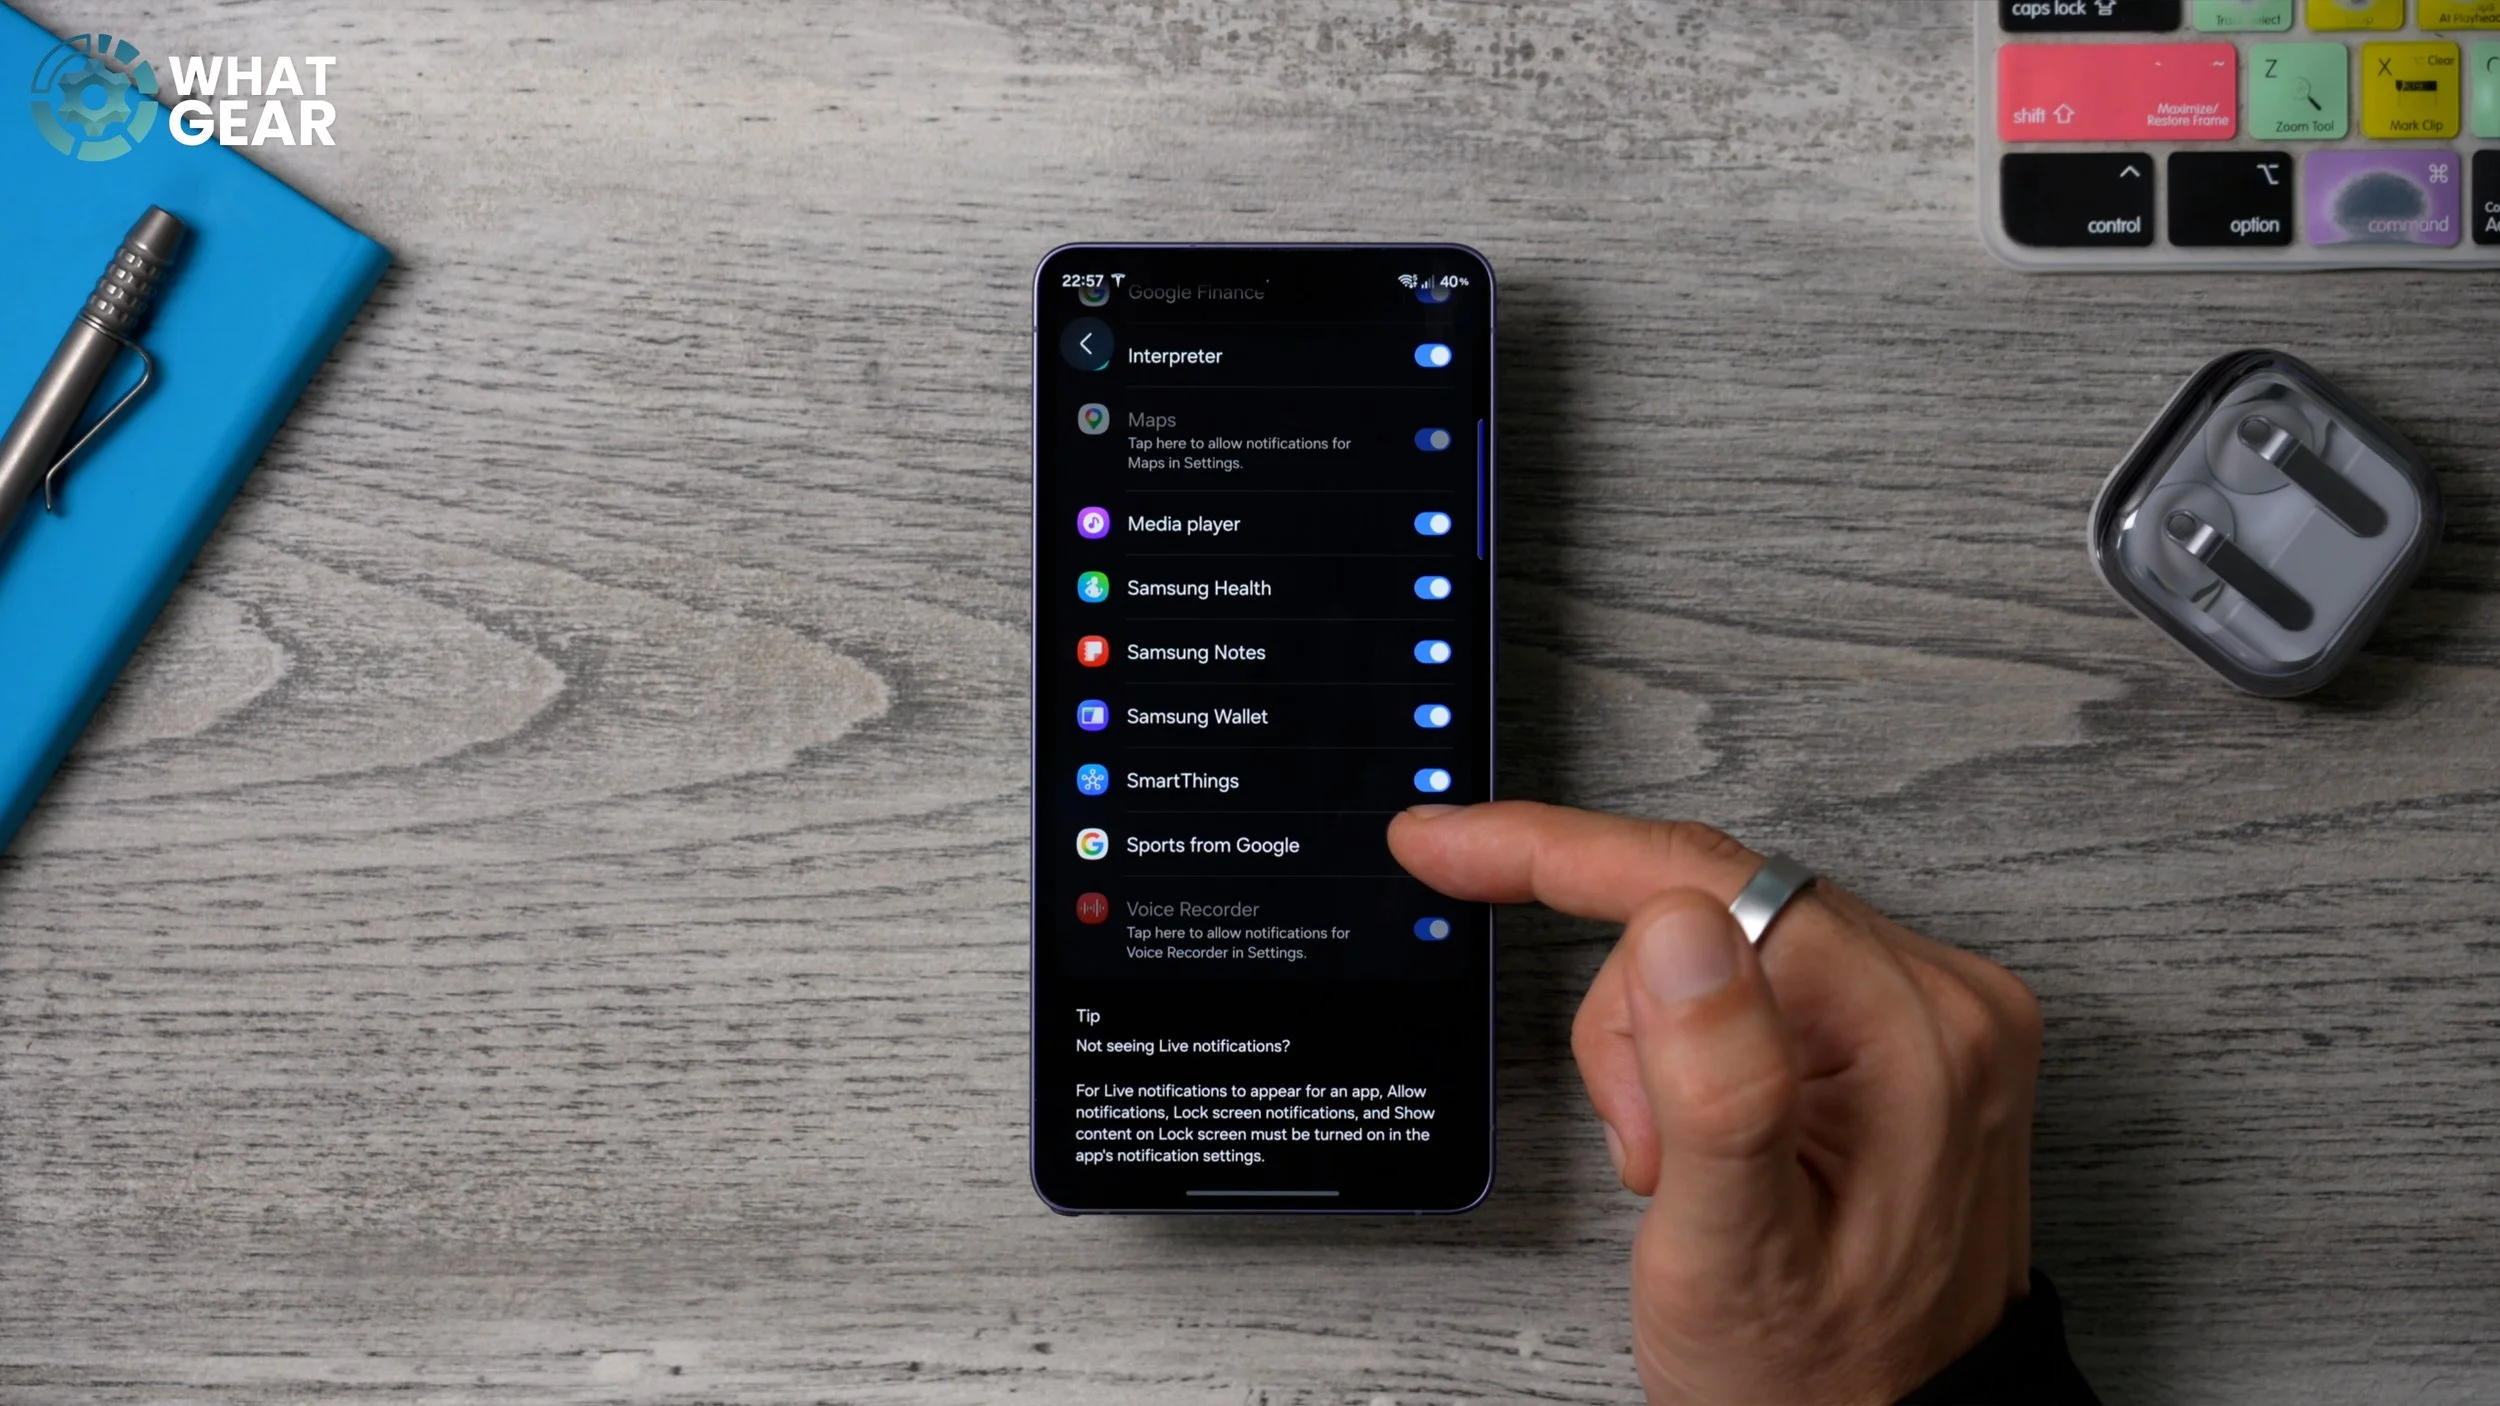
The setting that I recommend you switch on, if you scroll all the way to the bottom, is Sports from Google. Now, once you've done that, tap on where it says Sports from Google, and in here go to Sports from Google settings, and then this will load up the official Google Sports page, where you can search for your favourite teams and follow them. Once you've done that, you will now get live updates via the Now Bar whenever your team is playing, and it will show on your lock screen. So if you find yourself stuck at work behind a desk and you're not allowed to watch TV or even listen to the radio or anything, you can keep an eye on the scores even while your phone is locked.